一.概述
在Jenkins中有几种方式构建项目
- 手动构建,点击build now
- 创建触发器,每天的规定时间构建
- 基于githooks触发,每次push代码就会触发,紧接着就会构建相应的任务
本案例部署演示基于Githooks触发
当用户在本地仓库执行'git-push'命令时,服务器上运端仓库就会对应执行'git-receive-pack'命令;在所有远程仓库的引用(ref)都更新后,这个钩子就会被'git-receive-pack'调用。
二.部署
前提环境,git仓库已经搭建好,有一个web服务器也已经部署完毕
[root@localhost ~]# su - git
[git@localhost ~]$
[git@localhost ~]$ mkdir auto_php.git
[git@localhost ~]$ cd auto_php.git
[git@localhost auto_php.git]$ git --bare init
初始化空的 Git 版本库于 /home/git/auto_php.git/
#git远程仓库和本地仓库在一台机器上,git用户假设是远程仓库,root用户就是我的本地仓库
[git@localhost ~]$ ssh-keygen
[git@localhost ~]$ ssh-copy-id root@192.168.111.4
#生成秘钥对,传送给Jenkins(Jenkins运行用户是root)所以我需要传给对方主机root用户即可.
[root@localhost ~]# ssh-keygen
[root@localhost ~]# ssh-copy-id git@192.168.111.3
[root@localhost ~]# ssh-copy-id root@192.168.111.5
#????????
[root@localhost ~]# git clone git@192.168.111.3:/home/git/auto_php.git
正克隆到 'auto_php'...
warning: 您似乎克隆了一个空版本库。
[root@localhost ~]# cd auto_php/
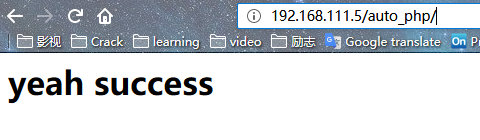
[root@localhost auto_php]# echo "<h1>yeah success<h1>" > index.html
[root@localhost auto_php]# git add .
[root@localhost auto_php]# git commit -m 'index'
[root@localhost auto_php]# git push origin master
#克隆到本地,并且上传测试代码
- 在Jenkins 的web界面创建
freestyle project的一个新任务,名称为auto_php源码管理选择gitURL填写git@192.168.111.3:/home/git/auto_php.git构建选择invoke ansible ad-hoc command(因为我用的是ansible部署,根据自己实际进行选择),接着填写在ansible hosts定义的名称webserverfile or host list填写你的ansible hosts所在的位置/etc/ansible/hosts
module填写synchronize模块module auguments or command to execute填写src=${WORKSPACE} dest=/var/www/html/ rsync_opts=--exclude=.git(src指定的是在Jenkins上代码文件的路径.dest目标主机路径,后面是将.git文件除外,该文件不同步)保存
可以尝试手动build一下,测试任务是否有错误
配置githooks
githooks一般都是配置在远程仓库的主机的相应位置上,(如:使用的是GitLab仓库,那么要做的操作是针对于远程仓库做的操作)而且不适用于生产环境,可在测试环境使用
[git@localhost hooks]$ vim post-receive

#!/bin/sh
read params

branch=$(echo $params | awk '{print $3}' | awk -F '/' '{print $3}')

if [ $branch == "master" ];then
  ssh root@192.168.111.4 '/usr/local/java/bin/java -jar /var/cache/jenkins/war/WEB-INF/jenkins-cli.jar -s http://192.168.111.4:8080 -auth admin:666666 build auto_php'
else
  exit
fi
#简单思路就是提取分支名称,如果是master分支,那么就会执行在Jenkins上的构建项目操作,钩子脚本就像一个在后台一直在监控的脚本一样,只要有出发到相关的条件,就会执行
#在命令语句里,有执行任务的名称以及Jenkins的用户名和密码

[git@localhost hooks]$ chmod +x post-receive
#注意配置钩子时我们是在git用户
测试
[root@localhost auto_php]# pwd
/root/auto_php
[root@localhost auto_php]# echo "<h2>test1<h2>" > index.html
[root@localhost auto_php]# git commit -a -m 'test1'
[master 0937f7d] test1
 1 file changed, 1 insertion(+), 1 deletion(-)
[root@localhost auto_php]# git push origin master
Counting objects: 8, done.
Delta compression using up to 2 threads.
Compressing objects: 100% (2/2), done.
Writing objects: 100% (6/6), 458 bytes | 0 bytes/s, done.
Total 6 (delta 0), reused 0 (delta 0)

remote: 七月 12, 2019 1:56:12 下午 org.apache.sshd.common.util.security.AbstractSecurityProviderRegistrar getOrCreateProvider
remote: 信息: getOrCreateProvider(EdDSA) created instance of net.i2p.crypto.eddsa.EdDSASecurityProvider
To git@192.168.111.3:/home/git/auto_php.git
   92f8cbd..0937f7d  master -> master
web服务器查看文件是否变化
[root@localhost ~]# cat /var/www/html/auto_php/index.html
<h2>test1<h2>
再来一次
[root@localhost auto_php]# echo "<h2>test2<h2>" >> index.html
[root@localhost auto_php]# git commit -a -m 'test2'
[master f927624] test2
 1 file changed, 1 insertion(+)
[root@localhost auto_php]# git push origin master
Counting objects: 5, done.
Writing objects: 100% (3/3), 249 bytes | 0 bytes/s, done.
Total 3 (delta 0), reused 0 (delta 0)
remote: 七月 12, 2019 1:58:54 下午 org.apache.sshd.common.util.security.AbstractSecurityProviderRegistrar getOrCreateProvider
remote: 信息: getOrCreateProvider(EdDSA) created instance of net.i2p.crypto.eddsa.EdDSASecurityProvider
To git@192.168.111.3:/home/git/auto_php.git
   0937f7d..f927624  master -> master
web服务器查看文件是否变化
[root@localhost ~]# cat /var/www/html/auto_php/index.html
<h2>test1<h2>
<h2>test2<h2>

三.总结
- 不适用于生产环境,但是难道还需要用两个Jenkins
- 我的意思是,如果我们测试环境一个Jenkins,生产环境一个Jenkins.那么我们的步骤就是,测试环境Jenkins拉取代码进行测试,并且部署到测试服务器,如果没有问题,我们还是需要手动构建生产环境的Jenkins任务,,使它拉取测试完成的代码,然后部署到生产服务器.