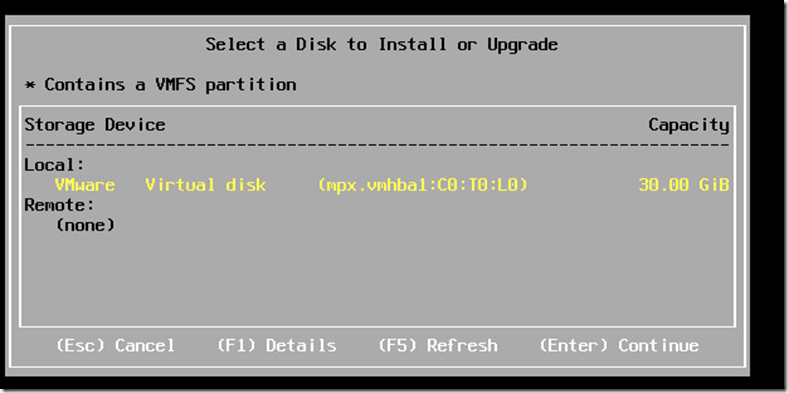
参考:http://hj192837.blog.51cto.com/655995/1060952
http://www.running-system.com/how-to-build-a-nested-lab-on-a-hp-dl380-g5-server-step-2/
非常详细的攻略:Installing 64 bit guests in nested ESXi 5
http://techiehaven.com/vmware/installing-64-bit-guests-in-nested-esxi-5/
Holy Cow! Getting this to work by piecing together valuable information from various sources took forever.
If you are having trouble getting this to work and you know your CPU supports VT-x and Intel EPT this is what you need to do…
- Add a line to the PHYSICAL host config. To do this you will need to SSH(putty) into your physical host. Make sure you enable SSH in the Host first using vmware client. Select the physical host, go to the configuration tab, go to the Security Profile settings link in the software window on the left side. Click on the Properties link for Services up at the top, select and highlight SSH and go to the options button, then click on Start.
- Once SSHed in, put in your login and password then type the following… echo ‘vhv.allow = “true” ‘ >> /etc/vmware/config
- Reboot the physical ESXi server you just modified. Note, although I have read you don’t have to reboot after making this change I would anyway. Also, after you restart the physical host SSH will by default turn back off.
Now you are ready to create the ESXi virtual guests.
- Create a new VM
- Select as the guest OS, Linux and in the Version drop down Red Hat Enterprise Linux 6 (64-bit). (This might not be necessary as selecting Other and Other 64 bit will probably also work)
- Change Network Adapter to E1000
- Select 2GB as the Virtual Disk Size and Thick Provision (This is an IMHO as long as you have a decent amount of space)
- Select Finish as we need to complete the creation before changing a few necessary settings.
- Now go into Edit settings for the newly created VM
- Change the SCSI controller 0 type to LSI Logic Parallel
- Select your network label (You will most likely want to create a new vSwitch and enable Promiscuous on the Physical host to make sure the virtualized ESXi guests operate correctly in the network)
- Go to the options tab
- Select and highlight General Options and off to the right change the Guest OS. Click on Other radio button and then use the drop down to select VMware ESXi 5.x. If this option is not there the you are editing the vm to soon or you didn’t select the Other radio button. If you try and do this step while initially creating the VM and instead of hitting finish you selected to manually edit the VM before it was created the option won’t be there.
- Select and highlight CPU/MMU Virtualization and off to the right select the radio button for the last option Use Intel VT-x/AMD-V and Intel EPT/AMD RVI for MMU (not writing out the whole thing)
At this point I would keep this as a template for creating multiple ESXi virtual guests.
Open the VM in console and power it up. You should see it trying to boot from the network. Click the CD ROM picture with the wrench on it and attach the VM to either a stored .iso or a local .iso or a local CD ROM that has the ESXi hypervisor installation. Restart the VM by sending ctrl-alt-del to the VM.
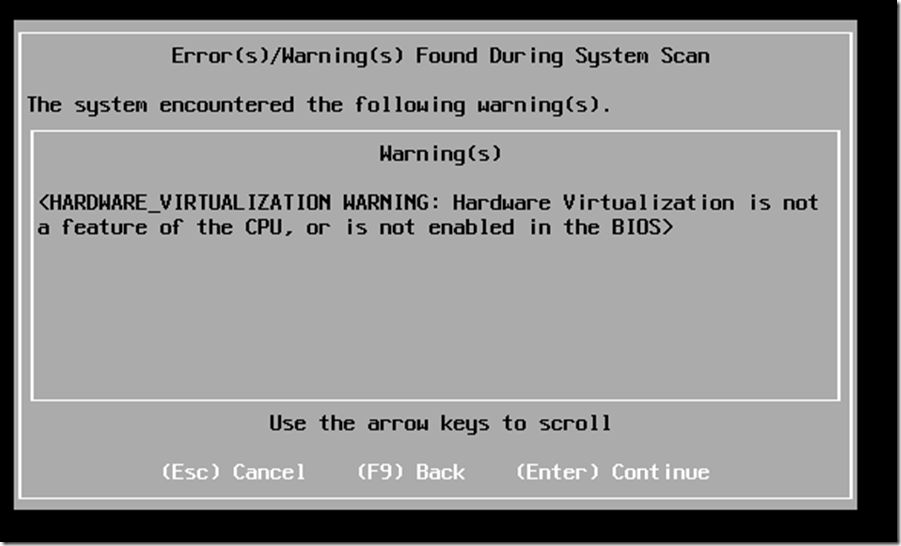
If everything is working correctly you should not get the dreaded “<hardware virtualization warning: Hardware virtualization is not a feature of the cpu or is not enabled in the bios>”
If you do get that message when installing ESXi then check back over the previous steps. I think the 3 Key ingredients to this working (making sure the CPU has VT-x and EPT of course) are as follows:
- You must add the vhv.allow = “TRUE” to the config file on the Physical Host.
- You must have the OS of the virtual guest you are installing ESXi on selected as VMware ESXi 5.x
- You must select that last option for CPU/MMU Virtualization
--------------------------------------------
利用vi /etc/vmware/config增加一行設定去允許Netsed hypervisors
vhv.enable = “TRUE”(vSphere 5.1)
vhv.allow = “TRUE”(vSphere 5.0 or vSphere 5.0 update 1)
结果:5.0版成功,可安装xen或kvm并建立嵌套虚机,5.1版失败
----------------------
vhv.allow = “TRUE” 不适用于5.1
vhv.enable = “TRUE” 用于5.1,但这个是针对每个vm,配置于vmx的参数,
不是配置于/etc/vmware/config 的全局参数 。
另外,5.1已经提供针对单独vm启用VT嵌套的图形化配置选项,
可以通过web client ,在以下位置中设置:
Hardware Virtualization: Expose hardware assisted virtualization to the guest OS (打上勾)
-------------------------------------------
The VM failed to resume on the destination during early power on (ESX 5.1 upgrade)
I upgraded an ESXi 5 host to 5.1 and received the following error after the upgrade was finished and I had tried to VMotion to the upgraded server:
The VM failed to resume on the destination during early power on. (This happened at 65%)
I read articles on setting a new Heap size…FAIL, making sure the NFS share names were correct and not upper/lower case…..FAIL.
It turns out I was using the server I upgraded to try run ESXi 5.1 in Nested mode. This does not work with an EPT Intel processor. During my attempts to try trick ESXi5 into running a 64 bit VM (nested mode) I added the following to: /etc/vmware/config:
vhv.allow = “true”
vhv.enabled = “true”
Once I removed these lines and rebooted, VMotions started working again.
-------------------------------------------------
在esxi中嵌套运行esxi又称作VHV.
运行条件如下:
1. Intel VT-x or AMD-V is required for running "Nested Virtualization" which supports nested 32-bit VMs
2. Intel EPT or AMD RVI is required for running nested 64-bit VMs.
可以查看esxi的如下web地址
https://[your-esxi-host-ip-address]/mob/?moid=ha-host&doPath=capability
的"nestedHVSupported"项目来确认是否支持VHV
3.Virtual VMware ESXi Machine需要硬件版本9,建立虚拟机的时候选择linux,other 64bit
4.设置esxi虚拟机, 展开 "CPU" 设置,设置 "Hardware Virtualization" 为VHV.
5.建立esxi虚拟机后设置guestOS版本为VMware ESXi 5.x
修改.VMX and updateguestOS = "vmkernel5"
6.修改esxi主机上的vm netwrok交换机为混杂模式promiscuous mode
报错:
因为R300不支持VHV,所以弹出:


