在Tomcat下直接开发Servlet
web应用创建步骤:
1,在tomcat的webapps目录下,新建web应用,然后在web应用中新建一个web-inf/classes目录
2,在classes目录下,新建一个servlet(也就是一个Java文件)
 1 package mvc;
 2 // 导入必需的 java 库
 3 import javax.servlet.*;
 4 import javax.servlet.http.*;
 5 import java.io.IOException;
 6 import java.io.PrintWriter;
 7
 8 // 扩展 HttpServlet 类
 9 public class HeloWorld extends HttpServlet {
10
11     private String message;
12
13     public void init() throws ServletException
14     {
15         // 执行必需的初始化
16         message = "Hello World";
17     }
18
19     public void doGet(HttpServletRequest request,
20                       HttpServletResponse response)
21             throws ServletException, IOException
22     {
23         // 设置响应内容类型
24         response.setContentType("text/html");
25
26         // 实际的逻辑是在这里
27         PrintWriter out = response.getWriter();
28         out.println("<h1>" + message + "</h1>");
29     }
30
31     public void destroy()
32     {
33         // 什么也不做
34     }
35 }
3,setclasspath=%classpath%;(servlet-api.jar的安装目录)servlet-api.jar 导入包
4,编译

导入包之后再编译,则通过
.符号表示生成的class文件保存到当前目录下
5,在web-inf目录中新建一个web.xml文件,配置servlet的对外访问路径
 1 <?xml version="1.0" encoding="ISO-8859-1"?>
 2 <!--
 3  Licensed to the Apache Software Foundation (ASF) under one or more
 4   contributor license agreements.  See the NOTICE file distributed with
 5   this work for additional information regarding copyright ownership.
 6   The ASF licenses this file to You under the Apache License, Version 2.0
 7   (the "License"); you may not use this file except in compliance with
 8   the License.  You may obtain a copy of the License at
 9
10       http://www.apache.org/licenses/LICENSE-2.0
11
12   Unless required by applicable law or agreed to in writing, software
13   distributed under the License is distributed on an "AS IS" BASIS,
14   WITHOUT WARRANTIES OR CONDITIONS OF ANY KIND, either express or implied.
15   See the License for the specific language governing permissions and
16   limitations under the License.
17 -->
18
19
20
21 </web-app>
22 <web-app>
23     <servlet>
24         <servlet-name>HelloWorld</servlet-name>
25         <servlet-class>mvc.HelloWorld</servlet-class>
26     </servlet>
27
28     <servlet-mapping>
29         <servlet-name>HelloWorld</servlet-name>
30         <url-pattern>/HelloWorld</url-pattern>
31     </servlet-mapping>
32 </web-app>
6,启动tomcat,浏览器验证发布结果
Eclipse下开发Servlet
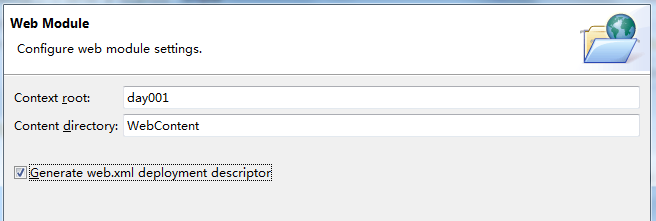
1,新建动态web工程,注意点击next,,,选中默认的xml文件


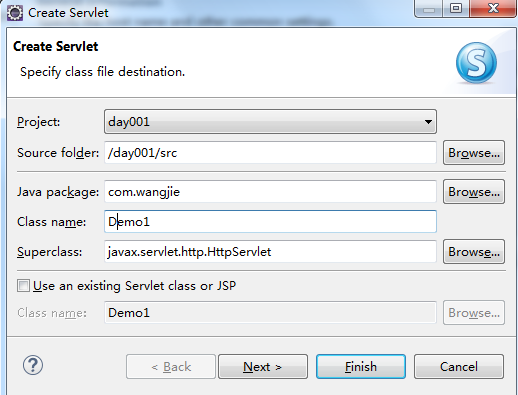
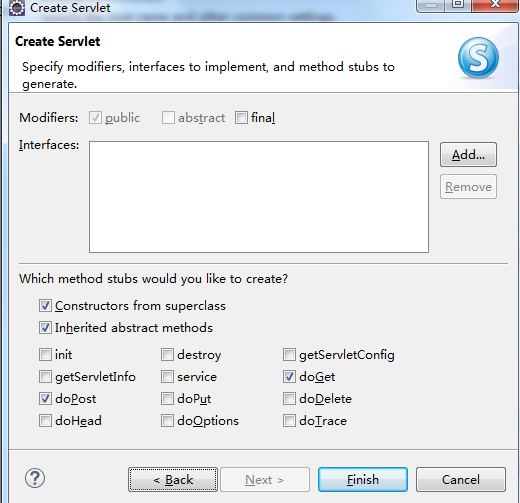
2,在Java源代码文件夹下的src文件夹中新建Servlet,点击next,,,,选择要复写的方法


3,编写web.xml文件,配置对外访问路径
4,Servlet发布,
点击Servers,启动Tomcat,添加要发布的工程
5,网页浏览验证