1、使用ansible的playbook实现自动化安装httpd
环境主控端192.168.47.154 ,被控端192.168.47.{1,2}7
安装ansible 软件包,关闭selinux;firewalld;date 时间同步
[root@centos7 ~]# yum install ansible
[root@centos7 ~]# mkdir /data/playbook/
[root@centos7 ~]# vim /data/playbook/httpd.yml
---
- hosts: websrvs
remote_user: root
tasks:
- name: install
yum: name=httpd
- name: config
shell: sed -i 's/Listen .*/^Listen 9527/' /etc/httpd/conf/httpd.conf
- name: service
service: name=httpd state=started enabled=yes
:wq
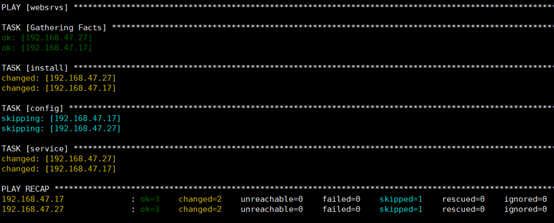
[root@centos7 ~]# ansible-playbook /data/playbook/httpd.yml --check –C 检查不操作

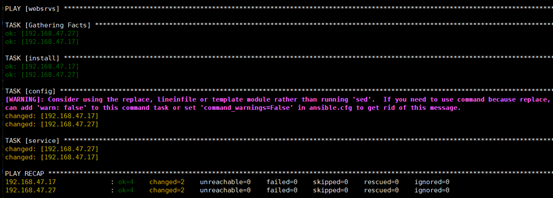
[root@centos7 ~]# ansible-playbook /data/playbook/httpd.yml 执行

成功
[root@centos7 playbook]# ansible websrvs -m shell -a "ss -nult " 验证
[root@centos7 playbook]# ansible websrvs -m shell -a "systemctl status httpd "
[root@centos7 playbook]# ansible websrvs -m shell -a "cat /etc/httpd/conf/httpd.conf|grep Listen " 查看结果
2、建立httpd服务器,要求提供两个基于名称的虚拟主机:
(1)www.X.com,页面文件目录为/web/vhosts/x;错误日志为/var/log/httpd/x.err,访问日志为/var/log/httpd/x.acces
(2)www.Y.com,页面文件目录为/web/vhosts/y;错误日志为 /var/log/httpd/www2.err,访问日志为/var/log/httpd/y.access
(3)为两个虚拟主机建立各自的主页文件index.html,内容分别为其对应的主机名
服务端192.168.47.17 ,环境安装httpd
[root@centos7 ~]# mkdir -pv /web/vhosts/{x,y}
[root@centos7 ~]# echo www.X.com > /web/vhosts/x/index.html
[root@centos7 ~]# echo www.Y.com > /web/vhosts/y/index.html
[root@centos7 ~]# vim /etc/httpd/conf.d/test.conf
<virtualhost *:80>
documentroot /web/vhosts/x
CustomLog "/var/log/httpd/x.access" combined
ErrorLog "/var/log/httpd/x.err"
servername www.X.com
<Directory "/web/vhosts/x">
Require all granted
AllowOverride ALL
</Directory>
</virtualhost>
<virtualhost *:80>
documentroot /web/vhosts/y
CustomLog "/var/log/httpd/y.access" combined
ErrorLog "/var/log/httpd/www2.err"
servername www.Y.com
<Directory "/web/vhosts/y">
Require all granted
</Directory>
</virtualhost>
:wq 保存退出
[root@centos7 /]# systemctl restart httpd 服务端重启httpd服务
[root@centos7 ~]# vim /etc/hosts 在客户端配置hosts文件
添加一条:
192.168.47.17 www.X.com www.Y.com
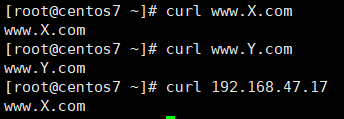
验证:
[root@centos7 ~]# curl www.X.com
[root@centos7 ~]# curl www.Y.com
