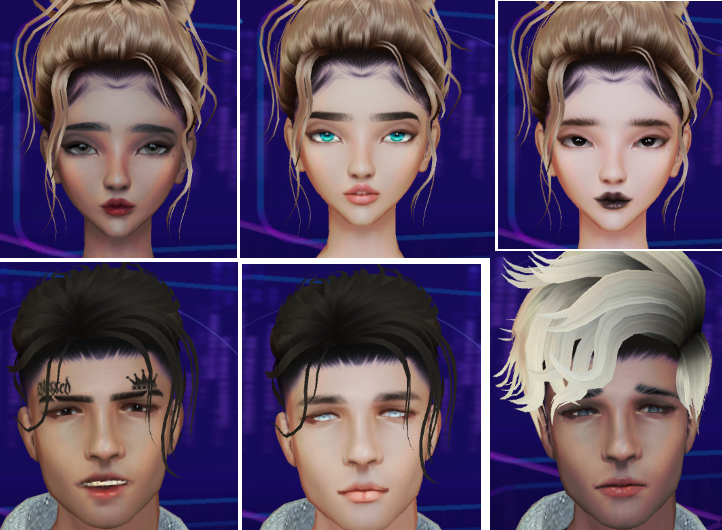
如何实现化妆功能,更换眉毛,嘴唇,眼球,胡子等?
即如下效果:
首先是shader,这个实现起来想必非常简单,相当于把一张要替换的图片叠加到脸部纹理上,当然还要给定一个具体的纹理坐标。
示例代码如下:
  1 Shader "America/Character/Tattoo/America-Diffuse-AlphaTest-Face"
  2 {
  3     Properties
  4     {
  5         _Color ("Main Color", Color) = (1,1,1,1)
  6         _MainTex ("Base (RGB)", 2D) = "white" {}
  7         _Ramp ("Toon Ramp (RGB)", 2D) = "gray" {}
  8
  9         _OverlyingColor("Overlying Color", Color) = (0.5, 0.5, 0.5, 1)
 10
 11         _TattooTex1 ("Tattoo 1 (RGBA)", 2D) = "black" {}
 12         _TattooPos1 ("Tattoo Position 1", Vector) = (0,0,1,1)
 13         _TattooTex2 ("Tattoo 2 (RGBA)", 2D) = "black" {}
 14         _TattooPos2 ("Tattoo Position 2", Vector) = (0,0,1,1)
 15         _TattooTex3 ("Tattoo 3 (RGBA)", 2D) = "black" {}
 16         _TattooPos3 ("Tattoo Position 3", Vector) = (0,0,1,1)
 17         _TattooTex4 ("Tattoo 4 (RGBA)", 2D) = "black" {}
 18         _TattooPos4 ("Tattoo Position 4", Vector) = (0,0,1,1)
 19     }
 20
 21     SubShader
 22     {
 23         Tags
 24         {
 25             "RenderType" = "Transparent"
 26             "IgnoreProjector" = "True"
 27             "Queue" = "Transparent+100"
 28         }
 29         LOD 200
 30
 31         Pass
 32         {
 33             Tags
 34             {
 35                 "LightMode" = "ForwardBase"
 36             }
 37             Cull Off
 38
 39             CGPROGRAM
 40             #pragma vertex vert
 41             #pragma fragment frag
 42             #pragma multi_compile_fwdbase
 43
 44             #include "UnityCG.cginc"
 45             #include "AutoLight.cginc"
 46             #include "Lighting.cginc"
 47
 48             #include "../AmericaCG.cginc"
 49
 50             fixed4 _Color;
 51             sampler2D _MainTex;
 52             sampler2D _Ramp;
 53             fixed4 _OverlyingColor;
 54
 55             sampler2D _TattooTex1;
 56             float4 _TattooPos1;
 57             sampler2D _TattooTex2;
 58             float4 _TattooPos2;
 59             sampler2D _TattooTex3;
 60             float4 _TattooPos3;
 61             sampler2D _TattooTex4;
 62             float4 _TattooPos4;
 63
 64             struct appdata
 65             {
 66                 float4 vertex : POSITION;
 67                 float2 uv : TEXCOORD0;
 68                 float3 normal : NORMAL;
 69             };
 70
 71             struct v2f
 72             {
 73                 float4 pos : SV_POSITION;
 74                 float2 uv : TEXCOORD0;
 75                 float3 worldPos : TEXCOORD1;
 76                 float3 worldNormal : TEXCOORD2;
 77             };
 78
 79             v2f vert(appdata v)
 80             {
 81                 v2f o;
 82                 o.pos = UnityObjectToClipPos(v.vertex);
 83                 o.uv = v.uv;
 84                 o.worldPos = mul(unity_ObjectToWorld, v.vertex);
 85                 o.worldNormal = UnityObjectToWorldNormal(v.normal);
 86                 return o;
 87             }
 88
 89             fixed4 frag(v2f i) : SV_TARGET
 90             {
 91                 fixed4 albedo = tex2D(_MainTex, i.uv);
 92
 93                 // 纹身
 94                 albedo = ApplyTattoo(i.uv, _TattooTex1, _TattooPos1, albedo);
 95                 albedo = ApplyTattoo(i.uv, _TattooTex2, _TattooPos2, albedo);
 96                 albedo = ApplyTattoo(i.uv, _TattooTex3, _TattooPos3, albedo);
 97                 albedo = ApplyTattoo(i.uv, _TattooTex4, _TattooPos4, albedo);
 98
 99                 albedo *= _Color;
100
101                 fixed3 ambient = albedo.rgb * UNITY_LIGHTMODEL_AMBIENT.rgb;
102
103                 fixed3 worldLight = normalize(UnityWorldSpaceLightDir(i.worldPos));
104                 float d = dot(worldLight, i.worldNormal) * 0.5 + 0.5;
105                 fixed3 rampCol = tex2D(_Ramp, float2(d, d)).rgb;
106                 fixed3 diffuse = albedo.rgb * _LightColor0.rgb * rampCol;
107
108                 fixed4 col = fixed4(ambient + diffuse * 2, albedo.a);
109                 col.rgb = Overlay(col, _OverlyingColor);
110
111                 return col;
112             }
113
114             ENDCG
115         }
116
117
118     }
119
120     Fallback "Diffuse"
121 }
其中,ApplyTattoo的实现如下:
// 应用纹身
fixed4 ApplyTattoo(float2 uv, sampler2D tattooTex, float4 tattooPos, fixed4 albedo)
{
    if (uv.x >= tattooPos.x && uv.x <= tattooPos.x+tattooPos.z && uv.y >= tattooPos.y && uv.y <= tattooPos.y + tattooPos.w)
    {
        fixed tattooU = (uv.x - tattooPos.x) / tattooPos.z;
        fixed tattooV = (uv.y - tattooPos.y) / tattooPos.w;
        fixed2 tattooUV = fixed2(tattooU, tattooV);
        fixed4 tattooCol = tex2D(tattooTex, tattooUV);
        albedo.rgb = lerp(albedo.rgb, tattooCol.rgb, tattooCol.a);
    }

    return albedo;
}
转载请注明出处:https://www.cnblogs.com/jietian331/p/12659339.html
材质球面板如下:
