说在前面,这篇文章是为记录下我个人的操作记录,不一定适合你的情况,但你可以当作参考 :)
关于环境搭建你可以看这里
这个第一个django项目我是参考《django web开发指南》这本书的,注意这本书是09年出版的,现在django已经更新了,所以书上的讲解和现在的操作会有一些出入,如果你也刚好是看这本书,苦于书上的介绍与实际有出入,那我的文章可能刚好能帮助你解决这个问题
我的环境:
ubuntu 12.04
python 2.7.3
django 1.5.1
mysql Ver 14.14 Distrib 5.5.29, for debian-linux-gnu (x86_64) using readline 6.2
服务器 : 这里我选择了django自带的
流程:
- 使用django提供的命令新建django项目
- 再建数据库, 并在setting.py设置好django对数据库的配置
- 使用django命令新建应用
- 在setting.py中添加应用声明并修改应用目录下的models文件内容
- 使用django命令创建表
- 设置自动admin应用,完成后再执行一次创建表的命令
- 最后, 开启服务器, 在浏览器中输入网址验证吧
开始:
首先选择一个目录(你喜欢), 在其下面运行下面的命令
django-admin.py startproject firstproj

firstproj  是你自己的设定
在我的环境下,得到了这些文件
firstproj/ manage.py
注意 《django web开发指南》里面介绍的是目录下存在以下这些文件
__init__.py settings.py urls.py manage.py
那么这些文件在我的环境上去了哪里呢? 没错,看到我的目录下存在
firstproj 和
manage.py ,所以
manage.py 独立放在了外面,而其他文件(
_init__.py setting.py urls.py)就放在
firstproj/firstproj/下,在我的环境下是这样的:
注意是 firstproj/firstproj/
__init__.py settings.py urls.py wsgi.py
注意这里是多了
wsgi.py
这时候你运行 ./manage.py runserver ,然后在浏览器输入 http://127.0.0.1:8000就能看到一个提示页面,“ It Worked!"
继续:
现在我需要用mysql新建一个数据库
mysql -u root -p
create database firstproj;
新建了一个数据库 firstproj
show databases;
+--------------------+
| Database           |
+--------------------+
| information_schema |
| firstproj          |
| mysql              |
| performance_schema |
| test               |
+--------------------+
5 rows in set (0.00 sec)
数据库建好了,这时候就去
setting.py 里修改关于数据库的信息
DATABASES = {
    'default': {
        'ENGINE': 'django.db.backends.mysql', # 这里添加了mysql
        'NAME': 'firstproj',                      # 注意这里改了
        # The following settings are not used with sqlite3:
        'USER': 'root', # 这里改了root
        'PASSWORD': '你数据库的密码',
        'HOST': '',                      # Empty for localhost through domain sockets or '127.0.0.1' for localhost through TCP.
        'PORT': '',                      # Set to empty string for default.
    }
}
保存退出,回到
firstproj/ 路径,
注意不是 firstproj/firstproj/
执行命令
./manage.py startapp blog
创建应用 blog, 完成之后 ls 一下, 如下:
blog firstproj manage.py
由于创建了应用, 进入 setting.py 注册一下,修改如下:
INSTALLED_APPS = (
    'django.contrib.auth',
    'django.contrib.contenttypes',
    'django.contrib.sessions',
    'django.contrib.sites',
    'django.contrib.messages',
    'django.contrib.staticfiles',
	'blog', #添加这行! 不是写 'firstproj.blog'
    # Uncomment the next line to enable the admin:
    #'django.contrib.admin',
    # Uncomment the next line to enable admin documentation:
    # 'django.contrib.admindocs',
)
保存退出, 进入blog目录下,
修改 models.py , 如下:
from django.db import models

class BlogPost(models.Model):
	title = models.CharField(max_length=150)
	boby = models.TextField()
	timestamp = models.DateTimeField()
保存退出。
这时候在 firstproj/ 下运行:
./manage.py syncdb
由于之前提到的步骤中我是按照书上介绍的操作,所以都出现了如下的错误:
ImportError: No module named fisrtpoj.blog
ImportError: No module named firstpoj.blog
ImportError: No module named blog
OperationalError: (1045, "Access denied for user 'sheng'@'localhost' (using password: YES)")
OperationalError: (1045, "Access denied for user 'root'@'localhost' (using password: YES)")
当每一次操作都出现错误,我便按照每一条错误信息进行修改, 直到OK为止, 注意上面的错误我是贴出来提醒一下, 并不是你按照我上面贴出的步骤操作后也会出现这些错误。
./manage.py syncdb
这条指令操作成功会出现以下信息, 初始化信息:
Creating tables ...
Creating table auth_permission
Creating table auth_group_permissions
Creating table auth_group
Creating table auth_user_groups
Creating table auth_user_user_permissions
Creating table auth_user
Creating table django_content_type
Creating table django_session
Creating table django_site
Creating table blog_blopost

You just installed Django's auth system, which means you don't have any superusers defined.
Would you like to create one now? (yes/no): yes
Username (leave blank to use 'sheng'):
Email address: 你的邮箱
Password:
Password (again):
Superuser created successfully.
Installing custom SQL ...
Installing indexes ...
Installed 0 object(s) from 0 fixture(s)
到现在, 就要设置自动 admin 应用:
打开 setting.py , 修改如下
INSTALLED_APPS = (
    'django.contrib.auth',
    'django.contrib.contenttypes',
    'django.contrib.sessions',
    'django.contrib.sites',
    'django.contrib.messages',
    'django.contrib.staticfiles',
	'blog',
    # Uncomment the next line to enable the admin:
    'django.contrib.admin', #修改了这里
    # Uncomment the next line to enable admin documentation:
    # 'django.contrib.admindocs',
)
保存退出
打开urls.py , 修改如下(注意这里跟书上是不同的):
from django.conf.urls import patterns, include, url

# Uncomment the next two lines to enable the admin:
from django.contrib import admin #修改这里
admin.autodiscover() #修改这里

urlpatterns = patterns('',
    # Examples:
    # url(r'^$', 'firstproj.views.home', name='home'),
    # url(r'^firstproj/', include('firstproj.foo.urls')),

    # Uncomment the admin/doc line below to enable admin documentation:
    # url(r'^admin/doc/', include('django.contrib.admindocs.urls')),

    # Uncomment the next line to enable the admin:
     url(r'^admin/', include(admin.site.urls)), #修改这里
)
其实文件中的注释已经很好的做了一个说明
接着修改 blog/models.py ,修改如下:
from django.db import models
from django.contrib import admin #添加这句

class BlogPost(models.Model):
	title = models.CharField(max_length=150)
	boby = models.TextField()
	timestamp = models.DateTimeField()

admin.site.register(BlogPost) #添加这句
保存退出
再执行一次
./manage.py syncdb
最后,开启 django 自带服务器, 执行 ./manage.py runserver
然后在浏览器中输入 http://127.0.0.1:8000/admin/
如无意外你会看到这个画面

输入在 setting.py 中设置的用户名和密码,然后你会看到下面这个画面:
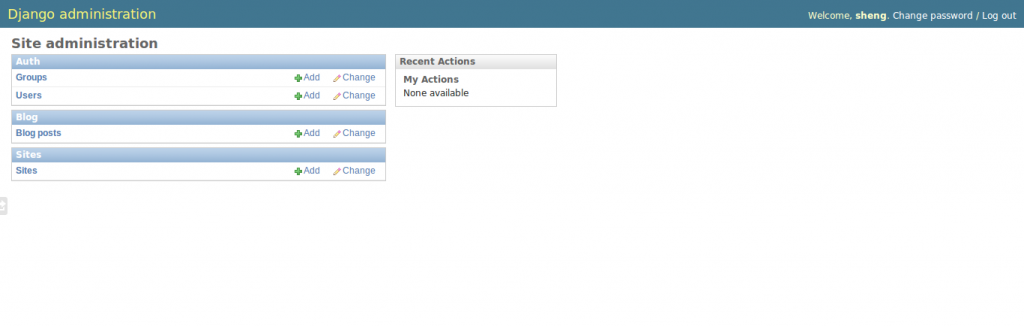
如果你成功看到这个画面,说明你成功了, 恭喜!