该文转载自:http://rangercyh.blog.51cto.com/1444712/521244
系统调用是操作系统内核和应用程序之间的接口,而设备驱动程序是操作系统内核和机器硬件之间的接口。
设备驱动程序为应用程序屏蔽了硬件的细节,这样在应用程序看来,硬件设备只是一个设备文件, 应用程序可以像操作普通文件一样对硬件设备进行操作。
设备驱动程序是内核的一部分,它完成以下的功能:
(1) 对设备初始化和释放.
(2) 把数据从内核传送到硬件和从硬件读取数据.
(3) 读取应用程序传送给设备文件的数据和回送应用程序请求的数据.
(4) 检测和处理设备出现的错误.
Linux支持三中不同类型的设备:字符设备(character devices)、块设备(block devices)和网络设备(network interfaces)。
字符设备和块设备的主要区别是:在对字符设备发出读/写请求时,实际的硬件I/O一般就紧接着发生了。
块设备则不然,它利用一块系统内存作缓冲区,当用户进程对设备请求能满足用户的要求,就返回请求的数据,如果不能,就调用请求函数来进行实际的I/O操作。块设备是主要针对磁盘等慢速设备设计的,以免耗费过多的CPU时间来等待.
用户进程是通过设备文件来与实际的硬件打交道,每个设备文件都都有其文件属性(c/b),表示是字符设备还是块设备。
另外每个文件都有两个设备号,第一个是主设备号,标识驱动程序,第二个是从设备号,标识使用同一个设备驱动程序的不同的硬件设备,
比如有两个软盘,就可以用从设备号来区分他们.设备文件的的主设备号必须与设备驱动程序在登记时申请的主设备号一致,否则用户进程将无法访问到驱动程序.。
设备驱动程序工作的基本原理:
用户进程利用系统调用对设备进行诸如read/write操作,系统调用通过设备文件的主设备号找到相应的设备驱动程序,然后读取这个数据结构相应的函数指针,接着把控制权交给该函数。
最后,在用户进程调用驱动程序时,系统进入核心态,这时不再是抢先式调度。也就是说,系统必须在你的驱动程序的子函数返回后才能进行其他的工作。
如果你的驱动程序陷入死循环,你只有重新启动机器了。
下面我们就来添加一个字符设备:
- 编写设备驱动源代码
在设备驱动程序中有一个非常重要的结构file_operations,该结构的每个域都对应着一个系统调用。
用户进程利用系统调用对设备文件进行诸如read/write操作时,系统调用通过设备文件的主设备号找到相应的设备驱动程序,然后读取这个数据结构相应的函数指针,接着把控制权交给该函数。
- struct file_operations {
- int (*seek) (struct inode * ,struct file *, off_t ,int);
- int (*read) (struct inode * ,struct file *, char ,int);
- int (*write) (struct inode * ,struct file *, off_t ,int);
- int (*readdir) (struct inode * ,struct file *, struct dirent * ,int);
- int (*select) (struct inode * ,struct file *, int ,select_table *);
- int (*ioctl) (struct inode * ,struct file *, unsined int ,unsigned long);
- int (*mmap) (struct inode * ,struct file *, struct vm_area_struct *);
- int (*open) (struct inode * ,struct file *);
- int (*release) (struct inode * ,struct file *);
- int (*fsync) (struct inode * ,struct file *);
- int (*fasync) (struct inode * ,struct file *,int);
- int (*check_media_change) (struct inode * ,struct file *);
- int (*revalidate) (dev_t dev);
- }
编写设备驱动程序的主要工作是编写子函数,并填充file_operations的各个域。
例如:
- Struct file_operations my_fops={
- .read=my_read,
- .write=my_write,
- .open=my_open,
- .release=my_release
- }
然后再定义函数my_read,my_write,my_open,my_release相应的函数体。
例如:
- static ssize_t my_open(struct inode *inode,struct file *file){
- static int counter=0;
- if(Device_Open)
- return -EBUSY;
- Device_Open++;
- /*写入设备的信息*/
- sprintf(msg,"the device has been called %d times ",counter++);
- msg_ptr=msg;
- return 0;
- }
同时对于可卸载的内核模块(LKM),至少还有两个基本的模块:
例如本例中的:
- static int __init my_init(void){
- int result;
- result=register_chrdev(0,"sky_driver",&my_fops);
- if(result<0){
- printk("error:can not register the device ");
- return -1;
- }
- if(my_major==0){
- my_major=result;
- printk("<1>hehe,the device has been registered! ");
- printk("<1>the virtual device was assigned major number %d. ",my_major);
- printk("<1>To talk to the driver,create a dev file with ");
- printk("<1>'mknod/dev/my c %d 0' ",my_major);
- printk("<1>Remove the dev and the file when done ");
- }
- return 0;
- }
- static void __exit my_exit(void){
- unregister_chrdev(my_major,"sky_driver");
- printk("<1>unloading the device ");
- }
my_init 用于注册设备,获得设备的主设备号
调用register_chrdev(0,“sky_driver(设备名)”,&my_fops);
my_exit 用于注销设备
调用unregister_chrdev(my_major, “sky_driver(设备名)”);
然后在程序尾再调用这两个函数
Module_init(my_init);
Module_exit(my_exit)
MODULE_LICENSE(“GPL”);
编写自己的驱动程序源文件mydriver.c:
- #include <linux/kernel.h>
- #include <linux/module.h>
- #include <linux/fs.h>
- #include <linux/init.h>
- #include <linux/uaccess.h>
- #if CONFIG_MODVERSIONS == 1
- #define MODVERSIONS
- #include <linux/version.h>
- #endif
- #define DEVICE_NUM 0 //随机产生一个设备号
- static int device_num = 0; //用来保存创建成功后的设备号
- static char buffer[1024] = "mydriver"; //数据缓冲区
- static int open_nr = 0; //打开设备的进程数,用于内核的互斥
- //函数声明
- static int mydriver_open(struct inode *inode, struct file *filp);
- static int mydriver_release(struct inode *inode, struct file* filp);
- static ssize_t mydriver_read(struct file *file, char __user *buf, size_t count, loff_t *f_pos);
- static ssize_t mydriver_write(struct file *file, const char __user *buf, size_t count, loff_t *f_pos);
- //填充file_operations结构相关入口
- static struct file_operations mydriver_fops = {
- .read = mydriver_read,
- .write = mydriver_write,
- .open = mydriver_open,
- .release = mydriver_release,
- };
- //打开函数
- static int mydriver_open(struct inode *inode, struct file *filp)
- {
- printk(" Main device is %d, and the slave device is %d ", MAJOR(inode->i_rdev), MINOR(inode->i_rdev));
- if (open_nr == 0) {
- open_nr++;
- try_module_get(THIS_MODULE);
- return 0;
- }
- else {
- printk(KERN_ALERT "Another process open the char device. ");//进程挂起
- return -1;
- }
- }
- //读函数
- static ssize_t mydriver_read(struct file *file, char __user *buf, size_t count, loff_t *f_pos)
- {
- //if (buf == NULL) return 0;
- if (copy_to_user(buf, buffer, sizeof(buffer))) //读缓冲
- {
- return -1;
- }
- return sizeof(buffer);
- }
- //写函数,将用户的输入字符串写入
- static ssize_t mydriver_write(struct file *file, const char __user *buf, size_t count, loff_t *f_pos)
- {
- //if (buf == NULL) return 0;
- if (copy_from_user(buffer, buf, sizeof(buffer))) //写缓冲
- {
- return -1;
- }
- return sizeof(buffer);
- }
- //释放设备函数
- static int mydriver_release(struct inode *inode, struct file* filp)
- {
- open_nr--; //进程数减1
- printk("The device is released! ");
- module_put(THIS_MODULE);
- return 0;
- }
- //注册设备函数
- static int __init mydriver_init(void)
- {
- int result;
- printk(KERN_ALERT "Begin to init Char Device!"); //注册设备
- //向系统的字符登记表登记一个字符设备
- result = register_chrdev(DEVICE_NUM, "mydriver", &mydriver_fops);
- if (result < 0) {
- printk(KERN_WARNING "mydriver: register failure ");
- return -1;
- }
- else {
- printk("mydriver: register success! ");
- device_num = result;
- return 0;
- }
- }
- //注销设备函数
- static void __exit mydriver_exit(void)
- {
- printk(KERN_ALERT "Unloading... ");
- unregister_chrdev(device_num, "mydriver"); //注销设备
- printk("unregister success! ");
- }
- //模块宏定义
- module_init(mydriver_init);
- module_exit(mydriver_exit);
- MODULE_LICENSE("GPL");
- 编译该设备驱动代码
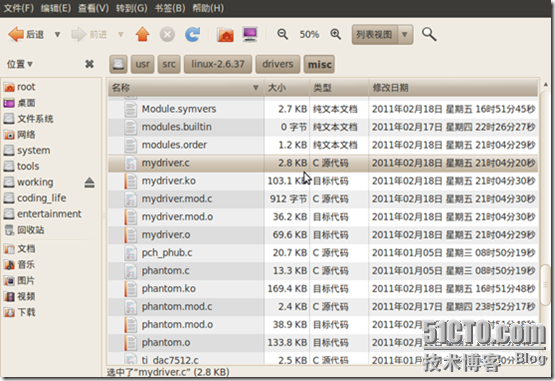
然后将设备驱动源文件复制到/usr/src/linux/drivers/misc下
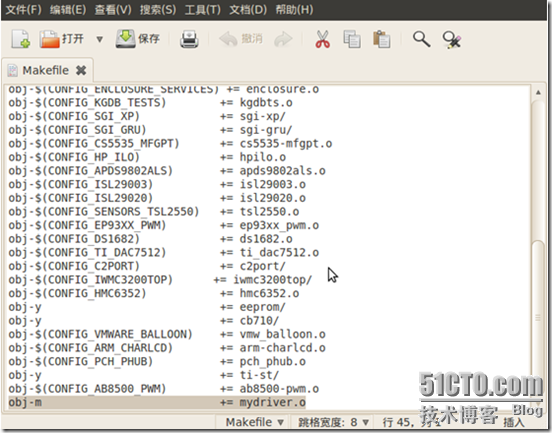
修改misc目录下的Makefile文件,只要在最后添加一句即可:obj-m +=mydriver.o。
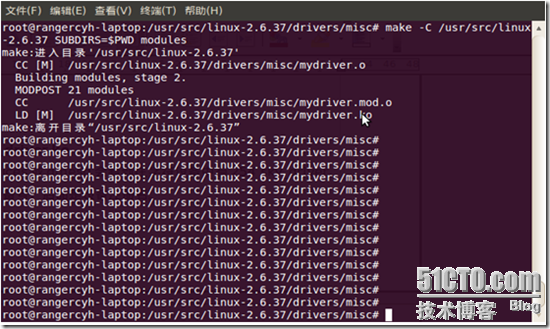
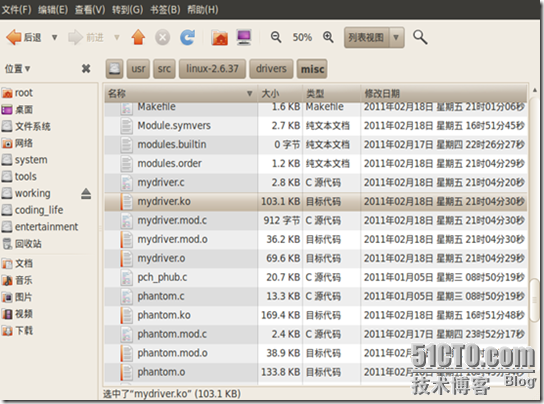
在/usr/src/linux/drivers/misc路径下执行命令:Make -C /usr/src/linux SUBDIRS=$PWD modules编译成功将得到mydriver.ko文件。
可以在misc目录下观察得到了mydriver.ko文件。
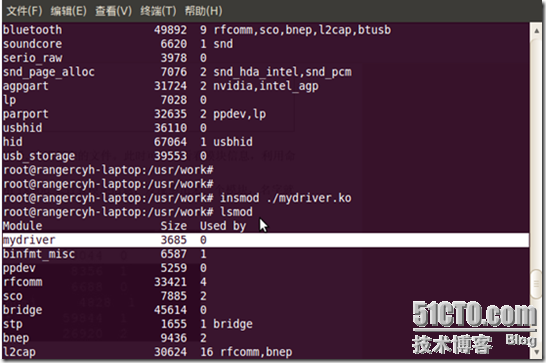
继续执行insmod ./mydriver.ko命令挂载内核中的模块。
然后通过lsmod命令可以看到增加的设备模块mydriver。
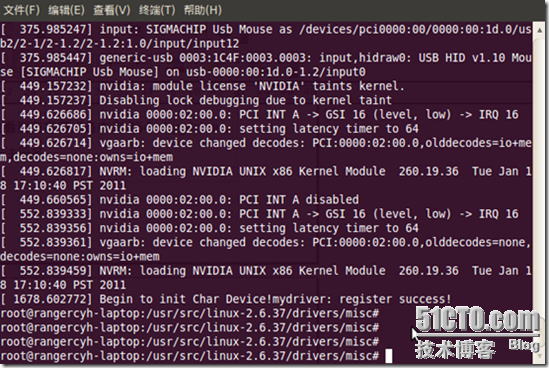
输入cat /var/log/messages可以看到设备注册成功。
此时进入/proc/devices文件会看到在字符设备中有250 mydriver。前面的是系统分配的主设备号,后面是设备注册名。
进入在/dev路径下,执行命令:
mknod /dev/mydriver c 250 0
第一个参数是新建设备文件的地址和名字。
第二个参数是指创建的是字符设备文件。
第三个参数是主设备号,第四个参数是从设备号,自己随便取。
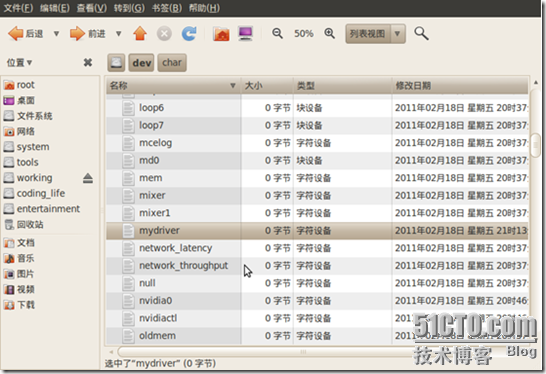
执行成功会在/dev/char中看到一个新的设备文件mydriver
至此设备添加成功。
- 编译测试程序。
编写测试代码如下:
- #include <sys/types.h>
- #include <sys/stat.h>
- #include <string.h>
- #include <stdio.h>
- #include <fcntl.h>
- int main(void)
- {
- int fd;
- char buf[1024];
- char get[1024];
- memset(get, 0, sizeof(get));
- memset(buf, 0, sizeof(buf));
- printf("please enter a string you want input to mydriver: ");
- gets(get);
- fd = open("/dev/mydriver", O_RDWR, S_IRUSR|S_IWUSR);//打开设备
- if (fd > 0) {
- read(fd, &buf, sizeof(buf));
- printf("The message in mydriver now is: %s ", buf);
- //将输入写入设备
- write(fd, &get, sizeof(get));
- //读出设备的信息并打印
- read(fd, &buf, sizeof(buf));
- printf("The message changed to: %s ", buf);
- sleep(1);
- }
- else {
- printf("OMG...");
- return -1;
- }
- close(fd);//释放设备
- return 0;
- }
gcc -o mydriver_test mydriver_test.c
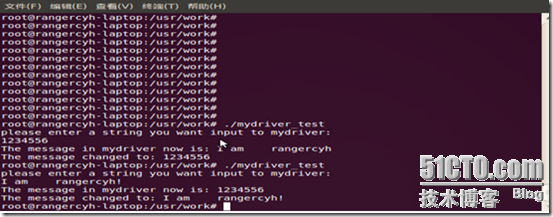
./mydriver_test
输入任意字符串,驱动程序将字符串拷贝进新加入的设备,然后再读取出来,设备中保留字符串信息,再次输入将覆盖原来的信息
