一、jdk环境配置
1.上传jdk包
[root@m01 ~]# rz
[root@m01 ~]# ll
total 181208
-rw-r--r--   1 root root  185540433 2021-06-16 14:21 jdk-8u131-linux-x64.tar.gz
2.编写安装jdk脚本
[root@staging ~]# vim Ins_Jdk.sh
##########################################################################
# Author:          jin.hui
# QQ:              974089352
# File Name:       Ins_Jdk.sh
# Copyright (C):   2021 All rights reserved
# Created Time:    2021年05月19日 星期三 17时30分31秒
#########################################################################
#!/usr/bin/bash

jdk=jdk-8u131-linux-x64.tar.gz
jdk_dir=/opt/java

#1.新建jdk存放目录
mkdir $jdk_dir

#2.解压jdk压缩包
tar xf $jdk -C $jdk_dir

#3.配置环境变量
cat >> /etc/profile.d/java.sh <<EOF
export PATH=/opt/java/jdk1.8.0_131/bin:$PATH
EOF

#4.刷新环境变量
source /etc/profile

#5.验证服务
jdk_version=`java -version`

#6.jdk安装完成提示语
cat << EOF
+-------------------------------------------------+
| $jdk_version 安 装 已 完 成           |
| 请 使 用 相 关 服 务 !                          |
+-------------------------------------------------+
EOF

sleep 5

mv Ins_Jdk.sh /tmp
3.验证java环境
[root@m01 ~]# chmod +x Ins_Jdk.sh
[root@m01 ~]# sh Ins_Jdk.sh
java version "1.8.0_131"
Java(TM) SE Runtime Environment (build 1.8.0_131-b11)
Java HotSpot(TM) 64-Bit Server VM (build 25.131-b11, mixed mode)
+-------------------------------------------------+
|  安 装 已 完 成           |
| 请 使 用 相 关 服 务 !                          |
+-------------------------------------------------+
[root@m01 ~]#
二、准备MySQL环境
1.安装MySQL
ps:前文已讲述安装方法,这一步略。
2.登录数据库
# 登录数据库
[root@m01 ~]# mysql -u root -p
Enter password:
Welcome to the MySQL monitor.  Commands end with ; or g.
Your MySQL connection id is 9
Server version: 8.0.24 Source distribution

Copyright (c) 2000, 2021, Oracle and/or its affiliates.

Oracle is a registered trademark of Oracle Corporation and/or its
affiliates. Other names may be trademarks of their respective
owners.

Type 'help;' or 'h' for help. Type 'c' to clear the current input statement.

mysql>
3.授权数据库
# 创建jira用户并授权数据库
mysql> CREATE DATABASE jiradb_new CHARACTER SET utf8mb4 COLLATE utf8mb4_bin;
Query OK, 1 row affected (0.01 sec)

mysql> create user 'jirauser'@'%' identified by 'jirapass';
Query OK, 0 rows affected (0.16 sec)

mysql> grant all privileges on jiradb_new.* to 'jirauser'@'%' with grant option;
Query OK, 0 rows affected (0.00 sec)

mysql> flush privileges;
Query OK, 0 rows affected (0.44 sec)
4.修改mysql配置文件
# 修改数据库配置文件my.cnf
[mysqld] 在文件中找到该 部分,并添加或修改以下参数:

将默认存储引擎设置为 InnoDB:

[mysqld]
...
default-storage-engine=INNODB
...
指定数据库服务器使用的字符集:

[mysqld]
...
character_set_server=utf8mb4
...
将默认行格式设置为 DYNAMIC:

[mysqld]
...
innodb_default_row_format=DYNAMIC
...
启用大前缀:

[mysqld]
...
innodb_large_prefix=ON
...
将 InnoDB 文件格式设置为 Barracuda:

[mysqld]
...
innodb_file_format=Barracuda
...
指定的值 innodb_log_file_size 至少为 2G:

[mysqld]
...
innodb_log_file_size=2G
...
确保 sql_mode 参数未指定 NO_AUTO_VALUE_ON_ZERO

// remove this if it exists
sql_mode = NO_AUTO_VALUE_ON_ZERO

# 重启数据库
[root@m01 ~]# systemctl restart mysqld.service
三、安装JIRA
1.下载jira
https://www.atlassian.com/software/jira/download
#1.下载版本8.5.16
[root@m01 ~]# wget https://www.atlassian.com/software/jira/downloads/binary/atlassian-jira-software-8.14.0-x64.bin

#2.查看下载包
[root@m01 ~]# ll
total 580300
-rw-r--r--   1 root root  408667330 2021-06-15 23:18 atlassian-jira-software-8.14.0-x64.bin
2.安装jira
#1.添加执行权限
[root@m01 ~]# chmod  +x atlassian-jira-software-8.14.0-x64.bin

#2.新建jira存放目录
[root@m01 ~]# mkdir /opt/jira-8.14.0

#3.安装jira
[root@m01 ~]# ./atlassian-jira-software-8.14.0-x64.bin
Unpacking JRE ...
Starting Installer ...

This will install Jira Software 8.14.0 on your computer.
OK [o, Enter], Cancel [c]

Click Next to continue, or Cancel to exit Setup.

Choose the appropriate installation or upgrade option.
Please choose one of the following:
Express Install (use default settings) [1], Custom Install (recommended for advanced users) [2, Enter], Upgrade an existing Jira installation [3]
2

Select the folder where you would like Jira Software to be installed.
Where should Jira Software be installed?
[/opt/atlassian/jira]
/opt/jira-8.14.0

Default location for Jira Software data
[/var/atlassian/application-data/jira]
/opt/jira-data

Configure which ports Jira Software will use.
Jira requires two TCP ports that are not being used by any other
applications on this machine. The HTTP port is where you will access Jira
through your browser. The Control port is used to startup and shutdown Jira.
Use default ports (HTTP: 8080, Control: 8005) - Recommended [1, Enter], Set custom value for HTTP and Control ports [2]


Jira can be run in the background.
You may choose to run Jira as a service, which means it will start
automatically whenever the computer restarts.
Install Jira as Service?
Yes [y, Enter], No [n]


Details on where Jira Software will be installed and the settings that will be used.
Installation Directory: /opt/jira-8.14.0
Home Directory: /opt/jira-data
HTTP Port: 8080
RMI Port: 8005
Install as service: Yes
Install [i, Enter], Exit [e]


Extracting files ...


Please wait a few moments while Jira Software is configured.

Installation of Jira Software 8.14.0 is complete
Start Jira Software 8.14.0 now?
Yes [y, Enter], No [n]


Please wait a few moments while Jira Software starts up.
Launching Jira Software ...

Installation of Jira Software 8.14.0 is complete
Your installation of Jira Software 8.14.0 is now ready and can be accessed
via your browser.
Jira Software 8.14.0 can be accessed at http://localhost:8080
Finishing installation ...
3.验证jira
#1.查看数据目录
[root@m01 ~]# ll /opt/
total 4
drwxr-xr-x  3 root root   26 2021-06-16 14:24 java
drwxr-xr-x 15 root root 4096 2021-06-16 15:35 jira-8.14.0
drwx------  9 jira root  120 2021-06-16 15:35 jira-data

#2.查看进程
[root@m01 ~]# ps -ef |grep jira
jira      20914      1 20 15:35 ?        00:01:59 /opt/jira-8.14.0/jre//bin/java -Djava.util.logging.config.file=/opt/jira-8.14.0/conf/logging.properties -Djava.util.logging.manager=org.apache.juli.ClassLoaderLogManager -Xms384m -Xmx2048m -XX:InitialCodeCacheSize=32m -XX:ReservedCodeCacheSize=512m -Djava.awt.headless=true -Datlassian.standalone=JIRA -Dorg.apache.jasper.runtime.BodyContentImpl.LIMIT_BUFFER=true -Dmail.mime.decodeparameters=true -Dorg.dom4j.factory=com.atlassian.core.xml.InterningDocumentFactory -XX:-OmitStackTraceInFastThrow -Djava.locale.providers=COMPAT -Datlassian.plugins.startup.options= -Djdk.tls.ephemeralDHKeySize=2048 -Djava.protocol.handler.pkgs=org.apache.catalina.webresources -Dorg.apache.catalina.security.SecurityListener.UMASK=0027 -Xloggc:/opt/jira-8.14.0/logs/atlassian-jira-gc-%t.log -XX:+UseGCLogFileRotation -XX:NumberOfGCLogFiles=5 -XX:GCLogFileSize=20M -XX:+PrintGCDetails -XX:+PrintGCDateStamps -XX:+PrintGCTimeStamps -XX:+PrintGCCause -XX:+ExplicitGCInvokesConcurrent -Dignore.endorsed.dirs= -classpath /opt/jira-8.14.0/bin/bootstrap.jar:/opt/jira-8.14.0/bin/tomcat-juli.jar -Dcatalina.base=/opt/jira-8.14.0 -Dcatalina.home=/opt/jira-8.14.0 -Djava.io.tmpdir=/optjira-8.14.0/temp org.apache.catalina.startup.Bootstrap start
root      21062   4487  0 15:44 pts/1    00:00:00 grep --color=auto jira

#3.查看端口号
[root@m01 ~]# netstat  -lntp |grep 8080
tcp6       0      0 :::8080                 :::*                    LISTEN      20914/java
4.添加MySQL驱动
#1.上传mysql8.0驱动
[root@m01 ~]# cd /opt/jira-8.14.0/lib
[root@m01 /opt/jira-8.14.0/lib]# rz
四、破解JIRA
1.下载破解包
下载地址:https://files.cnblogs.com/files/sanduzxcvbnm/atlassian-agent-v1.2.3.zip
#1.下载破解包
[root@m01 ~]# wget https://files.cnblogs.com/files/sanduzxcvbnm/atlassian-agent-v1.2.3.zip
--2021-06-16 17:04:09--  https://files.cnblogs.com/files/sanduzxcvbnm/atlassian-agent-v1.2.3.zip
Resolving files.cnblogs.com (files.cnblogs.com)... 47.110.20.149
Connecting to files.cnblogs.com (files.cnblogs.com)|47.110.20.149|:443... connected.
HTTP request sent, awaiting response... 301 Moved Permanently
Location: https://files-cdn.cnblogs.com/files/sanduzxcvbnm/atlassian-agent-v1.2.3.zip [following]
--2021-06-16 17:04:10--  https://files-cdn.cnblogs.com/files/sanduzxcvbnm/atlassian-agent-v1.2.3.zip
Resolving files-cdn.cnblogs.com (files-cdn.cnblogs.com)... 47.96.168.161
Connecting to files-cdn.cnblogs.com (files-cdn.cnblogs.com)|47.96.168.161|:443... connected.
HTTP request sent, awaiting response... 200 OK
Length: 1015739 (992K) [application/zip]
Saving to: ‘atlassian-agent-v1.2.3.zip’

100%[===============================================================================>] 1,015,739   1.75MB/s   in 0.6s

2021-06-16 17:04:10 (1.75 MB/s) - ‘atlassian-agent-v1.2.3.zip’ saved [1015739/1015739]

#2.解压破解包
[root@m01 ~]# unzip atlassian-agent-v1.2.3.zip
Archive:  atlassian-agent-v1.2.3.zip
   creating: atlassian-agent-v1.2.3/
  inflating: atlassian-agent-v1.2.3/LICENSE
  inflating: atlassian-agent-v1.2.3/README.pdf
  inflating: atlassian-agent-v1.2.3/atlassian-agent.jar
 extracting: atlassian-agent-v1.2.3asum.txt

#3.将atlassian-agent.jar移动到当前目录下
[root@m01 ~]# mv atlassian-agent-v1.2.3/atlassian-agent.jar ./
[root@m01 ~]# ll
total 592116
-rw-r--r--   1 root root     974241 2019-10-10 12:15 atlassian-agent.jar
drwxr-xr-x   2 root root         57 2021-06-16 17:04 atlassian-agent-v1.2.3
-rw-r--r--   1 root root    1015739 2020-10-13 14:30 atlassian-agent-v1.2.3.zip
-rwxr-xr-x   1 root root  418775222 2020-11-23 21:23 atlassian-jira-software-8.14.0-x64.bin
2.复制破解文件
[root@m01 ~]# cp -a atlassian-agent.jar  /opt/jira-8.14.0/
[root@m01 ~]# echo 'export JAVA_OPTS="-javaagent:/opt/jira-8.14.0/atlassian-agent.jar ${JAVA_OPTS}"' >> /opt/jira-8.14.0/bin/setenv.sh

[root@m01 ~]# tail -1 /opt/jira-8.14.0/bin/setenv.sh
export CATALINA_OPTS="-javaagent:/opt/jira-8.14.0/atlassian-agent.jar ${CATALINA_OPTS}"
3.重启服务
# 重启jira
[root@m01 ~]# cd /opt/jira-8.14.0/bin
[root@m01 /opt/jira-8.14.0/bin]# ./stop-jira.sh
executing using dedicated user

                  `sMMMMMMMMMMMMMM+
                     MMMMMMMMMMMMMM
                     :sdMMMMMMMMMMM
                             MMMMMM
          `sMMMMMMMMMMMMMM+  MMMMMM
             MMMMMMMMMMMMMM  +MMMMM
              :sMMMMMMMMMMM   MMMMM
                     MMMMMM    `UOJ
   `sMMMMMMMMMMMMM+  MMMMMM
     MMMMMMMMMMMMMM  +MMMMM
      :sdMMMMMMMMMM   MMMMM
             MMMMMM    `UOJ
             MMMMMM
             +MMMMM
              MMMMM
               `UOJ

      Atlassian Jira
      Version : 8.14.0


If you encounter issues starting or stopping Jira, please see the Troubleshooting guide at https://docs.atlassian.com/jira/jadm-docs-0814/Troubleshooting+installation


Server startup logs are located in /opt/jira-8.14.0/logs/catalina.out
Using CATALINA_BASE:   /opt/jira-8.14.0
Using CATALINA_HOME:   /opt/jira-8.14.0
Using CATALINA_TMPDIR: /opt/jira-8.14.0/temp
Using JRE_HOME:        /opt/jira-8.14.0/jre/
Using CLASSPATH:       /opt/jira-8.14.0/bin/bootstrap.jar:/opt/jira-8.14.0/bin/tomcat-juli.jar
Using CATALINA_PID:    /opt/jira-8.14.0/work/catalina.pid
Tomcat stopped.

[root@m01 /opt/jira-8.14.0/bin]# ./startup.sh

                  `sMMMMMMMMMMMMMM+
                     MMMMMMMMMMMMMM
                     :sdMMMMMMMMMMM
                             MMMMMM
          `sMMMMMMMMMMMMMM+  MMMMMM
             MMMMMMMMMMMMMM  +MMMMM
              :sMMMMMMMMMMM   MMMMM
                     MMMMMM    `UOJ
   `sMMMMMMMMMMMMM+  MMMMMM
     MMMMMMMMMMMMMM  +MMMMM
      :sdMMMMMMMMMM   MMMMM
             MMMMMM    `UOJ
             MMMMMM
             +MMMMM
              MMMMM
               `UOJ

      Atlassian Jira
      Version : 8.14.0


If you encounter issues starting or stopping Jira, please see the Troubleshooting guide at https://docs.atlassian.com/jira/jadm-docs-0814/Troubleshooting+installation


Server startup logs are located in /opt/jira-8.14.0/logs/catalina.out
Using CATALINA_BASE:   /opt/jira-8.14.0
Using CATALINA_HOME:   /opt/jira-8.14.0
Using CATALINA_TMPDIR: /opt/jira-8.14.0/temp
Using JRE_HOME:        /opt/jira-8.14.0/jre/
Using CLASSPATH:       /opt/jira-8.14.0/bin/bootstrap.jar:/opt/jira-8.14.0/bin/tomcat-juli.jar
Using CATALINA_PID:    /opt/jira-8.14.0/work/catalina.pid
Tomcat started.

#3.查看服务状态
[root@m01 /opt/jira-8.14.0/bin]# ps -ef |grep jira
root      21381      1 99 16:24 pts/1    00:00:15 /opt/jira-8.14.0/jre//bin/java -Djava.util.logging.config.file=/opt/jira-8.14.0/conf/logging.properties -Djava.util.logging.manager=org.apache.juli.ClassLoaderLogManager -Xms384m -Xmx2048m -XX:InitialCodeCacheSize=32m -XX:ReservedCodeCacheSize=512m -Djava.awt.headless=true -Datlassian.standalone=JIRA -Dorg.apache.jasper.runtime.BodyContentImpl.LIMIT_BUFFER=true -Dmail.mime.decodeparameters=true -Dorg.dom4j.factory=com.atlassian.core.xml.InterningDocumentFactory -XX:-OmitStackTraceInFastThrow -Djava.locale.providers=COMPAT -Djdk.tls.ephemeralDHKeySize=2048 -Djava.protocol.handler.pkgs=org.apache.catalina.webresources -Dorg.apache.catalina.security.SecurityListener.UMASK=0027 -Xloggc:/opt/jira-8.14.0/logs/atlassian-jira-gc-%t.log -XX:+UseGCLogFileRotation -XX:NumberOfGCLogFiles=5 -XX:GCLogFileSize=20M -XX:+PrintGCDetails -XX:+PrintGCDateStamps -XX:+PrintGCTimeStamps -XX:+PrintGCCause -XX:+ExplicitGCInvokesConcurrent -Dignore.endorsed.dirs= -classpath /opt/jira-8.14.0/bin/bootstrap.jar:/opt/jira-8.14.0/bin/tomcat-juli.jar -Dcatalina.base=/opt/jira-8.14.0 -Dcatalina.home=/opt/jira-8.14.0 -Djava.io.tmpdir=/opt/jira-8.14.0/temp org.apache.catalina.startup.Bootstrap start
root      21401   4487  0 16:24 pts/1    00:00:00 grep --color=auto jira
[root@m01 /opt/jira-8.14.0/bin]# !net
netstat  -lntp |grep 8080
tcp6       0      0 :::8080                 :::*                    LISTEN      21381/java
五、访问JIRA
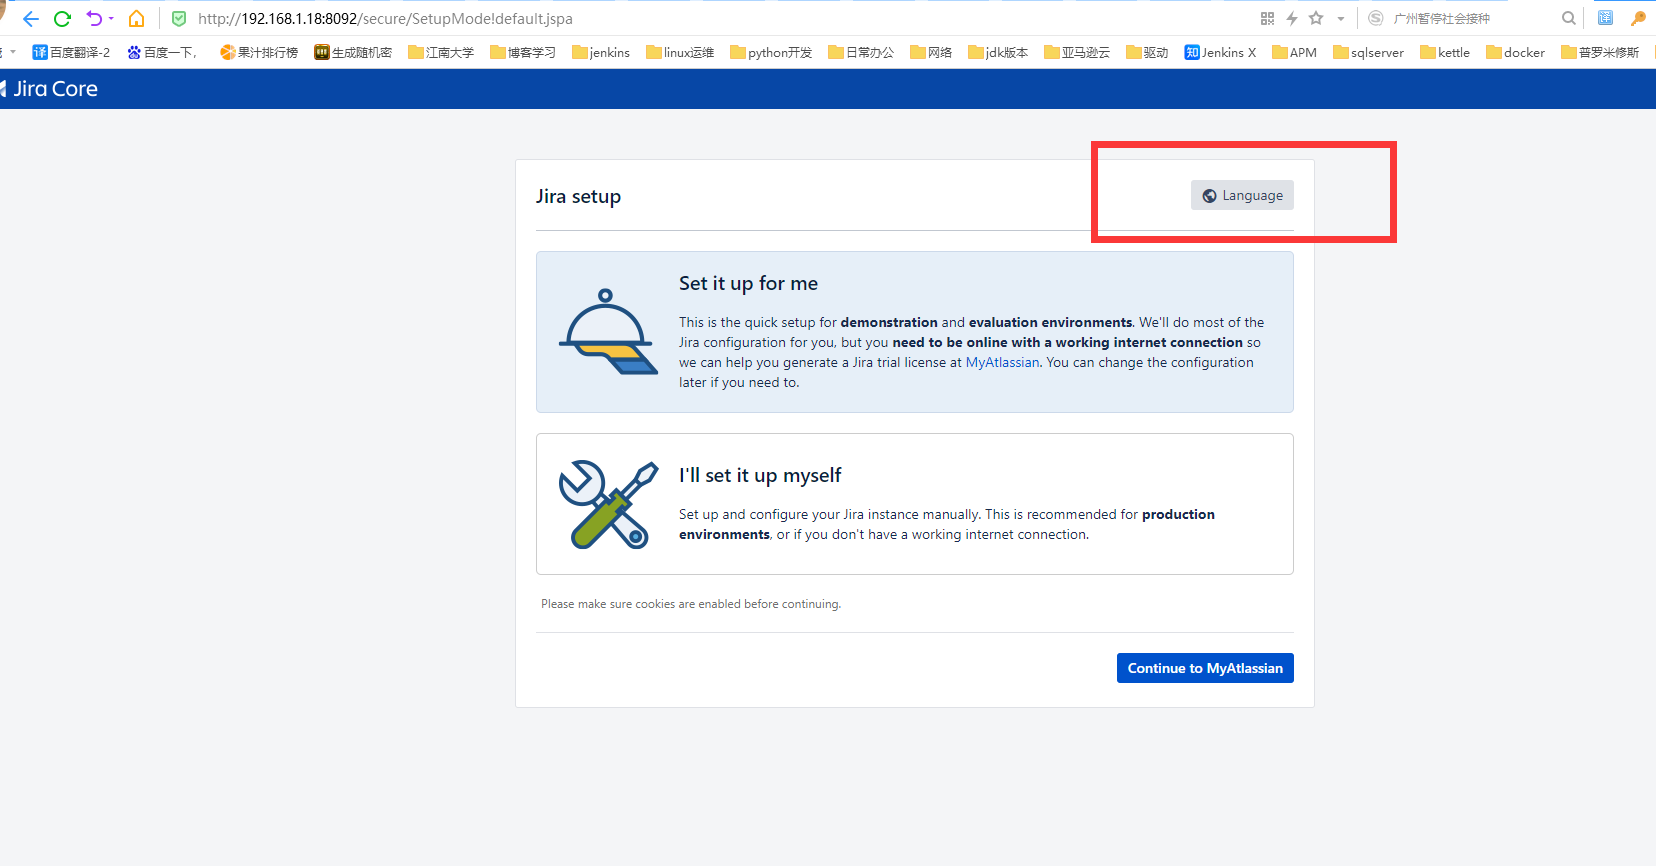
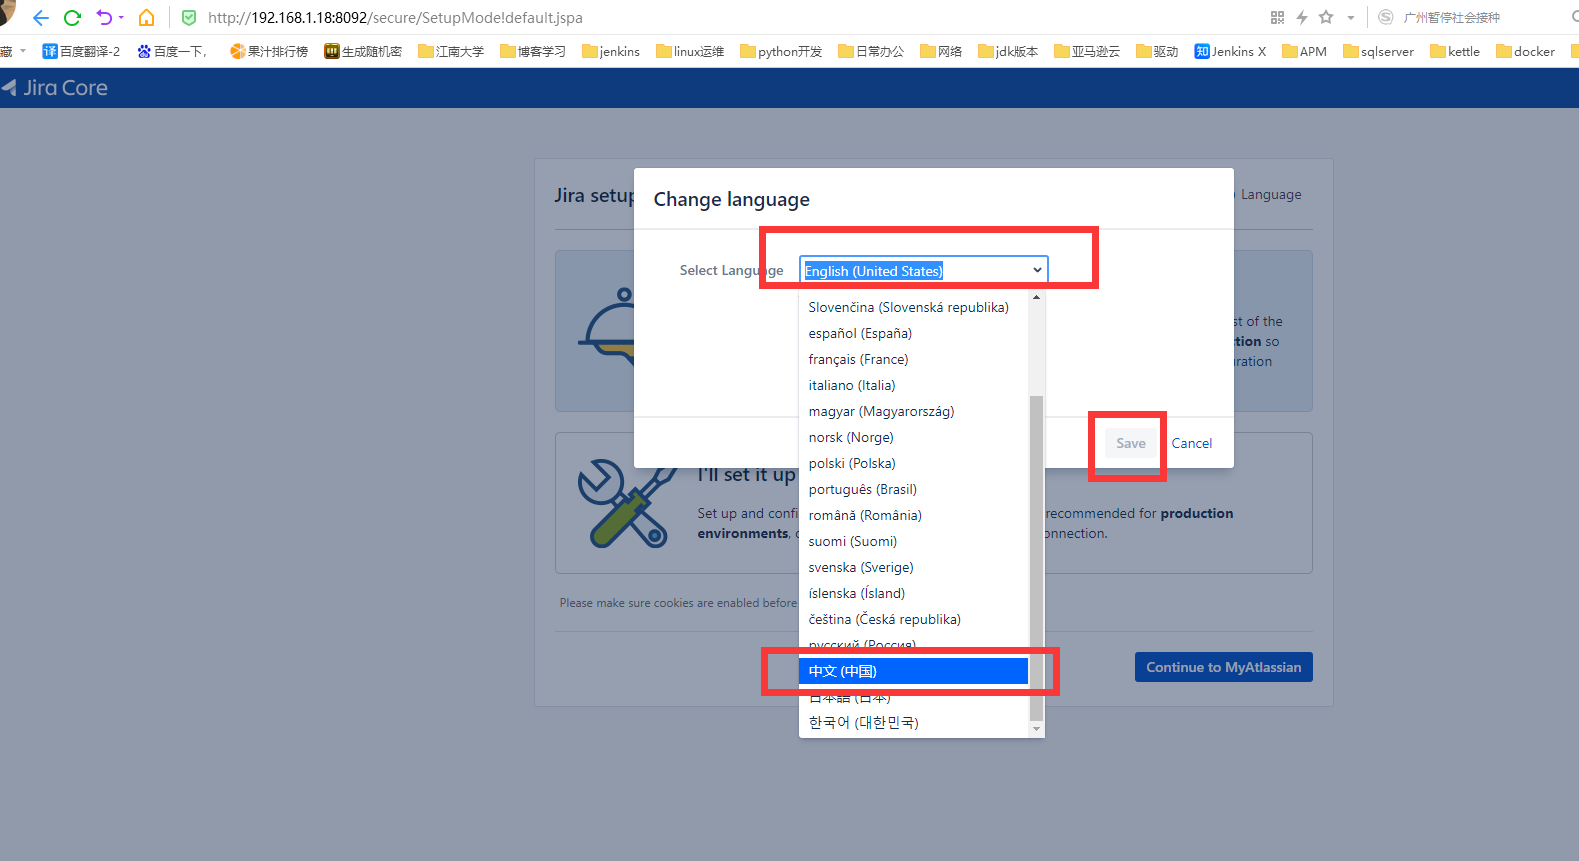
#1.访问 IP:port,如:192.168.1.18:8092,出现以下界面,点击language,选择安装语言为中文,点击保存。
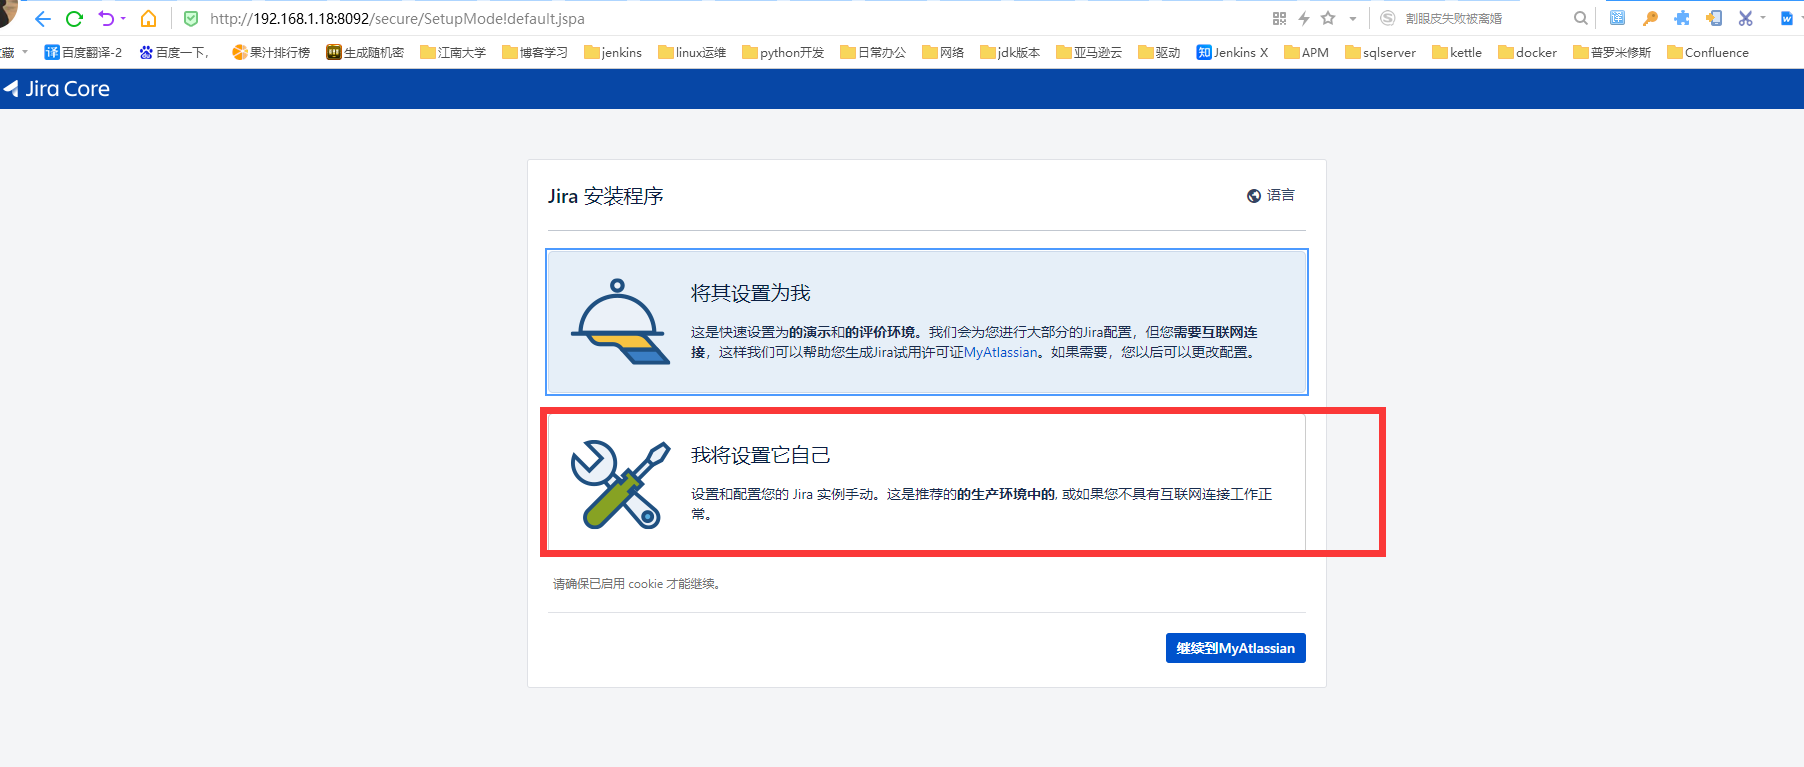
#2.选择我将设置它自己,点击继续。
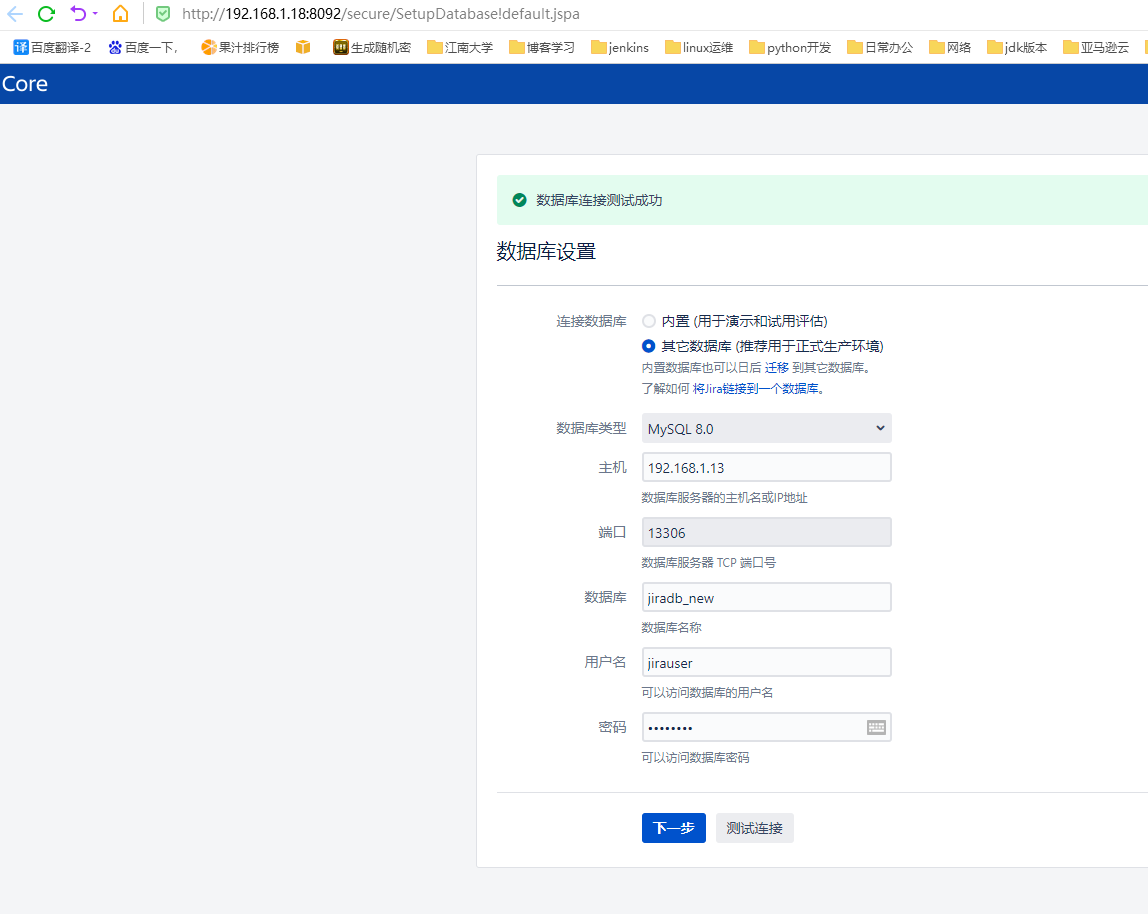
#3.配置数据库,填入相关用户名和密码,点击测试连接,成功点击下一步。
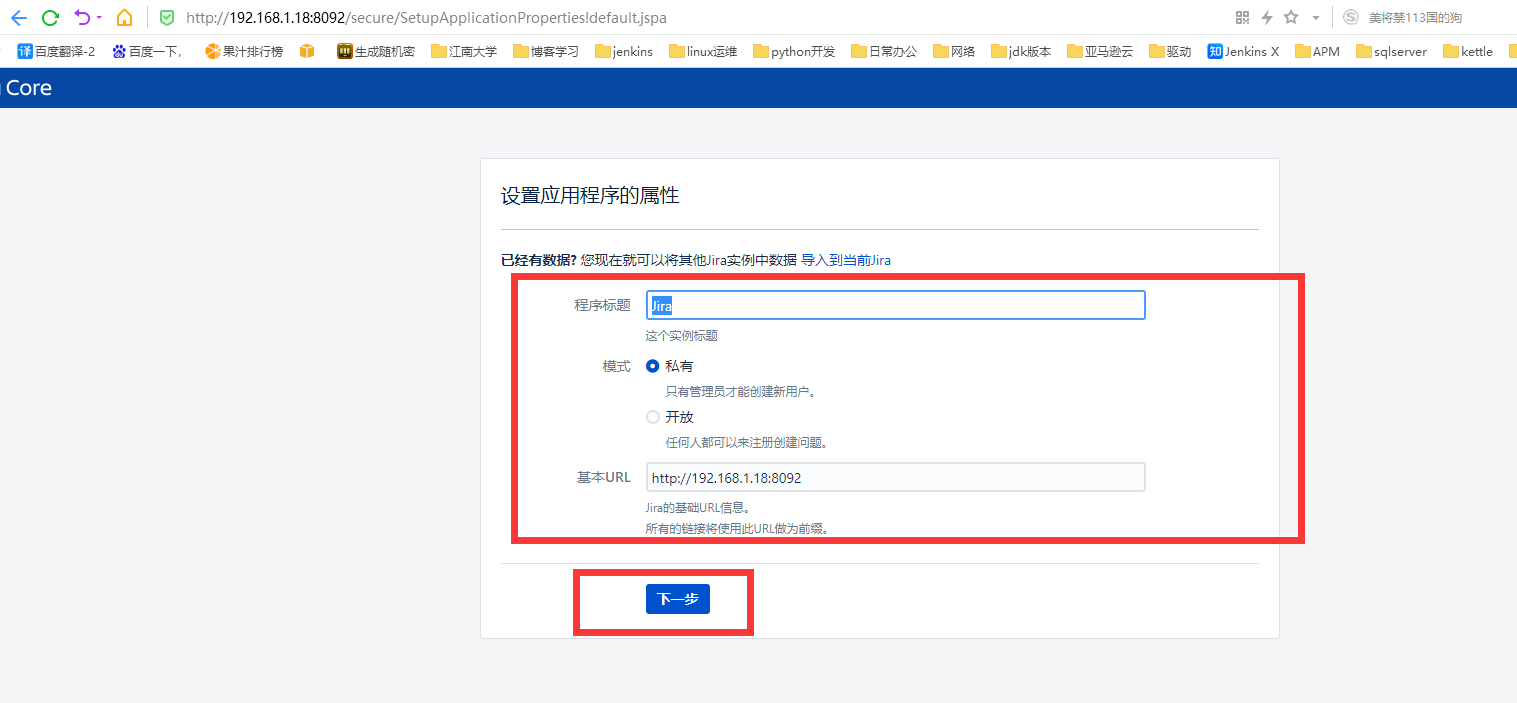
#4.填写相应的程序标题,选择相应的模式,进本URL,填写完成后单击下一步。
#5.复制如下服务器ID
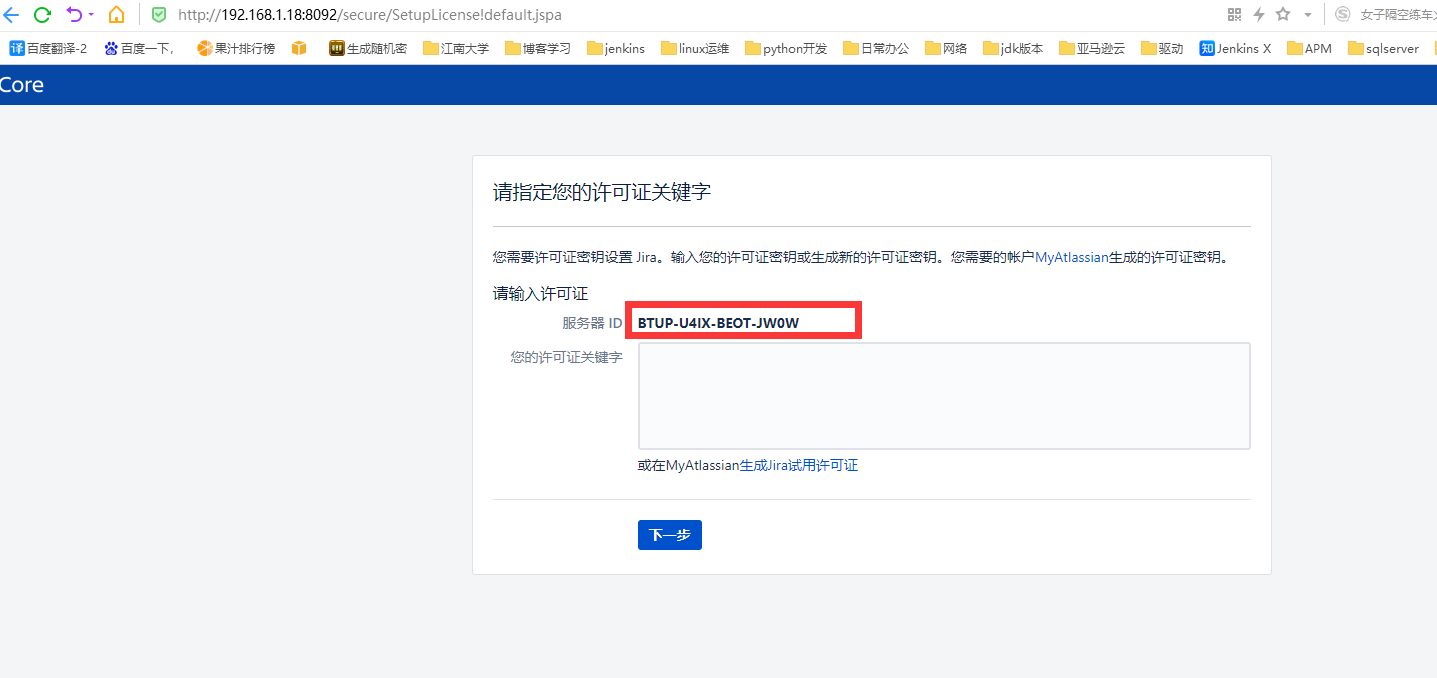
# 6.生成JIRA许可命令,设置产品类型:-p conf, 详情可执行:java -jar atlassian-agent.jar
java -jar atlassian-agent.jar -d -m test@test.com -n BAT -p conf -o http://192.168.0.89 -s BTW4-2T4Y-9BTK-R0DP

复制服务器ID: BTW4-2T4Y-9BTK-R0DP
在本地存放atlassian-agent.jar的目录下执行命令,生成许可证:
需替换邮箱(test@test.com)、名称(BAT)、访问地址(http://192.168.0.89)、服务器ID(BTW4-2T4Y-9BTK-R0DP)为你的信息
#7.生成许可证
[root@m01 ~]# java -jar atlassian-agent.jar -d -m hui.jin@dataxgroup.com -n BAT -p conf -o http://192.168.1.18 -s BTUP-U4IX-BEOT-JW0W
====================================================
======= Atlassian Crack Agent =======
======= https://zhile.io =======
======= QQ Group: 30347511 =======
====================================================
Your license code(Don't copy this line!!!):
AAABjg0ODAoPeJyNkltvgkAQhd/5FSR9hrJ4N9mkCqShATUV+77iqNvgQmYXW/vruwim3mKabEiWz
Dl75pt5Skow30phko7p9IetwZAQ8zVOTNdxibFBALHNiwLQjngKQkJyKGDCdkC9aRwH7144igwPg
SmeC58poJXQcroW6RgPJD7IFHlRqehCZHzHFazMrBaYy4O5VaqQw+fnny3PwOa5ETMuFAgmUgi+C
46H5rX+wHJ6+hifHNkpZbDitfUkCuMwCXxjUu6WgNP1QgJKapFTuAdeBearMlV2dbFkvlZfDMG+M
XpQy1LF90AVlnDB8vz/A7lOxTzQXWNd2uD50A9XzbnGvFz+YTyWBHuWlcdh0DXLZGN/bTTFDRNc1
nUVaQ2aDFybdPu2Y7eJ4eVC6ZCBhp5RBVK9VB87zXe14X0I/2xrrhhWUeqAzRxCn0ahPw8mVkS6b
qvX7rY6pOdejvXeJs0B94BaPu6MZ/c29nYXZiWmWybhel/PxUdaBXLZ9KOT0TvpGlDHUONR8gv5t
yJtMCwCFE4iI87rvt/tLaS31y6b5EX26JbiAhQXjJC5T1HSsq5pttx24DbUFXMKPg==X02jb
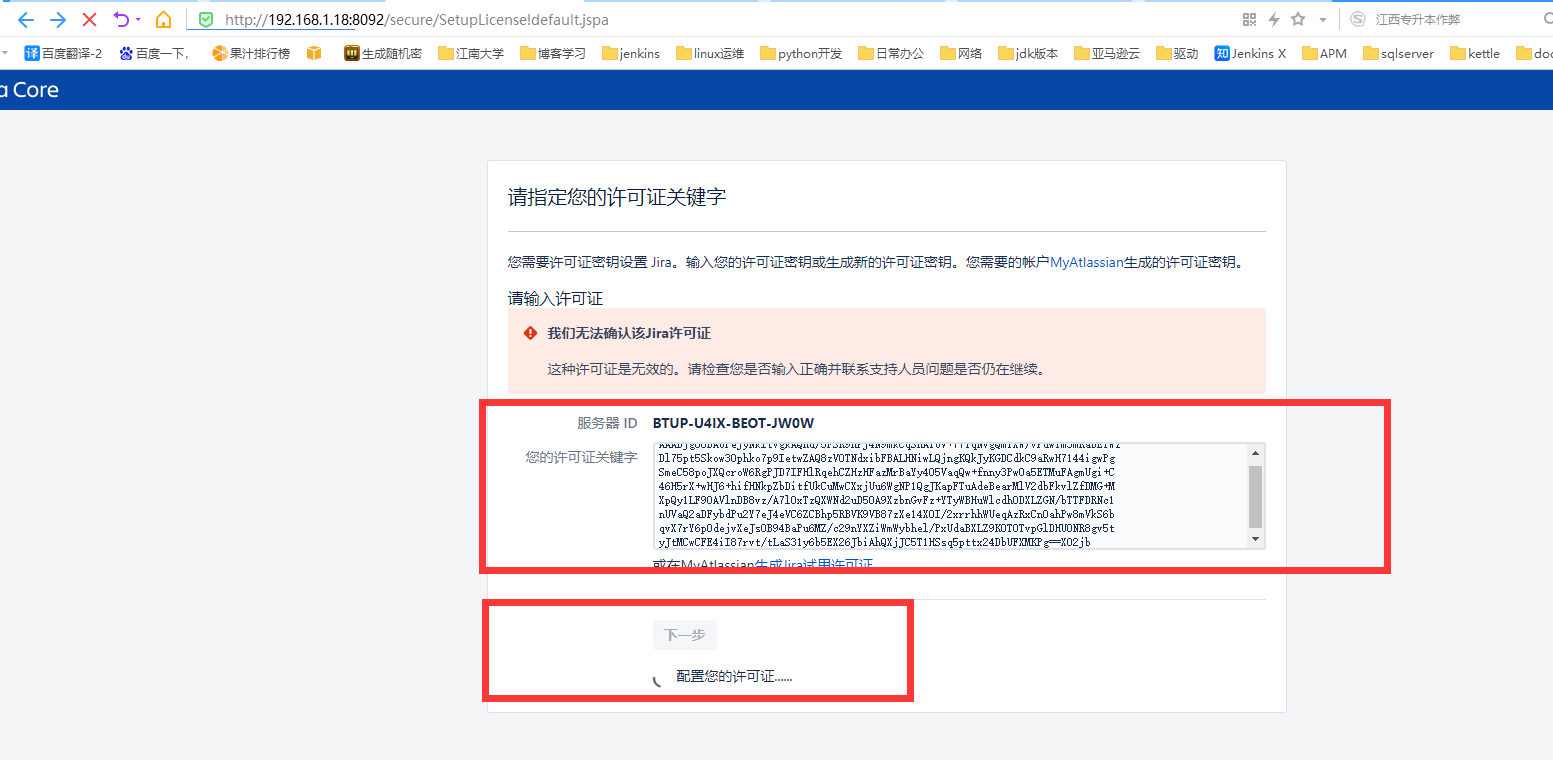
#8.复制生成的许可证,完成破解
六、配置JIRA
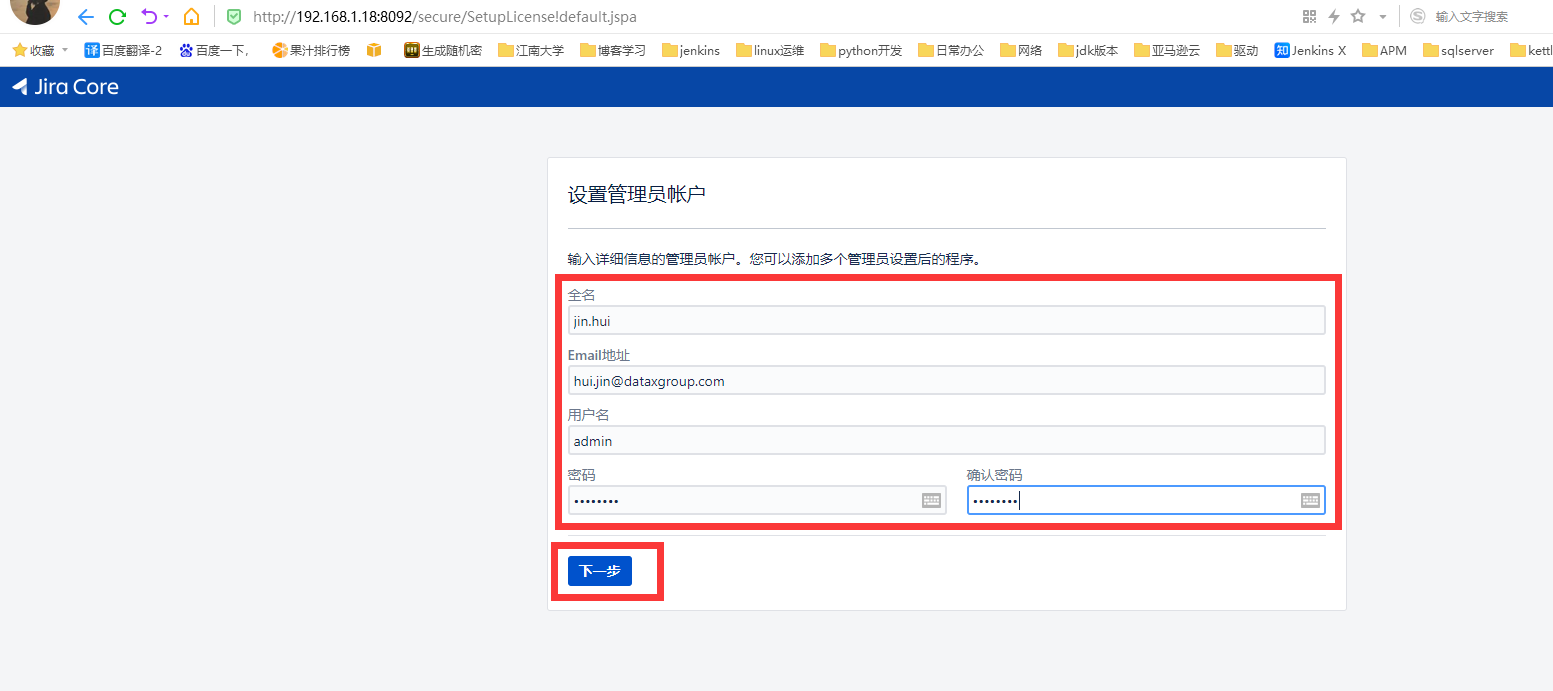
1.设置管理员账户
# 填写相应的管理员账户信息,填写完成后点击下一步
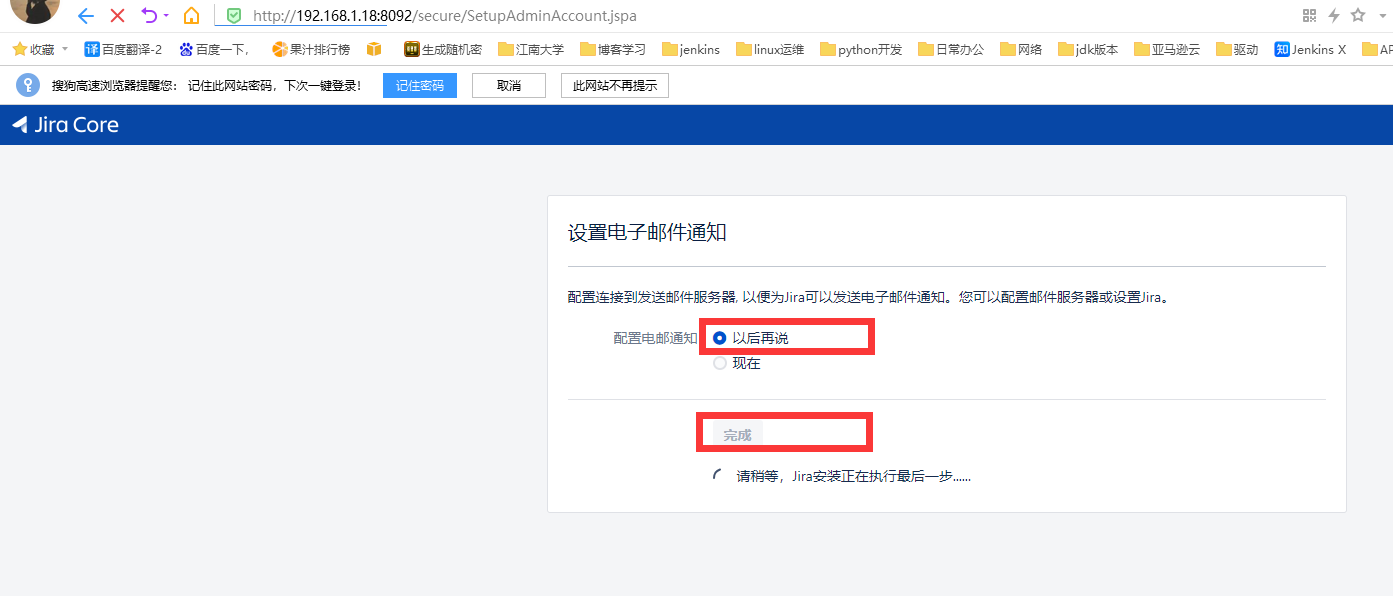
2.设置邮件服务器
# 邮件服务器可以立即设置,也可以稍后设置,这里选择以后再说,点击完成。
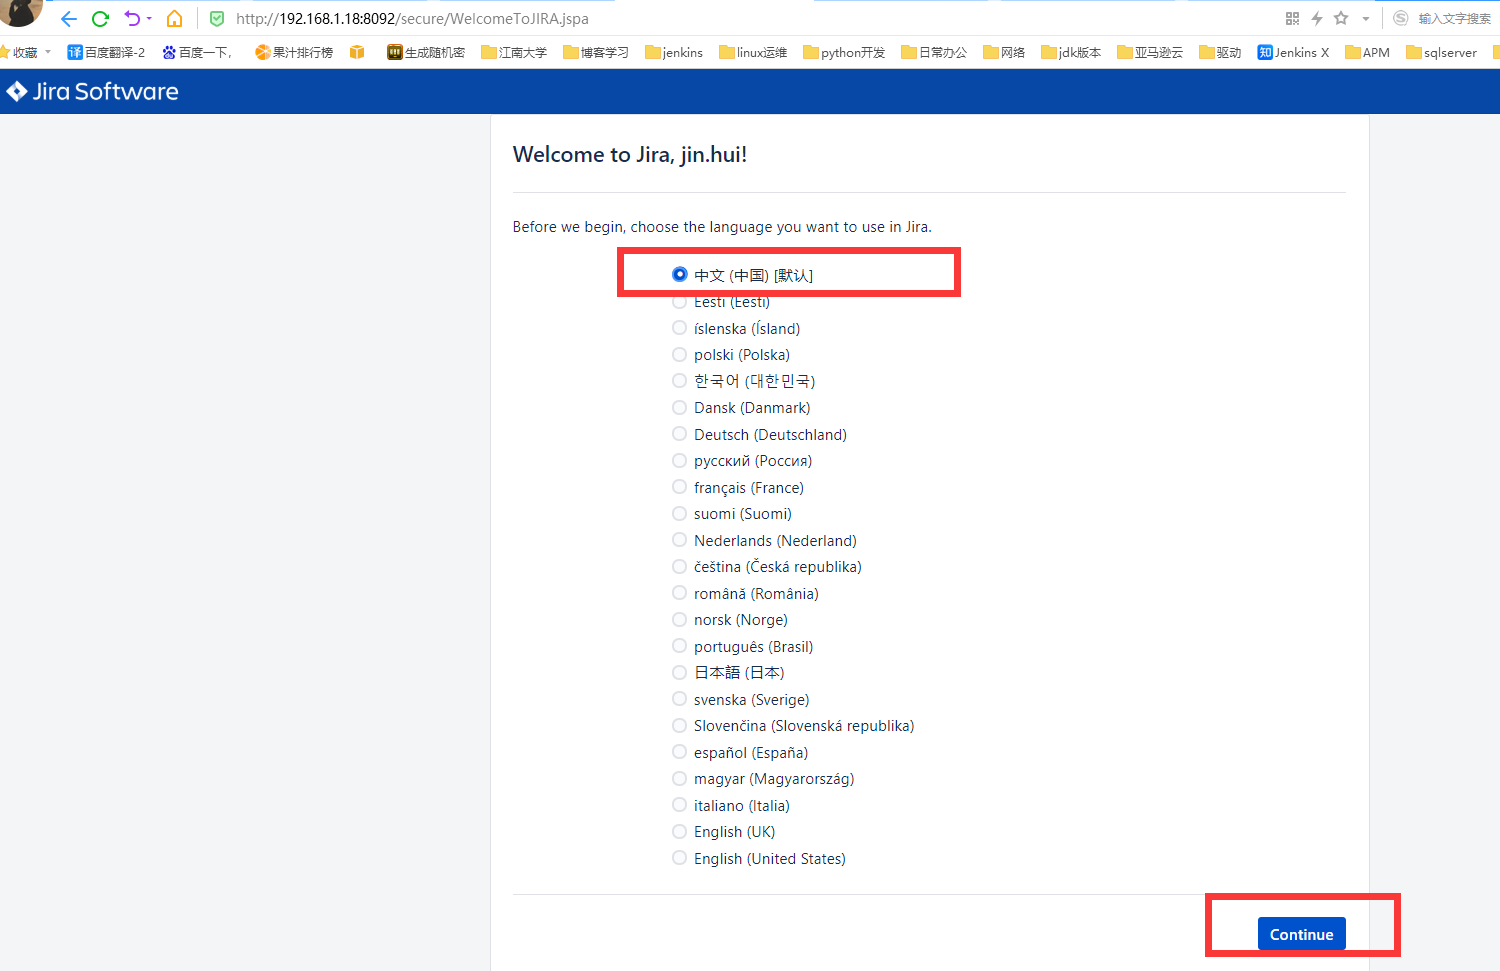
3.选择语言
# 选择语言为中文,点击continue。
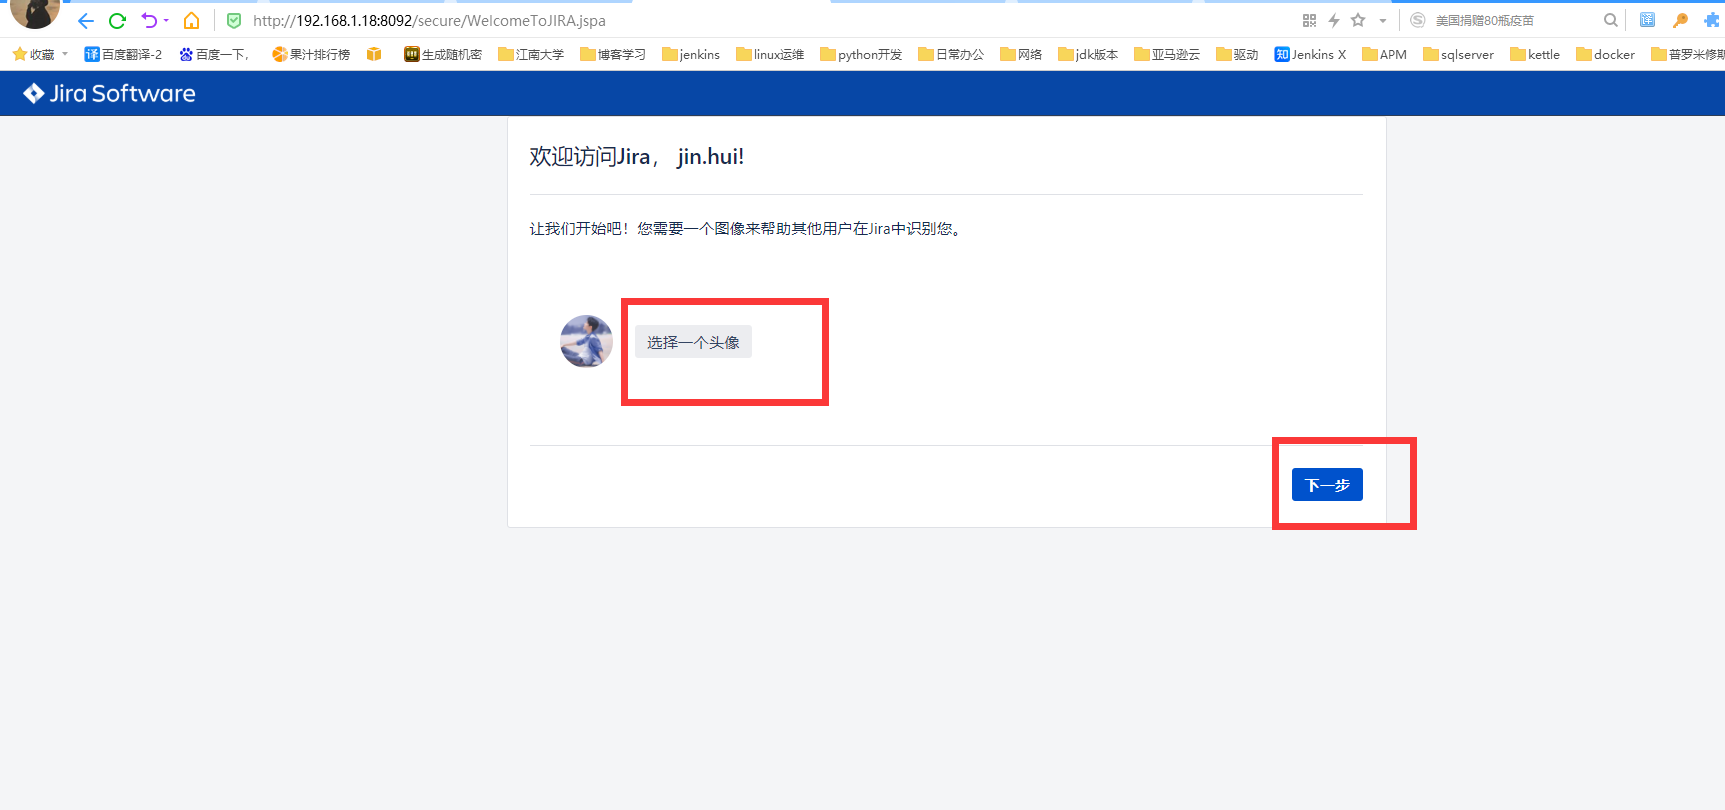
4.设置头像
# 选择一个喜欢的头像,或者自己上传头像,选择完成后,单击下一步。
5.创建项目
#1.这里单击选择创建新项目

#2.选择项目管理,单击下一步
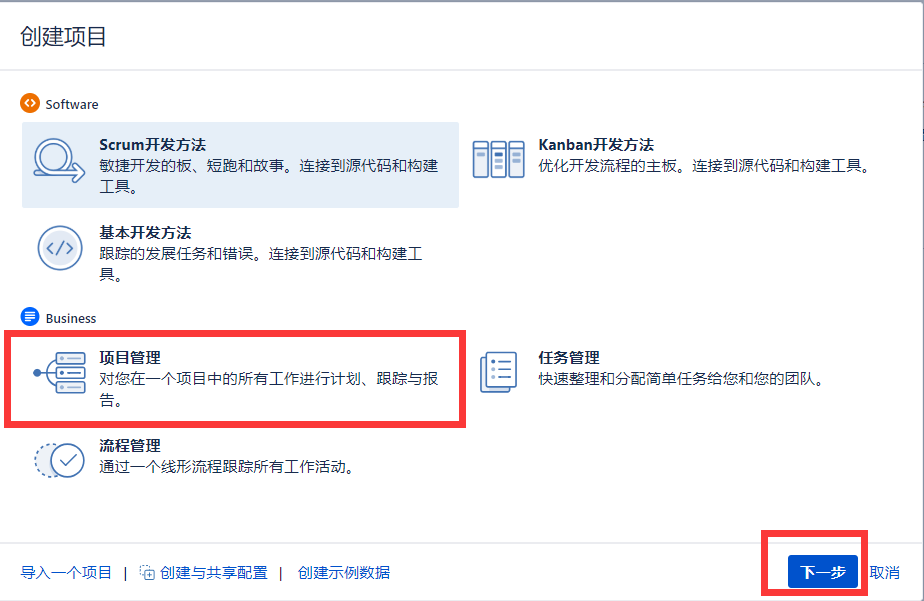
#3.直接点击选择

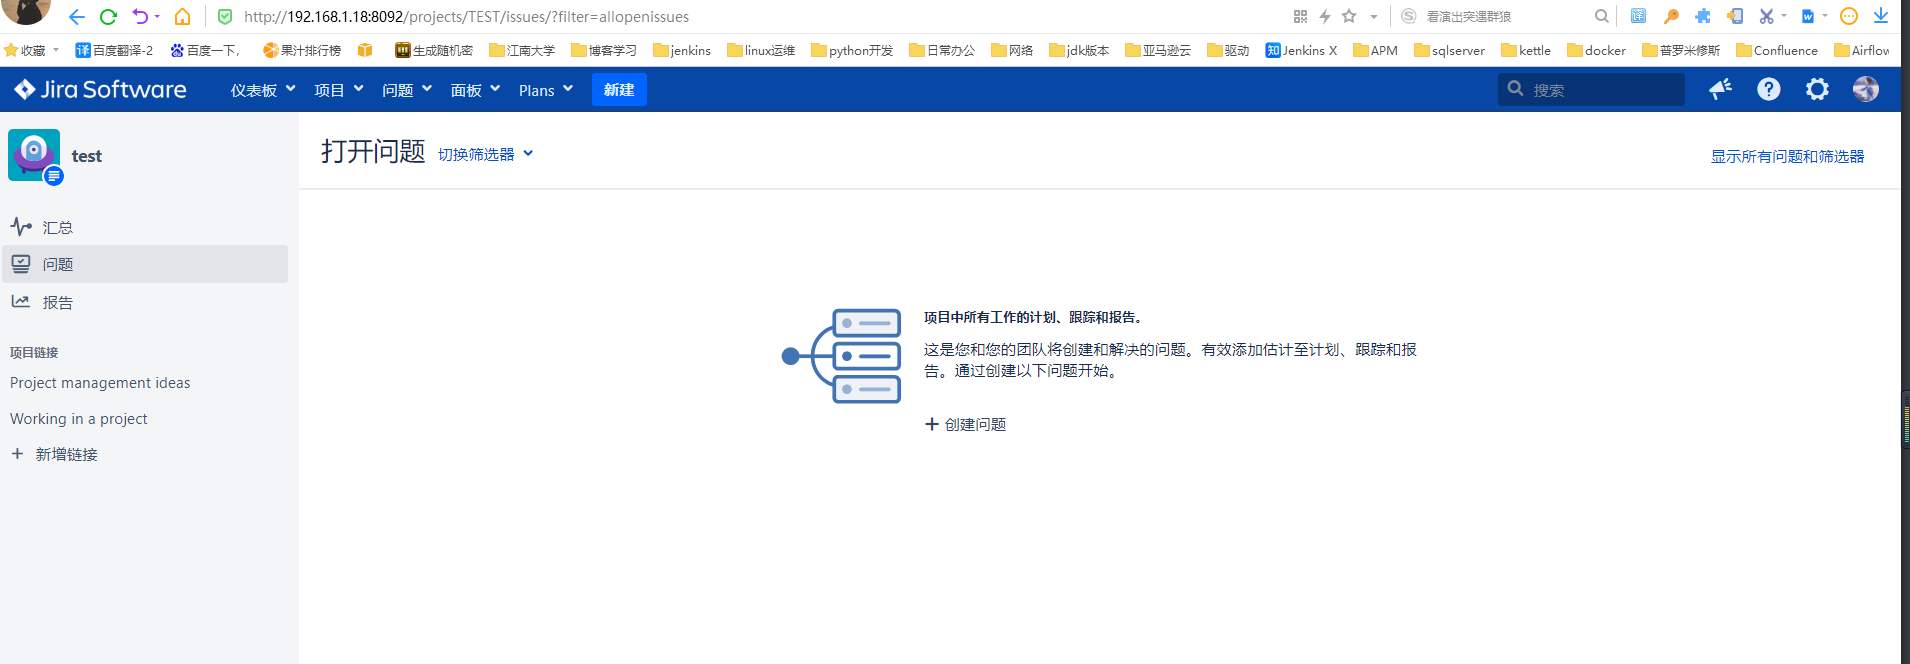
#4.给这个项目取个名称,点击提交

#4.创建完成后出现以下页面
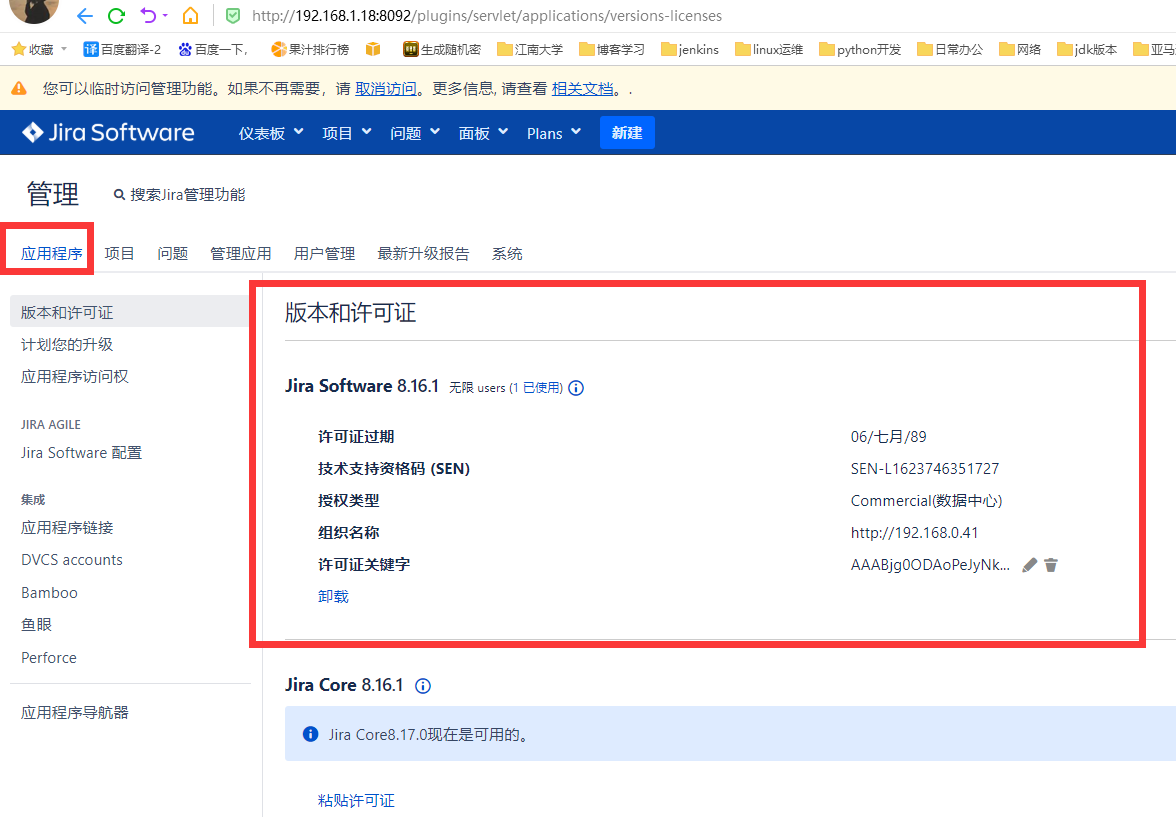
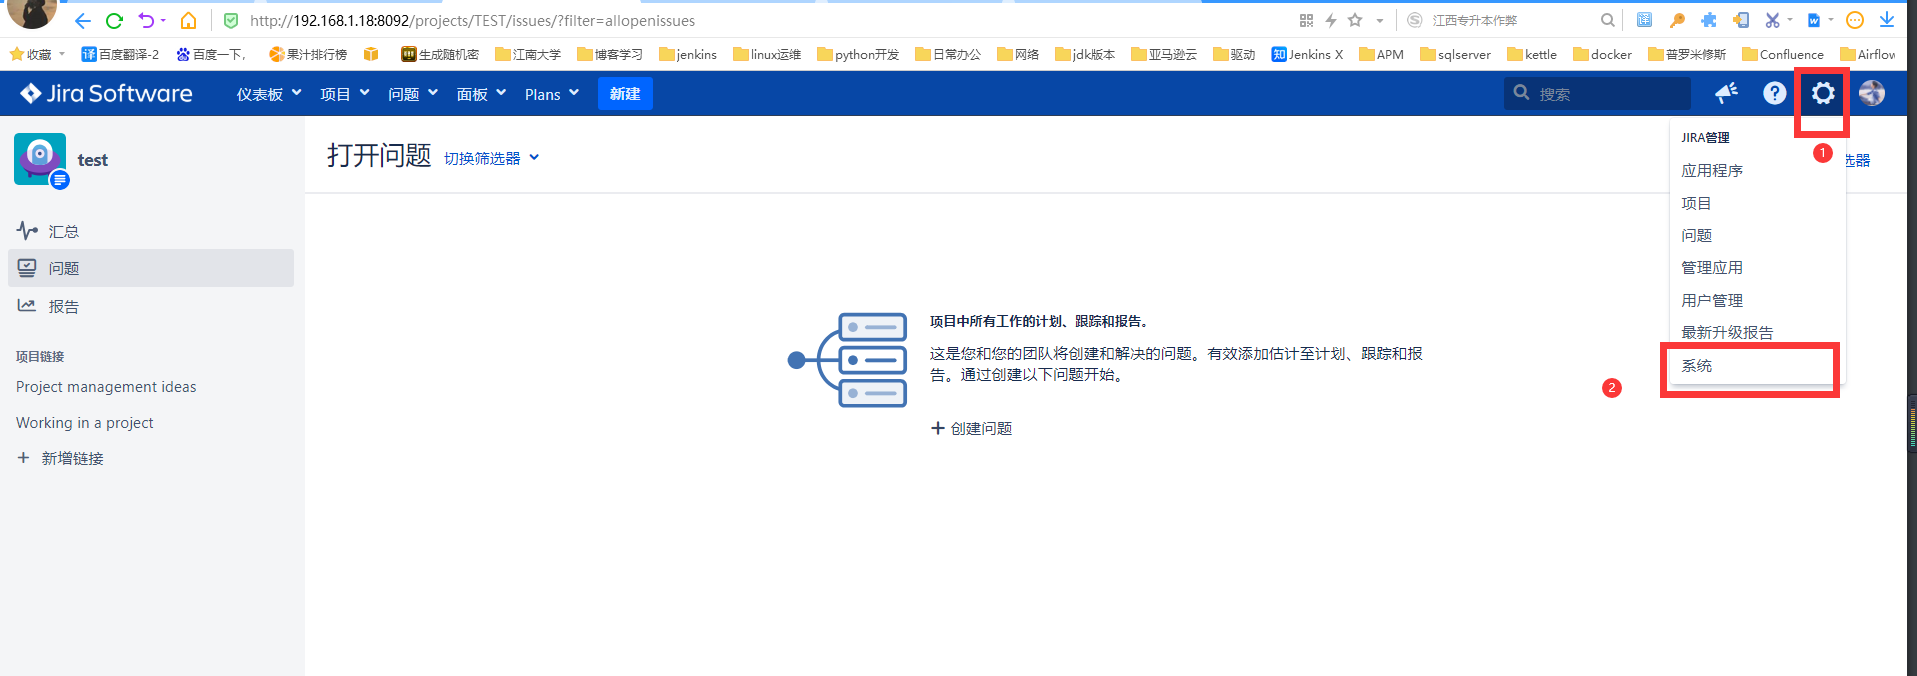
#5.点击设置-->点击系统,输入管理员密码,
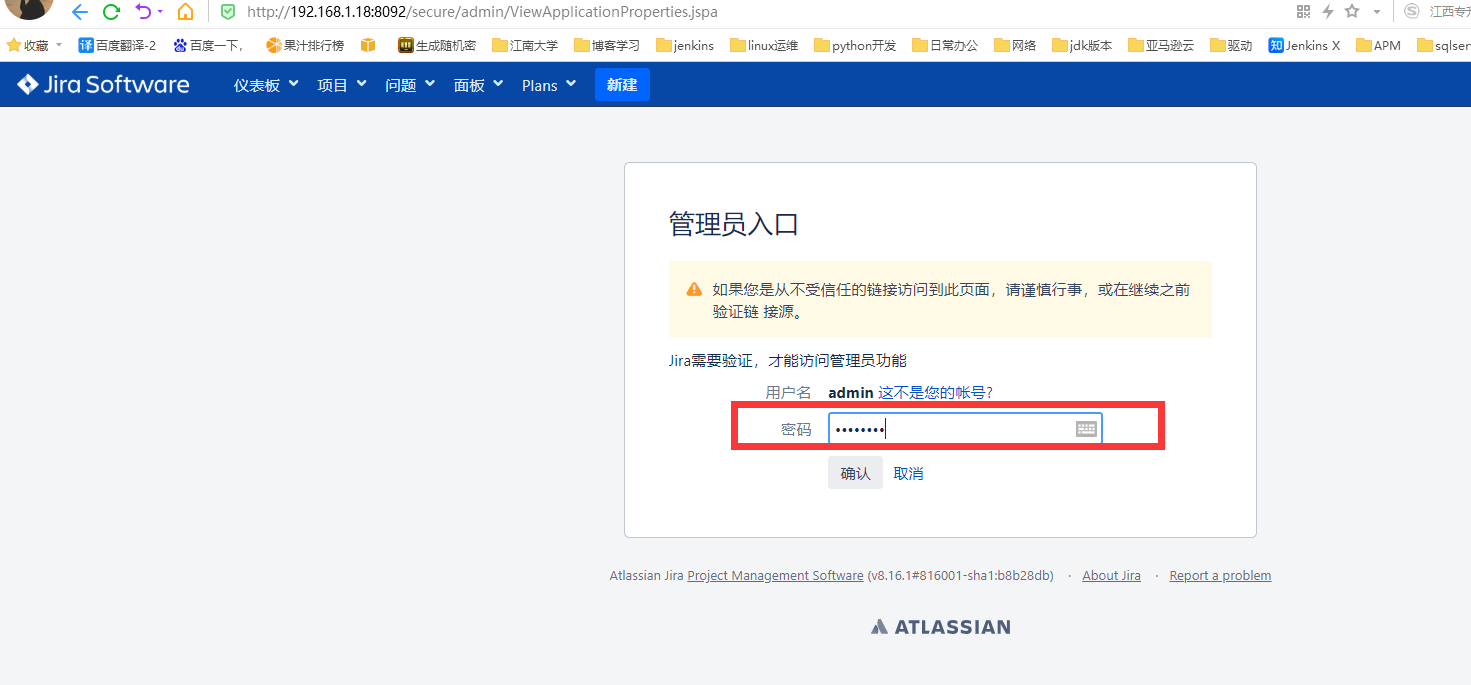
#6.点击应用程序,查看版本信息,许可证过期时间。至此部署JIRA全部完成。