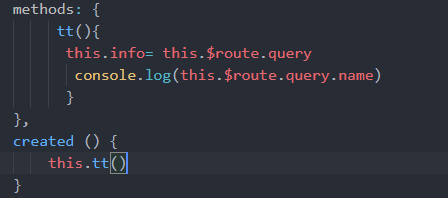
路由的跳转传值:
具体文章在:  https://blog.csdn.net/mf_717714/article/details/81945218


在路由设置  path: '/xx/:id',

    接收数据this.$route.params
    例如
    this.$route.params.id
   // 命名的路由
   this.router.push({ name: 'user', params: { userId: '123' }})

在目标页面通过this.$route.query获取参数:
this.$route.query.row.xxx 

注意path不能与params一起使用,需要通过path来匹配路由的时候,使用query来传参。
query要用path来引入,params要用name来引入,接收参数都是类似的,分别是this.route.query.name和this.route.query.name和this.route.query.name和this.route.params.name。
params 可以用路由的名字跳转和传值, querypath路径, name 也可以 接收也是 :this.route.query.name
监控路由
  watch: {

    $route(to,from){
      console.log('路由变化 !'+to.path)
      if(to.path=='/account/sc'){
        this.getwish()
      }
    }
  }
子组件给父组件传值
prps
<cp :cid="cid"> cp 为子组件

        可以监测
可以在在cp的那个页面监测
    watch: {
       cid(val) {

      }
    }
父组件给子组件传值
点击事件
子组件里面里面有个方法
lbcp(id){
this.$emit('cplb',id)
}
父组件里面的方法
<left @cplb="acc">
二级路由跳转一级路由:
首先 不能用
<router-link :to=“{name:Orderinfo}”>跳到一级路由</router-link>
,这样是无法跳到一级路由的。
改成这样就可以了,
不能用变量:<router-link to=“/Orderinfo">跳到一级路由</router-link>
或
<a href="/Orderinfo">跳到一级路由</a>
第二为, 路由参数的问题
不能直接传值
用事件来传值,
只能通过事件来
this.$touter.push({"/show?id='123'"})
