工具Eclipse 2018
Maven 配置
ThymeLeaf 安装: https://blog.csdn.net/xingqibaing/article/details/82787164
spring项目创建:https://www.cnblogs.com/LUA123/p/8110285.html
https://www.jb51.net/article/144068.htm
https://blog.csdn.net/wangjiankai1993/article/details/80272886
controller、Service层讲解 https://www.jianshu.com/p/06376b97b11e
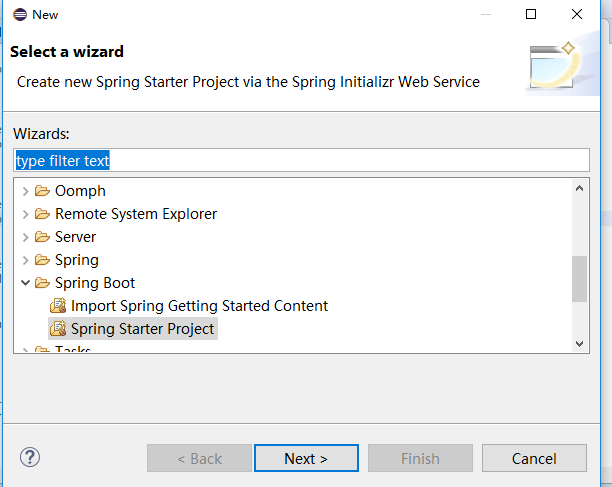
1、选择项目类型

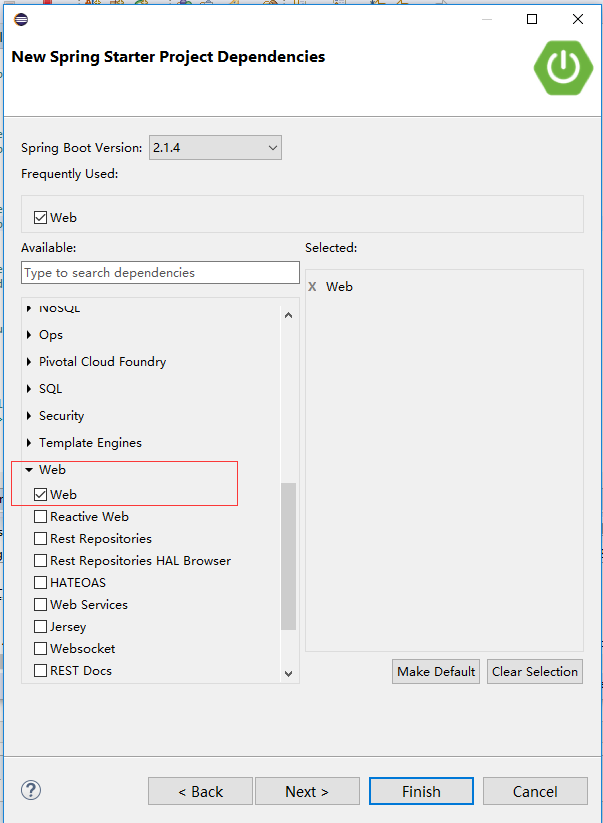
2、设置项目

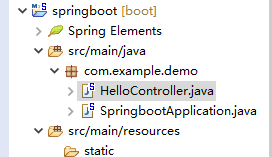
3、项目结构

4、创建HelloController
package com.example.demo;
import org.springframework.web.bind.annotation.RequestMapping;
import org.springframework.web.bind.annotation.RestController;
@RestController
public class HelloController {
@RequestMapping("/")
public String hello() {
return "Welcome to start SpringBoot!";
}
}
5、pom.xml
<?xml version="1.0" encoding="UTF-8"?>
<project xmlns="http://maven.apache.org/POM/4.0.0" xmlns:xsi="http://www.w3.org/2001/XMLSchema-instance"
xsi:schemaLocation="http://maven.apache.org/POM/4.0.0 http://maven.apache.org/xsd/maven-4.0.0.xsd">
<modelVersion>4.0.0</modelVersion>
<parent>
<groupId>org.springframework.boot</groupId>
<artifactId>spring-boot-starter-parent</artifactId>
<version>2.1.4.RELEASE</version>
<relativePath/> <!-- lookup parent from repository -->
</parent>
<groupId>com.example</groupId>
<artifactId>spring-boot2</artifactId>
<version>0.0.1-SNAPSHOT</version>
<name>spring-boot2</name>
<description>Demo project for Spring Boot</description>
<properties>
<java.version>1.8</java.version>
</properties>
<dependencies>
<dependency>
<groupId>org.springframework.boot</groupId>
<artifactId>spring-boot-starter-web</artifactId>
</dependency>
<dependency>
<groupId>org.springframework.boot</groupId>
<artifactId>spring-boot-starter-test</artifactId>
<scope>test</scope>
</dependency>
</dependencies>
<build>
<plugins>
<plugin>
<groupId>org.springframework.boot</groupId>
<artifactId>spring-boot-maven-plugin</artifactId>
</plugin>
</plugins>
</build>
</project>
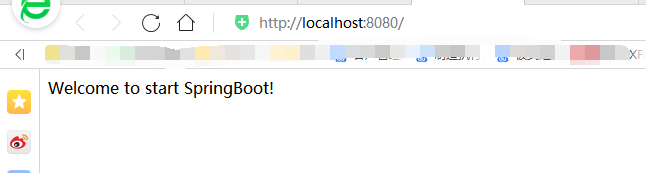
6、启动
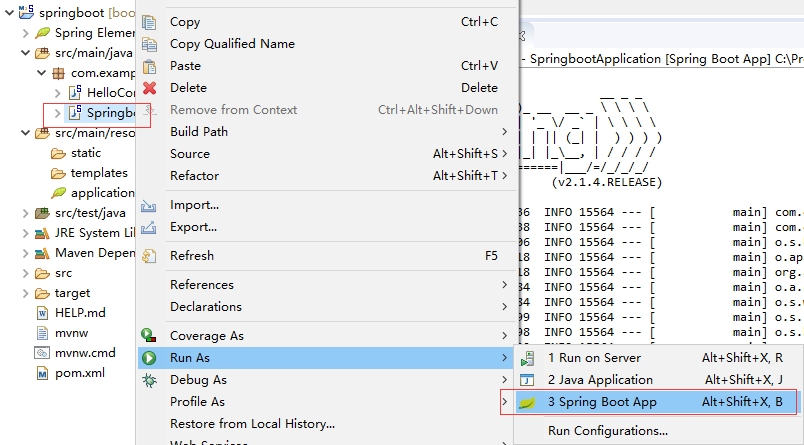
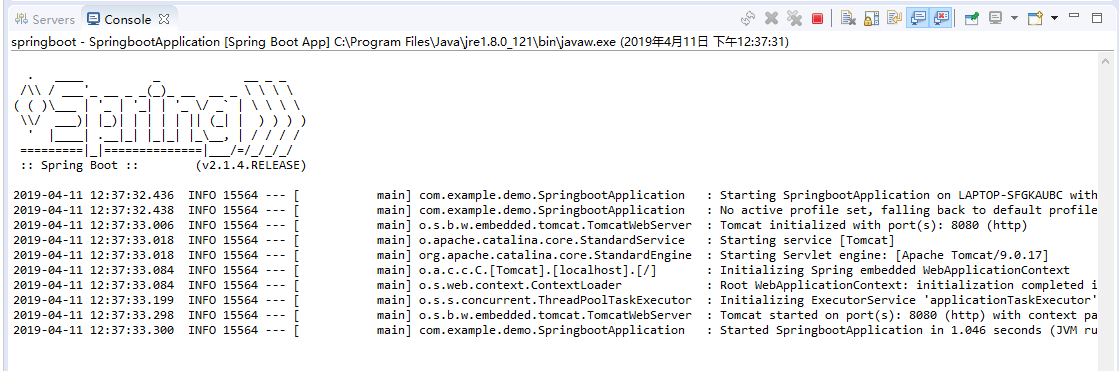
运行结果
7、添加MyBatis、Thymeleaf依赖
Thymeleaf 安装: https://blog.csdn.net/xingqibaing/article/details/82787164
Thymeleaf入门使用: https://blog.csdn.net/love_everybody/article/details/79870035
<dependency>
<groupId>org.mybatis.spring.boot</groupId>
<artifactId>mybatis-spring-boot-starter</artifactId>
</dependency>
<dependency>
<groupId>org.springframework.boot</groupId>
<artifactId>spring-boot-starter-thymeleaf</artifactId>
</dependency>
注意:运行报 Failed to configure a DataSource: 'url' attribute is not specified and no embedded datasource could be configured.
由于依赖了mybatis-spring-boot-starter,此时还未配置数据源,在运行时需先配置数据源。