本篇记录一下springboot监听事件的四种方式。总体来说,springboot监听事件包含四个步骤
(1)自定义要监听的事件
(2)自定义监听器
(3)使spring容器获取到监听器,这里有三种方式,后面会依次说到
(4)发布事件
下面是详细步骤:
pom.xml


<?xml version="1.0" encoding="UTF-8"?>

<project xmlns="http://maven.apache.org/POM/4.0.0" xmlns:xsi="http://www.w3.org/2001/XMLSchema-instance"
    xsi:schemaLocation="http://maven.apache.org/POM/4.0.0 http://maven.apache.org/xsd/maven-4.0.0.xsd">
    <modelVersion>4.0.0</modelVersion>

    <groupId>com.edu.spring</groupId>
    <artifactId>springboot</artifactId>
    <version>1.0.0</version>
    <packaging>jar</packaging>

    <name>springboot</name>
    <!-- FIXME change it to the project's website -->
    <url>http://www.example.com</url>

    <dependencyManagement>
        <dependencies>
            <dependency>
                <groupId>org.springframework.boot</groupId>
                <artifactId>spring-boot-dependencies</artifactId>
                <version>2.1.6.RELEASE</version>
                <scope>import</scope>
                <type>pom</type>
            </dependency>
        </dependencies>
    </dependencyManagement>

    <properties>
        <project.build.sourceEncoding>UTF-8</project.build.sourceEncoding>
        <maven.compiler.source>1.8</maven.compiler.source>
        <maven.compiler.target>1.8</maven.compiler.target>
    </properties>

    <dependencies>
        <dependency>
            <groupId>org.springframework.boot</groupId>
            <artifactId>spring-boot-starter</artifactId>
        </dependency>
    </dependencies>

</project>
MyApplicationEvent.java自定义事件,继承ApplicationEvent
package com.edu.spring.springboot;

import org.springframework.context.ApplicationEvent;

public class MyApplicationEvent extends ApplicationEvent {

    private static final long serialVersionUID = 1L;

    public MyApplicationEvent(Object source) {
        super(source);
    }
}
MyAppilcationListener.java实现接口ApplicationListener,接收自定义事件的泛型
package com.edu.spring.springboot;

import org.springframework.context.ApplicationListener;

public class MyAppilcationListener implements ApplicationListener<MyApplicationEvent> {

    public void onApplicationEvent(MyApplicationEvent event) {
    System.out.println("接收到事件:"+event.getClass());
    }

}
App.java发布事件,这里添加监听器的方式是SpringApplication的addListeners方法
package com.edu.spring.springboot;

import org.springframework.boot.SpringApplication;
import org.springframework.boot.autoconfigure.SpringBootApplication;
import org.springframework.context.ConfigurableApplicationContext;

@SpringBootApplication
public class App
{
    public static void main( String[] args )
    {
        SpringApplication app=new SpringApplication(App.class);
        app.addListeners(new MyAppilcationListener());//添加监听
        ConfigurableApplicationContext context=app.run(args);
        context.publishEvent(new MyApplicationEvent(new Object()));//发布事件
        context.close();
    }
}
运行结果如下:

第二种添加监听器的方式,在自定义的监听器上添加@Component,如下:
MyAppilcationListener.java
package com.edu.spring.springboot;

import org.springframework.context.ApplicationListener;
import org.springframework.stereotype.Component;

@Component
public class MyAppilcationListener implements ApplicationListener<MyApplicationEvent> {

    public void onApplicationEvent(MyApplicationEvent event) {
    System.out.println("接收到事件:"+event.getClass());
    }

}
App.java,现在不需要调用SpringApplication的addListeners方法,如下:
package com.edu.spring.springboot;

import org.springframework.boot.SpringApplication;
import org.springframework.boot.autoconfigure.SpringBootApplication;
import org.springframework.context.ConfigurableApplicationContext;

@SpringBootApplication
public class App
{
    public static void main( String[] args )
    {
        SpringApplication app=new SpringApplication(App.class);
        ConfigurableApplicationContext context=app.run(args);
        context.publishEvent(new MyApplicationEvent(new Object()));//发布事件
        context.close();
    }
}
第三种添加监听器的方式,在application.properties配置文件中添加context.listener.classes属性,如下
application.properties
context.listener.classes=com.edu.spring.springboot.MyAppilcationListener
MyAppilcationListener.java,不需要添加注解,如下:
package com.edu.spring.springboot;

import org.springframework.context.ApplicationListener;

public class MyAppilcationListener implements ApplicationListener<MyApplicationEvent> {

    public void onApplicationEvent(MyApplicationEvent event) {
    System.out.println("接收到事件:"+event.getClass());
    }

}
App.java,现在不需要调用SpringApplication的addListeners方法,如下:
package com.edu.spring.springboot;

import org.springframework.boot.SpringApplication;
import org.springframework.boot.autoconfigure.SpringBootApplication;
import org.springframework.context.ConfigurableApplicationContext;

@SpringBootApplication
public class App
{
    public static void main( String[] args )
    {
        SpringApplication app=new SpringApplication(App.class);
        ConfigurableApplicationContext context=app.run(args);
        context.publishEvent(new MyApplicationEvent(new Object()));//发布事件
        context.close();
    }
}
运行结果如下:

第四种添加监听器的方式,使用@EventListener注解,如下:
MyEventHandle.java
package com.edu.spring.springboot;

import org.springframework.context.event.EventListener;
import org.springframework.stereotype.Component;

@Component
public class MyEventHandle {

    @EventListener
    public void event(MyApplicationEvent event) {
        System.out.println("MyEventHandle接收到事件:"+event.getClass());
    }
}
App.java
package com.edu.spring.springboot;

import org.springframework.boot.SpringApplication;
import org.springframework.boot.autoconfigure.SpringBootApplication;
import org.springframework.context.ConfigurableApplicationContext;

@SpringBootApplication
public class App
{
    public static void main( String[] args )
    {
        SpringApplication app=new SpringApplication(App.class);
        ConfigurableApplicationContext context=app.run(args);
        context.publishEvent(new MyApplicationEvent(new Object()));//发布事件
        context.close();
    }
}
运行结果如下:

很明显,第四种方式最简洁,既不用实现ApplicationListener接口,也不用调用SpringApplication的addListeners方法。
spring自定义了许多事件,如下图:
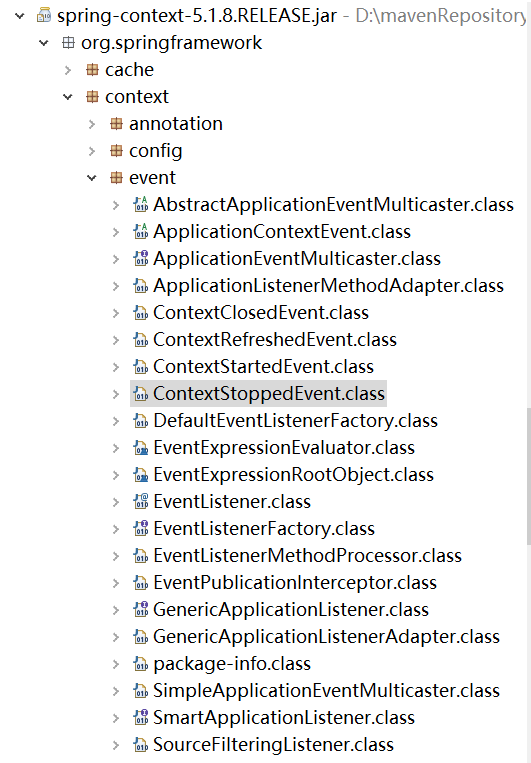
使用这些事件的时候不用发布,下面拿ContextStoppedEvent举例,该事件在调用ConfigurableApplicationContext的stop方法时触发。
MyEventHandle.java,可以写多个事件,只要在方法上添加@EventListener即可
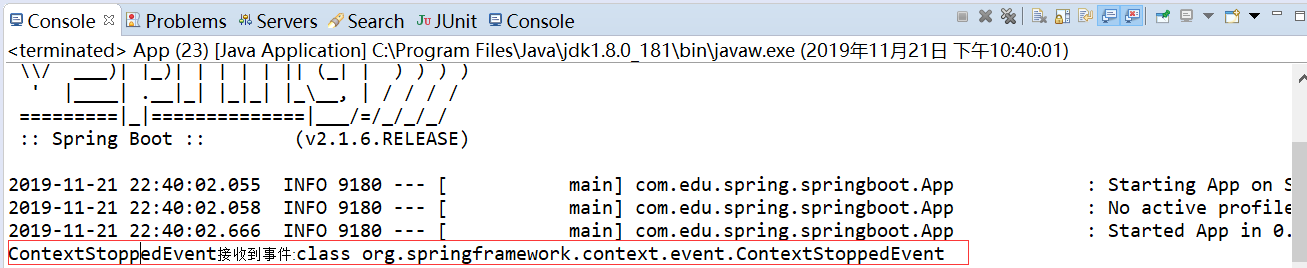
package com.edu.spring.springboot;

import org.springframework.context.event.ContextStoppedEvent;
import org.springframework.context.event.EventListener;
import org.springframework.stereotype.Component;

@Component
public class MyEventHandle {

    @EventListener
    public void test(ContextStoppedEvent event){
        System.out.println("ContextStoppedEvent接收到事件:"+event.getClass());
    }

}
App.java
package com.edu.spring.springboot;

import org.springframework.boot.SpringApplication;
import org.springframework.boot.autoconfigure.SpringBootApplication;
import org.springframework.context.ConfigurableApplicationContext;

@SpringBootApplication
public class App
{
    public static void main( String[] args )
    {
        SpringApplication app=new SpringApplication(App.class);
        ConfigurableApplicationContext context=app.run(args);
        context.stop();
    }
}
运行结果如下: