前言
WPF相较于以前学的WinForm,WPF在UI设计与动画方面的炫丽是最吸引我来学习的。在WPF中XMAL代码的引入使得代码的编写能够前后端分离,为获得更好的界面,也使得我们不得不分出一半的时间花在前端代码的编写上(虽然微软提供了Blend for Visual Studio这样的设计软件,但我认为学习的时候就应该从难处学),而样式(Style)又是前端代码中非常重要的元素,所以在啃《WPF编程宝典第四版》的时候边看边练习后,决定写一些学习笔记,后面也会继续写。介于内容并不深入,所以且称为入门吧。
样式基础
一、最直观的例子
WPF的样式是非常强大的,除了与HTML标记中的CSS类似,它还能够支持触发器(Trigger),比如当元素属性发生变化时,可通过触发器改变控件样式,但本文中暂不涉及触发器(下一篇博客里写)。先展示一个最直观的例子。
<Window x:Class="StyleTest.MainWindow"
xmlns="http://schemas.microsoft.com/winfx/2006/xaml/presentation"
xmlns:x="http://schemas.microsoft.com/winfx/2006/xaml"
xmlns:d="http://schemas.microsoft.com/expression/blend/2008"
xmlns:mc="http://schemas.openxmlformats.org/markup-compatibility/2006"
xmlns:local="clr-namespace:StyleTest"
xmlns:sys="clr-namespace:System;assembly=mscorlib"
mc:Ignorable="d"
<Window.Resources>
<FontFamily x:Key="ButtonFontFamily">Times New Roman</FontFamily>
<sys:Double x:Key="ButtonFontSize">18</sys:Double>
<FontWeight x:Key="ButtonFontWeight">Bold</FontWeight>
</Window.Resources>
<StackPanel VerticalAlignment="Center">
<Button Name="cmd" Content="Resource Button"
Width="150" Height="30" Margin="3"
FontFamily="{StaticResource ButtonFontFamily}"
FontSize="{StaticResource ButtonFontSize}"
FontWeight="{StaticResource ButtonFontWeight}"/>
</StackPanel>
</Window>

【解释】
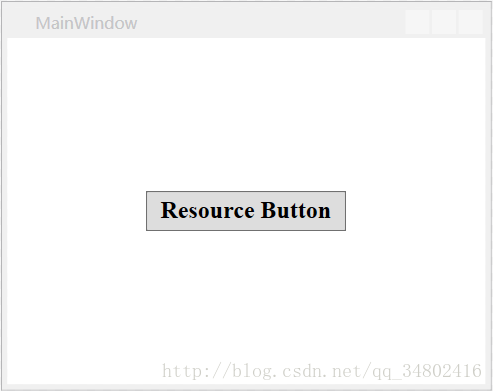
首先为窗口添加了三个资源:第一个是FontFamily对象,包含希望使用的字体名称;第二个是存储数字18的double对象(需要引用xmlns:sys=”clr-namespace:System;assembly=mscorlib”这条命名空间);第三个是枚举值FontWeightBold。(使用资源最常见的原因之一便是通过它们保存样式)
然后在元素中直接使用这些资源,因为在应用程序的整个生命周期中,这些资源都不会发生变化,所以使用静态资源是合理的。
最后就得了一个应用了样式的按钮。
注:样式设置元素的初始外观,但可以随意覆盖它们设置的这些特性。如再在Button元素中明确设置Fontsize=”20”那么按钮标签中的FontSize设置会被覆盖。
二、稍加改进的例子
我们发现上面那个例子中的使用方法显得极其冗杂,还没有原来不使用资源时简明,所以我们稍加改进。
<Window.Resources>
<Style x:Key="BigFontButtonStyle">
<Setter Property="Control.FontFamily" Value="Times New Roman"/>
<Setter Property="Control.FontSize" Value="18"/>
<Setter Property="Control.FontWeight" Value="Bold"/>
</Style>
</Window.Resources>
<StackPanel VerticalAlignment="Center">
<Button Name="cmd" Content="Resource Button"
Width="150" Height="30" Margin="3"
Style="{StaticResource BigFontButtonStyle}"/>
</StackPanel>
后台代码设置样式
cmd.Style = (Style)cmd.FindResource("BigFontButtonStyle");
【解释】
上面的标记创建了一个独立资源:即一个System.Windows.Style对象。并包含三个Setter对象,每个Setter对象用于一个希望设置的属性。并为该样式设置一个键名用以引用该样式。
Setter对象中的Property设置是针对Control类型,而不再只是例子1中的Button类型。当它们都对控件的样式进行设置时,例子1中只对Button控件有效果,而例子2中对其他包含FontFamily、FontSize、FontWeight的控件都能有效果。除此以外我们还可以使用TargetType属性限定该样式可以引用的对象,语法如下:
<Window.Resources>
<Style x:Key="BigFontButtonStyle" TargetType="Button">
<Setter Property="Control.FontFamily" Value="Times New Roman"/>
<Setter Property="Control.FontSize" Value="18"/>
<Setter Property="Control.FontWeight" Value="Bold"/>
</Style>
</Window.Resources>
只允许Button控件进行引用该样式。
关联事件处理
光看标题有点懵逼的感觉,这个时候思考下面例子就清楚了:如何使鼠标悬浮在一行文字上时,文字高亮显示;离开时,文字恢复原样?最简单的便是通过编写控件的事件处理程序来实现。同样,我们还可以通过样式来进行实现,实现方法就是通过创建Style的EventSetter对象的集合。
<Window.Resources>
<Style x:Key="MouseOverHighlightStyle" TargetType="TextBlock">
<Setter Property="HorizontalAlignment" Value="Center"/>
<Setter Property="TextAlignment" Value="Center"/>
<Setter Property="Padding" Value="5"/>
<EventSetter Event="TextBlock.MouseEnter" Handler="element_MouseEnter"/>
<EventSetter Event="TextBlock.MouseLeave" Handler="element_MouseLeave"/>
</Style>
</Window.Resources>
<StackPanel VerticalAlignment="Center">
<TextBlock Text="This is a TextBlock"
Style="{StaticResource MouseOverHighlightStyle}"/>
</StackPanel>
后台代码:
private void element_MouseEnter(object sender,MouseEventArgs e)
{
((TextBlock)sender).Background = new SolidColorBrush(Colors.Aqua);
}
private void element_MouseLeave(object sender, MouseEventArgs e)
{
((TextBlock)sender).Background = null;
}

【解释】
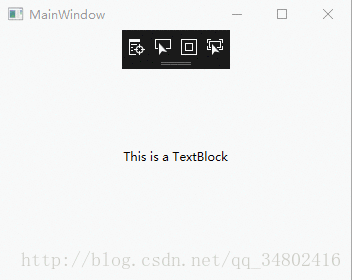
MouseEnter和MouseLeave事件完成了背景颜色改变。在TextBlock标签中,我们可以看到只需要应用一行Style=”{StaticResource MouseOverHighlightStyle}”边可以实现功能,这非常适合当我们需要为大量元素应用鼠标悬停效果的情况下,基于样式的事件处理程序简化了这项任务。
但WPF中极少使用事件设置器这种技术,更方便使用的是事件触发器(后面再说),它以声明的方式定义了所希望的行为(并且不需要任何代码)。
多层样式——样式的继承
有时候我们希望在另一个样式的基础上创建样式,这时可通过为样式设置BasedOn特性来使用此类样式继承,使用起来非常简单。
<Window.Resources>
<Style x:Key="MouseOverHighlightStyle" TargetType="TextBlock">
<Setter Property="HorizontalAlignment" Value="Center"/>
<Setter Property="TextAlignment" Value="Center"/>
<Setter Property="Padding" Value="5"/>
<EventSetter Event="TextBlock.MouseEnter" Handler="element_MouseEnter"/>
<EventSetter Event="TextBlock.MouseLeave" Handler="element_MouseLeave"/>
</Style>
<Style x:Key="BaseOnStyle"
TargetType="TextBlock"
BasedOn="{StaticResource MouseOverHighlightStyle}">
<Setter Property="Control.Foreground" Value="Red"/>
</Style>
</Window.Resources>
<StackPanel VerticalAlignment="Center">
<TextBlock Text="This is a TextBlock"
Style="{StaticResource MouseOverHighlightStyle}"/>
<TextBlock Text="Inherited Style TextBlock"
Style="{StaticResource BaseOnStyle}"/>
</StackPanel>

【解释】
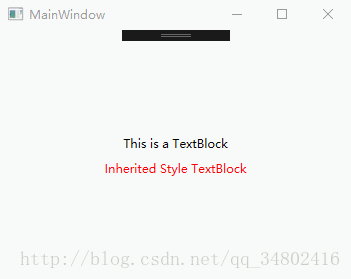
第二个Textbox继承了第一个Textbox的样式,并在其基础上将文字颜色(Foreground)修改为了Red(红色)。
通过类型自动应用样式
听名字依旧有些懵逼的感觉,那么继续来想一个例子:当我们需要为界面的所有Button设置统一样式的时候怎么做?当Button比较少的时候,我们可以用上面的方法逐个设置样式,但是当Button非常多的时候,这样的方法就显得麻烦了。这个时候我们就可以使用TargetType来自动的为对应的控件应用样式。直接看例子:
<Window.Resources>
<Style x:Key="MouseOverHighlightStyle" TargetType="TextBlock">
<Setter Property="HorizontalAlignment" Value="Center"/>
<Setter Property="TextAlignment" Value="Center"/>
<Setter Property="Padding" Value="5"/>
<EventSetter Event="TextBlock.MouseEnter" Handler="element_MouseEnter"/>
<EventSetter Event="TextBlock.MouseLeave" Handler="element_MouseLeave"/>
</Style>
<Style TargetType="TextBlock"
BasedOn="{StaticResource MouseOverHighlightStyle}">
<Setter Property="Control.Foreground" Value="Green"/>
</Style>
</Window.Resources>
<StackPanel VerticalAlignment="Center">
<TextBlock Text="This is a TextBlock"
Style="{StaticResource MouseOverHighlightStyle}"/>
<TextBlock Text="Inherited Style TextBlock"
Style="{StaticResource BaseOnStyle}"/>
<TextBlock Text="Global Style TextBlock"/>
<TextBlock Text="Global Without Style TextBlock"
Style="{x:Null}"/>
</StackPanel>

【解释】
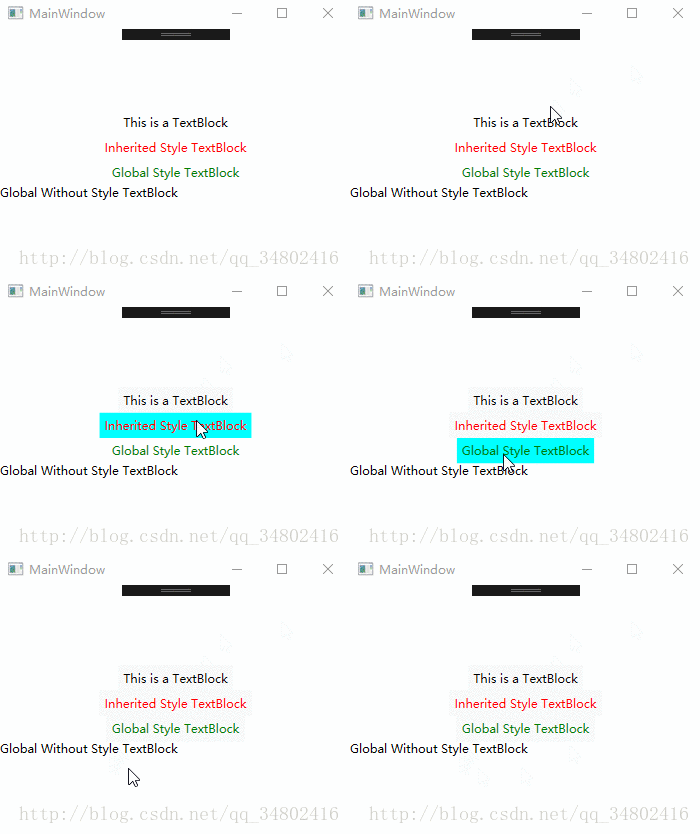
使用类型标记扩展来隐式的设置键名,样式会自动应用与整个元素树的所有TextBlock上,如下所示
x:Key="{x:Type TextBlock}"
1
正如之前所说的,Style可以被覆盖,前两个TextBlock为自己提供了一个新样式;而第三个并没有,所以第三个自动的应用了该样式;第四个将Style属性设置为null值,这样就有效的删除了样式。
小结
通过这几个例子,我自己已经能够对样式有一定里理解了,但还只是入门了,后面样式的触发器才更难一些,并且具有更丰富的功能。用上了新的编辑器(markDown)感觉还是非常棒的~
————————————————
版权声明:本文为CSDN博主「Rhine404」的原创文章,遵循CC 4.0 BY-SA版权协议,转载请附上原文出处链接及本声明。
原文链接:https://blog.csdn.net/qq_34802416/article/details/78231575