1.swagger,可以这么理解swagger是接口规范。Rest Api 传递参数的除了get请求外,put post,需要传递json。或者就是直接都通过传递json到后台
这里主要介绍一下springboot后台整合swagger的使用步骤。如果要查看swagger(OpenApi)的规范,可以参考git的官方文件规范。
springboot 整合swagger的简单基本使用。
第一步:
在pom.xml文件中引入依赖:
|
1
2
3
4
5
6
7
8
9
10
|
<dependency> <groupId>io.springfox</groupId> <artifactId>springfox-swagger2</artifactId> <version>2.9.2</version></dependency><dependency> <groupId>io.springfox</groupId> <artifactId>springfox-swagger-ui</artifactId> <version>2.9.2</version></dependency> |
第二步:
添加swagger的配置类
|
1
2
3
4
5
6
7
8
9
10
11
12
13
14
15
16
17
18
19
|
@Configuration@EnableSwagger2@ComponentScan(basePackages = { "com.xxx.controller" })//扫描的包路径public class SwaggerConfig { @Bean public Docket api() { return new Docket(DocumentationType.SWAGGER_2).apiInfo(apiInfo()).select() .paths(PathSelectors.any()).build(); } private ApiInfo apiInfo() { return new ApiInfoBuilder() .title("用户登录")//接口标题 .description("用户登录接口")//接口描述 .version("v1.0")//版本号 .contact(new Contact("name", "url", "email"))//联系人信息 .build(); }} |
如果没有添加@ComponentScan(basePackages={})扫描的包路径。也可以通过一下方式实现添加多个扫描包
|
1
2
3
4
5
6
7
8
9
10
11
12
13
14
15
16
17
18
19
20
21
22
23
24
25
26
27
28
29
30
31
32
33
34
35
|
@Configuration@EnableSwagger2public class SwaggerConfiguration { private static final String SPLITOR = ","; //重写basePackage()支持多包扫描 @Bean public Docket createRestApi() { return new Docket(DocumentationType.SWAGGER_2) .apiInfo(apiInfo())//头部插入等信息 .select() .apis(basePackage("cn.com.agree.aweb.controller.gateway" + SPLITOR //扫描注解的包 + "cn.com.agree.aweb.controller.cluster" + SPLITOR + "cn.com.agree.aweb.controller.flow" + SPLITOR + "cn.com.agree.aweb.controller.fuse" + SPLITOR + "cn.com.agree.aweb.controller.conversion" + SPLITOR + "cn.com.agree.aweb.controller.signature" + SPLITOR + "cn.com.agree.aweb.controller.api")) .paths(PathSelectors.any()) .build(); } private ApiInfo apiInfo() { return new ApiInfoBuilder() .title("网关管控接口")// .description("更多请关注http://www.baidu.com")// .termsOfServiceUrl("http://www.baidu.com")// .contact("sunf") .version("v1.1") .build(); }} |
第三步则是在Controller类里加入swagger注解,这样对应的接口可以在项目启动后通过url路径(http://localhost:8080/swagger-ui.html)访问到。
|
1
2
3
4
5
6
7
8
9
10
|
@ApiOperation(value = "用户登录",tags = {"用户管理"}) @ApiImplicitParams({ @ApiImplicitParam(name = "userName", value = "用户名", paramType = "body",required=true), @ApiImplicitParam(name = "password", value = "密码", paramType = "body",required=true) }) @RequestMapping(value = "/login", method = RequestMethod.POST) public RestResult<String> apiMethod( @Valid @RequestBody LoginRequestDTO loginRequestDTO, Errors errors, HttpServletRequest request) throws Exception { //业务处理 return null; } |
请求参数在路径上的注解PathVariable使用,示例如下:
|
1
2
3
4
5
6
7
|
@ApiOperation("根据id刪除后端服务") @DeleteMapping("/v1.1/{id}") @ApiImplicitParam(name = "id", value = "后端服务id", paramType = "path", dataType = "string", required = true) @OperationLog(name = "删除后端服务") public Object deleteServerById(@PathVariable("id") String id, @RequestParam("api_id") String apiId) { return apiServiceService.deleteServerById(id, apiId); } |
以上三步骤就是简单的swagger基本使用步骤。
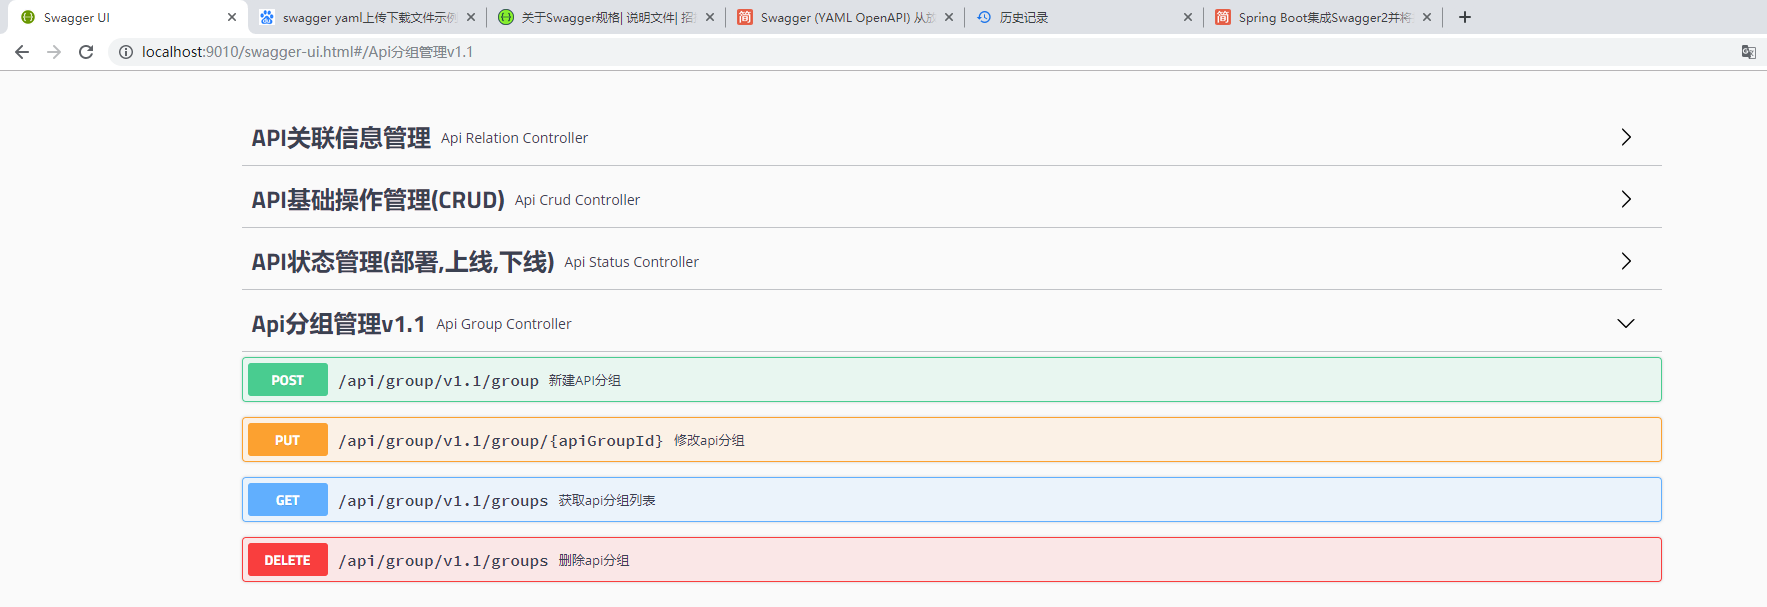
访问swaggerUi后,页面如下:点开对应的接口,可以直接在浏览器进行测试接口是否可用。
