自己做了一个MVC小例子,功能实现为:显示用户列表,并可以通过详细按钮查看此条记录的详细信息。
(一)数据库[selfTest]
数据表:Users[英雄表]
CREATE TABLE [Users] (
[unid] [int] IDENTITY (1, 1) NOT NULL ,
[username] [varchar] (50) NULL ,
[userpw] [varchar] (50) NULL ,
[createtime] [datetime] NULL DEFAULT (getdate()),
[memo] [varchar] (200) NULL ,
CONSTRAINT [PK_Users] PRIMARY KEY CLUSTERED
( [unid]
) ON [PRIMARY]
) ON [PRIMARY]

现表中有这三条记录,请手工录入。
注意:LinqTosql要求数据表须有主键。
(二)建立MVC项目
这里不做说明,请参见其它相关。
(三)添加母板页
目的就是为了集中添加一些资源文件,如JS,Css,图片等
起名为:self.master
引入相关资源文件
<link href="<%=Url.Content("~/Content/base.css") %>" rel="Stylesheet" type="text/css" />
<script src="<%=Url.Content("~/Scripts/jquery-
(这个我是在Views中添加的,请习惯用Url.Content方法引入资源文件,这样,目录访问不容易出错)
(四)建立视图与控制器
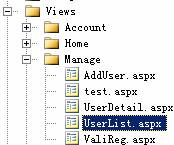
(1)在Views中添加Manage文件夹,并在Manage文件夹中添加UserList.aspx视图。(暂时不写任何呈现逻辑)
(2)添加Manage控制器。(暂时不添加动作)

(五)建立Linq to sql(dbml文件)
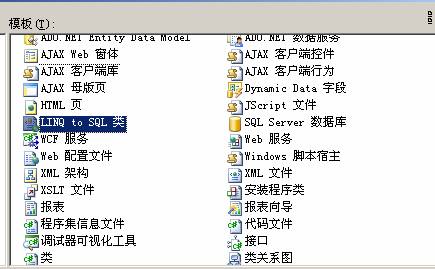
(1)添加Linq to sql(在Models文件夹中——添加——新建项)
名字为:SelfDB
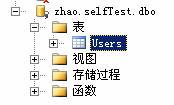
在服务器资源管理器中,从selfTest数据库中,把表 [Users]拖至SelfDB
保存。
(六)在控制器中添加英雄表显示
(1)创建Linqtosql类(自动生成的)
Models.SelfDBDataContext ss = new SelfMvc.Models.SelfDBDataContext();
(2)查询,并返回结果
public ActionResult UserList()
{
var qq = (from p in ss.Users select p);
return View("UserList",qq);
}
(七)在视图中添加Models和呈现逻辑
第五步中,(2)返回的是英雄列表,在视图中修改:
Inherits="System.Web.Mvc.ViewPage<IEnumerable<SelfMvc.Models.Users>>"
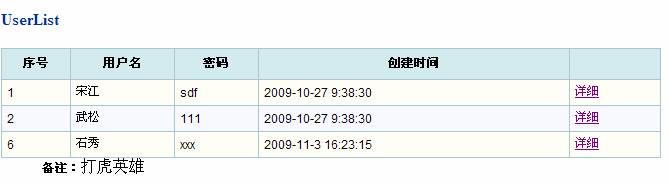
<table class="GridViewStyle normalText" cellspacing="0" cellpadding="4" border="0" style="width:98%;">
<tr class="HeaderStyle"><th> 序号</th><th>用户名</th><th>密码</th><th>创建时间</th><th></th></tr>
<% for (int i = 0; i < Model.Count(); i++)
{ %>
<%if (i % 2 == 0)
{ %>
<tr class="RowStyle">
<%}
else
{ %>
<tr class="AltRowStyle">
<%} %>
<td>
<%=Html.Encode((Model.ToList()[i]).unid)%>
</td>
<td>
<%=Html.Encode((Model.ToList()[i]).username)%>
</td>
<td>
<%=Html.Encode((Model.ToList()[i]).userpw)%>
</td>
<td>
<%=Html.Encode((Model.ToList()[i]).createtime)%>
</td>
<td>
<a href="#" id="btndetail" onclick="showDetail(this,<%=Html.Encode((Model.ToList()[i]).unid)%>)">详细</a>
</td>
<%} %>
</table>
(八)预览
访问地址为:http://localhost:7314/manage/userlist(我自己的)

(九)样式
样式我提前加了,现在说明一下样式等资源文件
在Content文件夹中添加base.css样式文件。
用到的Css样式为:
/*GridViewCSS Glass Black Style*/
.GridViewStyle
{
font-family: Arial, Sans-Serif;
font-size:small;
table-layout: auto;
border-collapse: collapse;
border: #a
}
/*Header and Pager styles*/
.HeaderStyle
{
background-color:#d3eaef;
background-position:left;
height:30px;
}
.HeaderStyle th
{
padding: 0px;
color: #000;
text-align:center;
border: #a
}
.HeaderStyle
{
text-decoration:none;
color:#ffffff;
text-align:left;
font-weight:normal;
border-left:solid 1px #a
border-right:solid 1px #a
padding-top:25px;
padding-bottom:9px;
padding-right:5px;
padding-left:5px;
background-position:top;
background-repeat:repeat-x;
}
.HeaderStyle
{
background-position:top;
background-repeat:repeat-x;
}
/*RowStyles*/
.RowStyle td, .AltRowStyle td
{
padding: 5px;
border-right: solid 1px #a
border-top: solid 1px #a
}
.RowStyle
{
background-color: #FEFFF7;
}
.AltRowStyle
{
background-color: #F
}
.SelectedRowStyle td
{
background-color: #ffff66;
}
.normalText
{
font-size:
}
(十)添加查看详细信息。
这里只查看相关人物的备注信息。
(1)建立UserDetail.aspx视图
(2)在控制器Manage中添加UserDetail动作
public JsonResult UserDetail()
{
int iUnid = Convert.ToInt32(Request["unid"]);
var q = (from u in ss.Users where u.unid == iUnid select u).ToList();
return Json(q[0]);
}
(这里有JsonResult,真是太好了,返回的就是串行化好的json数据)
(3)在Content中添加selfjs/UserList.js文件
用于Jquery控制
(4)在视图中添加UserList.js文件引入(还用Url.Content方法)
<asp:Content ID="Content2" ContentPlaceHolderID="head" runat="server">
<script src="<%=Url.Content("~/Content/selfjs/UserList.js") %>" type="text/javascript"></script>
</asp:Content>
(5)在视图中添加显示英雄备注信息的元素(容器)
<div id="divdetail" style="display:none;">
<div class="divmargin"><span class="header">备注:</span><span id="spanheromemo"></span></div>
</div>
(6)在UserList.js文件中添加方法
//这个方法为向控制器Ajax请求,返回json数据(我预留了一个obj参数,其实这个参数现在没有用处)
这个方法是视图中那个 [详细]链接的单击事件
function showDetail(obj, e) {
$.getJSON(
"/Manage/UserDetail",
{unid:e},
function(data) {
handleData(data);
}
);
}
//此方法为处理json数据
function handleData(data) {
$("#divdetail").show();
$("#spanheromemo").text(data.memo);
}
(7)预览
总结:
这个比较长。请自己手工完成!这里不提供源码。如果有问题可以留言共同讨论。