消息通信机制NSNotificationCenter的学习。最近写程序需要用到这类,研究了下,现把成果和
NSNotificationCenter是专门供程序中不同类间的消息通信而设置的,使用起来极为方便,
长话短说。
设置通知,就是说要在什么地方(哪个类)接受通知,一般在初始化中做。
[[NSNotificationCenter defaultCenter] addObserver:self selector:@selector(test:) name:@"test" object:nil];
我仅对以上参数做以说明:addObserver 这个是观察者,就是说 在什么地方接收通知;
selector 这个是收到通知后,调用何种方法;
name: 这个是通知的名字,也是通知的唯一标示,编译器就通过这个找到通知的。
发送通知,就是说此时要调用观察者处的方法。
[[NSNotificationCenter defaultCenter] postNotificationName:@"test" object:searchFriendArray];
我仅对以上参数做以说明:
postNotificationName:通知的名字,也是通知的唯一标示,编译器就通过这个找到通知的。
object:传递的参数
发送通知时,默认调用test方法。
- (void) test:(NSNotification*) notification
{
searchFriendArrary = [notification object];//通过这个获取到传递的对象
}
小结:关于详解iPhone开发之消息通信机制NSNotificationCenter的内容介绍我那了,希望通过本文的学习能对你有所帮助。
iOS push机制

Provider是指某个iPhone软件的Push服务器,APNS是Apple Push Notification Service的缩写,是苹果的服务器。
上图可以分为三个阶段:
第一阶段:应用程序把要发送的消息、目的iPhone的标识打包,发给APNS。
第二阶段:APNS在自身的已注册Push服务的iPhone列表中,查找有相应标识的iPhone,并把消息发送到iPhone。
第三阶段:iPhone把发来的消息传递给相应的应用程序,并且按照设定弹出Push通知。
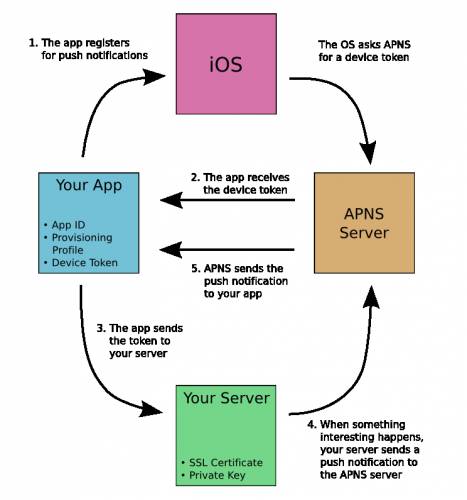
从上图我们可以看到:
1、应用程序注册消息推送。
2、iOS从APNS Server获取device token,应用程序接收device token。
3、应用程序将device token发送给PUSH服务端程序。
4、服务端程序向APNS服务发送消息。
5、APNS服务将消息发送给iPhone应用程序。
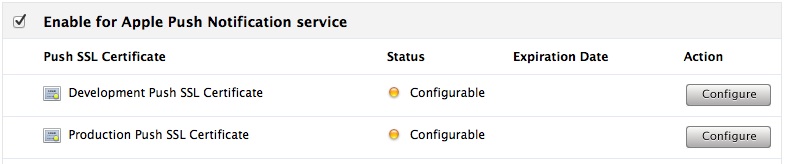
无论是iPhone客户端和APNS,还是Provider和APNS,都需要通过证书进行连接。
下面我介绍一下几种用到的证书。
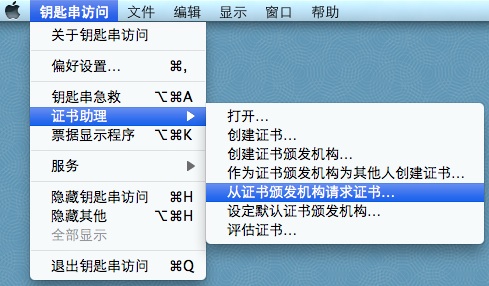
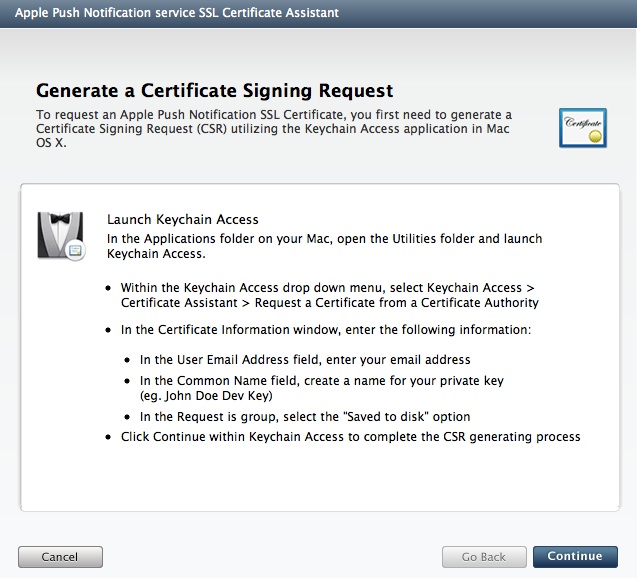
一、CSR文件
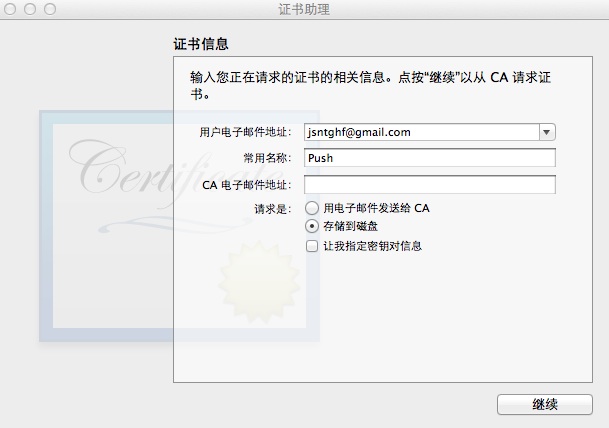
1、生成Certificate Signing Request(CSR)
2、填写你的邮箱和常用名称,并选择保存到硬盘。
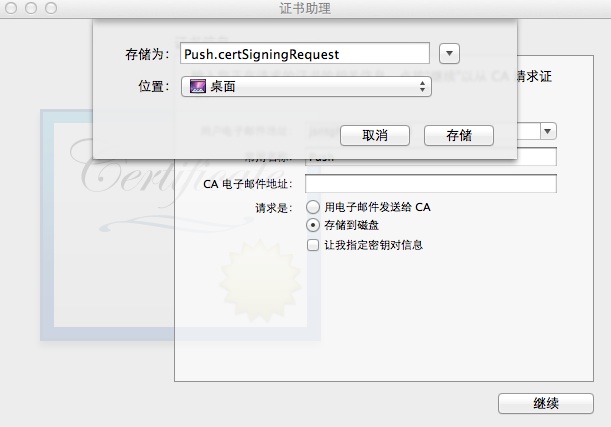
这样就在本地生成了一个Push.certSigningRequest文件。
二、p12文件
1、导出密钥。
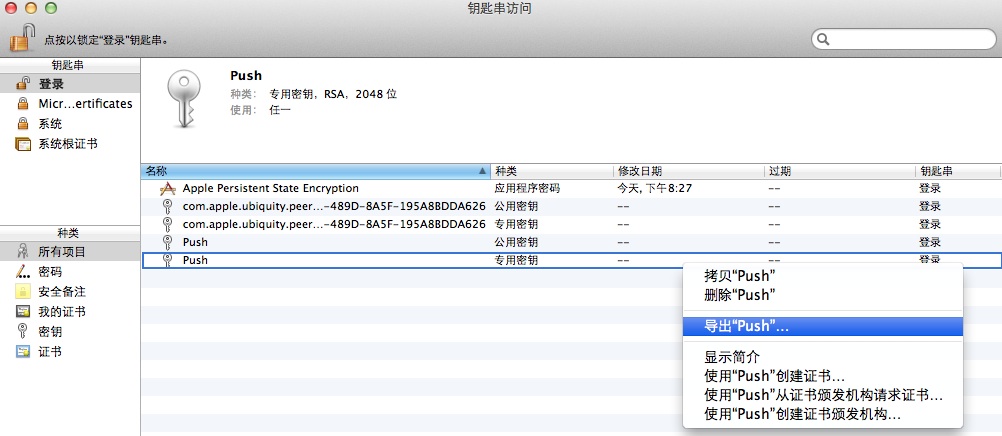

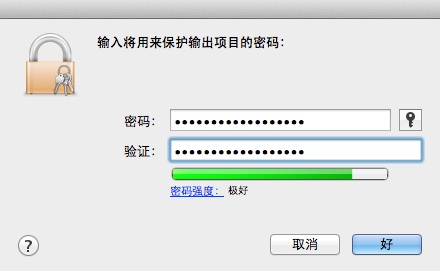
这样就生成了一个Push.p12文件。
三、SSL certificate文件
1、用你付过费的帐号登录到iOS Provisioning Portal,并新建一个App ID,这个过程可以参考:iOS应用的真机调试,这样就会生成下面这条记录:

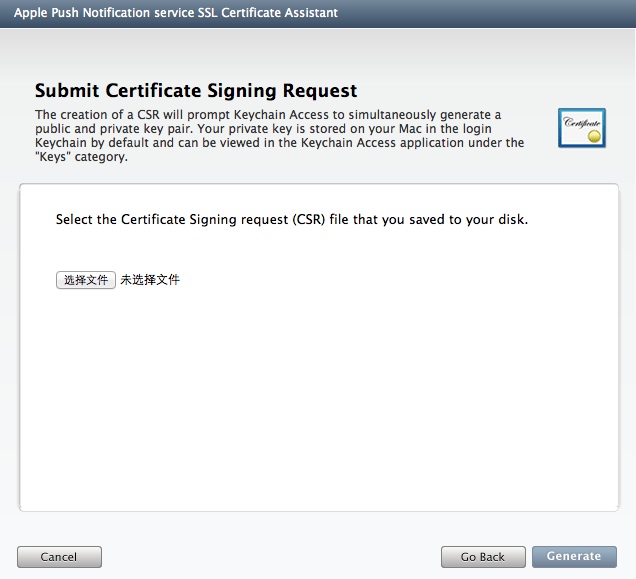
5、选择前面生成好的Push.certSigningRequest文件,点击Generate,出现如下所示的页面:
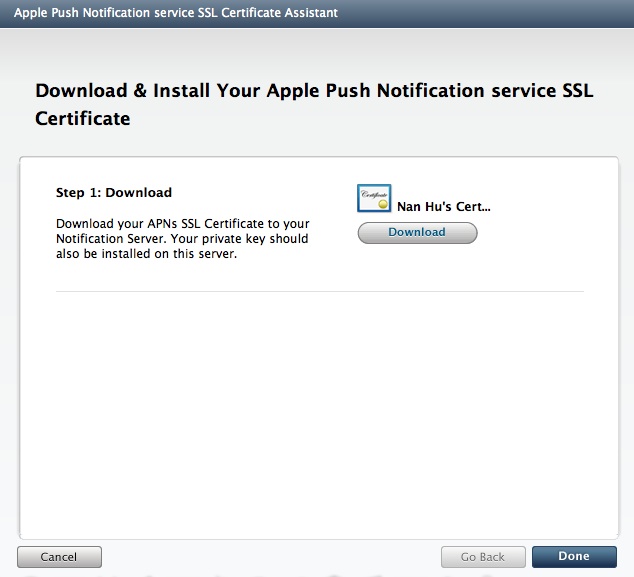
7、点击Download,并将文件命名为aps_developer_identity.cer。
8、点击Done,你会发现状态变成了Enabled:
、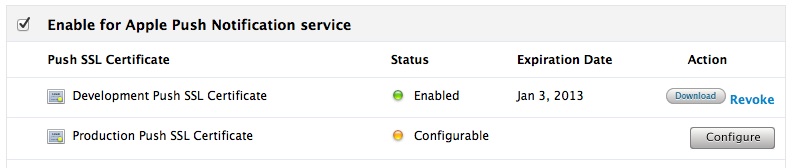
注意:有的App ID的Apple Push Notification service列是灰色的,并且不允许使用Configure按钮,这是因为APNS不支持带通配符的App ID。
到现在为止,我们已经生成了三个文件:
1、Push.certSigningRequest
2、Push.p12
3、aps_developer_identity.cer
在项目的AppDelegate中的didFinishLaunchingWithOptions方法中加入下面的代码:
- [[UIApplication sharedApplication] registerForRemoteNotificationTypes:(UIRemoteNotificationTypeAlert | UIRemoteNotificationTypeSound | UIRemoteNotificationTypeBadge)];
通过registerForRemoteNotificationTypes方法,告诉应用程序,能接受push来的通知。
在项目的AppDelegate中添加下面的方法来获取deviceToken:
- - (void)application:(UIApplication *)app didRegisterForRemoteNotificationsWithDeviceToken:(NSData *)deviceToken {
- NSString *token = [NSString stringWithFormat:@"%@", deviceToken];
- NSLog(@"My token is:%@", token);
-
// 把token发送给服务器保存起来
//NSLog(@"Did register for remote notifications: %@", deviceToken);
//ASIFormDataRequest *request = [ASIFormDataRequest requestWithURL:[NSURL URLWithString:HX_API_PUSH]];
//NSLog(@"%@", [request url]);
//[request setPostValue:[self hexToken:deviceToken] forKey:@"token"];
//[request setPostValue:@"com.chinaamc.hxjjhd" forKey:@"app"];
//[request setPostValue:@"0" forKey:@"unread"];
//NSString * appversion =[[[NSBundle mainBundle] infoDictionary] objectForKey:@"CFBundleVersion"];//版本号
//[request setPostValue:appversion forKey:@"userid"];
//[request setDelegate:self];
//[request setDidFinishSelector:@selector(requestDidFinishPush:)];
//[request setDidFailSelector:@selector(requestDidFailPush:)];
//[request startAsynchronous];
- }
- - (void)application:(UIApplication *)app didFailToRegisterForRemoteNotificationsWithError:(NSError *)error {
- NSString *error_str = [NSString stringWithFormat: @"%@", error];
- NSLog(@"Failed to get token, error:%@", error_str);
- }
获取到的deviceToken,我们可以提交给后台应用程序,发送通知的后台应用程序除了需要知道deviceToken之外,还需要一个与APNS连接的证书。
这个证书可以通过我们前面生成的两个文件中得到。
1、将aps_developer_identity.cer转换成aps_developer_identity.pem格式
- openssl x509 -in aps_developer_identity.cer -inform DER -out aps_developer_identity.pem -outform PEM
2、将p12格式的私钥转换成pem
- openssl pkcs12 -nocerts -out Push_Noenc.pem -in Push.p12
3、创建p12文件
- openssl pkcs12 -export -in aps_developer_identity.pem -inkey Push_Noenc.pem -certfile Push.certSigningRequest -name "aps_developer_identity" -out aps_developer_identity.p12
这样我们就得到了在.net或java等后台应用程序中使用的证书文件:aps_developer_identity.p12
如果后台应用是php的话,那么可以按照 iOS消息推送机制中pem文件的生成这篇文章中的方法来生成php后台应用程序中使用的证书文件:ck.pem
注意:有的App ID的Apple Push Notification service列是灰色的,并且不允许使用Configure按钮,这是因为APNS不支持带通配符的App ID。
到现在为止,我们已经生成了三个文件:
1、Push.certSigningRequest
2、Push.p12
3、aps_developer_identity.cer
在项目的AppDelegate中的didFinishLaunchingWithOptions方法中加入下面的代码:
- [[UIApplication sharedApplication] registerForRemoteNotificationTypes:(UIRemoteNotificationTypeAlert | UIRemoteNotificationTypeSound | UIRemoteNotificationTypeBadge)];
通过registerForRemoteNotificationTypes方法,告诉应用程序,能接受push来的通知。
在项目的AppDelegate中添加下面的方法来获取deviceToken:
- - (void)application:(UIApplication *)app didRegisterForRemoteNotificationsWithDeviceToken:(NSData *)deviceToken {
- NSString *token = [NSString stringWithFormat:@"%@", deviceToken];
- NSLog(@"My token is:%@", token);
- }
- - (void)application:(UIApplication *)app didFailToRegisterForRemoteNotificationsWithError:(NSError *)error {
- NSString *error_str = [NSString stringWithFormat: @"%@", error];
- NSLog(@"Failed to get token, error:%@", error_str);
- }
获取到的deviceToken,我们可以提交给后台应用程序,发送通知的后台应用程序除了需要知道deviceToken之外,还需要一个与APNS连接的证书。
这个证书可以通过我们前面生成的两个文件中得到。
1、将aps_developer_identity.cer转换成aps_developer_identity.pem格式
- openssl x509 -in aps_developer_identity.cer -inform DER -out aps_developer_identity.pem -outform PEM
2、将p12格式的私钥转换成pem
- openssl pkcs12 -nocerts -out Push_Noenc.pem -in Push.p12
3、创建p12文件
- openssl pkcs12 -export -in aps_developer_identity.pem -inkey Push_Noenc.pem -certfile Push.certSigningRequest -name "aps_developer_identity" -out aps_developer_identity.p12
这样我们就得到了在.net或java等后台应用程序中使用的证书文件:aps_developer_identity.p12
如果后台应用是php的话,那么可以按照 iOS消息推送机制中pem文件的生成这篇文章中的方法来生成php后台应用程序中使用的证书文件:ck.pem