参考: http://vue2.mmxiaowu.com/article/584a3957fc007e72b0f576d9
vue组件的注册
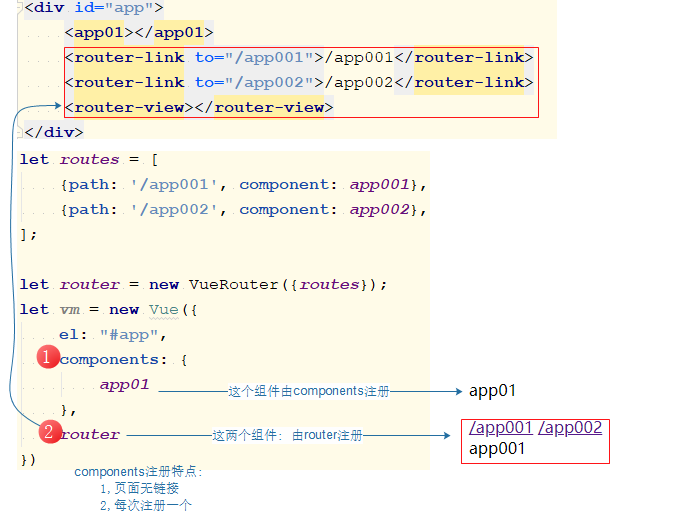
1.通过components方式注册
2.通过router方式注册(两者可以并行存在).
3.如果是render+router方式, 那么router只能写在render的组件template里.

<!DOCTYPE html>
<html lang="en">
<head>
<meta charset="UTF-8">
<title>Title</title>
</head>
<body>
<div id="app">
<app01></app01>
<router-link to="/app001">/app001</router-link>
<router-link to="/app002">/app002</router-link>
<router-view></router-view>
</div>
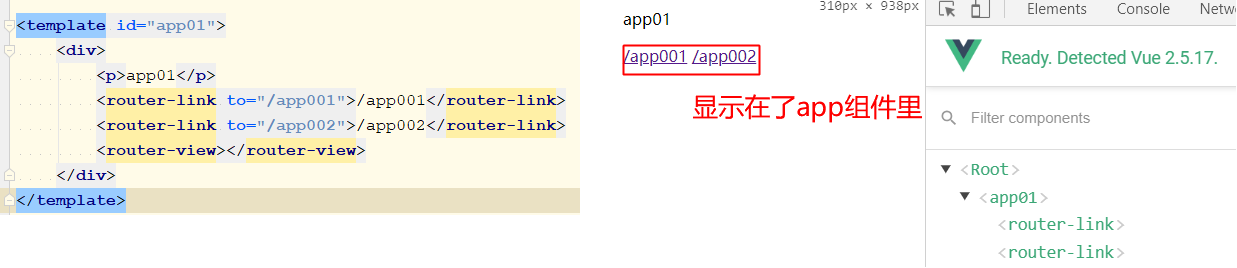
<template id="app01">
<div>
<p>app01</p>
</div>
</template>
<template id="app001">
<div>app001</div>
</template>
<template id="app002">
<div>app002</div>
</template>
<script src="node_modules/vue/dist/vue.js"></script>
<script src="node_modules/vue-router/dist/vue-router.js"></script>
<script>
let app01 = {
name:'app01',
template: "#app01",
};
let app001 = {
name:'app001',
template: "#app001",
};
let app002 = {
name:'app002',
template: "#app002",
};
let routes = [
{path: '/app001', component: app001},
{path: '/app002', component: app002},
];
let router = new VueRouter({routes});
let vm = new Vue({
el: "#app",
components: {
app01
},
router
})
</script>
</body>
</html>
router方式灵活,可以作为components注册组件的子组件存在
作为谁的子, 取决于router-link和router-view写在谁下了.
<!DOCTYPE html>
<html lang="en">
<head>
    <meta charset="UTF-8">
    <title>Title</title>
</head>
<body>
<div id="app">
    <app01></app01>
</div>


<template id="app01">
    <div>
        <p>app01</p>
        <router-link to="/app001">/app001</router-link>
        <router-link to="/app002">/app002</router-link>
        <router-view></router-view>
    </div>
</template>

<template id="app001">
    <div>app001</div>
</template>

<template id="app002">
    <div>app002</div>
</template>

<script src="node_modules/vue/dist/vue.js"></script>
<script src="node_modules/vue-router/dist/vue-router.js"></script>
<script>
    let app01 = {
        template: "#app01",
    };

    let app001 = {
        template: "#app001",
    };
    let app002 = {
        template: "#app002",
    };

    let routes = [
        {path: '/app001', component: app001},
        {path: '/app002', component: app002},
    ];

    let router = new VueRouter({routes});
    let vm = new Vue({
        el: "#app",
        components: {
            app01
        },
        router
    })
</script>
</body>
</html>
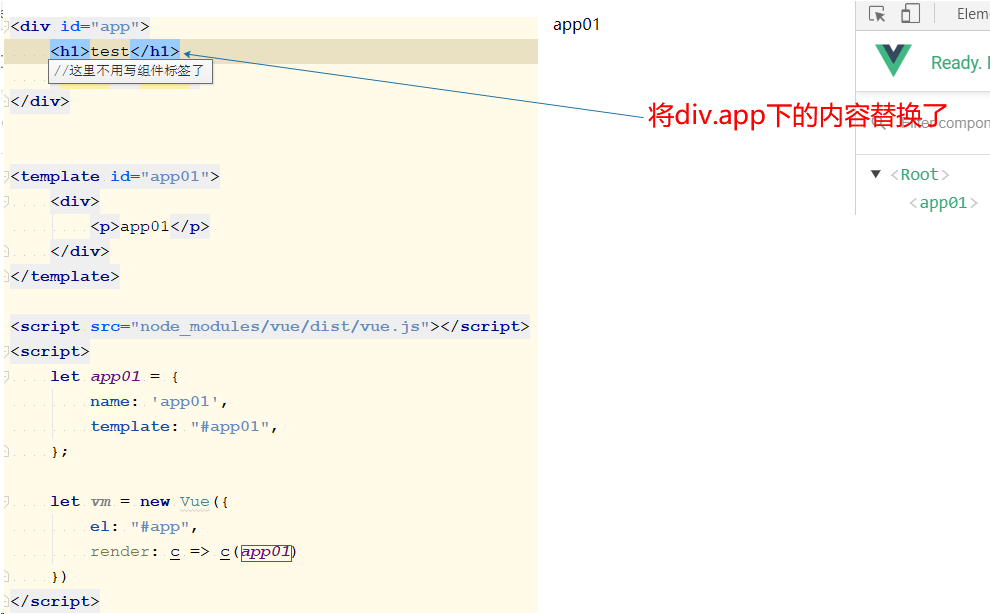
render方式注册组件
上面这个链接里说了: render+router

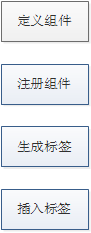
方法1:
render: c => c(app01)作用:
0,注册组件
1.生成标签
2.自动插入标签
特点: 会覆盖div.app下的内容
方法2:
render: c => c('app01')作用:
1.生成标签
2.自动插入标签
特点: 会覆盖div.app下内容
document的的创建标签方法
方法3: template
template: '
1,生成标签
2,插入标签
特点: 会覆盖app下内容
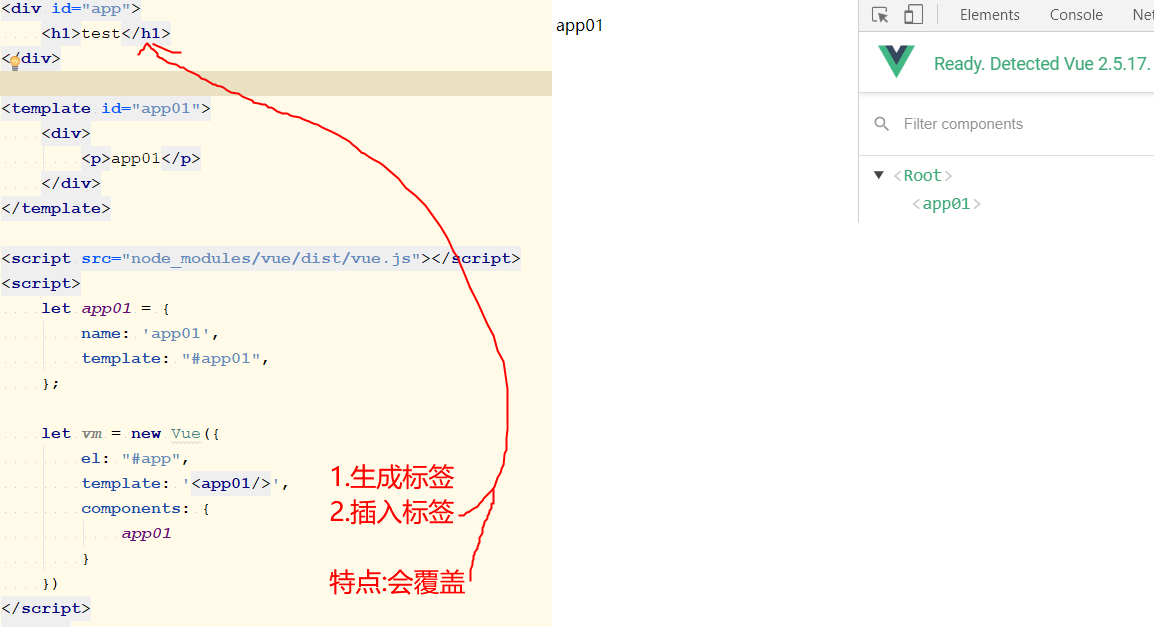
<!DOCTYPE html>
<html lang="en">
<head>
    <meta charset="UTF-8">
    <title>Title</title>
</head>
<body>
<div id="app">
    <h1>test</h1>
</div>

<template id="app01">
    <div>
        <p>app01</p>
    </div>
</template>

<script src="node_modules/vue/dist/vue.js"></script>
<script>
    let app01 = {
        name: 'app01',
        template: "#app01",
    };

    let vm = new Vue({
        el: "#app",
        template: '<app01/>',
        components: {
            app01
        }
    })
</script>
</body>
</html>
小结:
| render: c => c('app01') | template: ' |
|---|---|
| 1.生成标签 | 1.生成标签 |
| 2.插入标签 | 2.插入标签 |
| 覆盖app下的内容 | 覆盖app下的内容 |
| 配合runtime用 | 配合vue.js用 |
| 局部组件 | 全局组件 |
|---|---|
| 1.创建 | 1,创建 |
| 2.注册 | - |
| 3.使用 | 3,使用 |
第二栏是 template: '<app01/>'
webpack: 使用render+runtime-only方式
- 方法1
new Vue({
el: '#app',
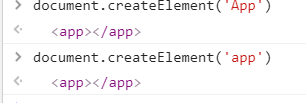
render: creatElment => creatElment(App),
});
- 方法2
通过render渲染一个元素, 然后把 App 当组件来用
new Vue({
    el: '#app',
    render: c => c('App'),
    components: {
        App
    }
});
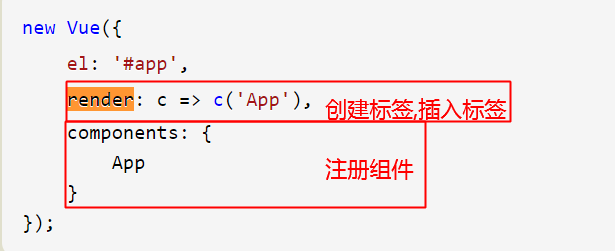
注意: 这种情况下, App 组件并不是根组件
webpack: 使用vue.js
- 方法3:
<div id="app">
    <App></App>
</div>
import Vue from '../node_modules/vue/dist/vue.js'
import App from "./App.vue";


new Vue({
    el: '#app',
    components: {
        App
    }
});
- 方法4:
import Vue from '../node_modules/vue/dist/vue.js'
import App from './App.vue'

new Vue({
    el: '#app',
    template: '<App/>',
    components: {
        App
    }
});
webpack: vue-cli使用的方式
vue-cli默认使用的是../node_modules/vue/dist/vue.js,而非runtime.

import Vue from '../node_modules/vue/dist/vue.js'

import App from './App.vue'
import login from './components/login.vue';
import register from './components/register.vue';

import VueRouter from 'vue-router';

Vue.use(VueRouter);

let routes = [
    {path: '/login', component: login},
    {path: '/register', component: register},
];
let router = new VueRouter({routes});

new Vue({
    el: '#app',
    template: '<App/>',
    components: {App},
    router
});
- 将login和register直接导入App.vue
- 将login和register先导入account.vue, 在将account.vue导入App.vue/
router方式导入
./components/login.vue
<template>
    <div>login</div>
</template>

<script>
    export default {
        name: "login"
    }
</script>

<style scoped>

</style>
./components/register.vue
<template>
    <div>register</div>
</template>

<script>
    export default {
        name: "register"
    }
</script>

<style scoped>

</style>
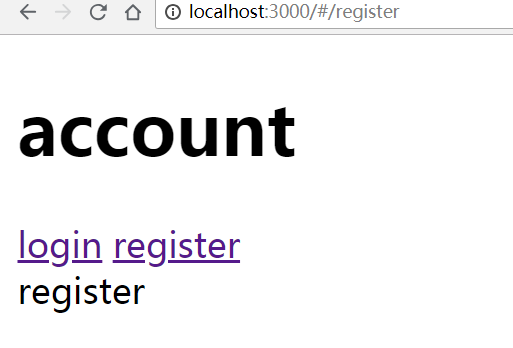
./components/account.vue
<template>
    <div>
        <router-link to="/account/login">/account/login</router-link>
        <router-link to="/account/register">/account/register</router-link>
        <router-view></router-view>
    </div>

</template>

<script>
    export default {
        name: "account"
    }
</script>

<style scoped>

</style>
App.vue
<template>
    <div id="app">
        <router-link to="/account">/account</router-link>
        <router-view></router-view>
    </div>
</template>
<script>
    export default {
        name: 'app',
    }
</script>
<style>
</style>
import 方式实现
./components/login.vue
<template>
    <div>login</div>
</template>

<script>
    export default {
        name: "login"
    }
</script>

<style scoped>

</style>
./components/register.vue
<template>
    <div>register</div>
</template>

<script>
    export default {
        name: "register"
    }
</script>

<style scoped>

</style>
./components/account.vue
<template>
    <div>
        <p>account</p>
        <login></login>
        <register></register>
    </div>

</template>

<script>
    import login from './login.vue';
    import register from './register.vue';

    export default {
        name: "account",
        components: {
            login,
            register
        }

    }
</script>

<style scoped>

</style>
App.vue
<template>
    <div id="app">
        <account></account>
    </div>
</template>
<script>
    import account from './components/account.vue'

    export default {
        name: 'app',
        components: {
            account
        }
    }
</script>
<style>
</style>
