之前关于gvim的博客中提到的很多插件安装比较繁琐,这一篇来介绍一下gvim管理插件的插件--vundle的安装以及使用,让givm的插件安装更加的简单
首先给出vundle的git地址
https://github.com/VundleVim/Vundle.vim/wiki/Vundle-for-Windows
1.提前准备
首先我们需要在windows下安装git,顺便说一句git真的比svn好用
window git下载地址如下
https://git-scm.com/download/win
这个版本已经按照博文中说的自带curl
2.打开git bash
运行如下命令
git clone https://github.com/VundleVim/Vundle.vim.git ~/.vim/bundle/Vundle.vim
将git克隆到系统当前用户目录的.vim文件夹下,一般会是C:/Users/username/.vim/bundle/Vundle.vim
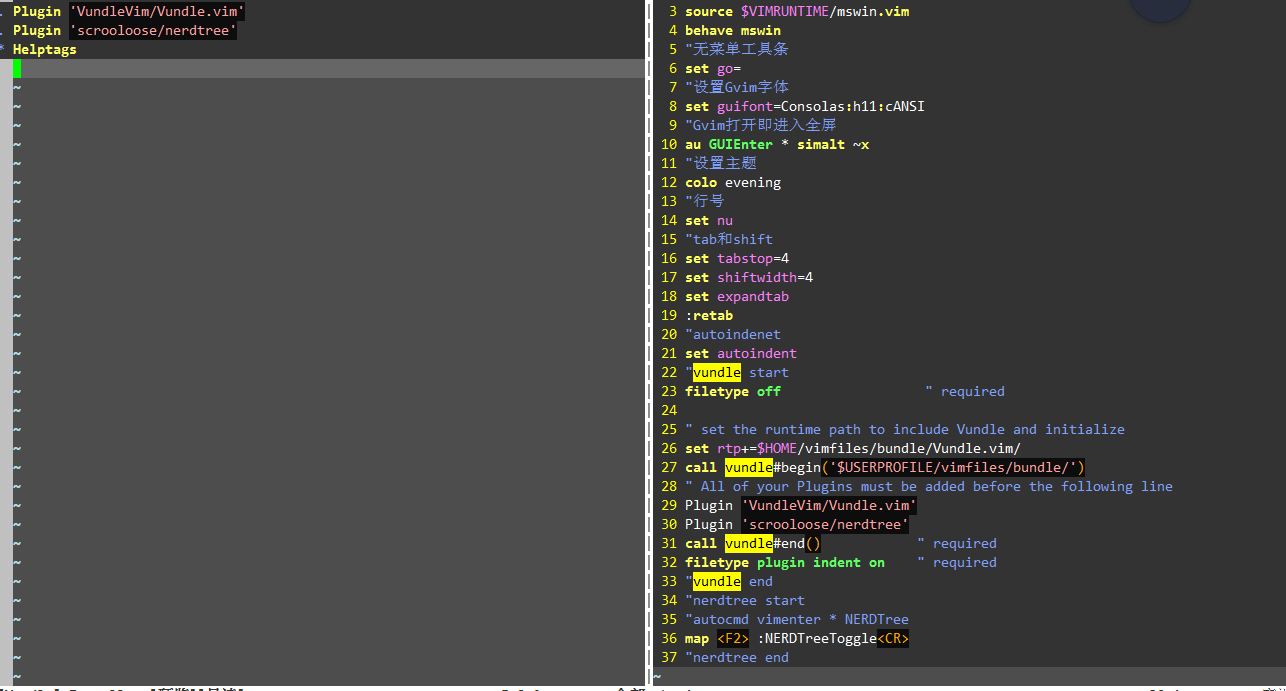
3.打开_vimrc,加入如下配置
"vundle start
set nocompatible " be iMproved, required
filetype off                  " required

" 将Vundle插件的目录添加到gvim的运行时变量中
set rtp+=$HOME/.vim/bundle/Vundle.vim/
call vundle#begin('$USERPROFILE/.vim/bundle/')
" All of your Plugins must be added before the following line
Plugin 'VundleVim/Vundle.vim'
Plugin 'scrooloose/nerdtree'
call vundle#end()            " required
filetype plugin indent on    " required
"vundle end
4.在
call vundle#end() " required
和
call vundle#end() " required
加入你要安装的插件,这里我安装了之前提到到NerdTree
Plugin 'scrooloose/nerdtree'
5.在givm命令模式中运行如下命令
:PluginInstall
安装成功会提示如下
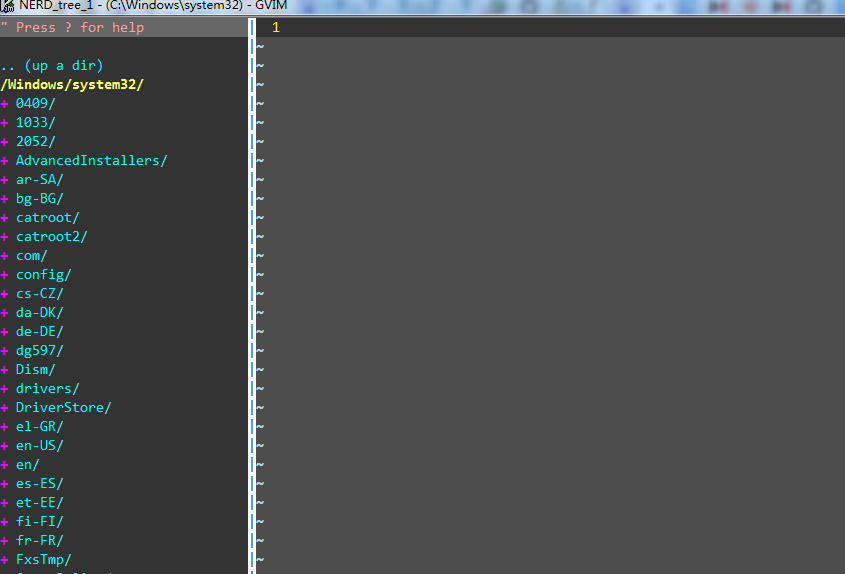
6.在_vimrc文件中添加对应的配置就可以使用了
"autocmd vimenter * NERDTree
map <F2> :NERDTreeToggle<CR>
"nerdtree end
7.完成图,其他插件的安装大同小异