IdentityServer4 中文文档 -9- (快速入门)使用客户端凭证保护API
原文:http://docs.identityserver.io/en/release/quickstarts/1_client_credentials.html
上一篇:IdentityServer4 中文文档 -8- (快速入门)设置和概览
下一篇:IdentityServer4 中文文档 -10- (快速入门)使用密码保护API
当前快速入门展示了使用 IdentityServer 保护 API 的最基础的场景。
在这个场景中,我们定义一个 API,同时定义一个 想要访问这个 API 的 客户端。客户端将从 IdentityServer 请求获得一个访问令牌,然后用这个令牌来获得 API 的访问权限。
定义 API
范围(Scopes)用来定义系统中你想要保护的资源,比如 API。
由于当前演练中我们使用的是内存配置 —— 添加一个 API,你需要做的只是创建一个 ApiResource 类型的实例,并为它设置合适的属性。
向你的项目中添加一份文件(比如:Config.cs),然后添加如下代码:
public static IEnumerable<ApiResource> GetApiResources()
{
    return new List<ApiResource>
    {
        new ApiResource("api1", "我的 API")
    };
}
定义 客户端
下一步是定义能够访问上述 API 的客户端。
在该场景中,客户端不会有用户参与交互,并且将使用 IdentityServer 中所谓的客户端密码(Client Secret)来认证。添加如下代码到你的配置中:
public static IEnumerable<Client> GetClients()
{
    return new List<Client>
    {
        new Client
        {
            ClientId = "client",

            // 没有交互性用户,使用 clientid/secret 实现认证。
            AllowedGrantTypes = GrantTypes.ClientCredentials,

            // 用于认证的密码
            ClientSecrets =
            {
                new Secret("secret".Sha256())
            },
            // 客户端有权访问的范围(Scopes)
            AllowedScopes = { "api1" }
        }
    };
}
配置 IdentityServer
为了让 IdentityServer 使用你的 Scopes 和 客户端 定义,你需要向 ConfigureServices 方法中添加一些代码。你可以使用便捷的扩展方法来实现 —— 它们在幕后会添加相关的存储和数据到 DI 系统中:
public void ConfigureServices(IServiceCollection services)
{
    // 使用内存存储,密钥,客户端和资源来配置身份服务器。
    services.AddIdentityServer()
        .AddTemporarySigningCredential()
        .AddInMemoryApiResources(Config.GetApiResources())
        .AddInMemoryClients(Config.GetClients());
}
现在,如果你运行服务器并将浏览器导航到 http://localhost:5000/.well-known/openid-configuration,你应该看能到所谓的 发现文档。你的客户端和 API 将使用这些信息来下载所需要的配置数据。

添加 API
下一步,向你的解决方案中添加 API。
你可以使用 ASP.NET Core Web API 模板,或者添加 Microsoft.AspNetCore.Mvc 程序包到你的项目中。再一次建议你像之前一样,控制所使用的端口并使用与之前配置 Kestrel 和启动资料相同的技术。该演练假设你已经将你的 API 配置为运行于 http://localhost:5001 之上。
控制器
添加一个新的控制器到你的 API 项目中:
[Route("identity")]
[Authorize]
public class IdentityController : ControllerBase
{
    [HttpGet()]
    public IActionResult Get()
    {
        return new JsonResult(from c in User.Claims select new { c.Type, c.Value });
    }
}
这个控制器将在后面被用于测试授权需求,同时通过API的眼睛(浏览工具)来可视化身份信息。
配置
接下来,添加认证中间件到 API 宿主。该中间件的主要工作是:
- 验证输入的令牌以确保它来自可信任的发布者(IdentityServer);
- 验证令牌是否可用于该 api(也就是 Scope)。
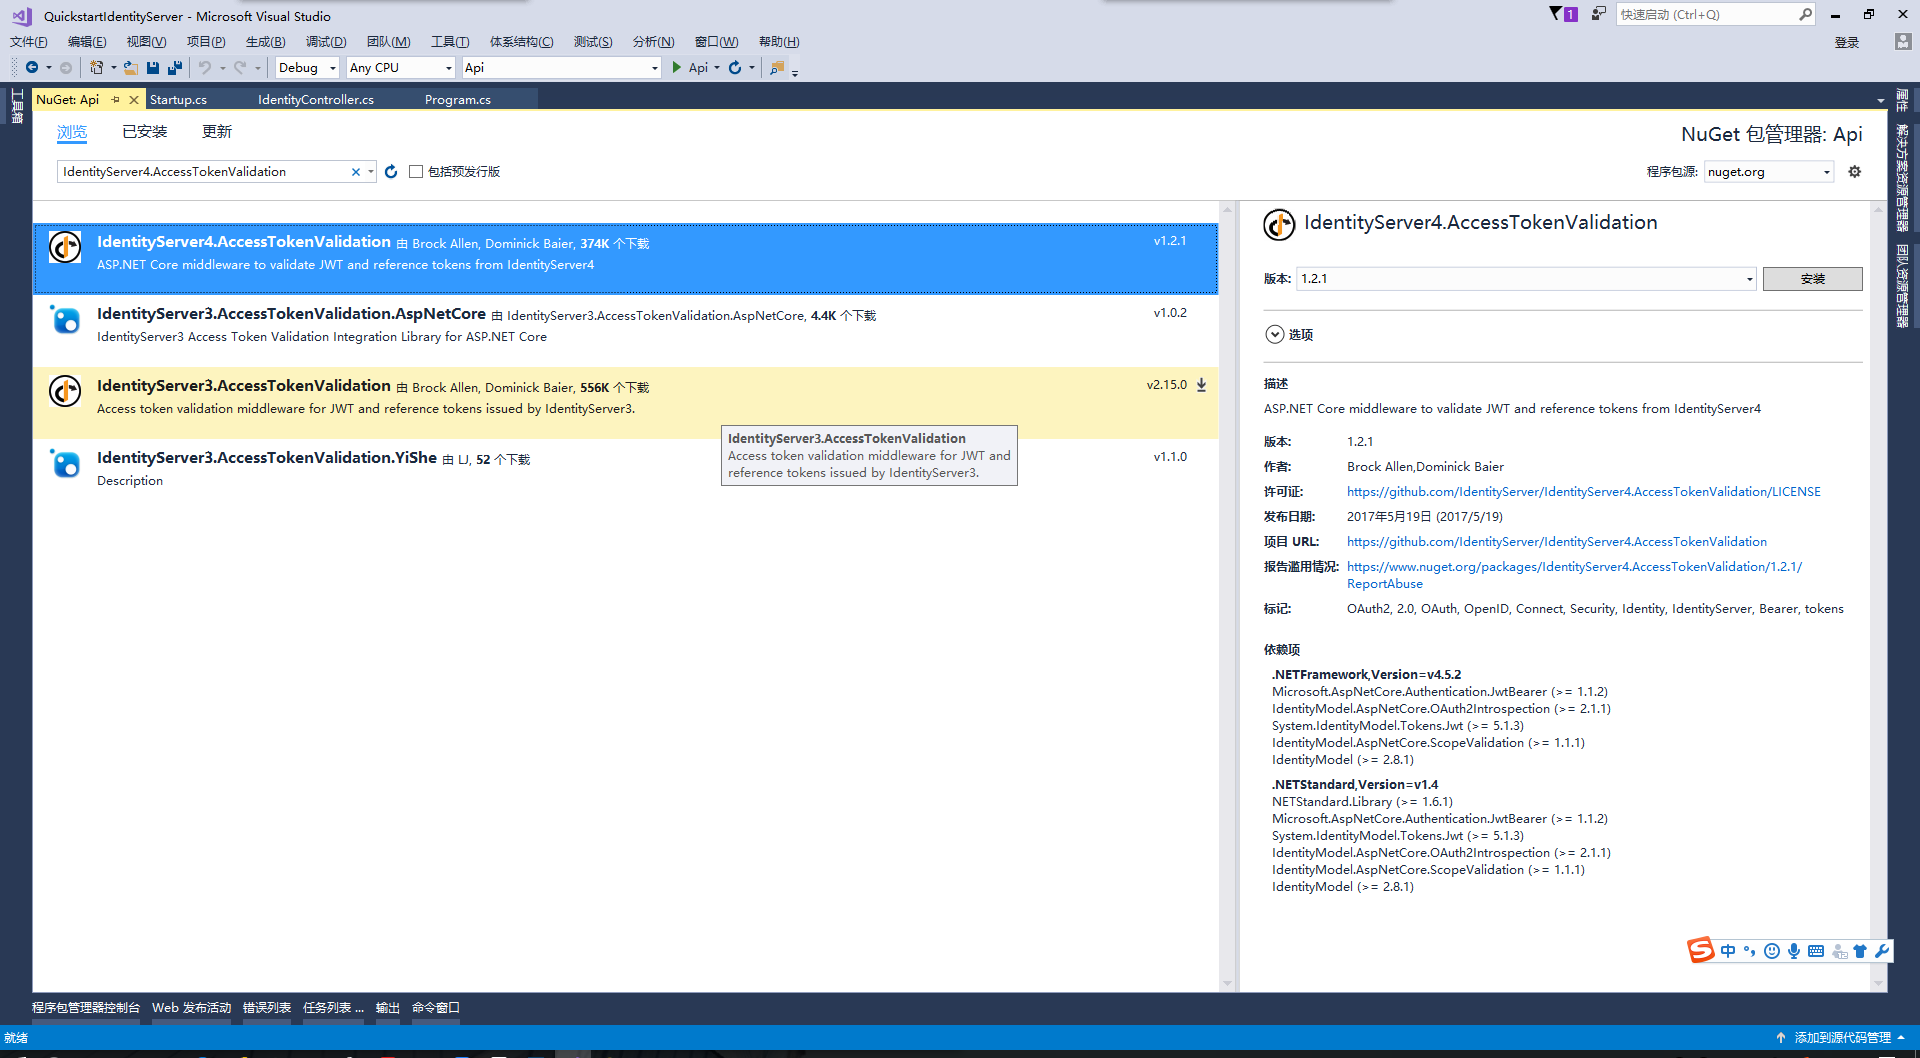
将 IdentityServer4.AccessTokenValidation NuGet 程序包添加到你的 API 项目:

你还需要添加中间件到你的 HTTP 管道中 —— 必须在添加 MVC 之前添加,比如:
 public void Configure(IApplicationBuilder app, IHostingEnvironment env, ILoggerFactory loggerFactory)
 {
     loggerFactory.AddConsole(Configuration.GetSection("Logging"));
     loggerFactory.AddDebug();

     app.UseIdentityServerAuthentication(new IdentityServerAuthenticationOptions()
     {
         Authority = "http://localhost:5000",
         RequireHttpsMetadata = false,
         ApiName = "api1"
     });

     app.UseMvc();
 }
如果你使用浏览器导航到上述控制器(http://localhost:5001/identity),你应该收到返回的 401 状态码。这意味着你的 API 要求提供证书。
这样一来, API 就是受 IdentityServer 保护的了。
创建客户端
最后一个步骤是编写一个客户端来请求访问令牌,然后使用这个令牌来访问 API。为此你需要为你的解决方案添加一个控制台应用程序。
IdentityServer 上的令牌端点实现了 OAuth 2.0 协议,你应该使用合法的 HTTP 来访问它。然而,我们有一个叫做 IdentityModel 的客户端库,它将协议交互封装到了一个易于使用的 API 里面。
添加 IdentityModel NuGet 程序包到你的客户端项目中。

IdentityModel 包含了一个用于 发现端点 的客户端库。这样一来你只需要知道 IdentityServer 的基础地址 —— 实际的端点地址可以从元数据中读取:
// 从元数据中发现端口
var disco = await DiscoveryClient.GetAsync("http://localhost:5000");
接着你可以使用 TokenClient 类型来请求令牌。为了创建一个该类型的实例,你需要传入令牌端点地址、客户端id和密码。
然后你可以使用 RequestClientCredentialsAsync 方法来为你的目标 API 请求一个令牌:
// 请求以获得令牌
var tokenClient = new TokenClient(disco.TokenEndpoint, "client", "secret");
var tokenResponse = await tokenClient.RequestClientCredentialsAsync("api1");

if (tokenResponse.IsError)
{
    Console.WriteLine(tokenResponse.Error);
    return;
}

Console.WriteLine(tokenResponse.Json);
注意:从控制台中复制和粘贴访问令牌到 jwt.io 以检查令牌的合法性。
最后是调用 API。
为了发送访问令牌到 API,你一般要使用 HTTP 授权 header。这可以通过 SetBearerToken 扩展方法来实现:
// 调用API
var client = new HttpClient();
client.SetBearerToken(tokenResponse.AccessToken);

var response = await client.GetAsync("http://localhost:5001/identity");
if (!response.IsSuccessStatusCode)
{
    Console.WriteLine(response.StatusCode);
}
else
{
    var content = await response.Content.ReadAsStringAsync();
    Console.WriteLine(JArray.Parse(content));
}
最终输出看起来应该是这样的:

注意:默认情况下访问令牌将包含 scope 身份信息,生命周期(nbf 和 exp),客户端 ID(client_id) 和 发行者名称(iss)。
进一步实践
当前演练目前主要关注的是成功的步骤:
- 客户端可以请求令牌
- 客户端可以使用令牌来访问 API
你现在可以尝试引发一些错误来学习系统的相关行为,比如:
- 尝试在 IdentityServer 未运行时(unavailable)连接它
- 尝试使用一个非法的客户端id或密码来请求令牌
- 尝试在请求令牌的过程中请求一个非法的 scope
- 尝试在 API 未运行时(unavailable)调用它
- 不向 API 发送令牌
- 配置 API 为需要不同于令牌中的 scope
上一篇:IdentityServer4 中文文档 -8- (快速入门)设置和概览
下一篇:IdentityServer4 中文文档 -10- (快速入门)使用密码保护API