一 环境准备
Centos7
java version "1.8.0_172"
elasticsearch-7.10.0-linux-x86_64.tar.gz
三个节点:
10.12.11.101
10.12.11.102
10.12.11.103
二 开始搭建
1 vi /etc/security/limits.conf
添加如下内容:
* soft nofile 65536
* hard nofile 65536
2 vi /etc/sysctl.conf
添加如下内容:
vm.max_map_count=262144
sysctl -p
3 解压jelasticsearch-7.10.0-linux-x86_64.tar.gz至三个节点目录/usr/local
4 修改每个主机的/usr/local/elasticsearch-7.10.0/config/elasticsearch.yml配置
node-1
# ======================== Elasticsearch Configuration =========================
cluster.name: test-es
node.name: node-1
http.port: 9200
network.host: 10.12.11.101
transport.tcp.port: 9300
discovery.seed_hosts: ["10.12.11.102:9300","10.12.11.103:9300"]
cluster.initial_master_nodes: ["node-1", "node-2", "node-3"]
gateway.recover_after_nodes: 2
node-2
# ======================== Elasticsearch Configuration =========================
cluster.name: test-es
node.name: node-2
http.port: 9200
network.host: 10.12.11.102
transport.tcp.port: 9300
discovery.seed_hosts: ["10.12.11.102:9300","10.12.11.103:9300"]
cluster.initial_master_nodes: ["node-1", "node-2", "node-3"]
gateway.recover_after_nodes: 2
node-3
# ======================== Elasticsearch Configuration =========================
cluster.name: test-es
node.name: node-3
http.port: 9200
network.host: 10.12.11.103
transport.tcp.port: 9300
discovery.seed_hosts: ["10.12.11.101:9300","10.12.11.102:9300"]
cluster.initial_master_nodes: ["node-1", "node-2", "node-3"]
gateway.recover_after_nodes: 2
5 设置用户名和密码的准备工作
1)生成CA证书
bin/elasticsearch-certutil ca (将产生新文件 elastic-stack-ca.p12)
----elasticsearch-certutil 命令还会提示你输入密码以保护文件和密钥,请保留该文件的副本并记住其密码,此处我们设置为空。
2)为集群中的每个节点生成证书和私钥
bin/elasticsearch-certutil cert --ca elastic-stack-ca.p12
mv elastic-certificates.p12 config/
----将产生新文件 elastic-certificates.p12。系统还会提示你输入密码,你可以输入证书和密钥的密码,也可以按Enter键将密码留空。默认情况下 elasticsearch-certutil 生成没有主机名信息的证书,这意味着你可以将证书用于集群中的每个节点,另外要关闭主机名验证。
3)将 elastic-certificates.p12 文件复制到每个节点上Elasticsearch配置目录中
----无需将 elastic-stack-ca.p12 文件复制到此目录。
4)配置集群中的每个节点以使用其签名证书标识自身并在传输层上启用TLS
启用TLS并指定访问节点证书所需的信息,将以下信息添加到每个节点的 elasticsearch.yml 文件中:
http.cors.enabled: true
http.cors.allow-origin: "*"
xpack.security.transport.ssl.enabled: true
xpack.security.enabled: true
xpack.security.transport.ssl.verification_mode: certificate
xpack.security.transport.ssl.keystore.path: elastic-certificates.p12
xpack.security.transport.ssl.truststore.path: elastic-certificates.p12
6 启动ES
bin/elasticsearch -d
7 修改密码
bin/elasticsearch-setup-passwords interactive
Initiating the setup of passwords for reserved users elastic,apm_system,kibana,logstash_system,beats_system,remote_monitoring_user.
You will be prompted to enter passwords as the process progresses.
Please confirm that you would like to continue [y/N]y
Enter password for [elastic]:
Reenter password for [elastic]:
Enter password for [apm_system]:
Reenter password for [apm_system]:
Enter password for [kibana]:
Reenter password for [kibana]:
Enter password for [logstash_system]:
Reenter password for [logstash_system]:
Enter password for [beats_system]:
Reenter password for [beats_system]:
Enter password for [remote_monitoring_user]:
Reenter password for [remote_monitoring_user]:
Changed password for user [apm_system]
Changed password for user [kibana]
Changed password for user [logstash_system]
Changed password for user [beats_system]
Changed password for user [remote_monitoring_user]
Changed password for user [elastic]
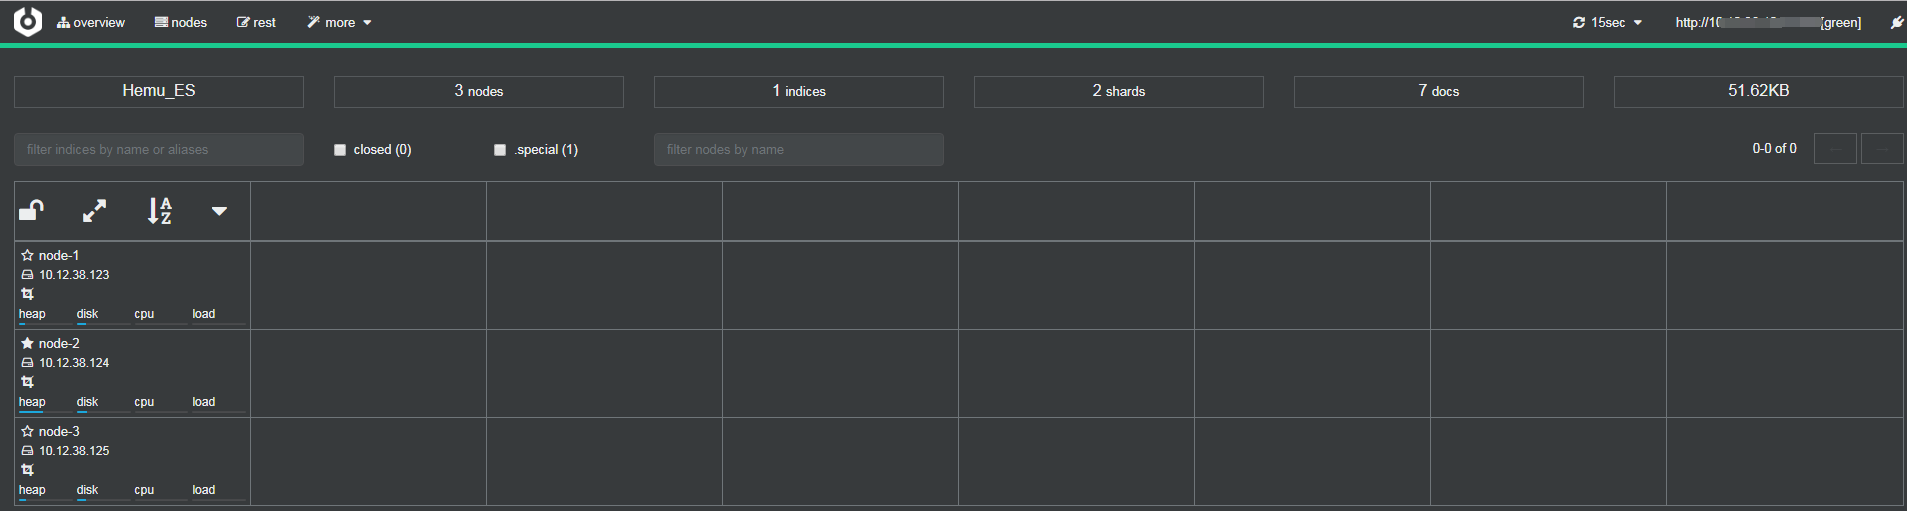
8 访问ES
使用cerebro查看 cerebro github
参考:https://www.cnblogs.com/hellxz/p/11076854.html
https://blog.csdn.net/taoge512/article/details/106145917