vue学习的一系列,全部来自于表哥---表严肃,是我遇到过的讲课最通透,英文发音最好听的老师,想一起听课就去这里吧 https://biaoyansu.com/i/hzhj1206
1过滤器filter
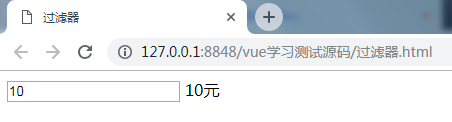
例如商城中商品的价格,既是动态的,而且重复出现的频率非常高,这就意味着,一些信息是重复的,像前面可以加一个“¥”,后面接一个单位“元”:¥10元。想实现只传价格10,其他信息让其自动生成,vue里提供了过滤器filter来实现。
例1:
<!DOCTYPE html>
<html>
    <head>
        <meta charset="utf-8">
        <title>过滤器</title>
    </head>
    <body>
        <div id="app">
            <div>
                <input v-model="price">
                {{price | currency}}
            </div>
        </div>
    </body>
    <script src="js/vue.js"></script>
    <script>
        Vue.filter('currency', function(val, unit) {
            val = val || 0;
            unit = unit || '元';
            return val + unit;
        });

        var app = new Vue({
            el: '#app',
            data: {
                price: 10
            }
        })
    </script>
</html>
说明:
通过管道符|,将前面的数据price传到后面的过滤器currency中,
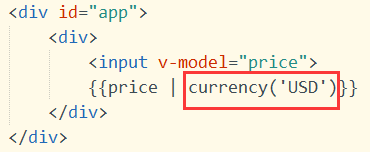
Vue.filter(),第一个参数是过滤器的名字,第二个参数是一个function,function也有两个参数(可以自定义的),第一个是传进来的值,第二个是过滤器的值,可以写在括号中传过来,就像调用函数时带着参数一样。
例2:单位换算
<!DOCTYPE html>
<html>
    <head>
        <meta charset="utf-8">
        <title>过滤器2</title>
    </head>
    <body>
        <div id="app">
            <div>
                请输入毫米数:<input type="text" v-model="length">
                <br>换算成米:{{length|meter}}
            </div>
        </div>
    </body>
    <script src="js/vue.js"></script>
    <script>
        Vue.filter('meter', function(val, unit) {
            val = val || 0;
            unit = unit || '米';
            return (val / 1000).toFixed(2) + unit;  //保留两位小数
        });

        var app = new Vue({
            el: '#app',
            data: {
                length: 100
            }
        })
    </script>
</html>

总结:filter就是解决一些格式的问题,可以提升用户体验的。如果filter内部非常复杂,建议写成计算属性computed,因为computed带有缓存,可重用性强。而filter都是做一些简单的事情。
2自定义指令
2.1基础配置
如果vue自带的指令无法满足需求,就要自定义一个指令,用法就像自定义属性一样,只要在元素上加上这个属性,就具有相应的功能,
组件和指令的区别,组件就像一个人物角色,指令就是人物所拥有的技能,一个人物可以有多种技能,不同的人物也可以有相同的技能。
用v-来自定义一个属性,
用directive来定义一个指令,第一个参数是指令名,这里就不用以v-开头了,第二个参数是回调函数,函数中第一个参数el是元素,就是指令所在的元素会自动传进来,这个元素可以用原生api来调用,也可以用jquery来调用$(el),第二个参数binding是指令传进来的值和其他基本信息,值在binding.value中
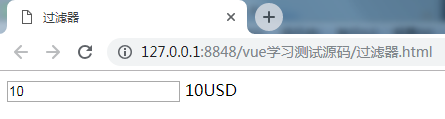
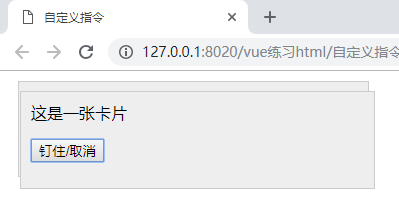
实例:钉住指令
<!DOCTYPE html>
<html>
    <head>
        <meta charset="utf-8" />
        <title>自定义指令</title>
        <style>
            .card {
                border: 1px solid #ccc;padding: 10px;margin: 10px;width: 20%;background: #eee;
            }
        </style>
    </head>

    <body style="height: 2000px;">
        <div id="zyx">
            <div v-pin='card1.pinned' class="card">
                这是一张卡片
                <p><button @click="card1.pinned=!card1.pinned">钉住/取消</button></p>
            </div>
            <div v-pin='card2.pinned' class="card">
                这是一张卡片
                <p><span @click="card2.pinned=!card2.pinned">钉住/取消</span></p>
            </div>
        </div>

        <script src="lib/vue.js"></script>
        <script>
            Vue.directive('pin',function(el,binding){
                console.log(binding);
                //var $el=$(el);
                if(binding.value){
                    el.style.position='fixed';
                    el.style.top='10px';
                    el.style.left='10px';
                }else{
                    el.style.position='static';
                }
            });

            var zyx = new Vue({
                el: '#zyx',
                data: {
                    card1:{
                        pinned:false
                    },
                    card2:{
                        pinned:false
                    }
                }
            });
        </script>
    </body>
</html>
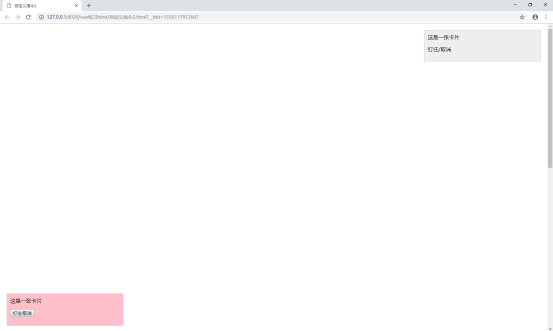
2.2配置传参及修饰符
上面的钉住指令,想进一步实现,可以钉在不同的方向位置,可以通过加修饰符,是指令后面加.,然后通过binding.modifiers来获取,
传参是指令后面加:,然后通过binding.arg来获取,
<!DOCTYPE html>
<html>
    <head>
        <meta charset="utf-8" />
        <title>自定义指令2</title>
        <style>
            .card {
                border: 1px solid #ccc;padding: 10px;margin: 10px;width: 20%;background: #eee;
            }
        </style>
    </head>

    <body style="height: 2000px;">
        <div id="zyx">
            <div v-pin:true.bottom.left='card1.pinned' class="card">
                这是一张卡片
                <p><button @click="card1.pinned=!card1.pinned">钉住/取消</button></p>
            </div>
            <div v-pin.top.right='card2.pinned' class="card">
                这是一张卡片
                <p><span @click="card2.pinned=!card2.pinned">钉住/取消</span></p>
            </div>
        </div>

        <script src="lib/vue.js"></script>
        <script>
            Vue.directive('pin',function(el,binding){
                var pined=binding.value; //值
                var posi=binding.modifiers; //修饰符
                var waring=binding.arg;  //参数

                if(pined){
                    el.style.position='fixed';
                    for(var key in posi){
                        if(posi[key]){
                            el.style[key]='10px';
                        }
                    }
                    if(waring==='true'){
                        el.style.background='pink';
                    }
                }else{
                    el.style.position='static';
                }
            });

            var zyx = new Vue({
                el: '#zyx',
                data: {
                    card1:{
                        pinned:false
                    },
                    card2:{
                        pinned:false
                    }
                }
            });
        </script>
    </body>
</html>
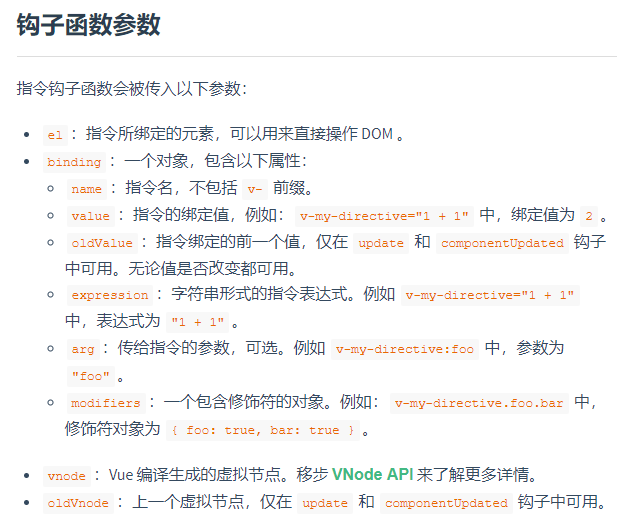
其他参数:(来自vue官网)
3混合mixins
Mixins就像一个重复功能和数据的储存器。
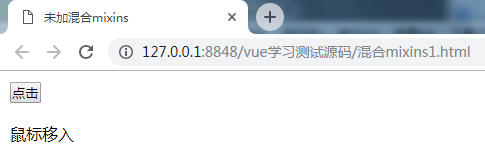
例:页面中有两个组件,一个是点击显示,点击关闭按钮隐藏;一个是鼠标移入显示,移出隐藏,
<!DOCTYPE html>
<html>
    <head>
        <meta charset="utf-8">
        <title>混合mixins</title>
        <style>
            *{padding: 0;margin: 0;}
            body{padding: 10px 0 0 10px;}
            .show-box{border: 1px solid #ccc;background: blanchedalmond;padding: 20px;margin-top: 10px;}
            .tips-word{margin-top: 20px;}
            .close-btn{display: inline-block;width: 20px;height: 20px;border: 1px solid #333;text-align: center;line-height: 20px;margin-left: 10px;cursor: pointer;}
        </style>
    </head>
    <body>
        <div id="app">
            <popup></popup>
            <tooltip></tooltip>
        </div>
    </body>
    <script src="js/vue.js"></script>
    <script>
        Vue.component('popup',{
            template:`
            <div>
                <button @click="toggle">点击</button>
                <div v-if="visible" class="show-box">
                    <span title="关闭" class="close-btn" @click="hide">×</span>
                    显示的内容
                </div>
            </div>
            `,
            data:function(){
                return{
                    visible:false
                }
            },
            methods:{
                toggle:function(){
                    this.visible=!this.visible;
                },
                hide:function(){
                    this.visible=false;
                }
            }
        });

        Vue.component('tooltip',{
            template:`
            <div>
                <p @mouseenter="show" @mouseleave="hide" class="tips-word">鼠标移入</p>
                <div v-if="visible" class="show-box">提示信息</div>
            </div>
            `,
            data:function(){
                return{
                    visible:false
                }
            },
            methods:{
                show:function(){
                    this.visible=true;
                },
                hide:function(){
                    this.visible=false;
                },
            }
        });

        var app=new Vue({
            el:'#app'
        })
    </script>
</html>
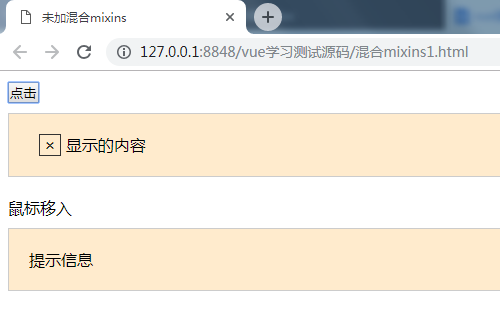
这里面重复的地方非常多,显得代码很啰嗦,实现的功能很简单,却要写这么多重复的东西。
Vue里面提供Mixins机制,可以把一些功能定义到Mixins中。定义一个base,然后把两个组件都要用的放进去,然后把原来那些替换成mixins,他的值是一个数组,值就是定义的base。Vue会自动合并这个对象和组件,组件就自动携带了mixins的功能,
<!DOCTYPE html>
<html>
    <head>
        <meta charset="utf-8">
        <title>混合mixins</title>
        <style>
            *{padding: 0;margin: 0;}
            body{padding: 10px 0 0 10px;}
            .show-box{border: 1px solid #ccc;background: blanchedalmond;padding: 20px;margin-top: 10px;}
            .tips-word{margin-top: 20px;}
            .close-btn{display: inline-block;width: 20px;height: 20px;border: 1px solid #333;text-align: center;line-height: 20px;margin-left: 10px;cursor: pointer;}
        </style>
    </head>
    <body>
        <div id="app">
            <popup></popup>
            <tooltip></tooltip>
        </div>
    </body>
    <script src="js/vue.js"></script>
    <script>
        var base={
            data:function(){
                return{
                    visible:false
                }
            },
            methods:{
                show:function(){
                    this.visible=true;
                },
                hide:function(){
                    this.visible=false;
                },
                toggle:function(){
                    this.visible=!this.visible;
                }
            }
        }

        Vue.component('popup',{
            template:`
            <div>
                <button @click="toggle">点击</button>
                <div v-if="visible" class="show-box">
                    <span title="关闭" class="close-btn" @click="hide">×</span>
                    显示的内容
                </div>
            </div>
            `,
            mixins:[base]
        });

        Vue.component('tooltip',{
            template:`
            <div>
                <p @mouseenter="show" @mouseleave="hide" class="tips-word">鼠标移入</p>
                <div v-if="visible" class="show-box">提示信息</div>
            </div>
            `,
            mixins:[base]
        });

        var app=new Vue({
            el:'#app'
        })
    </script>
</html>
这样代码就简洁多了,页面不管有多少个组件,只要他需要用到base的功能,直接加个mixins就可以了。
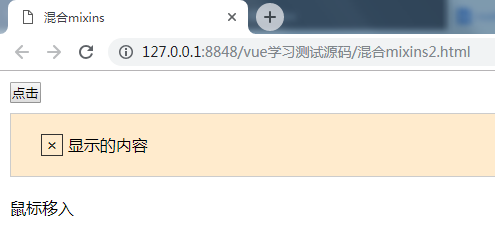
如果想让某个组件中的visible默认等于true呢?在组件中再定义一个data,里面指定visible为true就可以了,这样会把base里面的相应的内容覆盖掉,类似“就近原则”
<!DOCTYPE html>
<html>
    <head>
        <meta charset="utf-8">
        <title>混合mixins</title>
        <style>
            *{padding: 0;margin: 0;}
            body{padding: 10px 0 0 10px;}
            .show-box{border: 1px solid #ccc;background: blanchedalmond;padding: 20px;margin-top: 10px;}
            .tips-word{margin-top: 20px;}
            .close-btn{display: inline-block;width: 20px;height: 20px;border: 1px solid #333;text-align: center;line-height: 20px;margin-left: 10px;cursor: pointer;}
        </style>
    </head>
    <body>
        <div id="app">
            <popup></popup>
            <tooltip></tooltip>
        </div>
    </body>
    <script src="js/vue.js"></script>
    <script>
        var base={
            data:function(){
                return{
                    visible:false
                }
            },
            methods:{
                show:function(){
                    this.visible=true;
                },
                hide:function(){
                    this.visible=false;
                },
                toggle:function(){
                    this.visible=!this.visible;
                }
            }
        }

        Vue.component('popup',{
            template:`
            <div>
                <button @click="toggle">点击</button>
                <div v-if="visible" class="show-box">
                    <span title="关闭" class="close-btn" @click="hide">×</span>
                    显示的内容
                </div>
            </div>
            `,
            mixins:[base],
            data:function(){
                return{
                    visible:true
                }
            },
        });

        Vue.component('tooltip',{
            template:`
            <div>
                <p @mouseenter="show" @mouseleave="hide" class="tips-word">鼠标移入</p>
                <div v-if="visible" class="show-box">提示信息</div>
            </div>
            `,
            mixins:[base]
        });

        var app=new Vue({
            el:'#app'
        })
    </script>
</html>
4插槽slots
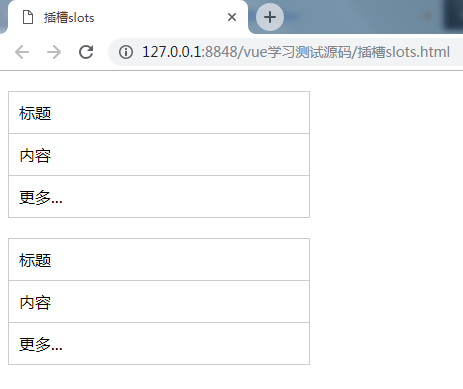
例:页面上有两个同样的组件
<!DOCTYPE html>
<html>
    <head>
        <meta charset="utf-8">
        <title>插槽slots</title>
        <style>
            .panel{border: 1px solid #ccc;margin-top: 20px;width: 300px;}
            .panel > *{padding: 10px;}
            .panel .content{border-top: 1px solid #ccc;border-bottom: 1px solid #ccc;}
        </style>
    </head>
    <body>
        <div id="app">
            <panel></panel>
            <panel></panel>
        </div>
        <template id="panel_tpl">
            <div class="panel">
                <div class="title">
                    标题
                </div>
                <div class="content">
                    内容
                </div>
                <div class="footer">更多...</div>
            </div>
        </template>
    </body>
    <script src="js/vue.js"></script>
    <script>
        Vue.component('panel',{
            template:'#panel_tpl'
        })

        var app=new Vue({
            el:'#app',
            data:{

            }
        })
    </script>
</html>
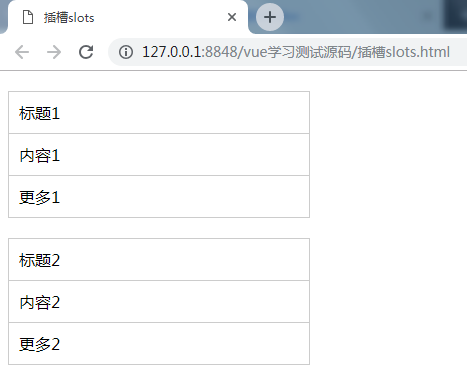
想实现里面的内容动态,就可以把内容换成<slot></slot>,然后在<panel></panel>中写内容,这样就可以分别设置内容了。可以为slot指定一个name,就能定义多个slot了,然后在组件标签中,加上属性slot=”name”,就可以了。写在<slot></slot>中的为默认值。
<!DOCTYPE html>
<html>
    <head>
        <meta charset="utf-8">
        <title>插槽slots</title>
        <style>
            .panel{border: 1px solid #ccc;margin-top: 20px;width: 300px;}
            .panel > *{padding: 10px;}
            .panel .content{border-top: 1px solid #ccc;border-bottom: 1px solid #ccc;}
        </style>
    </head>
    <body>
        <div id="app">
            <panel>
                <div slot="title">标题1</div>
                <div slot="content">内容1</div>
            </panel>
            <panel>
                <div slot="title">标题2</div>
                <div slot="content">内容2</div>
                <div slot="footer">更多2</div>
            </panel>
        </div>
        <template id="panel_tpl">
            <div class="panel">
                <div class="title">
                    <slot name="title"></slot>
                </div>
                <div class="content">
                    <slot name="content"></slot>
                </div>
                <div class="footer">
                    <slot name="footer">更多1</slot>
                </div>
            </div>
        </template>
    </body>
    <script src="js/vue.js"></script>
    <script>
        Vue.component('panel',{
            template:'#panel_tpl'
        })

        var app=new Vue({
            el:'#app',
            data:{

            }
        })
    </script>
</html>
Slot特别常用,灵活、简洁、强大,可以用这种方式实现组件的嵌套。