一、什么是图片验证码?
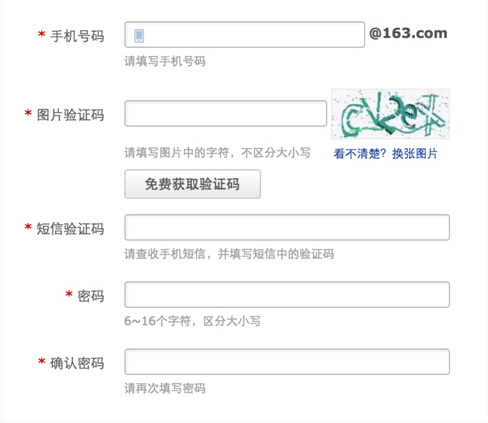
可以参考下面这张图:

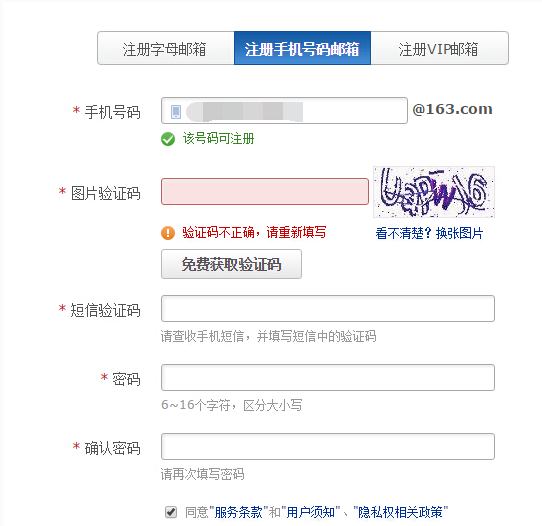
我们在一些网站注册的时候,经常需要填写以上图片的信息。
这种图片验证方式是我们最常见的形式,它可以有效的防范恶意攻击者采用恶意工具,调用“动态验证码短信获取”接口进行动态短信发送, 导致接入用户短信被刷,造成账号余额损失。同时这种动态发送方式会朝许多无关的手机用户,发送很多验证码短信,导致手机用户被骚扰,甚至引起用户投诉。这种恶意攻击究其原因是攻击者可以自动对接口进行大量调用。
如果网站在用户进行“动态验证码短信发送” 操作前,要求用户输入图片验证码,确认用户是真实有效后,服务器端再发送动态短信到用户手机上。这一种流程就可以有效的解决恶意攻击问题。
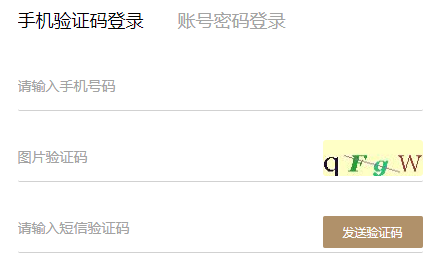
正确的加入图片验证码的方式是在短信验证码发送前,先让用户填写图片验证码,再发送短信验证码。
举一个正确的例子(下图)

说了这么多,具体是怎么实现的呢?
1、图片生成实体类:
package com.hexianwei.graphic;

import java.awt.Color;
import java.awt.Font;
import java.awt.Graphics2D;
import java.awt.image.BufferedImage;
import java.io.FileNotFoundException;
import java.io.FileOutputStream;
import java.io.IOException;
import java.io.OutputStream;
import java.util.Random;

import javax.imageio.ImageIO;


public class ImageVerificationCode {

    private int weight = 100;           //验证码图片的长和宽
    private int height = 40;
    private String text;                //用来保存验证码的文本内容
    private Random r = new Random();    //获取随机数对象
    //private String[] fontNames = {"宋体", "华文楷体", "黑体", "微软雅黑", "楷体_GB2312"};   //字体数组
    //字体数组
    private String[] fontNames = {"Georgia"};
    //验证码数组
    private String codes = "23456789abcdefghjkmnopqrstuvwxyzABCDEFGHJKMNPQRSTUVWXYZ";

    /**
     * 获取随机的颜色
     *
     * @return
     */
    private Color randomColor() {
        int r = this.r.nextInt(225);  //这里为什么是225,因为当r,g,b都为255时,即为白色,为了好辨认,需要颜色深一点。
        int g = this.r.nextInt(225);
        int b = this.r.nextInt(225);
        return new Color(r, g, b);            //返回一个随机颜色
    }

    /**
     * 获取随机字体
     *
     * @return
     */
    private Font randomFont() {
        int index = r.nextInt(fontNames.length);  //获取随机的字体
        String fontName = fontNames[index];
        int style = r.nextInt(4);         //随机获取字体的样式,0是无样式,1是加粗,2是斜体,3是加粗加斜体
        int size = r.nextInt(10) + 24;    //随机获取字体的大小
        return new Font(fontName, style, size);   //返回一个随机的字体
    }

    /**
     * 获取随机字符
     *
     * @return
     */
    private char randomChar() {
        int index = r.nextInt(codes.length());
        return codes.charAt(index);
    }

    /**
     * 画干扰线,验证码干扰线用来防止计算机解析图片
     *
     * @param image
     */
    private void drawLine(BufferedImage image) {
        int num = r.nextInt(10); //定义干扰线的数量
        Graphics2D g = (Graphics2D) image.getGraphics();
        for (int i = 0; i < num; i++) {
            int x1 = r.nextInt(weight);
            int y1 = r.nextInt(height);
            int x2 = r.nextInt(weight);
            int y2 = r.nextInt(height);
            g.setColor(randomColor());
            g.drawLine(x1, y1, x2, y2);
        }
    }

    /**
     * 创建图片的方法
     *
     * @return
     */
    private BufferedImage createImage() {
        //创建图片缓冲区
        BufferedImage image = new BufferedImage(weight, height, BufferedImage.TYPE_INT_RGB);
        //获取画笔
        Graphics2D g = (Graphics2D) image.getGraphics();
        //设置背景色随机
        g.setColor(new Color(255, 255, r.nextInt(245) + 10));
        g.fillRect(0, 0, weight, height);
        //返回一个图片
        return image;
    }

    /**
     * 获取验证码图片的方法
     *
     * @return
     */
    public BufferedImage getImage() {
        BufferedImage image = createImage();
        Graphics2D g = (Graphics2D) image.getGraphics(); //获取画笔
        StringBuilder sb = new StringBuilder();
        for (int i = 0; i < 4; i++)             //画四个字符即可
        {
            String s = randomChar() + "";      //随机生成字符,因为只有画字符串的方法,没有画字符的方法,所以需要将字符变成字符串再画
            sb.append(s);                      //添加到StringBuilder里面
            float x = i * 1.0F * weight / 4;   //定义字符的x坐标
            g.setFont(randomFont());           //设置字体,随机
            g.setColor(randomColor());         //设置颜色,随机
            g.drawString(s, x, height - 5);
        }
        this.text = sb.toString();
        drawLine(image);
        return image;
    }

    /**
     * 获取验证码文本的方法
     *
     * @return
     */
    public String getText() {
        return text;
    }

    public static void output(BufferedImage image, OutputStream out) throws IOException                  //将验证码图片写出的方法
    {
        ImageIO.write(image, "JPEG", out);
    }
}
2、在控制器中把图片响应给前端页面(ssm框架)
@RequestMapping("getVerifiCode")
    @ResponseBody
    public void getVerifiCode(HttpServletRequest request, HttpServletResponse response) throws IOException {
        /*
             1.生成验证码
             2.把验证码上的文本存在session中
             3.把验证码图片发送给客户端
             */
        ImageVerificationCode ivc = new ImageVerificationCode();     //用我们的验证码类,生成验证码类对象
        BufferedImage image = ivc.getImage();  //获取验证码
        request.getSession().setAttribute("text", ivc.getText()); //将验证码的文本存在session中
        ivc.output(image, response.getOutputStream());//将验证码图片响应给客户端
    }
3、从session获得验证码字符(ssm框架)
@RequestMapping("Login_authentication")
    @ResponseBody
    public String Login_authentication(HttpServletRequest request,HttpServletResponse response) throws IOException, ServletException {
        request.setCharacterEncoding("utf-8");
        String session_vcode=(String) request.getSession().getAttribute("text");    //从session中获取真正的验证码
        return session_vcode;
    }
4、前端请求图片
<a href="javascript:getVerifiCode()">
    <img id="yzm_img" style="cursor:pointer; 100px;height: 36px;margin: 5px 0 0 5px;border-radius: 3px;" title="点击刷新验证码" src="Mcake/getVerifiCode"/>
</a>
function getVerifiCode() {
    $("#yzm_img").prop('src','Mcake/getVerifiCode?a='+new Date().getTime());
}
5、效果:

注:本博客仅为个人学习笔记。