<div my-directive
    my-url="http://google.com"
    my-link-text="Click me to go to Google"></div>

angular.module('myApp', [])
.directive('myDirective', function() {
    return {
        restrict: 'A',
        replace: true,
        scope: {
            myUrl: '@', //绑定策略 :字符串绑定策略
            myLinkText: '@' //绑定策略:
        },
        template: '<a href="{{myUrl}}">' +
            '{{myLinkText}}</a>'
    };
});
作用域数据绑定
自定义标签或者进行扩展时,会有这样的需求场景,要在标签中添加一些属性,实现一些复杂功能。
关于这些属性,独立作用域是如何的做的呢?看看下面的内容吧。
举个例子:
<xingoo say="name"></xingoo>
<xingoo say="name()"></xingoo>
假设传入的是上面这种,我们如何区分它传入的到底是变量呢?还是字符串呢?还是方法呢?
因此AngularJS有了三种自定义的作用域绑定方式:
1 基于字符串的绑定:使用@操作符,双引号内的内容当做字符串进行绑定。
2 基于变量的绑定:使用=操作符,绑定的内容是个变量。
3 基于方法的绑定:使用&操作符,绑定的内容时个方法。
首先看一下基于字符串的绑定:

<!doctype html>
<html ng-app="myApp">
    <head>
         <meta http-equiv="Content-Type" content="text/html; charset=utf-8" />
         <script src="http://apps.bdimg.com/libs/angular.js/1.2.16/angular.min.js"></script>
    </head>
    <body>

        <div ng-controller="myAppCtrl">
            <xingoo say="test string"></xingoo>
            <xingoo say="{{str2}}"></xingoo>
            <xingoo say="test()"></xingoo>
        </div>

        <script type="text/javascript">
            var myAppModule = angular.module("myApp",[]);

            myAppModule.controller("myAppCtrl",['$scope',function($scope){
                $scope.str1 = "hello";
                $scope.str2 = "world";
                $scope.str3 = "angular";
            }]);

            myAppModule.directive("xingoo",function(){
                return {
                    restrict:'AE',
                    scope:{
                        say:'@'
                    },
                    template:"<div>{{say}}</div><br>",
                    repalce:true
                }
            })
        </script>
    </body>
</html>
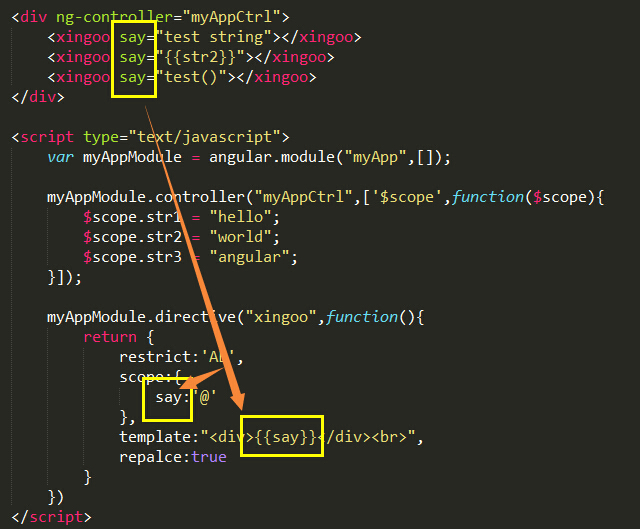
看一下代码,在body中使用了三次自定义的标签,每种标签的内部有一个say的属性,这个属性绑定了一个双引号的字符串。
在指令的定义中,添加了scope:{say:'@'}这个键值对属性,也就是说,angular会识别say所绑定的东西是一个字符串。
在模板中,使用表达式{{say}}输出say所表示的内容。
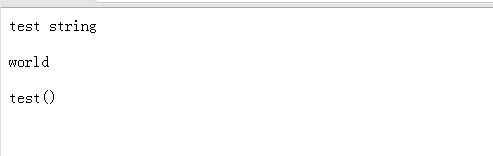
可以看到,双引号内的内容都被当做了字符串。当然{{str2}}表达式会被解析成对应的内容,再当做字符串。
如果绑定的是一个变量呢!
<!doctype html>
<html ng-app="myApp">
    <head>
         <meta http-equiv="Content-Type" content="text/html; charset=utf-8" />
         <script src="http://apps.bdimg.com/libs/angular.js/1.2.16/angular.min.js"></script>
    </head>
    <body>

        <div ng-controller="myAppCtrl">
            ctrl:<input type="text" ng-model="testname"><br>
            directive:<xingoo name="testname"></xingoo>
        </div>

        <script type="text/javascript">
            var myAppModule = angular.module("myApp",[]);

            myAppModule.controller("myAppCtrl",['$scope',function($scope){
                $scope.testname="my name is xingoo";
            }]);

            myAppModule.directive("xingoo",function(){
                return {
                    restrict:'AE',
                    scope:{
                        name:'='
                    },
                    template:'<input type="text" ng-model="name">',
                    repalce:true
                }
            })
        </script>
    </body>
</html>
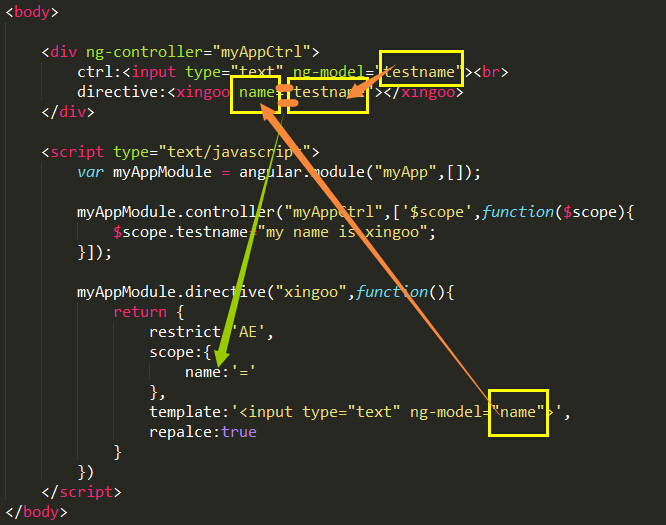
在上面的代码中,可以看到
1 在控制器myAppCtrl对应的div中,定义了一个变量ng-model —— testname。
2 testname对应的是输入框中输入的值。
3 然后把这个变量当做一个参数传递给xingoo这个标签的name属性。
4 在xingoo标签中,又把这个name绑定到模板中的一个输入框内。
最终两个输入框的内容被连接起来,无论改变哪一个输入框内的值,testname与name都会发生改变。

通过下面这张图可以看出来:
在指令中通过scope指定say绑定规则是变量的绑定方式。
最终通过xingoo标签内的属性依赖关系把 testname与name连接在一起:
最后是基于方法的绑定:&操作符
上面展示了基于字符串和变量的绑定方法,下面看看基于方法的绑定:
<!doctype html>
<html ng-app="myApp">
    <head>
         <meta http-equiv="Content-Type" content="text/html; charset=utf-8" />
         <script src="http://apps.bdimg.com/libs/angular.js/1.2.16/angular.min.js"></script>
    </head>
    <body>

        <div ng-controller="myAppCtrl">
            <xingoo say="sayHello(name)"></xingoo>
            <xingoo say="sayNo(name)"></xingoo>
            <xingoo say="sayYes(name)"></xingoo>
        </div>

        <script type="text/javascript">
            var myAppModule = angular.module("myApp",[]);

            myAppModule.controller("myAppCtrl",['$scope',function($scope){
                $scope.sayHello = function(name){
                    console.log("hello !"+ name);
                };
                $scope.sayNo = function(name){
                    console.log("no !"+ name);
                };
                $scope.sayYes = function(name){
                    console.log("yes !"+ name);
                };
            }]);

            myAppModule.directive("xingoo",function(){
                return {
                    restrict:'AE',
                    scope:{
                        say:'&'
                    },
                    template:'<input type="text" ng-model="username"/><br>'+
                        '<button ng-click="say({name:username})">click</button><br>',
                    repalce:true
                }
            })
        </script>
    </body>
</html>
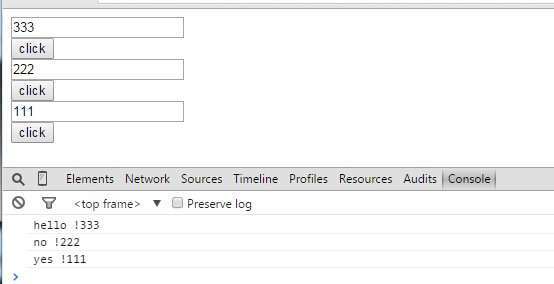
这段代码中scope中的绑定规则变成了&,也就是方法绑定。
在body中,通过自定义标签传入了三个方法,分别是sayHello(name),sayNo(name),sayYes(name),这三个方法都需要一个name变量。
在指令的定义中,模板替换成一个输入框,一个按钮:
输入框:用于输入username,也就是三个方法需要的参数name。
按钮:点击触发函数——通过绑定规则,绑定到相应的方法。

也就是说
通过say在scope中的定义,angular知道了say对应的是个方法;
通过{name:username}的关联,知道了传入的是username。
从而交给对应的方法执行。
页面效果:
参考
[1] 大漠穷求,AngularJS实战:http://www.imooc.com/video/3085/0