前言
有时候我们需要使用https安全协议,本文记录在SpringBoot项目启用https
生成证书
自签名证书
使用java jdk自带的生成SSL证书的工具keytool生成自己的证书
1、打开cmd
2、输入命令生成证书
keytool -genkeypair -alias tomcat_https -keypass 123456 -keyalg RSA -keysize 1024 -validity 365 -keystore d:/tomcat_https.keystore -storepass 123456
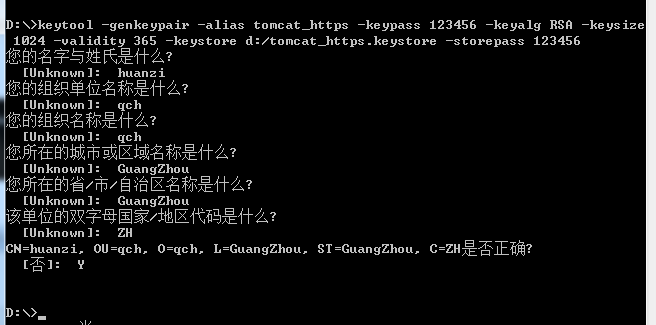

-alias 别名
-keypass 指定生成密钥的密码
-keyalg 指定密钥使用的加密算法(如 RSA)
-keysize 密钥大小
-validity 过期时间,单位天
-keystore 指定存储密钥的密钥库的生成路径、名称
-storepass 指定访问密钥库的密码
域名型证书
腾讯云域名型证书申请流程
https://cloud.tencent.com/document/product/400/6814
2020-01-10更新:今天使用内网穿透工具分给我们的二级域名去腾讯云申请证书,并记录一下
1、登录腾讯云 -> 证书管理 -> 申请免费证书
2、按照表单要求正确填写内容(填写的域名不需要www开头)
3、使用“文件验证”的方式进行域名验证 (https://cloud.tencent.com/document/product/400/4142)
首先看文档说明:

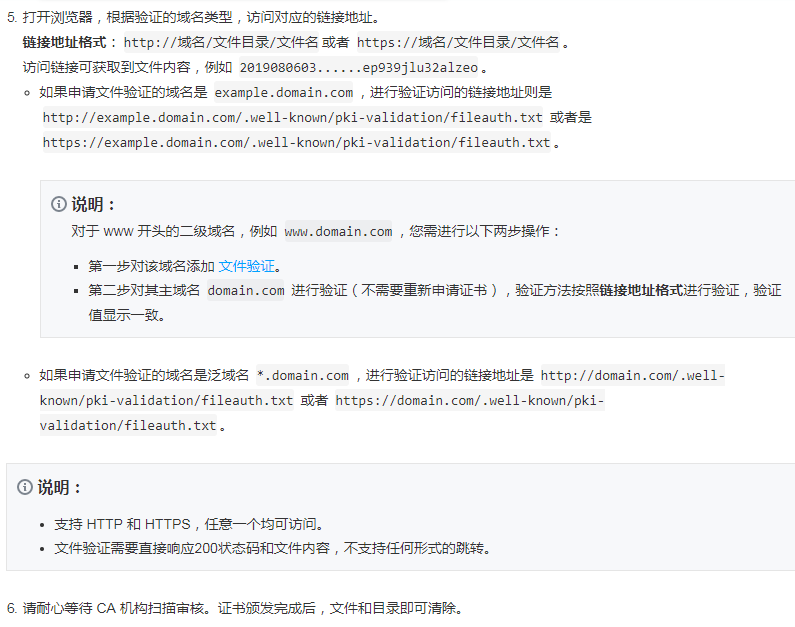
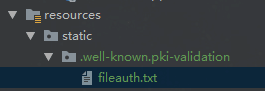
在springBoot项目中的static文件夹新建,然后把文件内容复制进去
启动项目,访问 http://XXXX/.well-known/pki-validation/fileauth.txt,返回文件内容
等待 CA 机构扫描审核、颁发证书 
另外,内网穿透隧道协议类型要改成https,本地端口改成443,其他的不用变
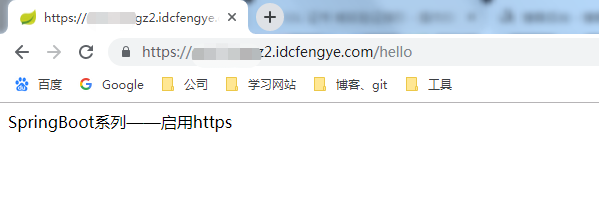
效果
项目配置
导入证书
把生成的tomcat_https.keystore放在resources里(任意安全目录都可以)

配置文件
#https默认端口:443,http默认端口:80
server.port=443
server.http-port=80

#开启https,配置跟证书一一对应
server.ssl.enabled=true
#指定证书
server.ssl.key-store=classpath:tomcat_https.keystore
server.ssl.key-store-type=JKS
#别名
server.ssl.key-alias=tomcat_https
#密码
server.ssl.key-password=123456
server.ssl.key-store-password=123456

spring.application.name=springboot-https
测试与效果
新增测试controller
package cn.huanzi.qch.springboothttps.controller;

import org.springframework.web.bind.annotation.GetMapping;
import org.springframework.web.bind.annotation.RestController;

@RestController
public class HttpsController {

    @GetMapping("/hello")
    public String hello() {
        return "SpringBoot系列——启用https";
    }

}
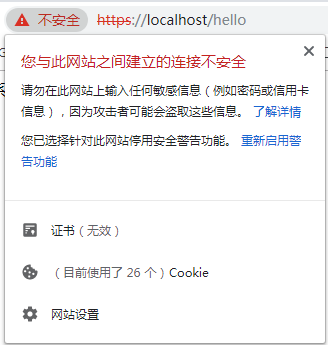
由于是自签名证书,浏览器不认可

选择“高级”,选择继续访问即可
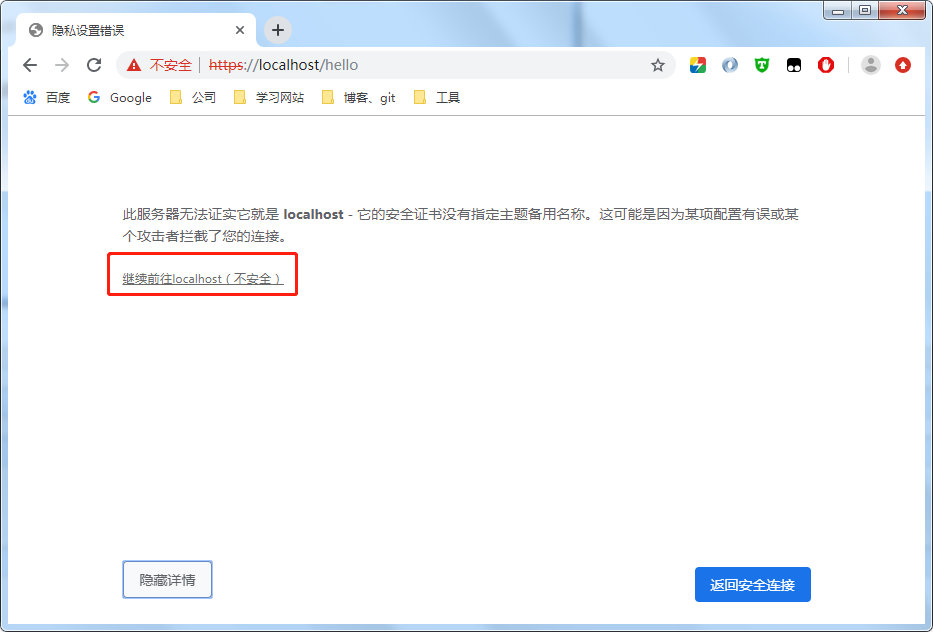
成功访问

客户端信任证书
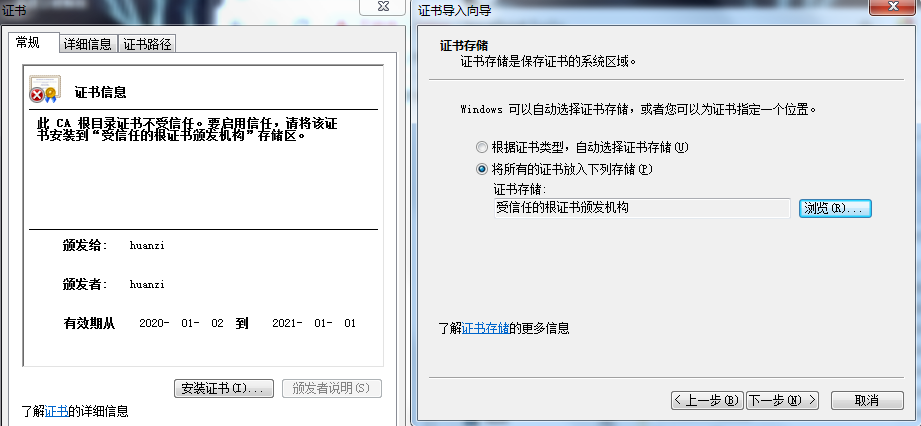
每次打开浏览器都阻止访问,很烦,因此需要导出.car文件证书,给客户端安装
keytool -keystore d:/tomcat_https.keystore -export -alias tomcat_https -file d:/server.cer


双击安装,选择导入到受信任的跟证书颁发机构
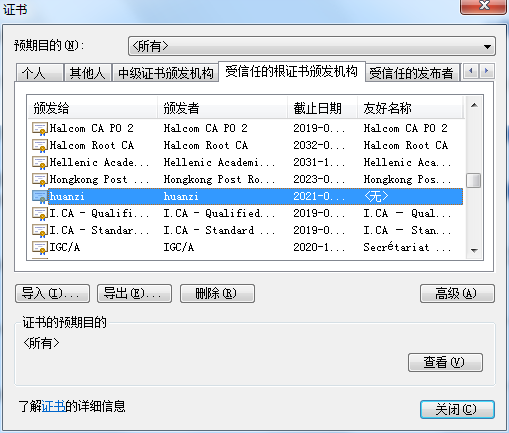
这样访问就不会再阻止了,但还是显示证书无效
http强制跳转https
注入TomcatServletWebServerFactory,监听http重定向到https
package cn.huanzi.qch.springboothttps.config;

import org.apache.catalina.Context;
import org.apache.catalina.connector.Connector;
import org.apache.tomcat.util.descriptor.web.SecurityCollection;
import org.apache.tomcat.util.descriptor.web.SecurityConstraint;
import org.springframework.beans.factory.annotation.Value;
import org.springframework.boot.web.embedded.tomcat.TomcatServletWebServerFactory;
import org.springframework.context.annotation.Bean;
import org.springframework.context.annotation.Configuration;

/**
 * http强制跳转https
 */
@Configuration
public class Http2Https {

    @Value("${server.port}")
    private int sslPort;//https的端口

    @Value("${server.http-port}")
    private int httpPort;//http的端口

    @Bean
    public TomcatServletWebServerFactory servletContainerFactory() {
        TomcatServletWebServerFactory tomcat = new TomcatServletWebServerFactory() {
            @Override
            protected void postProcessContext(Context context) {
                //设置安全性约束
                SecurityConstraint securityConstraint = new SecurityConstraint();
                securityConstraint.setUserConstraint("CONFIDENTIAL");
                //设置约束条件
                SecurityCollection collection = new SecurityCollection();
                //拦截所有请求
                collection.addPattern("/*");
                securityConstraint.addCollection(collection);
                context.addConstraint(securityConstraint);
            }
        };
        Connector connector = new Connector("org.apache.coyote.http11.Http11NioProtocol");
        //设置将分配给通过此连接器接收到的请求的方案
        connector.setScheme("http");

        //true: http使用http, https使用https;
        //false: http重定向到https;
        connector.setSecure(false);

        //设置监听请求的端口号,这个端口不能其他已经在使用的端口重复,否则会报错
        connector.setPort(httpPort);

        //重定向端口号(非SSL到SSL)
        connector.setRedirectPort(sslPort);

        tomcat.addAdditionalTomcatConnectors(connector);
        return tomcat;
    }
}
效果

后记
部分代码参考:https://www.cnblogs.com/niumoo/p/11717657.html
代码开源
代码已经开源、托管到我的GitHub、码云: