1.项目准备:爬取网站:http://www.proxy360.cn/Region/China,http://www.xicidaili.com/
2.创建编辑Scrapy爬虫:
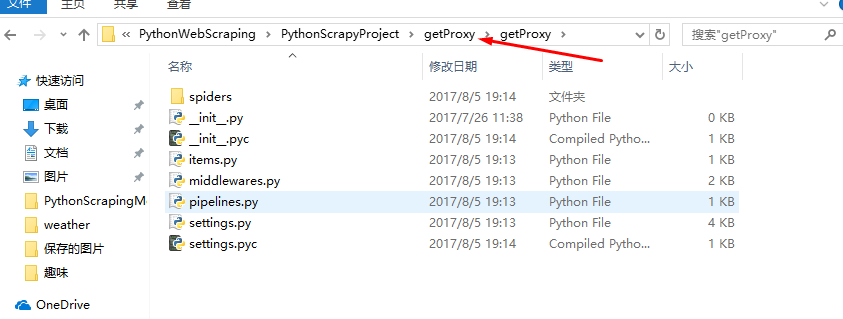
scrapy startproject getProxy
scrapy genspider proxy360Spider proxy360.cn
项目目录结构:
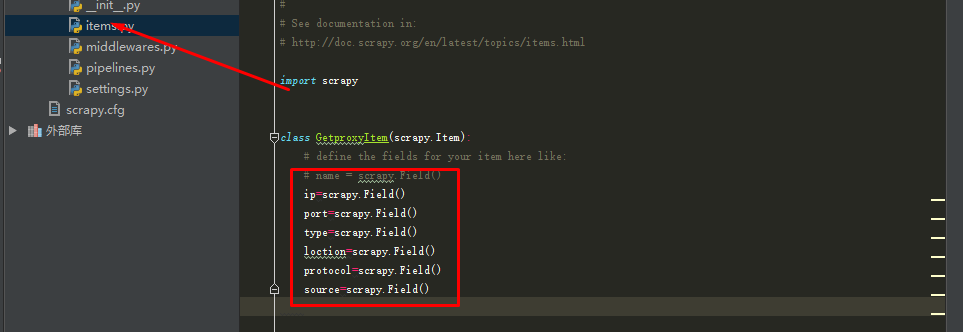
3.修改items.py:
4.修改Spider.py文件 proxy360Spider.py:
(1)先使用scrapy shell命令查看一下连接网络返回的结果和数据:
scrapy shell http://www.proxy360.cn/Region/China
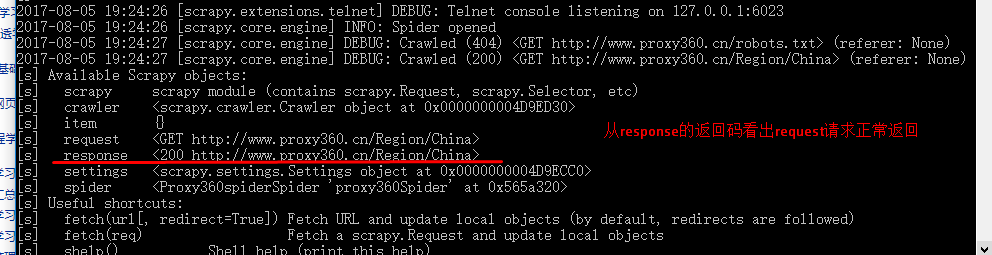
(2)再看一下response的数据内容:response.xpath('/*').extract(),返回的数据中含有代理服务器;
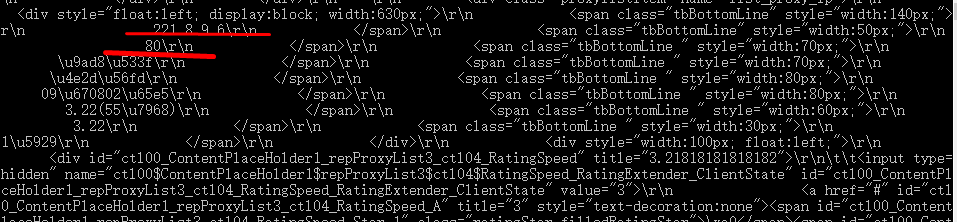
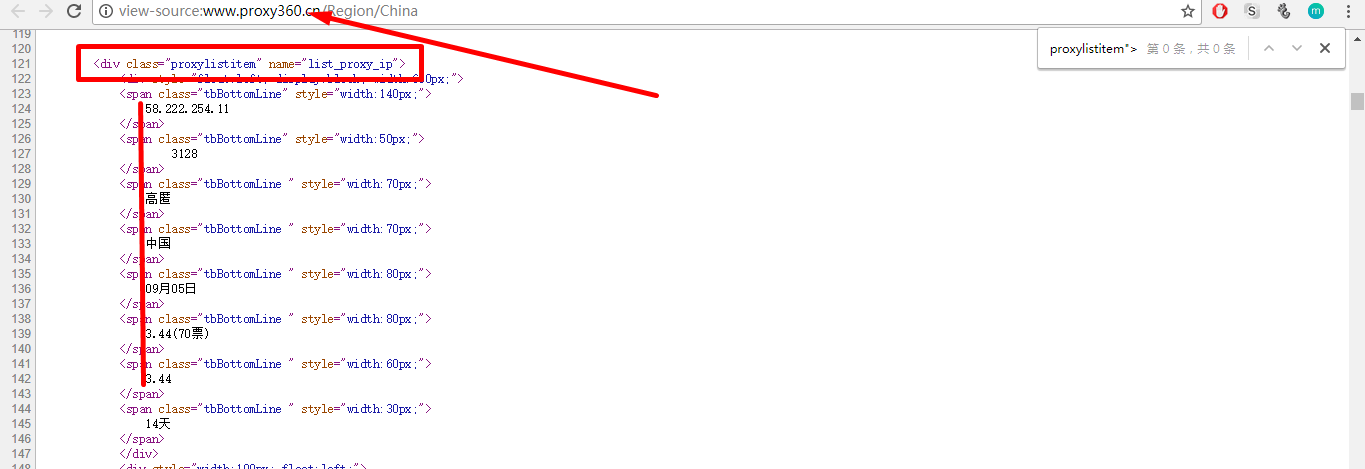
(3)观察发现所有的数据模块都是以<div class="proxylistitem" name="list_proxy_ip">这个tag开头的:
(4)在scrapy shell中测试一下:
subSelector=response.xpath('//div[@class="proxylistitem" and @name="list_proxy_ip"]')
subSelector.xpath('.//span[1]/text()').extract()[0]
subSelector.xpath('.//span[2]/text()').extract()[0]
subSelector.xpath('.//span[3]/text()').extract()[0]
subSelector.xpath('.//span[4]/text()').extract()[0]

(5) 编写Spider文件 proxy360Spider.py:
# -*- coding: utf-8 -*-
import scrapy
from getProxy.items import GetproxyItem

class Proxy360spiderSpider(scrapy.Spider):
    name = 'proxy360Spider'
    allowed_domains = ['proxy360.cn']

    nations=['Brazil','China','Amercia','Taiwan','Japan','Thailand','Vietnam','bahrein']
    start_urls=[ ]
    for nation in nations:
        start_urls.append('http://www.proxy360.cn/Region/'+nation)

    def parse(self, response):
        subSelector=response.xpath('//div[@class="proxylistitem" and @name="list_proxy_ip"]')
        items=[]
        for sub in subSelector:
            item=GetproxyItem()
            item['ip']=sub.xpath('.//span[1]/text()').extract()[0]
            item['port']=sub.xpath('.//span[2]/text()').extract()[0]
            item['type']=sub.xpath('.//span[3]/text()').extract()[0]
            item['loction']=sub.xpath('.//span[4]/text()').extract()[0]
            item['protocol']='HTTP'
            item['source']='proxy360'
            items.append(item)
        return items
(6)修改pipelines.py文件,处理:
# -*- coding: utf-8 -*-
# Define your item pipelines here
#
# Don't forget to add your pipeline to the ITEM_PIPELINES setting
# See: http://doc.scrapy.org/en/latest/topics/item-pipeline.html
class GetproxyPipeline(object):
def process_item(self, item, spider):
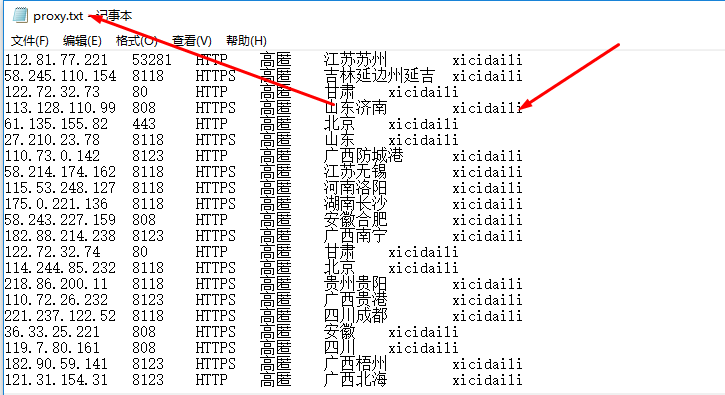
fileName='proxy.txt'
with open(fileName,'a') as fp:
fp.write(item['ip'].encode('utf8').strip()+' ')
fp.write(item['port'].encode('utf8').strip()+' ')
fp.write(item['protocol'].encode('utf8').strip()+' ')
fp.write(item['type'].encode('utf8').strip()+' ')
fp.write(item['loction'].encode('utf8').strip()+' ')
fp.write(item['source'].encode('utf8').strip()+' ')
return item
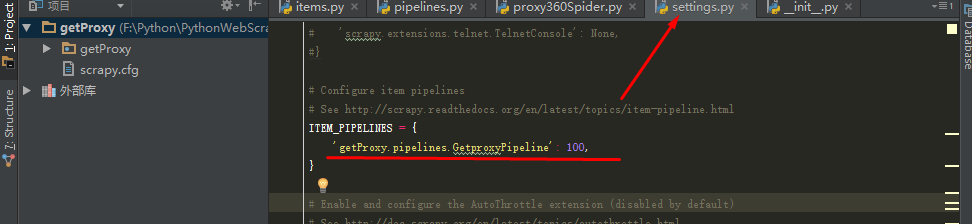
(7)修改Settings.py,决定由哪个文件来处理获取的数据:
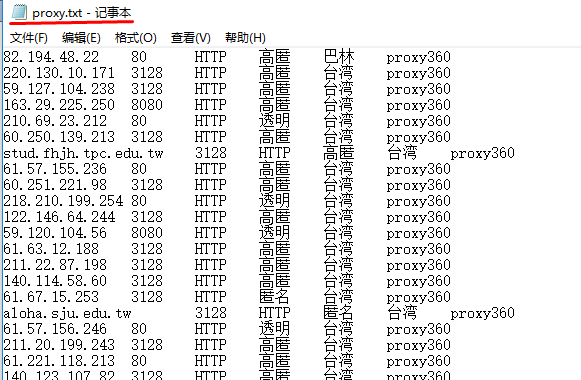
(8)执行结果:
5.多个Spider,只有一个Spdier的时候得到的proxy数据不够多:
(1 )到getProxy目录下,执行:scrapy genspider xiciSpider xicidaili.com

(2)确定如何获取数据:scrapy shell http://www.xicidaili.com/nn/2
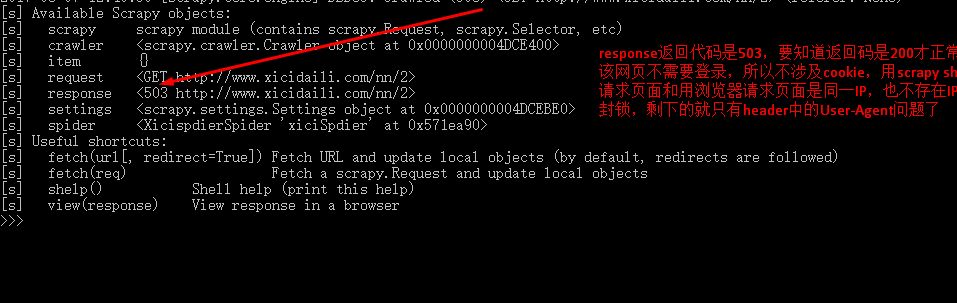
(3)只需要在settings.py中添加一个USER_Agent项就可以了

再次测试如何获取数据:scrapy shell http://www.xicidaili.com/nn/2

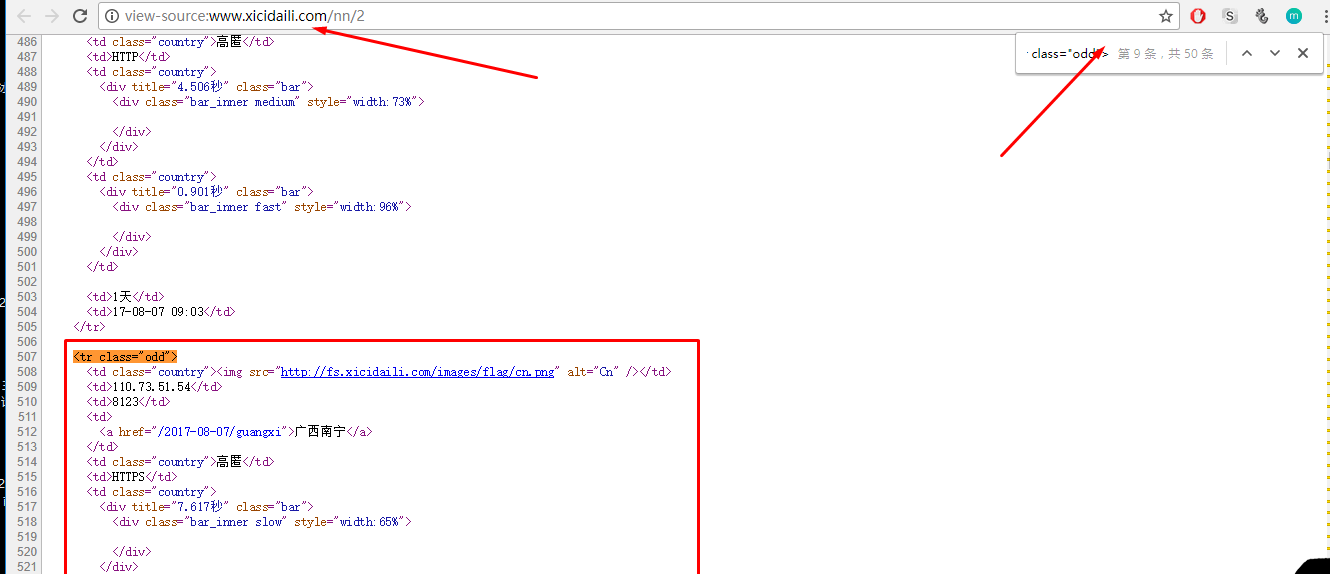
(4)在浏览器中查看源代码:发现所需的数据块都是以<tr class="odd">开头的
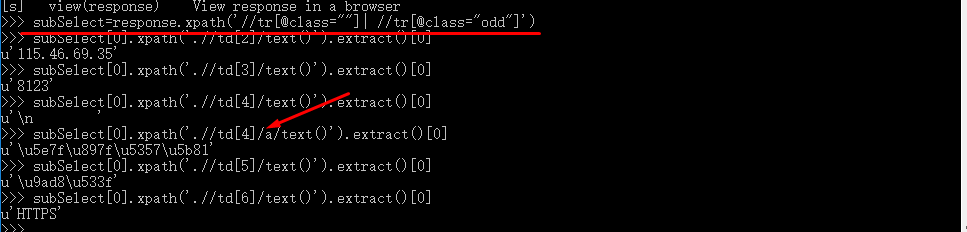
(5)在scrapy shell中执行命令:
subSelector=response.xpath('//tr[@class=""]| //tr[@class="odd"]')
subSelector[0].xpath('.//td[2]/text()').extract()[0]
subSelector[0].xpath('.//td[3]/text()').extract()[0]
subSelector[0].xpath('.//td[4]/a/text()').extract()[0]
subSelector[0].xpath('.//td[5]/text()').extract()[0]
subSelector[0].xpath('.//td[6]/text()').extract()[0]
(6)编写xiciSpider.py:
# -*- coding: utf-8 -*-
import scrapy
from getProxy.items import GetproxyItem

class XicispdierSpider(scrapy.Spider):
    name = 'xiciSpdier'
    allowed_domains = ['xicidaili.com']
    wds=['nn','nt','wn','wt']
    pages=20
    start_urls=[]
    for type in wds:
        for i in xrange(1,pages+1):
            start_urls.append('http://www.xicidaili.com/'+type+'/'+str(i))


    def parse(self, response):
         subSelector=response.xpath('//tr[@class=""]| //tr[@class="odd"]')
         items=[]
         for sub in subSelector:
             item=GetproxyItem()
             item['ip']=sub.xpath('.//td[2]/text()').extract()[0]
             item['port']=sub.xpath('.//td[3]/text()').extract()[0]
             item['type']=sub.xpath('.//td[5]/text()').extract()[0]
             if sub.xpath('.//td[4]/a/text()'):
                 item['loction']=sub.xpath('.//td[4]/a/text()').extract()[0]
             else:
                 item['loction']=sub.xpath('.//td[4]/text()').extract()[0]

             item['protocol']=sub.xpath('.//td[6]/text()').extract()[0]
             item['source']='xicidaili'
             items.append(item)


         return items
(7)执行:scrapy crawl xiciSpider
结果:
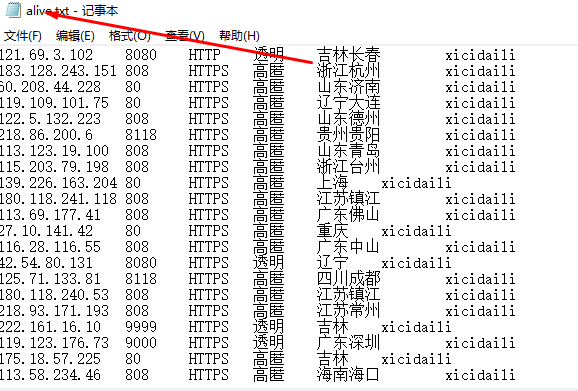
6.验证获取的代理服务器地址是否可用:另外写一个python程序验证代理:testProxy.py
#! /usr/bin/env python
# -*- coding: utf-8 -*-


import urllib2
import re
import threading

class TesyProxy(object):
    def __init__(self):
        self.sFile=r'proxy.txt'
        self.dFile=r'alive.txt'
        self.URL=r'http://www.baidu.com/'
        self.threads=10
        self.timeout=3
        self.regex=re.compile(r'baidu.com')
        self.aliveList=[]

        self.run()

    def run(self):
        with open(self.sFile,'r') as fp:
            lines=fp.readlines()
            line=lines.pop()
            while lines:
                for i in xrange(self.threads):
                    t=threading.Thread(target=self.linkWithProxy,args=(line,))

                    t.start()
                    if lines:
                        line=lines.pop()
                    else:
                        continue

            with open(self.dFile,'w') as fp:
                for i in xrange(len(self.aliveList)):
                    fp.write(self.aliveList[i])

    def linkWithProxy(self,line):
        lineList=line.split('	')
        protocol=lineList[2].lower()
        server=protocol+r'://'+lineList[0]+':'+lineList[1]
        opener=urllib2.build_opener(urllib2.ProxyHandler({protocol:server}))
        urllib2.install_opener(opener)
        try:
            response=urllib2.urlopen(self.URL,timeout=self.timeout)
        except:
            print('%s connect failed' %server)
            return
        else:
            try:
                str=response.read()
            except:
                print('%s connect failed' %server)
                return
            if self.regex.search(str):
                print('%s connect success ............' %server)
                self.aliveList.append(line)


if __name__ == '__main__':
    TP=TesyProxy()


执行命令:python testProxy.py
结果: