首先说明一下:原本我是跟着尚硅谷的周阳老师的视频去安装mysql的,但是槽点来啦!!!!
老是报这个错误
libgcc_s.so.1 must be installed for pthread_cancel to work
百度一下(面向百度编程),结果搞了好久,不行,我真的是佛了,算了,还是自己百度安装吧!
说到这里,我不知道是不是 centos版本的问题,因为老师的是centos6,而7 自带了mariadb,直接
安装会不会用冲突!!
版本:centos7
mysql: 5.5.48
这里说一下去官网下靠谱点
找到一篇靠谱的博客 ,参照这个来搞 :https://blog.csdn.net/qq_34983808/article/details/78757669
1、上传下载到的MySQL rpm 包到虚拟机centos上并解压到指定的目录下
资源(拿走不谢) https://pan.baidu.com/s/1CpmcJ077SyFCyIG_bdWBUQ 提取码 x9lw
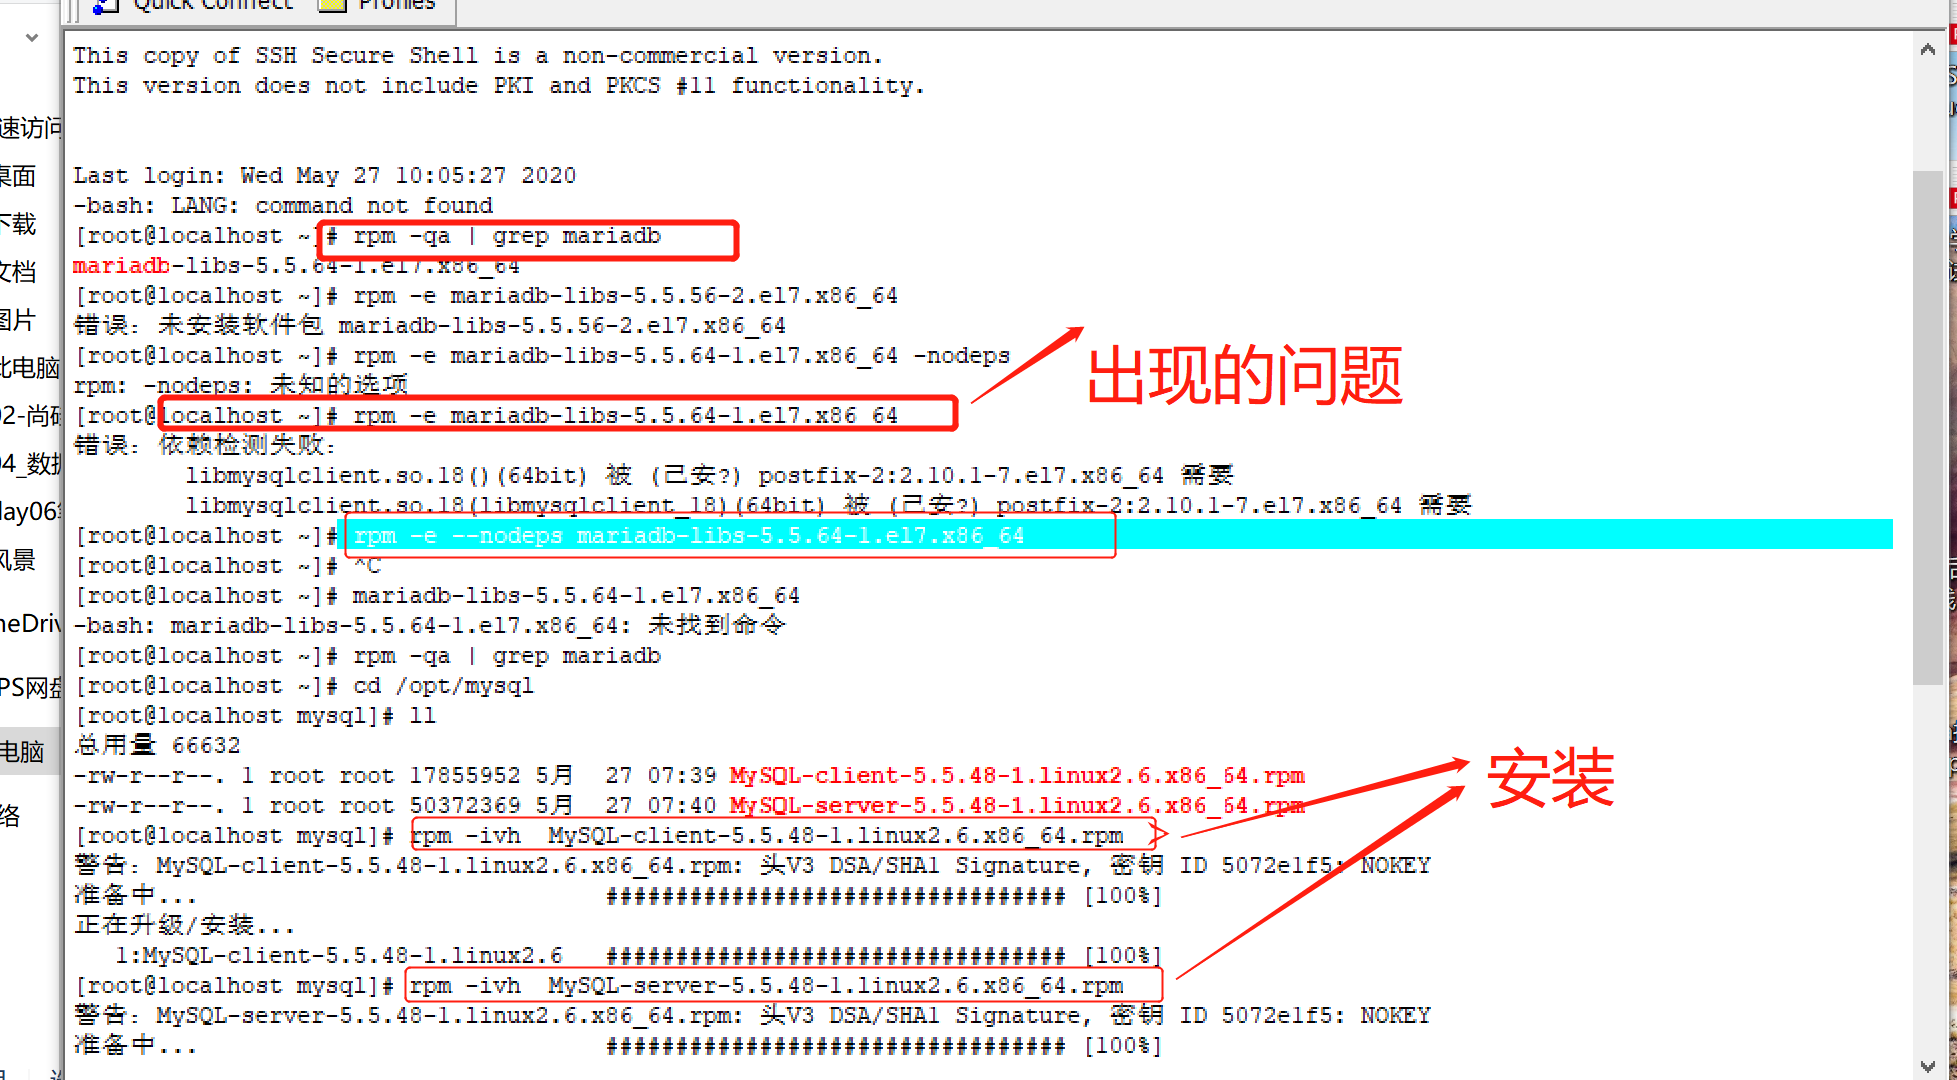
2、卸载centos7自带的mariadb,不然安装MySQL的时候会和mariadb文件相冲突导致安装不成功
1) 查看有没有rpm安装过mariadb : rpm -qa | grep mariadb
2) 移除mariadb : rpm -e --nodeps mariadb-libs-5.5.64-1.el7.x86_64
按照上述博客来搞有报错,没错的自动忽略,解决错误:https://blog.csdn.net/Hiqingtian/article/details/79022586
3、安装MySQL服务端和客户端
rpm -ivh MySQL-server-5.5.48-1.linux2.6.x86_64.rpm
rpm -ivh MySQL-client-5.5.48-1.linux2.6.x86_64.rpm

注意:安装完MySQL-server后,会出现如下提示

我大致翻译下:
请记得为mysql的root用户设置一个密码 ,
开启mysql服务,并执行如下指令:
/usr/bin/mysqladmin -u root password 'new-password'
/usr/bin/mysqladmin -u root -h localhost.localdomain password 'new-password'
或者
/usr/bin/mysql_secure_installation
这也将为您提供删除测试的选项
数据库和默认创建的匿名用户。 这是
强烈建议用于生产服务器。
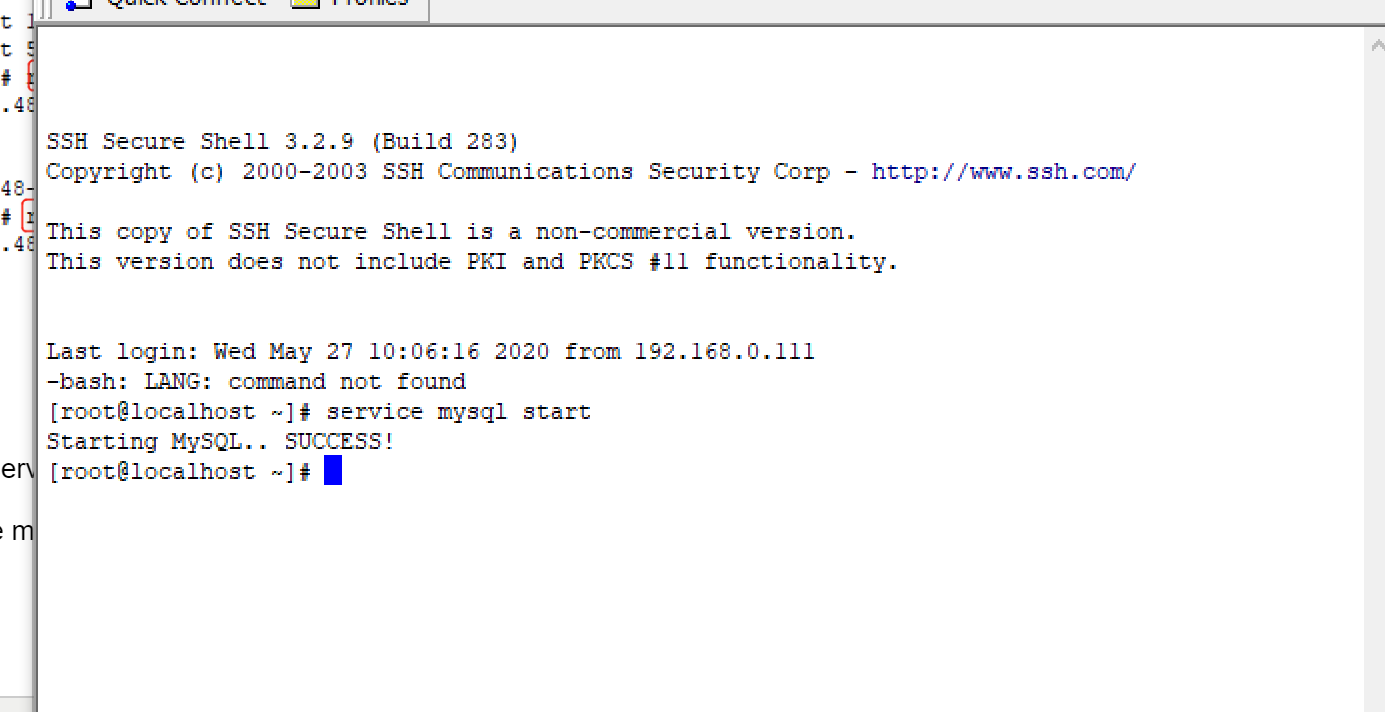
4、查看MySQL启动状态 :service mysql status
开启MySQL服务:service mysql start

5、修改密码
[root@localhost ~]# /usr/bin/mysql_secure_installation


NOTE: RUNNING ALL PARTS OF THIS SCRIPT IS RECOMMENDED FOR ALL MySQL
      SERVERS IN PRODUCTION USE!  PLEASE READ EACH STEP CAREFULLY!


In order to log into MySQL to secure it, we'll need the current
password for the root user.  If you've just installed MySQL, and
you haven't set the root password yet, the password will be blank,
so you should just press enter here.

Enter current password for root (enter for none):
OK, successfully used password, moving on...

Setting the root password ensures that nobody can log into the MySQL
root user without the proper authorisation.

Set root password? [Y/n] Y
New password:
Re-enter new password:
Password updated successfully!
Reloading privilege tables..
 ... Success!


By default, a MySQL installation has an anonymous user, allowing anyone
to log into MySQL without having to have a user account created for
them.  This is intended only for testing, and to make the installation
go a bit smoother.  You should remove them before moving into a
production environment.

Remove anonymous users? [Y/n] y   //移除默认创建的匿名用户
 ... Success!

Normally, root should only be allowed to connect from 'localhost'.  This
ensures that someone cannot guess at the root password from the network.

Disallow root login remotely? [Y/n] n  //不允许远程登录
 ... skipping.

By default, MySQL comes with a database named 'test' that anyone can
access.  This is also intended only for testing, and should be removed
before moving into a production environment.

Remove test database and access to it? [Y/n] y   //移除测试数据库
 - Dropping test database...
 ... Success!
 - Removing privileges on test database...
 ... Success!

Reloading the privilege tables will ensure that all changes made so far
will take effect immediately.

Reload privilege tables now? [Y/n] y   // 重新加载表的权限
 ... Success!

Cleaning up...


All done!  If you've completed all of the above steps, your MySQL
installation should now be secure.

Thanks for using MySQL!
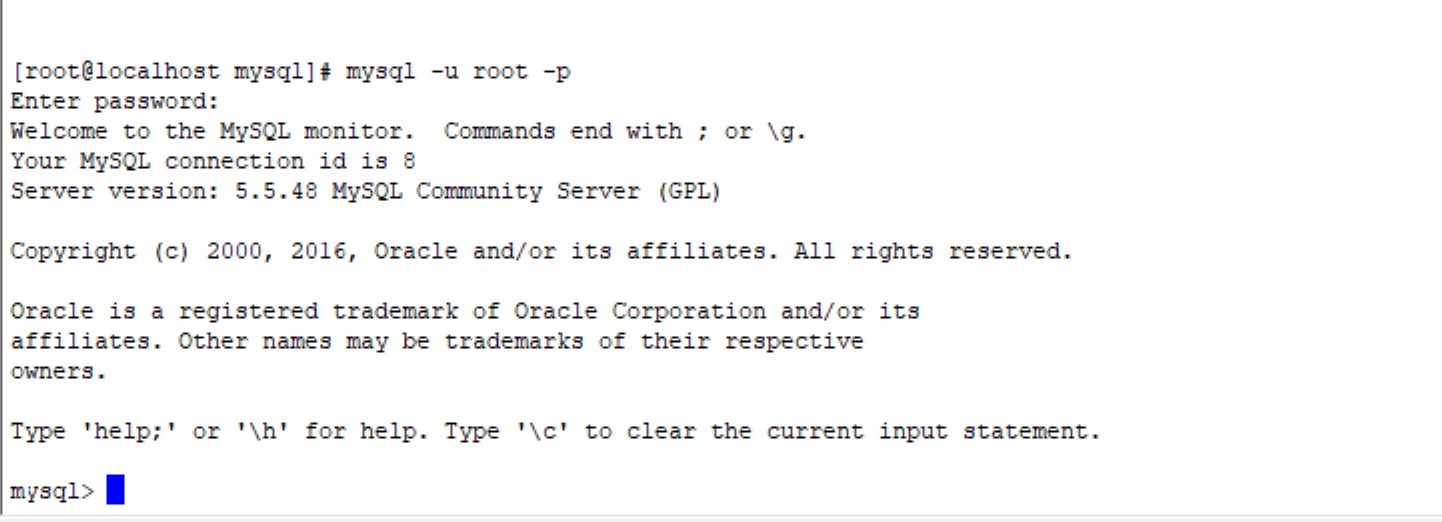
6、登录测试
mysql -uroot -p123:成功
