说明:
Adding Oracle RAC to Nodes with Oracle Clusterware Installed步骤来自ORACLE 官方文档:
https://docs.oracle.com/cd/E11882_01/rac.112/e41960/adddelunix.htm#RACAD7358
Adding and Deleting Cluster Nodes详细操作步骤参考:
https://docs.oracle.com/cd/E11882_01/rac.112/e41959/adddelclusterware.htm#CWADD90987
实验环境情况如下:
|
实验 |
节点名称 |
数据库实例名 |
操作系统 |
数据库版本 |
|
添加节点3 |
rac1/rac2(已经卸载)/rac3(现添加的节点) |
orcl1/orcl3(现添加) |
Linux 6.X |
oracle11.2.0.4 |
grid:GRID_HOME 名称为 ORACLE_HOME 路径为:/u01/app/11.2.0/grid
oracle:ORACLE_HOME 路径为:/u01/app/oracle/product/11.2.0/dbhome_1
操作大致以下步骤:
- 添加GI
- 安装oracle 软件
- 添加实例
1. 添加RAC 节点(安装GI)
1.1添加前环境准备
注意:环境准备参照我之前博客静默安装的环境准备:
http://www.cnblogs.com/hmwh/articles/8484696.html
需要注意的是IP地址添加到/etc/hosts,以及 grid,oracle 用户创建以及节点间的ssh互信,共享磁盘设置,创建的目录要一致,环境变量要修改,添加内核参数等。
1.2安装GI前预检查
1.2.1CVU 检查硬件和操作系统
官方是用的以下模板:
$ cluvfy comp peer [-refnode ref_node] -n node_list [-orainv orainventory_group] [-osdba osdba_group] [-verbose]
说明: From the Grid_home/bin directory on an existing node, run the CVU command to obtain a detailed comparison of the properties of the reference node with all of the other nodes that are part of your current cluster environment. Replace ref_node with the name of a node in your existing cluster against which you want CVU to compare the nodes to be added. Specify a comma-delimited list of nodes after the -n option. In the following example, orainventory_group is the name of the Oracle Inventory group, and osdba_group is the name of the OSDBA group:
[grid@racdg1 grid]$ cluvfy comp peer -n racdg1,racdg3 -verbose > /home/grid/prechek.log

无报错
1.2.2CVU检查 RAC3 是否满足
官方模板如下:
$ cluvfy stage -pre nodeadd -n node3 [-fixup [-fixupdir fixup_dir]] [-verbose]
[grid@racdg1 grid]$ cluvfy stage -pre nodeadd -n racdg3 -verbose > /home/grid/rac3check.log

/etc/resolv.conf 报错可以忽略。
1.3 安装GIRD 软件(扩展GI)
由于书写太麻烦,就未考虑共享情况,共享情况相应操作链接如下:
https://docs.oracle.com/cd/E11882_01/rac.112/e41959/adddelclusterware.htm#CWADD90992
以下是非共享情况:
在Grid_home/oui/bin 下执行安装addNode.sh 语句
1.3.1 If you are using Grid Naming Service (GNS), run the following command:
$ ./addNode.sh "CLUSTER_NEW_NODES={node3}"
1.3.2If you are not using GNS, run the following command:
$ ./addNode.sh "CLUSTER_NEW_NODES={node3}" "CLUSTER_NEW_VIRTUAL_HOSTNAMES={node3-vip}"
注意:
如果有多个节点需要添加,用以下格式:
"CLUSTER_NEW_NODES={node3,node4,node5}"
"CLUSTER_NEW_VIRTUAL_HOSTNAMES={node3-vip,node4-vip,node5-vip}"
特别提醒:
由于addNode.sh脚本中对自检过程进行了判断,/etc/resolv.conf 报错导致安装进行不下去,可以grid手动跳过自检命令:(10G 不用)
export IGNORE_PREADDNODE_CHECKS=Y
默认是是静默安装:
节点1执行:
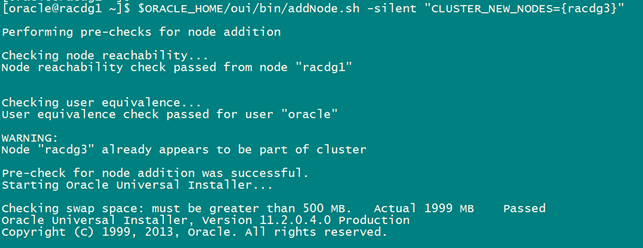
[grid@racdg1 grid]$ $ORACLE_HOME/oui/bin/addNode.sh -silent "CLUSTER_NEW_NODES={racdg3}" "CLUSTER_NEW_VIRTUAL_HOSTNAMES={racdg3-vip}"
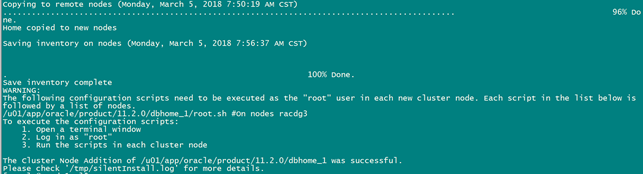
部分展示结果如下:

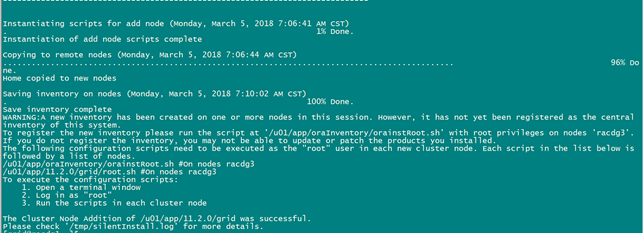
节点3 ROOT执行以下两个脚本:
/u01/app/oraInventory/orainstRoot.sh
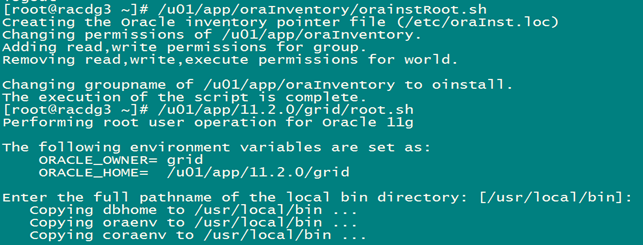
/u01/app/11.2.0/grid/root.sh
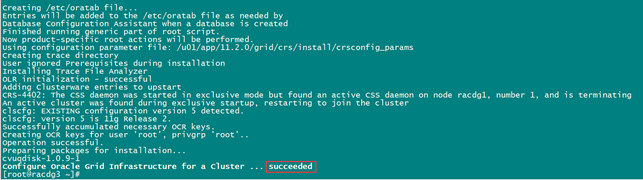
添加GI成功。
查看成功后的集群资源:
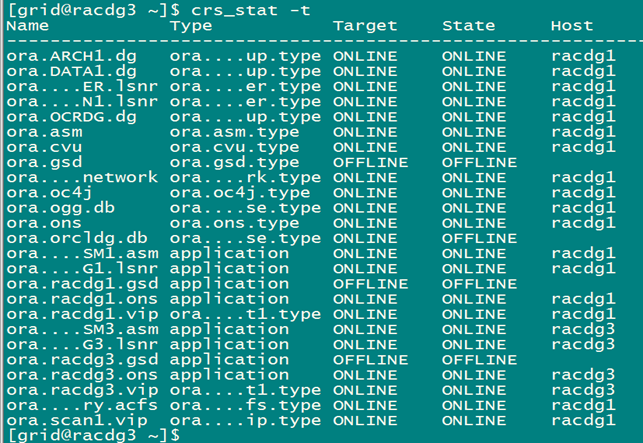
ASM 实例为+ASM3
2. 安装ORACLE rac软件
2.1安装oracle 软件
同理安装oracle 软件
Oracle_home/oui/bin 目录下 oracle 执行
2.1.1Local 本地目录安装
官方模板:
$ ./addNode.sh "CLUSTER_NEW_NODES={node3}"
$ORACLE_HOME/oui/bin/addNode.sh -silent "CLUSTER_NEW_NODES={racdg3}"
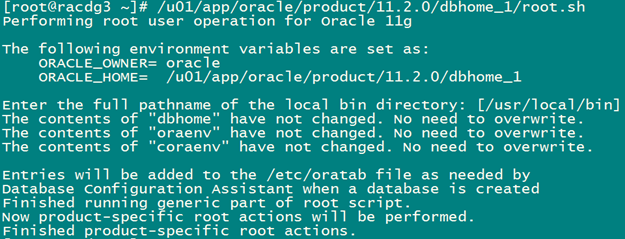
执行几下脚本:
/u01/app/oracle/product/11.2.0/dbhome_1/root.sh 节点3
2.1.2共享目录安装
由于书写太麻烦,就未考虑共享情况,共享情况相应操作链接如下:
https://docs.oracle.com/cd/E11882_01/rac.112/e41959/adddelclusterware.htm#CWADD90992
2.1.3验证
自行验证(可以查看生成的目录,opatch 命令等)。
3. 添加实例
3.1添加实例
注意:
此步骤为添加Administrator-Managed 数据库实例。
Policy-Managed 数据库实例为:emca -addNode db
3.1.1图形界面添加:
节点1 dbca
参照我之前的删除11G rac 节点
http://www.cnblogs.com/hmwh/articles/8493588.html
3.1.2 静默添加
官方模板:
dbca -silent -addInstance -nodeList node_name -gdbName gdb_name
[-instanceName instance_name -sysDBAUserName sysdba -sysDBAPassword password]
(根据具体情况)如下:
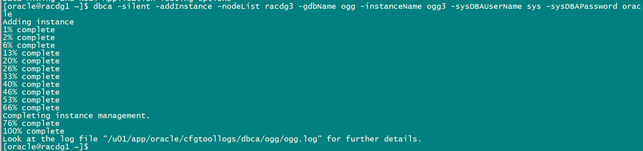
[oracle@racdg1 ~]$ dbca -silent -addInstance -nodeList racdg3 -gdbName ogg -instanceName ogg3 -sysDBAUserName sys -sysDBAPassword oracle
结果如下:
3.1.4 验证
例如:
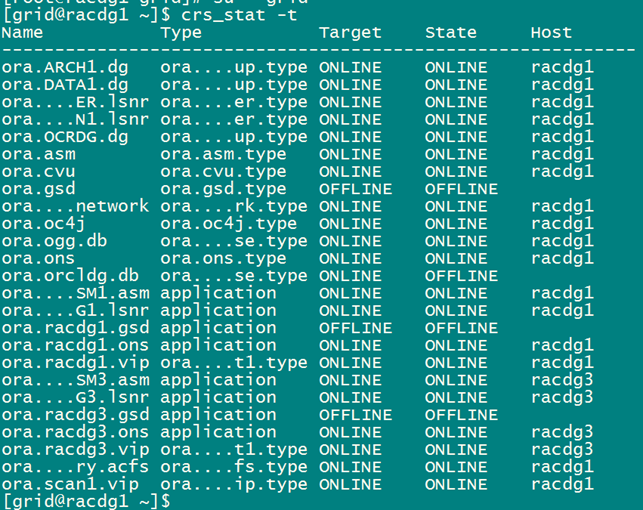
查看集群资源:
查看数据库实例:
set lin 150 pages 100
select INST_ID,INSTANCE_NUMBER,INSTANCE_NAME,HOST_NAME,STATUS from gv$instance;

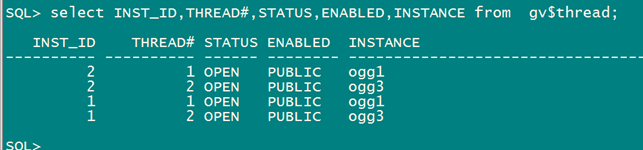
查看线程:
select INST_ID,THREAD#,STATUS,ENABLED,INSTANCE from gv$thread;
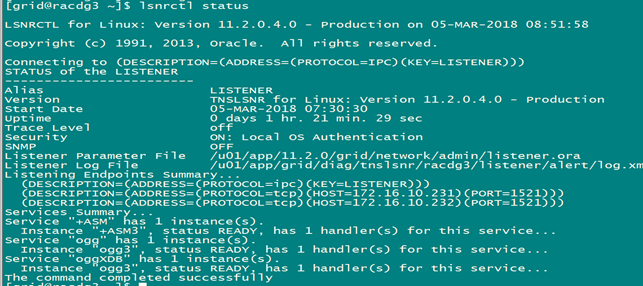
查看监听: