前言
为什么要搭建docker-hub
第一,由于众所周知的原因,我们从docker下载镜像的时候,速度慢,而我们自己搭建docker-hub速度则很快。
第二,官方的镜像有的时候无法满足我们的业务需求,我们需要进行定制开发,在完成之后,上传到公司内部的docker-hub中,方便其他人进行下载。
基于以上的原因,我们就需要搭建自己的docker-hub了。
经过上面的需求分析,我们选择了harbor来搭建我们的docker-hub。
1. 什么是harbor
Harbor正是一个用于存储Docker镜像的企业级Registry服务。是一个开源的可信云本机注册表项目,用于存储,签名和扫描内容。
2. harbor特征
- 云本机注册表:Harbour 支持容器映像和Helm图表,可作为容器运行时和业务流程平台等云本机环境的注册表。
- 基于角色的访问控制:用户和存储库通过“项目”进行组织,用户可以对项目下的图像或Helm图表拥有不同的权限。
- 基于策略的复制:可以基于具有多个过滤器(存储库,标记和标签)的策略在多个注册表实例之间复制(同步)图像和图表。如果遇到任何错误,Harbor会自动重试复制。非常适合负载平衡,高可用性,多数据中心,混合和多云场景。
- 漏洞扫描:Harbor定期扫描图像并警告用户漏洞。
- LDAP / AD支持:Harbor与现有企业LDAP / AD集成以进行用户身份验证和管理,并支持将LDAP组导入Harbor并为其分配适当的项目角色。
- OIDC支持:Harbour利用OpenID Connect(OIDC)来验证由外部授权服务器或身份提供商进行身份验证的用户的身份。可以启用单点登录以登录Harbor门户。
- 图像删除和垃圾收集:可以删除图像,并可以回收它们的空间。
- 公证人:可以确保图像的真实性。
- 图形用户门户:用户可以轻松浏览,搜索存储库和管理项目。
- 审计:跟踪存储库的所有操作。
- RESTful API:适用于大多数管理操作的RESTful API,易于与外部系统集成。嵌入式Swagger UI可用于探索和测试API。
- 轻松部署:提供在线和离线安装程序。此外,Helm Chart可用于在Kubernetes上部署Harbor。
3. harbor的安装
安装分为在线安装和离线安装,我们这里选择在线安装。
3.1 目标环境的要求
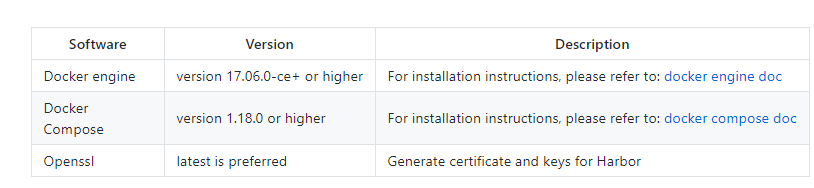
需要安装docker和docker-compose,且有如下要求:docker 17.06.0-ce+ and docker-compose 1.18.0+
3.1.1 硬件
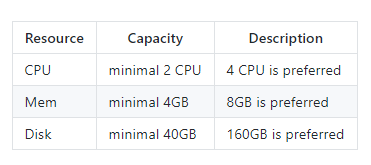
3.1.2 软件
3.1.3 网络端口

3.2 安装步骤
3.2.1 下载安装文件
我们可以从这里看所有的版本。
在线安装
$ tar xvf harbor-online-installer-<version>.tgz
离线安装:
$ tar xvf harbor-offline-installer-<version>.tgz
3.2.2 配置harbor.yml
必须设置的参数:
- hostname:目标机器的ip地址,可以是域名和公网ip,不能设置为127.0.0.1和localhost。
- data_volume:harbor数据的存放地址。
- harbor_admin_password:管理员密码,默认admin/Harbor12345 ,且只会生效一次。
- database:数据库相关配置,默认密码root123
- jobservice
- log:日志相关
- level: 日志的级别,debug, info, warning, error, fatal;
- rotate_count:最多保存几个日志文件
- rotate_size:每个日志文件的大小
- location:日志存放目录
可选的参数。
- http:http服务的端口号
- https:
- port:端口号
- certificate:ssl证书
- private_key:ssl-key的路径
- external_url:external proxy启用的时候,external_url可用,但是hostname不再可用。
贴出我的配置文件:
# Configuration file of Harbor

# The IP address or hostname to access admin UI and registry service.
# DO NOT use localhost or 127.0.0.1, because Harbor needs to be accessed by external clients.
hostname: *.*.*.*

# http related config
http:
  # port for http, default is 80. If https enabled, this port will redirect to https port
  port: 80

# https related config
# https:
#   # https port for harbor, default is 443
#   port: 443
#   # The path of cert and key files for nginx
#   certificate: /your/certificate/path
#   private_key: /your/private/key/path

# Uncomment external_url if you want to enable external proxy
# And when it enabled the hostname will no longer used
# external_url: https://reg.mydomain.com:8433

# The initial password of Harbor admin
# It only works in first time to install harbor
# Remember Change the admin password from UI after launching Harbor.
harbor_admin_password: Harbor12345

# Harbor DB configuration
database:
  # The password for the root user of Harbor DB. Change this before any production use.
  password: root123

# The default data volume
data_volume: /opt/docker-hub/data

# Harbor Storage settings by default is using /data dir on local filesystem
# Uncomment storage_service setting If you want to using external storage
# storage_service:
#   # ca_bundle is the path to the custom root ca certificate, which will be injected into the truststore
#   # of registry's and chart repository's containers.  This is usually needed when the user hosts a internal storage with self signed certificate.
#   ca_bundle:

#   # storage backend, default is filesystem, options include filesystem, azure, gcs, s3, swift and oss
#   # for more info about this configuration please refer https://docs.docker.com/registry/configuration/
#   filesystem:
#     maxthreads: 100
#   # set disable to true when you want to disable registry redirect
#   redirect:
#     disabled: false

# Clair configuration
clair:
  # The interval of clair updaters, the unit is hour, set to 0 to disable the updaters.
  updaters_interval: 12

  # Config http proxy for Clair, e.g. http://my.proxy.com:3128
  # Clair doesn't need to connect to harbor internal components via http proxy.
  http_proxy:
  https_proxy:
  no_proxy: 127.0.0.1,localhost,core,registry

jobservice:
  # Maximum number of job workers in job service
  max_job_workers: 10

chart:
  # Change the value of absolute_url to enabled can enable absolute url in chart
  absolute_url: disabled

# Log configurations
log:
  # options are debug, info, warning, error, fatal
  level: info
  # Log files are rotated log_rotate_count times before being removed. If count is 0, old versions are removed rather than rotated.
  rotate_count: 50
  # Log files are rotated only if they grow bigger than log_rotate_size bytes. If size is followed by k, the size is assumed to be in kilobytes.
  # If the M is used, the size is in megabytes, and if G is used, the size is in gigabytes. So size 100, size 100k, size 100M and size 100G
  # are all valid.
  rotate_size: 200M
  # The directory on your host that store log
  location: /var/log/harbor

#This attribute is for migrator to detect the version of the .cfg file, DO NOT MODIFY!
_version: 1.8.0

# Uncomment external_database if using external database.
# external_database:
#   harbor:
#     host: harbor_db_host
#     port: harbor_db_port
#     db_name: harbor_db_name
#     username: harbor_db_username
#     password: harbor_db_password
#     ssl_mode: disable
#   clair:
#     host: clair_db_host
#     port: clair_db_port
#     db_name: clair_db_name
#     username: clair_db_username
#     password: clair_db_password
#     ssl_mode: disable
#   notary_signer:
#     host: notary_signer_db_host
#     port: notary_signer_db_port
#     db_name: notary_signer_db_name
#     username: notary_signer_db_username
#     password: notary_signer_db_password
#     ssl_mode: disable
#   notary_server:
#     host: notary_server_db_host
#     port: notary_server_db_port
#     db_name: notary_server_db_name
#     username: notary_server_db_username
#     password: notary_server_db_password
#     ssl_mode: disable

# Uncomment external_redis if using external Redis server
# external_redis:
#   host: redis
#   port: 6379
#   password:
#   # db_index 0 is for core, it's unchangeable
#   registry_db_index: 1
#   jobservice_db_index: 2
#   chartmuseum_db_index: 3

# Uncomment uaa for trusting the certificate of uaa instance that is hosted via self-signed cert.
# uaa:
#   ca_file: /path/to/ca
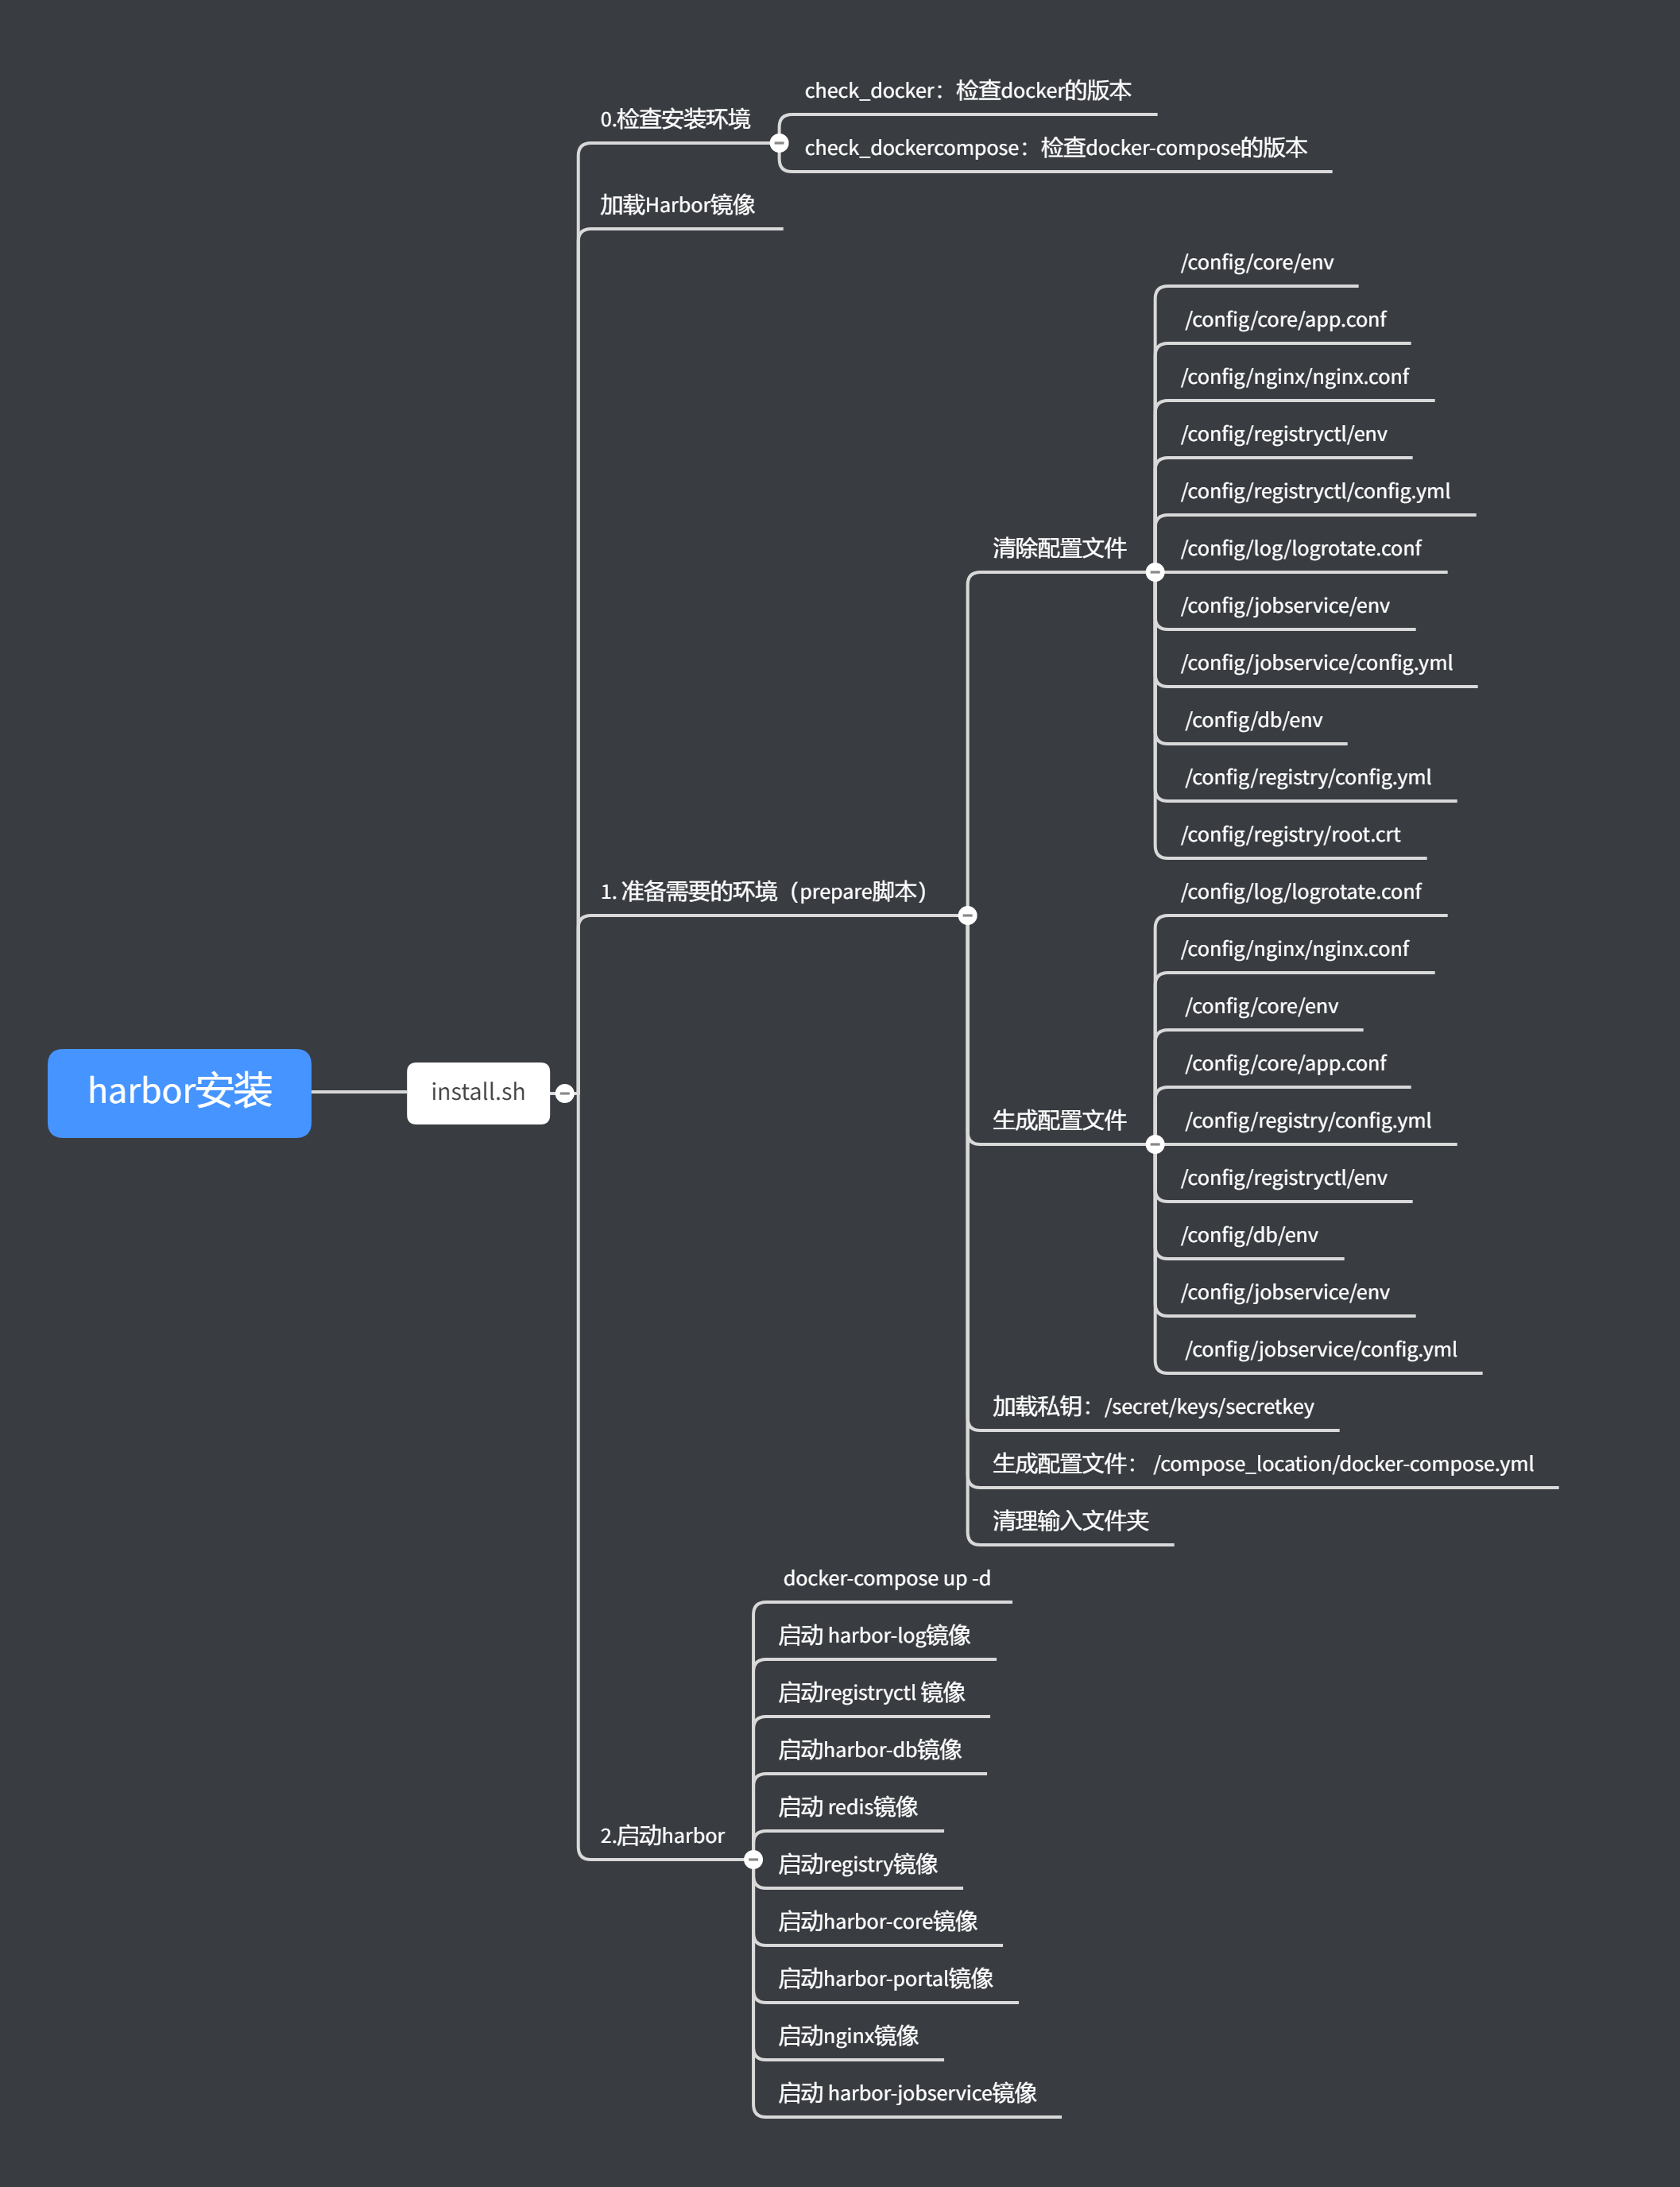
3.2.3 执行安装并启动
bash install.sh
我们分析下install.sh。
文档链接:https://mubu.com/doc/OOec-ZgGu 密码:eu3u
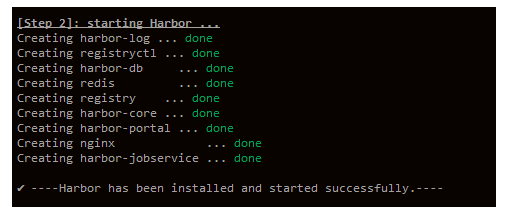
如果执行成功,会出现如下提示:
我们可以在浏览器输入提下内容,将看到启动界面如下:
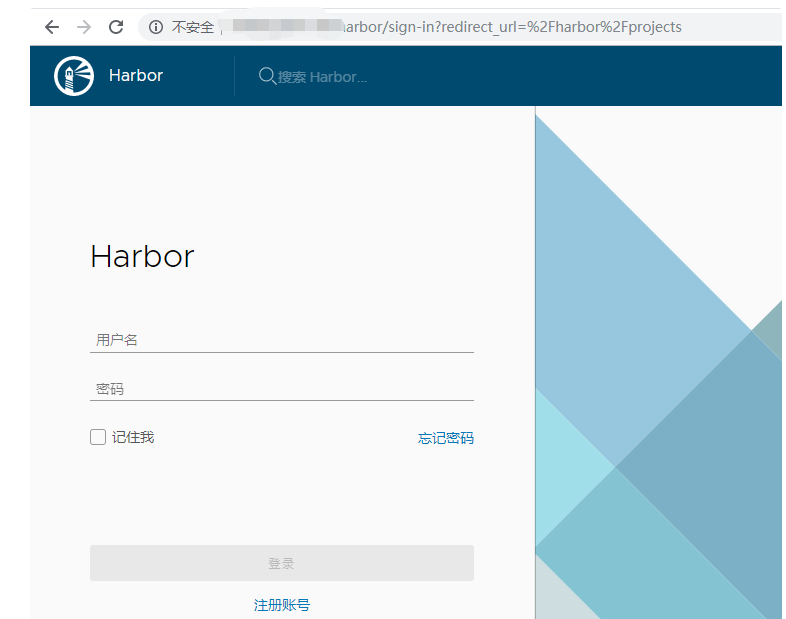
输入用户名和密码后,我们可以看到我们的docker-hub仓库。
3.2.4 管理Harbor的生命周期
docker-compose stop
docker-compose start
4. harbor的使用
这部分是十分庞大的,我就简单的介绍下常用的,完整的文档见这里。
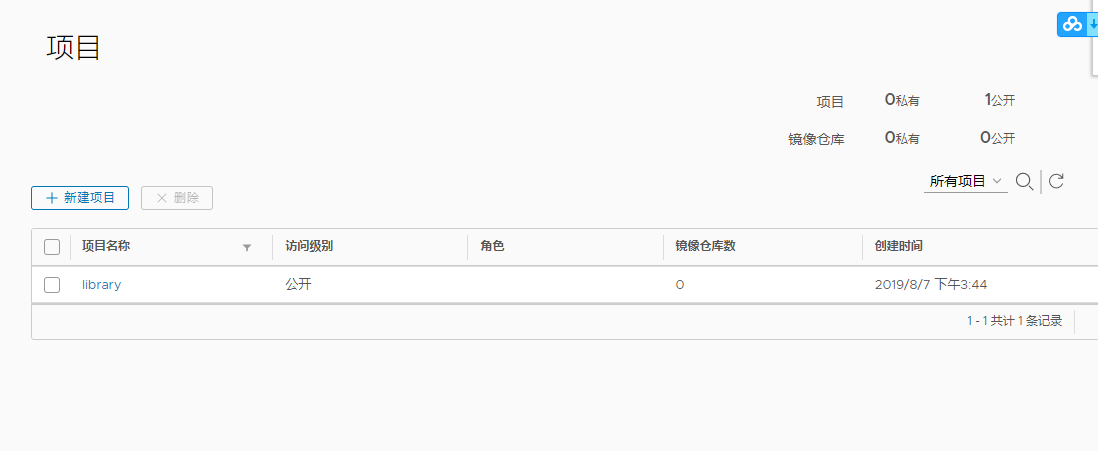
4.1 创建项目
项目可以分为公有的和私有的。
具体的操作不再赘述,去操作一遍就都会了。
4.2 拉取/推送镜像
首先我们需要进行登录,docker login ip
但是我们可能遇到下面的错误。

这样的原因是因为Harbor默认使用http,docker默认使用https的原因。
我们可以强制docker使用http,要在daemon.json中添加--insecure-registry myregistrydomain.com,即
{
  "log-driver":"json-file",
  "log-opts": {"max-size":"100m", "max-file":"1"},
  "insecure-registries" : ["myregistrydomain.com"]
}
然后我们还可能遇到下面的错误:

在github上的官方找到了下面的解决方案:原因是因为ubuntu上安装docker-compose的时候,不需要golang-docker-credential-helpers这个组件,我们把它删除即可,所以apt-get remove golang-docker-credential-helpers
这是第一种方案,第二中方案是让Harbor使用https,即申请一个CA证书,然后把CA证书放在/etc/docker/certs.d/myregistrydomain.com/ca.crt中。
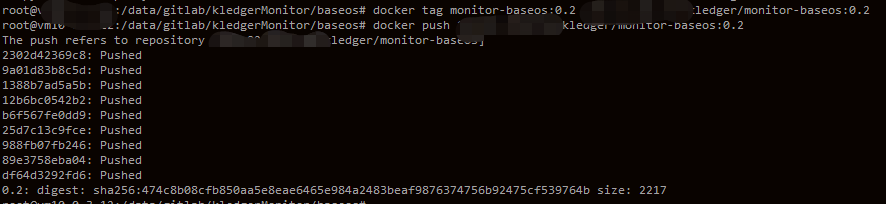
下面我们进行推送镜像。
docker tag monitor-baseos:0.2 ip/kledger/monitor-baseos:0.2
docker push ip/kledger/monitor-baseos:0.2
记得替换ip。
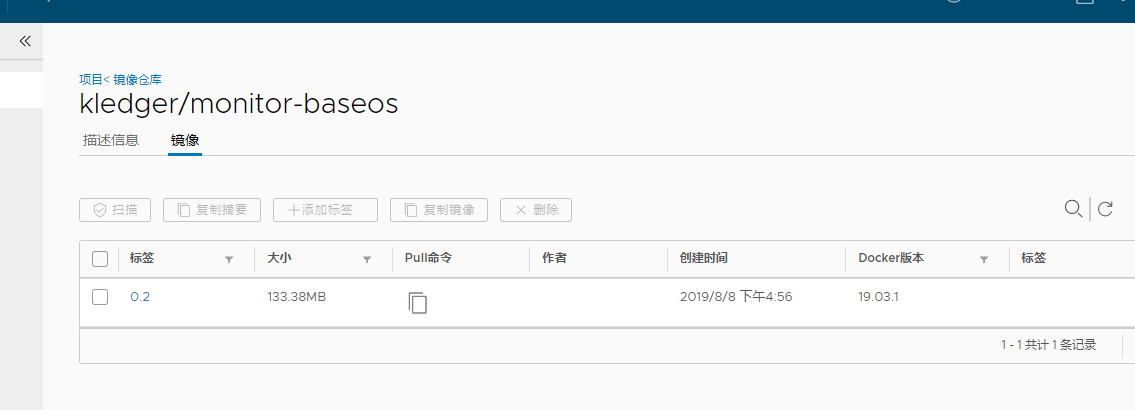
然后我们在浏览器中就可以看到了。
拉取镜像就更加简单了。
docker pull ip/kledger/monitor-baseos:0.2
同样的记得修改ip地址。