yaml相比json来说数据表示更加简洁,特别适合用来读取/更新配置文件,和json一样,也是一种数据串行化格式。json的序列化和反序列化可参考Python json文件读写,下面来介绍在Python中PyYAML库解析、保存yaml文件的方法。
YAML介绍
YAML是YAML Ain't a Markup Language(YAML不是一种标记语言)的缩写,它其实也是一种标记语言(Yet Another Markup Language),但为了强调这种语言以数据作为中心,而不是以标记语言为重点,而用反向缩略语重命名。(维基百科:https://zh.wikipedia.org/wiki/YAML)
YAML和JSON差异
- YAML使用缩进表示层级关系,使用空格进行缩进,JSON使用大括号和方括号
- YAML允许使用
#注释,JSON不能 - YAML的字符串可以使用单引号或者双引号,JSON必须使用双引号
YAML文档:
Arrays:
- 1
- 2
- 3
Dicts:
  '1': 1
  '2': 2
Numbers: 1
Strings: value
JSON文档:
{
    "Arrays": [
        1,
        2,
        3
    ],
    "Numbers": 1,
    "Strings": "value"
}
yaml序列化
Python 安装 PyYAML库
pip install pyyaml
dump
dump函数将Python对象序列化为一个YAML文档或者字符串。
import yaml
data1 = {'Numbers':1, 'Strings':"value", 'Arrays':[1,2,3], 'Dicts':{'1':1,'2':2}}
data = yaml.dump(data1, explicit_start=True)
print(data)
print(type(data))
执行结果:
---
Arrays:
- 1
- 2
- 3
Dicts:
  '1': 1
  '2': 2
Numbers: 1
Strings: value

<class 'str'>
dump_all
序列化多组对象,yaml文件中的多组数据用---分隔。
data2 = [1,2,3]
print(yaml.dump_all([data1,data2], explicit_start=True))
执行结果:
---
Arrays:
- 1
- 2
- 3
Dicts:
  '1': 1
  '2': 2
Numbers: 1
Strings: value
---
- 1
- 2
- 3
保存到文件中
可以将序列化数据保存到文件中。
with open("data1.yaml", "w", encoding="utf-8") as f:
    yaml.dump(data1,f,allow_unicode=True)
序列化类实例
和json一样,也可以序列化类实例。
class Person(yaml.YAMLObject):
yaml_tag = u'!Person'
def __init__(self, name, height):
self.name = name
self.height = height
def __repr__(self):
return f"{self.name}‘s height is {self.height}cm"
p = Person(name='zhangsan', height=175)
print(p)
print(yaml.dump(p))
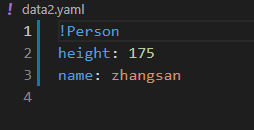
with open("data2.yaml", "w", encoding="utf-8") as f:
yaml.dump(p,f,allow_unicode=True)
执行结果:
zhangsan‘s height is 175cm
!Person
height: 175
name: zhangsan
yaml反序列化
主要有load、safe_load、load_all和safe_load_all4种方法,safe_load()方法只识别标准的YAML标签,防止不信任的对象输入。
load
支持任意类型的python对象,
datas = '{"Numbers":1, "Strings":"value", "Arrays":[1,2,3]}'
# data = yaml.safe_load(datas)
data = yaml.load(datas)
print(data)
print(type(data))
执行结果:
{'Numbers': 1, 'Strings': 'value', 'Arrays': [1, 2, 3]}
<class 'dict'>
load_all
加载多组序列化yaml数据
with open("data1.yaml", encoding="utf-8") as f:
    datas = yaml.load_all(f)
    print(datas)
    for data in datas:
        print(data)
        print(type(data))
执行结果:
<generator object load_all at 0x000001D8AE697CC8>
{'Arrays': [1, 2, 3], 'Dicts': {'1': 1, '2': 2}, 'Numbers': 1, 'Strings': 'value'}
<class 'dict'>
修改字段内容
import yaml

with open("data1.yaml", encoding="utf-8") as f:
    # data = yaml.safe_load(f)
    data = yaml.load(f)
    data['Arrays'].append(4)
    data['Strings'] = 'hello'
    # data.update({data['Strings']:hello})
    print(data)

with open("data1.yaml", "w", encoding="utf-8") as f:
    yaml.dump(data,f,allow_unicode=True)
执行结果:
{'Arrays': [1, 2, 3, 4], 'Dicts': {'1': 1, '2': 2}, 'Numbers': 1, 'Strings': 'hello'}
加载Python类实例
和json一样,也支持加载Python类的实例
import yaml

class Person(yaml.YAMLObject):
  yaml_tag = u'!Person'
  def __init__(self, name, height):
    self.name = name
    self.height = height

  def __repr__(self):
    return f"{self.name}‘s height is {self.height}cm"

with open("data2.yaml", encoding="utf-8") as f:
    p = yaml.load(f)
    print(p.name)
执行结果:
zhangsan
参考文档:
pyyaml官方文档:https://pyyaml.org/wiki/PyYAMLDocumentation
欢迎关注公众号:「测试开发小记」及时接收最新技术文章!