Cobbler服务器系统:CentOS 7 64位
IP地址:192.168.17.181
第一部分:在Cobbler服务器上操作
1、配置系统
关闭firewalld防火墙
[root@sky ~]# systemctl stop firewalld.service[root@sky ~]# systemctl disable firewalld.service[root@sky ~]# firewall-cmd --statenot running |
关闭SELinux(修改完重启)
[root@sky ~]# sed -i 's/SELINUX=enforcing/SELINUX=disabled/' /etc/selinux/config[root@sky ~]# reboot |
2、安装cobbler
安装epel源
[root@sky ~]# cd /etc/yum.repos.d/[root@sky yum.repos.d]# yum -y install epel-release |
安装cobbler
[root@sky yum.repos.d]# yum install -y cobbler cobbler-web tftp xinetd dhcp cman pykickstart debmirror syslinux net-tools |
安装cobbler依赖包
[root@sky yum.repos.d]# yum install -y ed patch perl perl-Compress-Zlib perl-Digest-SHA1 perl-LockFile-Simple perl-libwww-perl fence-agents设置服务开机启动
[root@sky yum.repos.d]# systemctl enable httpd.service[root@sky yum.repos.d]# systemctl enable dhcpd.service[root@sky yum.repos.d]# systemctl enable xinetd.service[root@sky yum.repos.d]# systemctl enable cobblerd.service |
查看服务开启状态
[root@sky yum.repos.d]# systemctl list-unit-files | grep -E "httpd|dhcpd|xinetd|cobblerd"cobblerd.service enabled dhcpd.service enabled httpd.service enabled xinetd.service enabled |
3、配置服务
配置web
[root@sky yum.repos.d]# sed -i 's/#ServerName www.example.com:80/ServerName 127.0.0.1:80/' /etc/httpd/conf/httpd.conf[root@sky yum.repos.d]# systemctl restart httpd.service |
配置cobbler
[root@sky yum.repos.d]# sed -i 's/server: 127.0.0.1/server: 192.168.17.181/g' /etc/cobbler/settings 修改cobbler用户的默认密码,
使用生成后的密码替换/etc/cobbler/settings中的密码
[root@sky yum.repos.d]# openssl passwd -1 -salt 'root' 'sky@123'$1$root$8e67rDXAsnndS790noSQV0[root@sky yum.repos.d]# vim /etc/cobbler/settingsdefault_password_crypted: "$1$root$8e67rDXAsnndS790noSQV0" <==替换掉此处内容 |
配置cobber_web (Web页面默认不允许任何人登录,需要手动修改认证相关配置)
[root@sky yum.repos.d]# useradd admin[root@sky yum.repos.d]# passwd admin[root@sky yum.repos.d]# sed -i 's/admin = ""/admin = "admin"/' /etc/cobbler/users.conf[root@sky yum.repos.d]# sed -i 's/module = authn_configfile/module = authn_pam/' /etc/cobbler/modules.conf |
配置xinetd
[root@sky yum.repos.d]# sed -i '14s/yes/no/' /etc/xinetd.d/tftp [root@sky yum.repos.d]# systemctl restart xinetd.service[root@sky yum.repos.d]# systemctl restart rsyncd.service[root@sky yum.repos.d]# systemctl enable rsyncd.service |
配置dhcp,pxe
[root@sky yum.repos.d]# sed -i 's/manage_dhcp: 0/manage_dhcp: 1/' /etc/cobbler/settings[root@sky yum.repos.d]# sed -i 's/pxe_just_once: 0/pxe_just_once: 1/' /etc/cobbler/settings
[root@sky yum.repos.d]# vim /etc/cobbler/dhcp.template |
ddns-update-style interim;allow booting;allow bootp;ignore client-updates;set vendorclass = option vendor-class-identifier;subnet 192.168.17.0 netmask 255.255.255.0 { option routers 192.168.17.1; option domain-name-servers 114.114.114.114; option subnet-mask 255.255.255.0; range dynamic-bootp 192.168.17.100 192.168.17.200; filename "/pxelinux.0"; default-lease-time 21600; max-lease-time 43200; next-server 192.168.17.181;}启动服务
[root@sky yum.repos.d]# systemctl restart cobblerd.service[root@sky yum.repos.d]# systemctl restart xinetd.service[root@sky yum.repos.d]# cobbler sync |
如果服务器对公网提供服务器,防火墙设置如下
[root@sky yum.repos.d]# firewall-cmd --permanent --add-port=67/udp[root@sky yum.repos.d]# firewall-cmd --permanent --add-port=68/udp[root@sky yum.repos.d]# firewall-cmd --permanent --add-port=80/tcp[root@sky yum.repos.d]# firewall-cmd --permanent --add-port=443/tc[root@sky yum.repos.d]# firewall-cmd --permanent --add-port=443/tcp[root@sky yum.repos.d]# firewall-cmd --reload[root@sky yum.repos.d]# firewall-cmd --permanent --list-ports |
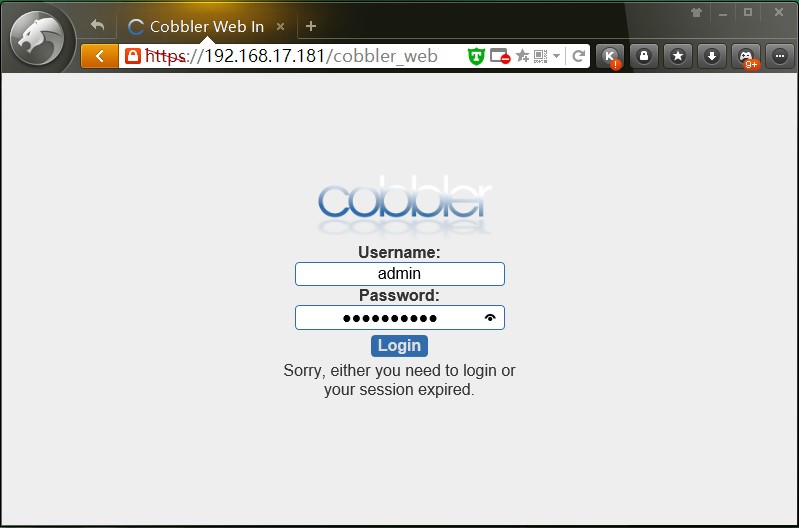
4、登录cobbler_web界面
https://192.168.17.181/cobbler_web
用户名:admin
密码: 系统admin的密码
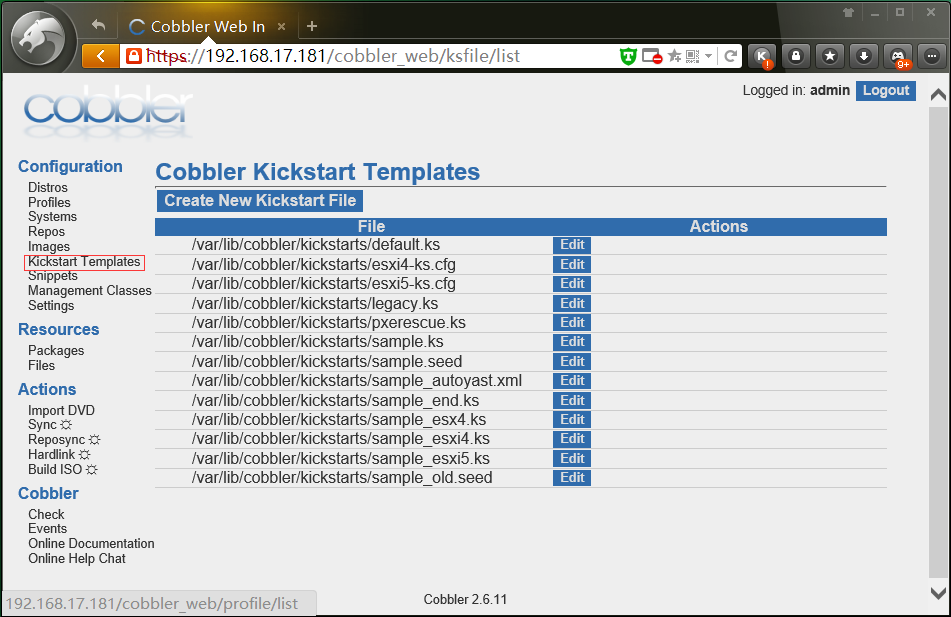
一些自带的Kickstart模板
参考博客:http://blog.csdn.net/linglong0820/article/details/48734647
5、挂载系统安装镜像到http服务器站点目录
上传系统安装镜像文件CentOS-7-x86_64-DVD-1511.iso 到/usr/local/src/目录(拿U盘考,用Xftp工具上传都行)
[root@sky ~]# mkdir -p /var/www/html/os/CentOS-7-x86_64 <==创建挂载目录 |
挂载系统镜像
[root@sky ~]# mount -t iso9660 -o loop /usr/local/src/CentOS-7-x86_64-DVD-1511.iso /var/www/html/os/CentOS-7-x86_64添加以下代码,实现开机自动挂载
[root@sky ~]# vim /etc/fstab/usr/local/src/CentOS-7-x86_64-DVD-1511.iso /var/www/html/os/CentOS-7-x86_64 iso9660 defaults,ro,loop 0 0备注:iso9660使用df -T 查看设备
卸载:umount /var/www/html/os/CentOS-7-x86_64
重复上面的操作,把自己需要安装的CentOS系统镜像文件都挂载到/var/www/html/os/目录下
例如:
CentOS-5.10-x86_64-bin-DVD-1of2.iso
CentOS-6.5-x86_64-bin-DVD1.iso
六、创建kickstarts自动安装脚本
进入默认Kickstart模板目录
[root@sky ~]#: cd /var/lib/cobbler/kickstarts/创建CentOS7安装脚本
[root@sky ~]# vim /var/lib/cobbler/kickstarts/CentOS7.ks
installlang zh_CN.UTF-8keyboard ustimezone Asia/Shanghaiauth --useshadow --enablemd5selinux --disabledfirewall --disabledservices --enabled=NetworkManager,sshdeula --agreedignoredisk --only-use=sdarebootbootloader --location=mbrzerombrclearpart --all --initlabelpart swap --asprimary --fstype="swap" --size=1024part /boot --fstype xfs --size=200part pv.01 --size=1 --growvolgroup rootvg pv.01logvol / --fstype xfs --name=lv01 --vgname=rootvg --size=10240logvol /data --fstype xfs --name=lv02 --vgname=rootvg --size=1 --grow
rootpw --iscrypted $default_password_cryptedrepo --name=base --baseurl=http://192.168.17.181/cobbler/ks_mirror/CentOS-7-x86_64/%packages --ignoremissing@base@core@chinese-supportntpnet-tools%end%postwget -O /etc/yum.repos.d/epel.repo http://mirrors.aliyun.com/repo/epel-7.repoecho "0 1 * * * /usr/sbin/ntpdate 202.120.2.101;hwclock -w;" >>/var/spool/cron/root/usr/sbin/ntpdate 202.120.2.101 >/dev/null 2>&1cd /rootwget http://192.168.17.181/cobbler/ks_mirror/config/autoip7.sh
sh /root/autoip7.sh%end |
七、导入系统镜像到cobbler
导入系统镜像文件,需要一段时间
[root@sky ~]# cobbler import --path=/var/www/html/os/CentOS-7-x86_64/ --name=CentOS-7-x86_64 --arch=x86_64 |
cobbler系统镜像导入目录在/var/www/cobbler/ks_mirror/下
命令格式:cobbler import --path=镜像路径 -- name=安装引导名 --arch=32位或64位
重复上面的操作,把其他的系统镜像文件导入到cobbler
八、设置profile,按照操作系统版本分别关联系统镜像文件和kickstart自动安装文件
在第一次导入系统镜像时,cobbler会给安装镜像指定一个默认的kickstart自动安装文件
例如:CentOS-7-x86_64版本的kickstart自动安装文件为:/var/lib/cobbler/kickstarts/sample_end.ks
查看cobbler默认指定的profile设置
[root@sky ~]# cobbler profile report --name CentOS-7-x86_64Name : CentOS-7-x86_64TFTP Boot Files : {}Comment : DHCP Tag : defaultDistribution : CentOS-7-x86_64Enable gPXE? : 0Enable PXE Menu? : 1Fetchable Files : {}Kernel Options : {}Kernel Options (Post Install) : {}Kickstart : /var/lib/cobbler/kickstarts/sample_end.ks <==系统默认分配的自动安装文件不对,需修改Kickstart Metadata : {}Management Classes : []Management Parameters : <<inherit>>Name Servers : []Name Servers Search Path : []Owners : ['admin']Parent Profile : Internal proxy : Red Hat Management Key : <<inherit>>Red Hat Management Server : <<inherit>>Repos : []Server Override : <<inherit>>Template Files : {}Virt Auto Boot : 1Virt Bridge : xenbr0Virt CPUs : 1Virt Disk Driver Type : rawVirt File Size(GB) : 5Virt Path : Virt RAM (MB) : 512Virt Type : kvm查看安装镜像文件信息
[root@sky ~]# cobbler distro report --name CentOS-7-x86_64Name : CentOS-7-x86_64Architecture : x86_64TFTP Boot Files : {}Breed : redhatComment : Fetchable Files : {}Initrd : /var/www/cobbler/ks_mirror/CentOS-7-x86_64/images/pxeboot/initrd.imgKernel : /var/www/cobbler/ks_mirror/CentOS-7-x86_64/images/pxeboot/vmlinuzKernel Options : {}Kernel Options (Post Install) : {}Kickstart Metadata : {'tree': 'http://@@http_server@@/cblr/links/CentOS-7-x86_64'}Management Classes : []OS Version : rhel7Owners : ['admin']Red Hat Management Key : <<inherit>>Red Hat Management Server : <<inherit>>Template Files : {} |
移除cobbler默认指定的错误profile
[root@sky ~]# cobbler profile remove --name=CentOS-7-x86_64
添加我们自己设置的新profile(CentOS7的自动安装脚本)
[root@sky ~]# cobbler profile add --name=CentOS-7-x86_64 --distro=CentOS-7-x86_64 --kickstart=/var/lib/cobbler/kickstarts/CentOS7.ks再次查看profile设置,发现默认启动脚本已经配置正确
[root@sky ~]# cobbler profile report --name CentOS-7-x86_64Name : CentOS-7-x86_64TFTP Boot Files : {}Comment : DHCP Tag : defaultDistribution : CentOS-7-x86_64Enable gPXE? : 0Enable PXE Menu? : 1Fetchable Files : {}Kernel Options : {}Kernel Options (Post Install) : {}Kickstart : /var/lib/cobbler/kickstarts/CentOS7.ks<==已经更改为我们自己设置的CentOS7自动安装脚本Kickstart Metadata : {}Management Classes : []Management Parameters : <<inherit>>Name Servers : []Name Servers Search Path : []Owners : ['admin']Parent Profile : Internal proxy : Red Hat Management Key : <<inherit>>Red Hat Management Server : <<inherit>>Repos : []Server Override : <<inherit>>Template Files : {}Virt Auto Boot : 1Virt Bridge : xenbr0Virt CPUs : 1Virt Disk Driver Type : rawVirt File Size(GB) : 5Virt Path : Virt RAM (MB) : 512Virt Type : xenpv |
编辑profile
[root@sky ~]# cobbler profile edit --name=CentOS-7-x86_64 --distro=CentOS-7-x86_64 --kickstart=/var/lib/cobbler/kickstarts/CentOS7.ks 命令参数:cobbler profile add|edit|remove --name=安装引导名 --distro=系统镜像名 --kickstart=kickstart自动安装文件路径
➣ --name:自定义的安装引导名,注意不能重复
➣ --distro:系统安装镜像名,用cobbler distro list可以查看
➣ --kickstart:与系统镜像文件相关联的kickstart自动安装文件
查看Cobbler列表
[root@sky ~]# cobbler list[root@sky ~]# cobbler report[root@sky ~]# cobbler profile report[root@sky ~]# cobbler distro list通过profile查找对应的kickstart自动安装文件文件
例如:
[root@sky ~]# ksfile=$( cobbler profile report --name CentOS-7-x86_64|grep -E '^Kickstart' |head -n 1|cut -d ':' -f 2 );cat $ksfile;重复上面的操作,把其他的系统镜像文件和kickstart自动安装文件关联起来
注意:
1、kickstart自动安装文件需要预先配置好
2、每次修改完配置文件,需要执行一次同步操作:cobbler sync 配置才能生效
3、kickstart自动安装文件可以用工具生成(需要用到图形界面操作)
yum install system-config-kickstart #安装
yum groupinstall "X Window System" #安装X Window图形界面
system-config-kickstart #运行kickstart配置
service cobbler sync #与cobbler sync作用相同
service cobbler restart #重启cobbler
第二部分:设置要安装的服务器从网络启动
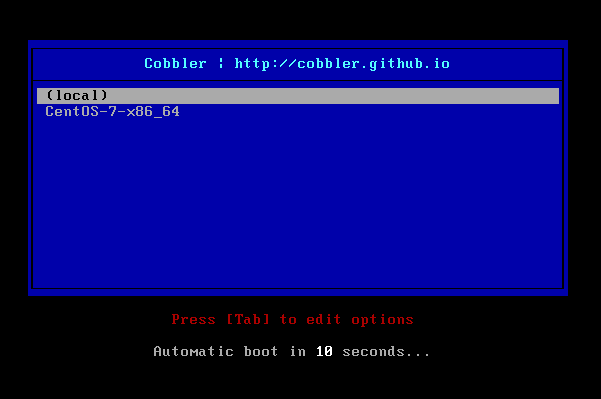
开机之后,如下图所示,根据需要选择相应的系统版本进行安装,安装完成之后,系统会自动重启

如果不选择,默认20秒之后选择(local)本地安装。现在我们修改用户不选择20秒超时后默认安装CentOS-7-x86_64系统
[root@sky ~]# cd /etc/cobbler/pxe/ |
[root@sky ~]# vi pxedefault.template |
DEFAULT menuPROMPT 0MENU TITLE Cobbler | http://cobbler.github.ioTIMEOUT 200TOTALTIMEOUT 6000ONTIMEOUT CentOS-7-x86_64<==改成超时未选择自动安装CentOS-7-x86_64系统LABEL local MENU LABEL (local) MENU DEFAULT LOCALBOOT -1$pxe_menu_itemsMENU end
[root@sky ~]# cobbler sync |
查看默认pxe文件是否修改成功
[root@sky ~]# cat /var/lib/tftpboot/pxelinux.cfg/default |
重新开机,不选择要安装的操作系统,查看超时是否会自动安装CentOS-7-x86_64系统

CentOS-7-x86_64系统安装成功!
重新安装系统:
在需要重装系统的服务器上安装koan
wget http://dl.fedoraproject.org/pub/epel/7/x86_64/k/koan-2.6.11-1.el7.noarch.rpm #CentOS 7
rpm -ivh koan-2.6.11-1.el7.noarch.rpm #安装koan
http://dl.fedoraproject.org/pub/epel/6/x86_64/koan-2.6.11-1.el6.noarch.rpm #CentOS 6.X
yum install -y cobbler debmirror pykickstart python-ctypes cman #安装koan运行依赖包(需要设置epel源)
koan --list=profiles --server=192.168.17.181 #查看Cobbler服务器系统镜像列表
koan --replace-self --server=192.168.17.181 --profile=CentOS-7-x86_64 #选择要重装的系统
reboot #重新启动系统进行自动安装
扩展阅读:
Cobbler目录说明:
1、Cobbler配置文件目录:/etc/cobbler
/etc/cobbler/settings #cobbler主配置文件
/etc/cobbler/dhcp.template #DHCP服务的配置模板
/etc/cobbler/tftpd.template #tftp服务的配置模板
/etc/cobbler/rsync.template #rsync服务的配置模板
/etc/cobbler/iso #iso模板配置文件
/etc/cobbler/pxe #pxe模板文件
/etc/cobbler/power #电源的配置文件
/etc/cobbler/users.conf #Web服务授权配置文件
/etc/cobbler/users.digest #用于web访问的用户名密码配置文件
/etc/cobbler/dnsmasq.template #DNS服务的配置模板
/etc/cobbler/modules.conf #Cobbler模块配置文件
2、Cobbler数据目录:/var/lib/cobbler
/var/lib/cobbler/config #配置文件
/var/lib/cobbler/triggers #Cobbler命令
/var/lib/cobbler/kickstarts #默认存放kickstart文件
/var/lib/cobbler/loaders #存放的各种引导程序
3、系统安装镜像目录:/var/www/cobbler
/var/www/cobbler/ks_mirror #导入的系统镜像列表
/var/www/cobbler/images #导入的系统镜像启动文件
/var/www/cobbler/repo_mirror #yum源存储目录
4、日志目录:/var/log/cobbler
/var/log/cobbler/install.log #客户端系统安装日志
/var/log/cobbler/cobbler.log #cobbler日志
至此,Cobbler全自动批量安装部署Linux系统完成!!!
参考博客:http://www.osyunwei.com/archives/7606.html