WebMagic的学习基础:Jsoup的学习(Jsoup基础API+Http+Jsoup实战爬取上)
Jsoup的Selector选择器API:
    @Test
    public void TestSelector() throws Exception {
        //解析文件
        Document document = Jsoup.parse(new File("C:\Users\SuperMan\Desktop\test.html"), "utf8");
        //通过标签查找元素
        Elements elements = document.select("span");
        for (Element e : elements
        ) {
            System.out.println(e.text());
        }
        //通过ID来查找元素 在id前加上#
        Element element = document.select("#city_bj").first();
        System.out.println(element.text());
        //通过属性来分析 中括号包围
        Element element1 = document.select("[abc]").first();
        System.out.println(element1.text());

        //通过Class查找 在查找内容前加上.   类似htnl文本
        Element element2 = document.select(".fdnav").first();
        System.out.println(element2.text());
        //通过属性-值的方式查找 中括号包围,等号表示匹配
        Elements elements1 = document.select("[class=icon_fuli]");
        for (Element e : elements1
        ) {
            System.out.println(e.text());
        }

    }
Jsoup的Selector选择器组合的API:
 @Test
    public void testSelectorGroup() throws Exception {
        //解析文件
        Document document = Jsoup.parse(new File("C:\Users\SuperMan\Desktop\test.html"), "utf8");
        //el#id 元素加id
        Element element=document.select("h3#city_bj").first();
        System.out.println(element.text());
        //el.class 元素加class
        Element element1=document.select("span.s_name").first();
        System.out.println(element1.text());
        //el[sttr] 元素+属性名
        Element element2=document.select("span[abc]").first();
        System.out.println(element2.text());
        //任意组合
        Element element3=document.select("span[abc].s_name").first();
        System.out.println(element3.text());
        //ancestor child 查找某个元素下子元素
        Elements elements=document.select(".city_con li");
        for (Element e:elements
             ) {
            System.out.println(e.text());
        }
        //查找元素下的直接子元素
        Elements elements1=document.select(".city_con > ul >li");
        for (Element e:elements
             ) {
            System.out.println(e.text());
        }
        //查找父元素的所有直接子元素
        Elements elements2=document.select(".city_con >ul > *");
        for (Element e:elements2
             ) {
            System.out.println(e.text());
        }
    }
爬取京东手机数据实战:
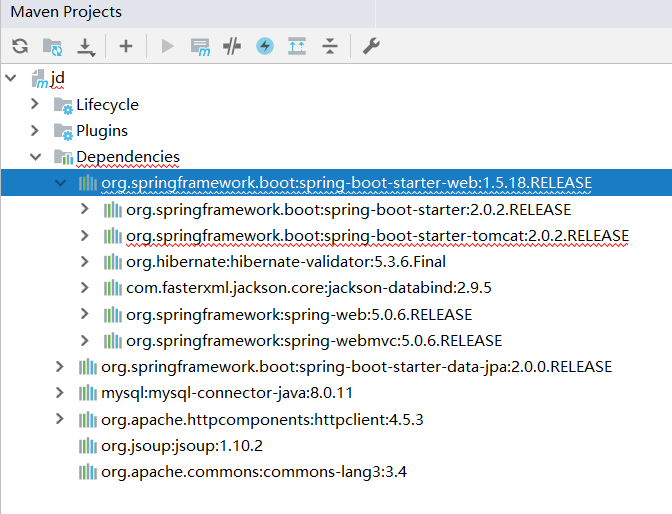
需要的依赖:
    <!--骨架-->
    <parent>
        <groupId>org.springframework.boot</groupId>
        <artifactId>spring-boot-starter-parent</artifactId>
        <version>2.0.2.RELEASE</version>
    </parent>
    <!--依赖-->
    <dependencies>
        <!--SpringMVC-->
        <dependency>
            <groupId>org.springframework.boot</groupId>
            <artifactId>spring-boot-starter-web</artifactId>
            <version>1.5.18.RELEASE</version>
        </dependency>

        <!--SpringData Jpa-->
        <dependency>
            <groupId>org.springframework.boot</groupId>
            <artifactId>spring-boot-starter-data-jpa</artifactId>
            <version>2.0.0.RELEASE</version>
        </dependency>

        <!--MySQL连接包-->
        <dependency>
            <groupId>mysql</groupId>
            <artifactId>mysql-connector-java</artifactId>
            <version>8.0.11</version>
        </dependency>

        <!-- HttpClient -->
        <dependency>
            <groupId>org.apache.httpcomponents</groupId>
            <artifactId>httpclient</artifactId>
            <version>4.5.3</version>
        </dependency>

        <!--Jsoup-->
        <dependency>
            <groupId>org.jsoup</groupId>
            <artifactId>jsoup</artifactId>
            <version>1.10.2</version>
        </dependency>

        <!--工具包-->
        <dependency>
            <groupId>org.apache.commons</groupId>
            <artifactId>commons-lang3</artifactId>
            <version>3.4</version>
        </dependency>
    </dependencies>
然后还需要添加数据库配置,用来将数据储存在数据库中(application.properties):
#DB Configuration:
spring.datasource.driverClassName=com.mysql.jdbc.Driver
spring.datasource.url=jdbc:mysql://127.0.0.1:3306/holiday2020
spring.datasource.username=root
spring.datasource.password=HEIYANG

#JPA Configuration:
spring.jpa.database=MySQL
spring.jpa.show-sql=true
到这里配置文件信息已经结束,下篇文章将会贴出所有代码。
注意点:在配置骨架的时候有可能会部分依赖出现不兼容的问题,导致pom.xml文件始终报错,文中的依赖已经是经过多次修改的版本,尽管仍然有不兼容的情况,但是整体程序是可以运行的(已经调了不知道多少次版本了,始终还是不兼容,如果有大佬可以指点一下,感激不尽)