1. android-async-http 简介
HttpClient拥有众多的API,实现稳定,bug很少。
HttpURLConnection是一种多用途、轻量的HTTP客户端,使用它来进行HTTP操作可以适用于大多数的应用程序。HttpURLConnection的API比较简单、扩展容易。不过在Android 2.2版本之前,HttpURLConnection一直存在着一些bug。
比如说对一个可读的InputStream调用close()方法时,就有可能会导致连接池失效了。所以说2.2之前推荐使用HttpClient,2.2之后推荐HttpURLConnection。
好了,那现在话又说回来,在android-async-http中使用的是HttpClient。哎…好像在Volley中分析过Volley对不同版本进行了判断,所以针对不同版本分别使用了HttpClient和HttpURLConnection。还是google牛逼啊!
回过神继续android-async-http吧,不瞎扯了。android-async-http是专门针对Android在Apache的HttpClient基础上构建的异步http连接。所有的请求全在UI(主)线程之外执行,而callback使用了Android的Handler发送消息机制在创建它的线程中执行
主要有以下功能:
(1)发送异步http请求,在匿名callback对象中处理response信息;
(2)http请求发生在UI(主)线程之外的异步线程中;
(3)内部采用线程池来处理并发请求;
(4)通过RequestParams类构造GET/POST;
(5)内置多部分文件上传,不需要第三方库支持;
(6)流式Json上传,不需要额外的库;
(7)能处理环行和相对重定向;
(8)和你的app大小相比来说,库的size很小,所有的一切只有90kb;
(9)在各种各样的移动连接环境中具备自动智能请求重试机制;
(10)自动的gzip响应解码;
(11)内置多种形式的响应解析,有原生的字节流,string,json对象,甚至可以将response写到文件中;
(12)永久的cookie保存,内部实现用的是Android的SharedPreferences;
(13)通过BaseJsonHttpResponseHandler和各种json库集成;
(14)支持SAX解析器;
(15)支持各种语言和content编码,不仅仅是UTF-8;
附注:
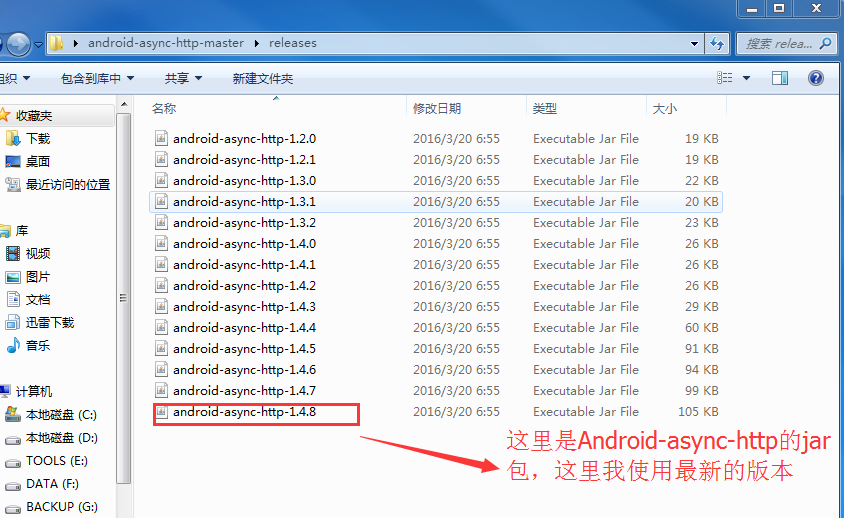
android-async-http项目地址:https://github.com/loopj/android-async-http
android-async-http文档介绍:http://loopj.com/android-async-http/
由上面的项目地址下载开源框架,解压如下:

2. 主要类介绍
- AsyncHttpRequest
继承自Runnabler,被submit至线程池执行网络请求并发送start,success等消息
- AsyncHttpResponseHandler
接收请求结果,一般重写onSuccess及onFailure接收请求成功或失败的消息,还有onStart,onFinish等消息
- TextHttpResponseHandler
继承自AsyncHttpResponseHandler,只是重写了AsyncHttpResponseHandler的onSuccess和onFailure方法,将请求结果由byte数组转换为String
- JsonHttpResponseHandler
继承自TextHttpResponseHandler,同样是重写onSuccess和onFailure方法,将请求结果由String转换为JSONObject或JSONArray
- BaseJsonHttpResponseHandler
继承自TextHttpResponseHandler,是一个泛型类,提供了parseResponse方法,子类需要提供实现,将请求结果解析成需要的类型,子类可以灵活地使用解析方法,可以直接原始解析,使用gson等。
- RequestParams
请求参数,可以添加普通的字符串参数,并可添加File,InputStream上传文件
- AsyncHttpClient
核心类,使用HttpClient执行网络请求,提供了get,put,post,delete,head等请求方法,使用起来很简单,只需以url及RequestParams调用相应的方法即可,还可以选择性地传入Context,用于取消Content相关的请求,同时必须提供ResponseHandlerInterface(AsyncHttpResponseHandler继承自ResponseHandlerInterface)的实现类,一般为AsyncHttpResponseHandler的子类,AsyncHttpClient内部有一个线程池,当使用AsyncHttpClient执行网络请求时,最终都会调用sendRequest方法,在这个方法内部将请求参数封装成AsyncHttpRequest(继承自Runnable)交由内部的线程池执行。
- SyncHttpClient
继承自AsyncHttpClient,同步执行网络请求,AsyncHttpClient把请求封装成AsyncHttpRequest后提交至线程池,SyncHttpClient把请求封装成AsyncHttpRequest后直接调用它的run方法。
RequestParams的基础使用:
RequestParams params = new RequestParams();
params.put("username", "yanbober");
params.put("password", "123456");
params.put("email", "yanbobersky@email.com");

/**
*Create RequestParams for a single parameter:
*/
RequestParams params = new RequestParams("single", "value");

/**
*Create RequestParams from an existing Map of key/value strings:
*/
RequestParams params = new RequestParams();
Map<String, String> map = new HashMap<String, String>();
map.put("first_name", "jesse");
map.put("last_name", "yan");
params.put("user", map);

/**
*Upload a File:
*/
RequestParams params = new RequestParams();
params.put("file_pic", new File("test.jpg"));
params.put("file_inputStream", inputStream);
params.put("file_bytes", new ByteArrayInputStream(bytes))//bytes is a byte array

/**
*Create RequestParams from an existing set :
*/
RequestParams params = new RequestParams();
Set<String> set = new HashSet<String>();
set.add("haha");
set.add("wowo");
params.put("what", set);

/**
*Create RequestParams from an existing List :
*/
RequestParams params = new RequestParams();
List<String> list = new ArrayList<String>();
list.add("Java");
list.add("C");
params.put("languages", list);

/**
*Create RequestParams from an existing String[] :
*/
RequestParams params = new RequestParams();
String[] colors = { "blue", "yellow" };
params.put("colors", colors);

/**
*Create RequestParams from an existing Map and List (Map in List) :
*/
RequestParams params = new RequestParams();
List<Map<String, String>> listOfMaps = new ArrayList<Map<String, String>>();
Map<String, String> user1 = new HashMap<String, String>();
user1.put("age", "30");
user1.put("gender", "male");

Map<String, String> user2 = new HashMap<String, String>();
user2.put("age", "25");
user2.put("gender", "female");

listOfMaps.add(user1);
listOfMaps.add(user2);

params.put("users", listOfMaps);
3. 官方建议使用自己新建静态的AsyncHttpClient:
 1 public class HttpClientUtils {
 2     private static String sessionId = null;
 3     private static AsyncHttpClient client = new AsyncHttpClient();
 4     private static PersistentCookieStore cookieStore ;
 5     static {
 6         //设置网络超时时间
 7         client.setTimeout(5000);
 8     }
 9
10     public static void get(String url, AsyncHttpResponseHandler responseHandler) {
11         client.get(url, responseHandler);
12
13     }
14
15     public static void get(Context context,String url,ResponseHandlerInterface responseHandler) {
16         client.get(context, url, responseHandler);
17
18     }
19
20     public static void get(String url,RequestParams params, ResponseHandlerInterface responseHandler) {
21         client.get(url, params, responseHandler);
22
23     }
24
25     public static void get(Context context, String url, RequestParams params, ResponseHandlerInterface responseHandler) {
26         client.get(context, url, params, responseHandler);
27
28     }
29
30     public static void get(Context context, String url, Header[] headers, RequestParams params, ResponseHandlerInterface responseHandler) {
31         client.get(context, url, headers, params, responseHandler);
32
33     }
34     public static void post(String url,RequestParams params, ResponseHandlerInterface responseHandler){
35         client.post(url, params, responseHandler);
36     }
37     public static AsyncHttpClient getClient(){
38         return client;
39     }
40
41     public static String getSessionId() {
42         return sessionId;
43     }
44
45     public static void setSessionId(String sessionId) {
46         HttpClientUtils.sessionId = sessionId;
47     }
48
49     public static PersistentCookieStore getCookieStore() {
50         return cookieStore;
51     }
52
53     public static void setCookieStore(PersistentCookieStore cookieStore) {
54         HttpClientUtils.cookieStore = cookieStore;
55         client.setCookieStore(cookieStore);
56     }
57
58 }
4. 请求流程

(1)调用AsyncHttpClient的get或post等方法发起网络请求。
(2)所有的请求都走了sendRequest,在sendRequest中把请求封装为了AsyncHttpRequest,并添加到线程池执行。
(3)当请求被执行时(即AsyncHttpRequest的run方法),执行AsyncHttpRequest的makeRequestWithRetries方法执行实际的请求,当请求失败时可以重试。并在请求开始,结束,成功或失败时向请求时传的ResponseHandlerInterface实例发送消息。
(4)基本上使用的都是AsyncHttpResponseHandler的子类,调用其onStart,onSuccess等方法返回请求结果。
5. android-async-http最简单基础的使用,只需如下步骤:
-
创建一个AsyncHttpClient;
-
(可选的)通过RequestParams对象设置请求参数;
-
调用AsyncHttpClient的某个get方法,传递你需要的(成功和失败时)callback接口实现,一般都是匿名内部类,实现了AsyncHttpResponseHandler,类库自己也提供许多现成的response handler,你一般不需要自己创建。
6. android-async-http 的使用
- 在匿名callback回调中处理response信息
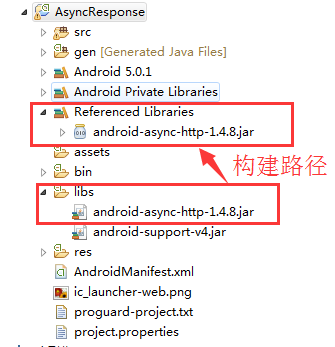
(1)新建一个Android工程,如下:
(2)上面要使用到网络访问,自然需要在AndroidManifest中添加网络权限。
(3)来到MainActivity,如下:
 1 package com.himi.asyncresponse;
 2
 3 import org.apache.http.Header;
 4
 5 import com.loopj.android.http.AsyncHttpClient;
 6 import com.loopj.android.http.AsyncHttpResponseHandler;
 7
 8 import android.app.Activity;
 9 import android.os.Bundle;
10
11 public class MainActivity extends Activity {
12
13     @Override
14     protected void onCreate(Bundle savedInstanceState) {
15         super.onCreate(savedInstanceState);
16         setContentView(R.layout.activity_main);
17
18         AsyncHttpClient client = new AsyncHttpClient();
19         client.get("https://www.baidu.com/", new AsyncHttpResponseHandler() {
20
21             @Override
22             public void onSuccess(int statusCode, Header[] headers, byte[] responseBody) {
23
24                 System.out.println("--------onSuccess------");
25                 System.out.println("反馈结果:");
26                 System.out.println(new String(responseBody));
27                 System.out.println("状态码:"+statusCode);
28                 System.out.println("header:");
29                 for(int i=0; i<headers.length; i++) {
30                     System.out.println(headers[i]);
31                 }
32             }
33
34             @Override
35             public void onFailure(int statusCode, Header[] headers, byte[] responseBody, Throwable error) {
36
37                 /*System.out.println("--------onFailure------");
38                 System.out.println("反馈结果:"+new String(responseBody));
39                 System.out.println("状态码:"+new String(responseBody));*/
40             }
41
42             @Override
43             public void onStart() {
44                 super.onStart();
45                 System.out.println("--------onStart------");
46             }
47
48             @Override
49             public void onFinish() {
50                 super.onFinish();
51                 System.out.println("--------onFinish------");
52             }
53
54             @Override
55             public void onRetry(int retryNo) {
56                 super.onRetry(retryNo);
57                 System.out.println("--------onRetry------");
58             }
59
60             @Override
61             public void onCancel() {
62                 super.onCancel();
63                 System.out.println("--------onCancel------");
64             }
65
66             public void onProgress(int bytesWritten, int totalSize) {
67                 super.onProgress(bytesWritten, totalSize);
68                 System.out.println("--------onProgress------");
69             }
70
71         });
72
73     }
74
75 }
布署程序到模拟器上,观察Logcat如下:

上面是使用Get方法,不带参数的。
下面我们介绍使用Get方法、Post方法带参数的,基本使用如下:
带参数Get请求:
 1 HttpClientUtils.get("http://www.baidu.com", new AsyncHttpResponseHandler() {
 2      @Override
 3      public void onSuccess(int statusCode, Header[] headers, byte[] responseBody) {
 4           System.out.println(response);
 5      }
 6      @Override
 7      public void onFailure(int statusCode, Header[] headers, byte[] responseBody, Throwable
 8  error)
 9  {
10           error.printStackTrace(System.out);
11      }
12  });
带参数Post请求:
 1 RequestParams params = new RequestParams();
 2 params.put("value1", value1);
 3 params.put("value2", value2);
 4 HttpClientUtils.post(url, params, new JsonHttpResponseHandler(){
 5                 @Override
 6                 public void onSuccess(int statusCode, Header[] headers,
 7                         JSONObject response) {
 8                     //请求成功回调
 9                 }
10                 @Override
11                 public void onFinish() { //请求完成
12                 }
13                 @Override
14                 public void onFailure(int statusCode, Header[] headers,
15                         String responseString, Throwable throwable) {
16                     //请求失败
17                 }
18
19             });
- 文件上传(支持断点上传)
核心代码示例:
File myFile = new File("/sdcard/test.java");
RequestParams params = new RequestParams();
try {
    params.put("filename", myFile);
    AsyncHttpClient client = new AsyncHttpClient();
    client.post("http://update/server/location/", params, new AsyncHttpResponseHandler(){
        @Override
        public void onSuccess(int statusCode, String content) {
            super.onSuccess(statusCode, content);
        }
    });
} catch(FileNotFoundException e) {
    e.printStackTrace();
}
- 支持解析成Json格式
(1)JsonHttpResponseHandler带Json参数的POST:
try {
    JSONObject json = new JSONObject();
    json.put("username", "ryantang");
    StringEntity stringEntity = new StringEntity(json.toString());
    client.post(mContext, "http://api.com/login", stringEntity, "application/json", new JsonHttpResponseHandler(){
        @Override
        public void onSuccess(JSONObject jsonObject) {
            super.onSuccess(jsonObject);
        }
    });
} catch (JSONException e) {
    e.printStackTrace();
} catch (UnsupportedEncodingException e) {
    e.printStackTrace();
}
(2)访问服务器端,获取json数据:
 AsyncHttpClient client = new AsyncHttpClient();
 String url = "http://172.16.237.227:8080/video/JsonServlet";
 client.get(url, new JsonHttpResponseHandler() {
      // 返回JSONArray对象 | JSONObject对象
      @Override
      public void onSuccess(int statusCode, Header[] headers, JSONArray response) {
          super.onSuccess(statusCode, headers, response);
          if (statusCode == 200) {
              //存储数组变量
              List<String> objects = new ArrayList<>();
              for (int i = 0; i < response.length(); i++) {
                   try {
                        // 获取具体的一个JSONObject对象
                         JSONObject obj = response.getJSONObject(i);
                         objects.add(obj.getString("name"));
                       } catch (JSONException e) {
                          // TODO Auto-generated catch block
                         e.printStackTrace();
                       }
                  }
              //C控制层主要就是对数据处理
              ArrayAdapter<String> adapter = new ArrayAdapter<String>(MainActivity.this, android.R.layout.simple_list_item_1, objects);
              //设置显示的内容
              lv_users.setAdapter(adapter);// C空置
           }
       }

     });
-
BinaryHttpResponseHandler下载文件:
AsyncHttpClient client = new AsyncHttpClient();
client.get("http://download/file/test.java", new BinaryHttpResponseHandler() {
    @Override
    public void onSuccess(byte[] arg0) {
        super.onSuccess(arg0);
        File file = Environment.getExternalStorageDirectory();
        File file2 = new File(file, "down");
        file2.mkdir();
        file2 = new File(file2, "down_file.jpg");
        try {
            FileOutputStream oStream = new FileOutputStream(file2);
            oStream.write(arg0);
            oStream.flush();
            oStream.close();
        } catch (Exception e) {
            e.printStackTrace();
            Log.i(null, e.toString());
        }
    }
});
官方文档里说PersistentCookieStore类用于实现Apache HttpClient的CookieStore接口,可自动将cookie保存到Android设备的SharedPreferences中,如果你打算使用cookie来管理验证会话,这个非常有用,因为用户可以保持登录状态,不管关闭还是重新打开你的app。
PersistentCookieStore继承自CookieStore,是一个基于CookieStore的子类, 使用HttpClient处理数据,并且使用cookie持久性存储接口。
文档里介绍了持久化Cookie的步骤:
(1)创建 AsyncHttpClient实例对象;
(2)将客户端的cookie保存到PersistentCookieStore实例对象,带有activity或者应用程序context的构造方法;
(3)任何从服务器端获取的cookie都会持久化存储到myCookieStore中,添加一个cookie到存储中,只需要构造一个新的cookie对象,并且调用addCookie方法;
AsyncHttpClient client = new AsyncHttpClient();
PersistentCookieStore cookieStore = new PersistentCookieStore(this);
client.setCookieStore(cookieStore);

BasicClientCookie newCookie = new BasicClientCookie("name", "value");
newCookie.setVersion(1);
newCookie.setDomain("mycompany.com");
newCookie.setPath("/");
cookieStore.addCookie(newCookie);