1. 介绍
最近陆陆续续有工程师拿到了VCK190单板。 VCK190集成了Xilinx的7nm AIE,有很强的处理能力。 本文介绍怎么运行Xilinx AIE的例程,熟悉AIE开发流程。
前一篇文章,Versal AIE 上手尝鲜 -- Standalone例程介绍了进行Standalone(BareMetal)程序开发的例子。
这一篇文章,在Xilinx提供的Linux平台基础上,介绍怎么进行Linux程序开发,使用了Vitis_Accel_Examples中的aie_adder作为例子。
2. 准备工作
2.1. License
在上手之前,需要注意是VCK190 Production单板,还是VCK190 ES单板。如果是VCK190 Production单板,使用VCK190 Voucher,在Xilinx网站,可以申请到License。安装License后,License的状态窗口下,能看到下列项目。
AIEBuild
AIESim
MEBuild
MESim
如果是VCK190 ES单板,需要在Lounge里申请"Versal Tools Early Eacess"; "Versal Tools PDI Early Eacess"的License,并在Vivado里使能ES器件。在Vivado/2020.2/scripts/init.tcl的文件里,添加“enable_beta_device xcvc*”,可以自动使能ES器件。
2.2. Platform
在进行开发之前,需要准备Platform。 VCK190 Production单板和VCK190 ES单板使用的Platform不一样,可以从下面链接下载各自的Platform,再复制到目录“Xilinx/Vitis/2020.2/platforms/”下。
VCK190 Production Platform
VCK190 ES Platform
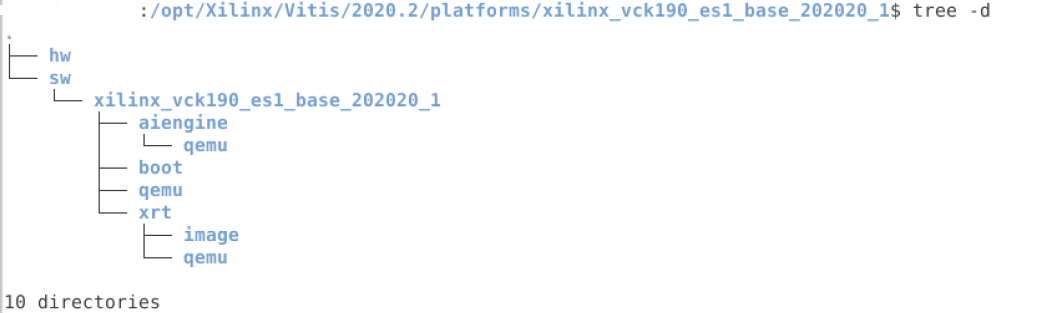
准备好后,目录结构与下面类似。

2.3. Common Images
Xilinx现在还提供了Common Images,包含对应单板的Linux启动文件,和编译器、sysroots(头文件、应用程序库)等。可以在Xilinx Download下载Versal common image。
2.4. 测试环境
Host OS: Ubuntu 18.04
Vitis 2020.2
PetaLinux 2020.2
VCK190 Production
3. aie_adder介绍
AIE的aie_adder,相当于C语言的helloword例子,它创建了AIE Kernel、用于为AIE Kernel搬移数据的PL Kernel,并以仿真方式、或者硬件方式运行。
3.1. 文件列表
aie_adder有下列文件。 稍后也对主要文件,进行简要介绍。
aie_adder:
│  description.json
│  details.rst
│  Makefile
│  qor.json
│  README.rst
│  system.cfg
│  utils.mk
│  xrt.ini
│
├─data
│      golden.txt
│      input0.txt
│      input1.txt
│
└─src
        aie_adder.cc
        aie_graph.cpp
        aie_graph.h
        aie_kernel.h
        host.cpp
        pl_mm2s.cpp
        pl_s2mm.cpp
3.2. aie_adder.cc
aie_adder.cc是定义AIE Kernel的文件,也是最重要的文件,仿真和实际运行都需要。
AIE Kernel也很简单,相当于是C语言编程的HelloWorld, 只是读取2个向量,做加法运算后,再写出去。
void aie_adder(input_stream_int32* in0, input_stream_int32* in1, output_stream_int32* out) {
    v4int32 a = readincr_v4(in0);
    v4int32 b = readincr_v4(in1);
    v4int32 c = operator+(a, b);
    writeincr_v4(out, c);
}
3.3. aie_graph.cpp
aie_graph.cpp定义和控制运算的graph,这个例子中,只用于仿真。
PLIO* in0 = new PLIO("DataIn0", adf::plio_32_bits, "data/input0.txt");
PLIO* in1 = new PLIO("DataIn1", adf::plio_32_bits, "data/input1.txt");
PLIO* out = new PLIO("DataOut", adf::plio_32_bits, "data/output.txt");

// Hank: only for simulation??
simulation::platform<2, 1> platform(in0, in1, out);

simpleGraph addergraph;

connect<> net0(platform.src[0], addergraph.in0);
connect<> net1(platform.src[1], addergraph.in1);

connect<> net2(addergraph.out, platform.sink[0]);

# 2. ifdef __AIESIM__
int main(int argc, char** argv) {
    addergraph.init();
    addergraph.run(4);
    addergraph.end();
    return 0;
}

# 3. endif
3.4. aie_graph.h
aie_graph.h定义了运算的graph,连接了stream数据流和AIE kernel,仿真和实际运行都需要。
using namespace adf;

class simpleGraph : public graph {
   private:
    kernel adder;

   public:
    port<input> in0, in1;
    port<output> out;

    simpleGraph() {
        adder = kernel::create(aie_adder);

        connect<stream>(in0, adder.in[0]);
        connect<stream>(in1, adder.in[1]);
        connect<stream>(adder.out[0], out);

        source(adder) = "aie_adder.cc";

        runtime<ratio>(adder) = 0.1;
    };
};
3.5. aie_kernel.h
aie_kernel.h最简单,只声明了aie_adder的原型,仿真和实际运行都需要。
void aie_adder(input_stream_int32* in0, input_stream_int32* in1, output_stream_int32* out);
3.6. host.cpp
host.cpp会申请内存,加载数据, 加载xclbin, 运行AIE Kernel。
simpleGraph addergraph;

static std::vector<char> load_xclbin(xrtDeviceHandle device, const std::string& fnm) {

    // load bit stream
    std::ifstream stream(fnm);
    stream.seekg(0, stream.end);
    size_t size = stream.tellg();
    stream.seekg(0, stream.beg);

    std::vector<char> header(size);
    stream.read(header.data(), size);

    auto top = reinterpret_cast<const axlf*>(header.data());
    xrtDeviceLoadXclbin(device, top);

    return header;
}

int main(int argc, char** argv) {

    // Open xclbin
    auto dhdl = xrtDeviceOpen(0); // Open Device the local device
    auto xclbin = load_xclbin(dhdl, "krnl_adder.xclbin");
    auto top = reinterpret_cast<const axlf*>(xclbin.data());
    adf::registerXRT(dhdl, top->m_header.uuid);

    int DataInput0[sizeIn], DataInput1[sizeIn];
    for (int i = 0; i < sizeIn; i++) {
        DataInput0[i] = rand() % 100;
        DataInput1[i] = rand() % 100;
    }

    // input memory
    // Allocating the input size of sizeIn to MM2S
    // This is using low-level XRT call xclAllocBO to allocate the memory

    xrtBufferHandle in_bohdl0 = xrtBOAlloc(dhdl, sizeIn * sizeof(int), 0, 0);
    auto in_bomapped0 = reinterpret_cast<uint32_t*>(xrtBOMap(in_bohdl0));
    memcpy(in_bomapped0, DataInput0, sizeIn * sizeof(int));
    printf("Input memory virtual addr 0x%px
", in_bomapped0);

    xrtBufferHandle in_bohdl1 = xrtBOAlloc(dhdl, sizeIn * sizeof(int), 0, 0);
    auto in_bomapped1 = reinterpret_cast<uint32_t*>(xrtBOMap(in_bohdl1));
    memcpy(in_bomapped1, DataInput1, sizeIn * sizeof(int));
    printf("Input memory virtual addr 0x%px
", in_bomapped1);

    // output memory
    // Allocating the output size of sizeOut to S2MM
    // This is using low-level XRT call xclAllocBO to allocate the memory

    xrtBufferHandle out_bohdl = xrtBOAlloc(dhdl, sizeOut * sizeof(int), 0, 0);
    auto out_bomapped = reinterpret_cast<uint32_t*>(xrtBOMap(out_bohdl));
    memset(out_bomapped, 0xABCDEF00, sizeOut * sizeof(int));
    printf("Output memory virtual addr 0x%px
", out_bomapped);

    // mm2s ip
    // Using the xrtPLKernelOpen function to manually control the PL Kernel
    // that is outside of the AI Engine graph

    xrtKernelHandle mm2s_khdl1 = xrtPLKernelOpen(dhdl, top->m_header.uuid, "pl_mm2s:{pl_mm2s_1}");
    // Need to provide the kernel handle, and the argument order of the kernel arguments
    // Here the in_bohdl is the input buffer, the nullptr is the streaming interface and must be null,
    // lastly, the size of the data. This info can be found in the kernel definition.
    xrtRunHandle mm2s_rhdl1 = xrtKernelRun(mm2s_khdl1, in_bohdl0, nullptr, sizeIn);
    printf("run pl_mm2s_1
");

    xrtKernelHandle mm2s_khdl2 = xrtPLKernelOpen(dhdl, top->m_header.uuid, "pl_mm2s:{pl_mm2s_2}");
    xrtRunHandle mm2s_rhdl2 = xrtKernelRun(mm2s_khdl2, in_bohdl1, nullptr, sizeIn);
    printf("run pl_mm2s_2
");

    // s2mm ip
    // Using the xrtPLKernelOpen function to manually control the PL Kernel
    // that is outside of the AI Engine graph

    xrtKernelHandle s2mm_khdl = xrtPLKernelOpen(dhdl, top->m_header.uuid, "pl_s2mm");
    // Need to provide the kernel handle, and the argument order of the kernel arguments
    // Here the out_bohdl is the output buffer, the nullptr is the streaming interface and must be null,
    // lastly, the size of the data. This info can be found in the kernel definition.
    xrtRunHandle s2mm_rhdl = xrtKernelRun(s2mm_khdl, out_bohdl, nullptr, sizeOut);
    printf("run pl_s2mm
");

    // graph execution for AIE
    printf("graph init. This does nothing because CDO in boot PDI already configures AIE.
");
    addergraph.init();

    printf("graph run
");
    addergraph.run(N_ITER);

    addergraph.end();
    printf("graph end
");

    // wait for mm2s done
    auto state = xrtRunWait(mm2s_rhdl1);
    std::cout << "mm2s_1 completed with status(" << state << ")
";
    xrtRunClose(mm2s_rhdl1);
    xrtKernelClose(mm2s_khdl1);

    state = xrtRunWait(mm2s_rhdl2);
    std::cout << "mm2s_2 completed with status(" << state << ")
";
    xrtRunClose(mm2s_rhdl2);
    xrtKernelClose(mm2s_khdl2);

    // wait for s2mm done
    state = xrtRunWait(s2mm_rhdl);
    std::cout << "s2mm completed with status(" << state << ")
";
    xrtRunClose(s2mm_rhdl);
    xrtKernelClose(s2mm_khdl);

    // Comparing the execution data to the golden data

    // clean up XRT
    std::cout << "Releasing remaining XRT objects...
";
    xrtBOFree(in_bohdl0);
    xrtBOFree(in_bohdl1);
    xrtBOFree(out_bohdl);
    xrtDeviceClose(dhdl);

    return errorCount;
}
3.7. pl_mm2s.cpp
pl_mm2s.cpp是利用HLS做的PL设计,用于从内存搬移数据到AIE Kernel。
void pl_mm2s(ap_int<32>* mem, hls::stream<qdma_axis<32, 0, 0, 0> >& s, int size) {
data_mover:
    for (int i = 0; i < size; i++) {
        qdma_axis<32, 0, 0, 0> x;
        x.data = mem[i];
        x.keep_all();
        s.write(x);
    }
}
3.8. pl_s2mm.cpp
pl_mm2s.cpp也是利用HLS做的PL设计,用于从AIE Kernel搬移数据到内存。
void pl_s2mm(ap_int<32>* mem, hls::stream<qdma_axis<32, 0, 0, 0> >& s, int size) {
data_mover:
    for (int i = 0; i < size; i++) {
        qdma_axis<32, 0, 0, 0> x = s.read();
        mem[i] = x.data;
    }
}
4. 经验
aie_adder 基本可以顺利完成。 在实验过程中,可能遇到下列问题。
4.1. DEVICE和EDGE_COMMON_SW
aie_adder 的说明中,没有提到编译命令。 Makefile中提供了多个命令,基本模式如下:
make all TARGET=<sw_emu/hw_emu/hw> DEVICE=<FPGA platform> HOST_ARCH=<aarch32/aarch64/x86> EDGE_COMMON_SW=<rootfs and kernel image path
检查Makefile,发现下列语句。
ifneq ($(findstring vck190, $(DEVICE)), vck190)
$(warning [WARNING]: This example has not been tested for $(DEVICE). It may or may not work.)
endif
于是指定DEVICE为vck190。
对于EDGE_COMMON_SW,在Xilinx下载网站找到了common image,包含rootfs 和 Linux kernel image。于是下载Versal common image,再在编译命令里指定解压后的目录“/opt/Xilinx/download/2020/xilinx-versal-common-v2020.2”。
总的编译命令如下。
make sd_card TARGET=hw DEVICE=vck190 HOST_ARCH=aarch64 EDGE_COMMON_SW=/opt/Xilinx/download/2020/xilinx-versal-common-v2020.2
编译后,报告找不到对应的platform(平台)。
Running Dispatch Server on port:41287
INFO: [v++ 60-1548] Creating build summary session with primary output /proj/hankf/vck190/Vitis_Accel_Examples-master-2021-0625/aie_kernels/aie_adder/pl_s2mm.xo.compile_summary, at Tue Jun 29 16:36:21 2021
INFO: [v++ 60-1316] Initiating connection to rulecheck server, at Tue Jun 29 16:36:21 2021
Running Rule Check Server on port:39067
INFO: [v++ 60-1315] Creating rulecheck session with output '/proj/hankf/vck190/Vitis_Accel_Examples-master-2021-0625/aie_kernels/aie_adder/_x/reports/pl_s2mm/v++_compile_pl_s2mm_guidance.html', at Tue Jun 29 16:36:22 2021
ERROR: [v++ 60-1258] No valid platform was found that matches 'vck190'. Please make sure that the platform is specified correctly, and the platform has the right version number. The platform repo paths are:
	/opt/Xilinx/Vitis/2020.2/platforms
The valid platforms found from the above repo paths are:
	/opt/Xilinx/Vitis/2020.2/platforms/xilinx_vck190_base_202020_1/xilinx_vck190_base_202020_1.xpfm
	/opt/Xilinx/Vitis/2020.2/platforms/xilinx_vck190_es1_base_202020_1/xilinx_vck190_es1_base_202020_1.xpfm
根据提示,把device换成xilinx_vck190_es1_base_202110_1,使用下列命令编译,同样的问题消失。新的编译命令如下。
make sd_card TARGET=hw DEVICE=xilinx_vck190_es1_base_202110_1 HOST_ARCH=aarch64 EDGE_COMMON_SW=/opt/Xilinx/download/2020/xilinx-versal-common-v2020.2
4.2. ES Device
如果没有使能ES Device,会得到错误“ERROR: [HLS 200-1023] Part 'xcvc1902-vsva2197-2MP-e-S-es1' is not installed.”。 需要在Vivado里使能ES器件。
===>The following messages were generated while  performing high-level synthesis for kernel: pl_s2mm Log file: /proj/hankf/vck190/Vitis_Accel_Examples-master-2021-0625/aie_kernels/aie_adder/_x/pl_s2mm/pl_s2mm/vitis_hls.log :
ERROR: [v++ 200-1023] Part 'xcvc1902-vsva2197-2MP-e-S-es1' is not installed.
ERROR: [v++ 60-300] Failed to build kernel(ip) pl_s2mm, see log for details: /proj/hankf/vck190/Vitis_Accel_Examples-master-2021-0625/aie_kernels/aie_adder/_x/pl_s2mm/pl_s2mm/vitis_hls.log
ERROR: [v++ 60-773] In '/proj/hankf/vck190/Vitis_Accel_Examples-master-2021-0625/aie_kernels/aie_adder/_x/pl_s2mm/pl_s2mm/vitis_hls.log', caught Tcl error: ERROR: [HLS 200-1023] Part 'xcvc1902-vsva2197-2MP-e-S-es1' is not installed.
ERROR: [v++ 60-599] Kernel compilation failed to complete
ERROR: [v++ 60-592] Failed to finish compilation
INFO: [v++ 60-1653] Closing dispatch client.
Makefile:144: recipe for target 'pl_s2mm.xo' failed
make: *** [pl_s2mm.xo] Error 1
4.3. iostream
编译时,得到错误“fatal error: iostream: No such file or directory”。
INFO: [v++ 60-791] Total elapsed time: 0h 0m 57s
INFO: [v++ 60-1653] Closing dispatch client.
/opt/Xilinx/Vitis/2020.2/gnu/aarch64/lin/aarch64-linux/bin/aarch64-linux-gnu-g++ -Wall -c -std=c++14 -Wno-int-to-pointer-cast --sysroot=/opt/Xilinx/download/2020/xilinx-versal-common-v2020.2/sysroots/aarch64-xilinx-linux  -I/opt/Xilinx/download/2020/xilinx-versal-common-v2020.2/sysroots/aarch64-xilinx-linux/usr/include/xrt -I/opt/Xilinx/download/2020/xilinx-versal-common-v2020.2/sysroots/aarch64-xilinx-linux/usr/include -I./ -I/opt/Xilinx/Vitis/2020.2/aietools/include -I/opt/Xilinx/Vitis/2020.2/include -o aie_control_xrt.o ./Work/ps/c_rts/aie_control_xrt.cpp
./Work/ps/c_rts/aie_control_xrt.cpp:1:10: fatal error: iostream: No such file or directory
    1 | #include <iostream>
      |          ^~~~~~~~~~
compilation terminated.
Makefile:170: recipe for target 'host' failed
make: *** [host] Error 1
交叉编译时,引用的头文件一般在sysroots里。
Versal common image解压后,有文件sdk.sh。执行sdk.sh,能得到sysroots。
于是在Versal的sysroots里查找iostream,果然有文件iostream。
hankf@XSZGS4:/opt/Xilinx/peta/2020.2.sdk/sysroots$ ls -l -h
total 8.0K
drwxr-xr-x 17 hankf hankf 4.0K Jun 30 14:32 aarch64-xilinx-linux
drwxr-xr-x  8 hankf hankf 4.0K Jun 30 14:33 x86_64-petalinux-linux

hankf@XSZGS4:/opt/Xilinx/peta/2020.2.sdk/sysroots$ find -name iostream
./aarch64-xilinx-linux/usr/include/c++/9.2.0/iostream
./x86_64-petalinux-linux/usr/include/c++/9.2.0/iostream
hankf@XSZGS4:/opt/Xilinx/peta/2020.2.sdk/sysroots$
根据编译命令中的选项,“--sysroot=/opt/Xilinx/download/2020/xilinx-versal-common-v2020.2/sysroots/aarch64-xilinx-linux”,想到要把sysroots放在目录/opt/Xilinx/download/2020/xilinx-versal-common-v2020.2里。于是在目录/opt/Xilinx/download/2020/xilinx-versal-common-v2020.2里为sysroots创建链接,从而使目录/opt/Xilinx/download/2020/xilinx-versal-common-v2020.2里有了sysroots。
hankf@XSZGS4:/opt/Xilinx/download/2020/xilinx-versal-common-v2020.2$ ln -s /opt/Xilinx/peta/2020.2.sdk/sysroots/ ./sysroots
hankf@XSZGS4:/opt/Xilinx/download/2020/xilinx-versal-common-v2020.2$ ls -l -h
total 3.1G
-rw-r--r-- 1 hankf hankf 657K Nov 19  2020 bl31.elf
-rw-r--r-- 1 hankf hankf 2.0K Nov 19  2020 boot.scr
-rw-r--r-- 1 hankf hankf  17M Nov 19  2020 Image
-rw-r--r-- 1 hankf hankf 1.6K Nov 19  2020 README.txt
-rw-r--r-- 1 hankf hankf 2.3G Nov 19  2020 rootfs.ext4
-rw-r--r-- 1 hankf hankf  44K Nov 19  2020 rootfs.manifest
-rw-r--r-- 1 hankf hankf 221M Nov 19  2020 rootfs.tar.gz
-rwxr-xr-x 1 hankf hankf 666M Nov 19  2020 sdk.sh
lrwxrwxrwx 1 hankf hankf   37 Jun 30 14:45 sysroots -> /opt/Xilinx/peta/2020.2.sdk/sysroots/
-rw-r--r-- 1 hankf hankf 946K Nov 19  2020 u-boot.elf

hankf@XSZGS4:/opt/Xilinx/download/2020/xilinx-versal-common-v2020.2$ ls -l ./sysroots/aarch64-xilinx-linux/
total 60
drwxr-xr-x  3 hankf hankf 4096 Jun 30 14:32 bin
drwxr-xr-x  3 hankf hankf 4096 Jun 30 14:32 boot
drwxr-xr-x  2 hankf hankf 4096 Jun 30 14:32 dev
drwxr-xr-x 41 hankf hankf 4096 Jun 30 14:32 etc
drwxr-xr-x  3 hankf hankf 4096 Jun 30 14:32 home
drwxr-xr-x  8 hankf hankf 4096 Jun 30 14:32 lib
drwxr-xr-x  2 hankf hankf 4096 Jun 30 14:32 media
drwxr-xr-x  2 hankf hankf 4096 Jun 30 14:32 mnt
dr-xr-xr-x  2 hankf hankf 4096 Jun 30 14:32 proc
drwxr-xr-x  2 hankf hankf 4096 Jun 30 14:32 run
drwxr-xr-x  3 hankf hankf 4096 Jun 30 14:32 sbin
dr-xr-xr-x  2 hankf hankf 4096 Jun 30 14:32 sys
drwxrwxr-x  2 hankf hankf 4096 Jun 30 14:32 tmp
drwxr-xr-x 10 hankf hankf 4096 Jun 30 14:32 usr
drwxr-xr-x  9 hankf hankf 4096 Jun 30 14:32 var
4.4. Source file does not exist: adder.xclbin
aie_adder 的Makefile中提供了多个命令。考虑到VCK190使用SD(TF)卡启动,于是使用了目标为sd_card的下列命令编译。但是编译后,遇到了错误“Source file does not exist: adder.xclbin”。
/opt/Xilinx/Vitis/2020.2/gnu/aarch64/lin/aarch64-linux/bin/aarch64-linux-gnu-g++ *.o -lxaiengine -ladf_api_xrt -lxrt_core -lxrt_coreutil -L/opt/Xilinx/download/2020/xilinx-versal-common-v2020.2/sysroots/aarch64-xilinx-linux/usr/lib --sysroot=/opt/Xilinx/download/2020/xilinx-versal-common-v2020.2/sysroots/aarch64-xilinx-linux -L/opt/Xilinx/Vitis/2020.2/aietools/lib/aarch64.o -o ./aie_adder
COMPLETE: Host application created.
rm -rf run_app.sh
v++ -p -t hw
	--platform xilinx_vck190_es1_base_202020_1
	--package.out_dir ./package.hw
	--package.rootfs /opt/Xilinx/download/2020/xilinx-versal-common-v2020.2/rootfs.ext4
	--package.image_format=ext4
	--package.boot_mode=sd
	--package.kernel_image=/opt/Xilinx/download/2020/xilinx-versal-common-v2020.2/Image
	--package.defer_aie_run
	--package.sd_file ./run_app.sh
	--package.sd_file aie_adder adder.xclbin libadf.a -o krnl_adder.xclbin
Option Map File Used: '/opt/Xilinx/Vitis/2020.2/data/vitis/vpp/optMap.xml'

****** v++ v2020.2 (64-bit)
  **** SW Build (by xbuild) on 2020-11-18-05:13:29
    ** Copyright 1986-2020 Xilinx, Inc. All Rights Reserved.

ERROR: [v++ 60-602] Source file does not exist: /proj/hankf/vck190/Vitis_Accel_Examples-master-2021-0625/aie_kernels/aie_adder/adder.xclbin
INFO: [v++ 60-1662] Stopping dispatch session having empty uuid.
INFO: [v++ 60-1653] Closing dispatch client.
Makefile:192: recipe for target 'sd_card' failed
make: *** [sd_card] Error 1
后来尝试命令“all”,能编译成功。
make all TARGET=hw DEVICE=vck190 HOST_ARCH=aarch64 EDGE_COMMON_SW=/opt/Xilinx/download/2020/xilinx-versal-common-v2020.2
4.5. SD Card cannot boot
使用编译好的文件,复制到TF卡,启动vck190单板,发现单板不能启动。
检查发现,手上的单板是production芯片,换用xilinx_vck190_base_202020_1,编译出来的文件能够启动。
最后成功编译,而且产生的映像能在vck190 production单板正常启动的编译命令如下:
make all TARGET=hw DEVICE=xilinx_vck190_base_202020_1 HOST_ARCH=aarch64 EDGE_COMMON_SW=/opt/Xilinx/download/2020/xilinx-versal-common-v2020.2