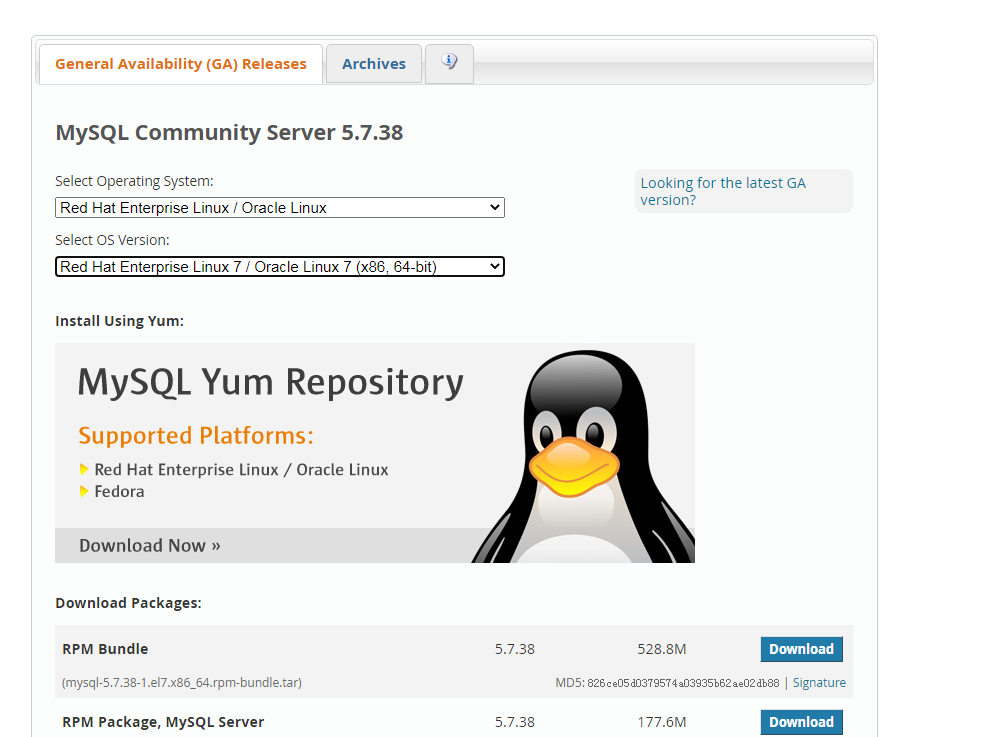
MySQL的RPM包包括很多套件,老一点版本一般直接安装Server和Client就可以。较新的版本由于包之间存在更多的依赖关系,通常需要下载以下几个包才可以完成标准的安装。
mysql-community-server数据库服务器和相关工具
mysql-community-clientMySQL客户端应用程序和工具
mysql-community-libsMySQL数据库客户端应用程序的共享库
mysql-community-common服务器和客户端库的通用文件
mysql-community-libs-compat以前的MySQL安装的共享兼容性库
一、下载RPM包
下载RPM捆绑包tar文件,该文件包含上面列出的所有RPM软件包,无需再一个个单独下载它们。
官网下载地址:https://dev.mysql.com/downloads/mysql/
wget https://cdn.mysql.com//Downloads/MySQL-5.7/mysql-5.7.38-1.el7.x86_64.rpm-bundle.tar

2.解压tar文件
tar -xvf mysql-5.7.38-1.el7.x86_64.rpm-bundle.tar
或者使用gzip命令解压
3.清理环境
一台服务器只能安装一个版本的MySQL/MariaDB软件,所以需要删除原有的MySQL/MariaDB
[root@centos7-82 ~]# rpm -qa | grep mysqld
[root@centos7-82 ~]# rpm -qa | grep mariadb
mariadb-libs-5.5.68-1.el7.x86_64
[root@centos7-82 ~]rpm -e mariadb-libs --nodeps
[root@centos7-82 ~]# rpm -qa | grep mariadb
由于centos默认安装有mariadb,所以需要查询你的系统是否存在,存在则删除
rpm -qa | grep mari*
建议使用yum删除
4.安装MySQL相关依赖包
yum install -y mysql-community-{server,client,common,libs}-*
5.使用RPM软件包标准安装的MySQL的目录结构
文件 位置
客户端和脚本 /usr/bin
mysqld服务器 /usr/sbin
配置文件 /etc/my.cnf
数据目录 /var/lib/mysql
错误日志 /var/log/mysqld.log
System V初始化脚本 /etc/init.d/mysqld
PID文件 /run/mysqld/mysqld.pid
socket文件 /var/lib/mysql/mysql.sock
客户端和脚本 /usr/bin
6、安装部署
[root@centos7-82 ~]# rpm -e mariadb-libs-1:5.5.68-1.el7.x86_64
error: Failed dependencies:
libmysqlclient.so.18()(64bit) is needed by (installed) postfix-2:2.10.1-9.el7.x86_64
libmysqlclient.so.18(libmysqlclient_18)(64bit) is needed by (installed) postfix-2:2.10.1-9.el7.x86_64
[root@centos7-82 ~]# rpm -e postfix-2:2.10.1-9.el7.x86_64
[root@centos7-82 ~]# rpm -e mariadb-libs-1:5.5.68-1.el7.x86_64
[root@centos7-82 ~]# rpm -ivh mysql-community-common-5.7.38-1.el7.x86_64.rpm
[root@centos7-82 ~]# rpm -ivh mysql-community-libs-5.7.38-1.el7.x86_64.rpm
[root@centos7-82 ~]# rpm -ivh mysql-community-client-5.7.38-1.el7.x86_64.rpm
[root@centos7-82 ~]# rpm -ivh mysql-community-server-5.7.38-1.el7.x86_64.rpm
7、初始化
MySQL 5.7之后的版本,在初次启动MySQL时会生成临时的密码。超级用户'root'@'localhost'临时密码存储在错误日志文件中,可以通过查看/var/log/mysqld.log来获取。本实例中密码为RCraca*d5Fo0
[root@centos7-82 ~]# systemctl start mysqld
[root@centos7-82 ~]# grep password /var/log/mysqld.log
2022-05-03T05:21:15.173927Z 1 [Note] A temporary password is generated for root@localhost: Jg/H_jRur6Zi
MySQshowL安全配置向导
安装完mysql-server 会提示可以运行mysql_secure_installation。运行mysql_secure_installation会执行几个设置:
a)为root用户设置密码
b)删除匿名账号
c)取消root用户远程登录
d)删除test库和对test库的访问权限
e)刷新授权表使修改生效
通过这几项的设置能够提高mysql库的安全。建议生产环境中mysql安装这完成后一定要运行一次mysql_secure_installation,详细步骤请参看下面的命令:
NOTE: RUNNING
ALL PARTS OF THIS SCRIPT IS RECOMMENDED FOR ALL MySQL
SERVERS IN PRODUCTION USE! PLEASE READ EACH
STEP CAREFULLY!
In order to log into MySQL to secure it, we'll
need the current
password for the root user. If you've just
installed MySQL, and
you haven't set the root password yet, the
password will be blank,
so you should just press enter here.
Enter current password for root (enter for
none):<–初次运行直接回车
OK, successfully used password, moving on…
Setting the root password ensures that nobody
can log into the MySQL
root user without the proper authorisation.
Set root password? [Y/n] <– 是否设置root用户密码, 刚才我已设置密码,我们输n
... skipping
By default, a
MySQL installation has an anonymous user, allowing anyone
to log into MySQL without having to have a
user account created for
them. This is intended only for testing, and
to make the installation
go a bit smoother. You should remove them before
moving into a
production environment.
Remove anonymous users? [Y/n] <– 是否删除匿名用户,生产环境建议删除,所以直接回车或Y
… Success!
Normally, root should only be allowed to
connect from 'localhost'. This
ensures that someone cannot guess at the root
password from the network.
Disallow root login remotely? [Y/n] <–是否禁止root远程登录,根据自己的需求选择Y/n并回车,建议禁止
… Success!
By default, MySQL comes with a database named
'test' that anyone can
access. This is also intended only for
testing, and should be removed
before moving into a production environment.
Remove test database and access to it? [Y/n] <– 是否删除test数据库,直接回车或Y
- Dropping test database…
… Success!
- Removing privileges on test database…
… Success!
Reloading the privilege tables will ensure
that all changes made so far
will take effect immediately.
Reload privilege tables now? [Y/n] <– 是否重新加载权限表,直接回车
… Success!
Cleaning up…
All done! If you've completed all of the above
steps, your MySQL
installation should now be secure.
Thanks for using MySQL!
测试登录
[root@centos7-82 ~]# mysql -u root -p
Enter password:
Welcome to the MySQL monitor. Commands end with ; or \g.
Your MySQL connection id is 8
Server version: 5.7.38 MySQL Community Server (GPL)
Copyright (c) 2000, 2022, Oracle and/or its affiliates.
Oracle is a registered trademark of Oracle Corporation and/or its
affiliates. Other names may be trademarks of their respective
owners.
Type 'help;' or '\h' for help. Type '\c' to clear the current input statement.
mysql> show databases;
+--------------------+
| Database |
+--------------------+
| information_schema |
| mysql |
| performance_schema |
| sys |
+--------------------+
4 rows in set (0.00 sec)
mysql>