iOS自定义Tabbar
因为公司需求,苹果的原生tabBar已经不能满足本人类的需求,我在网上查了下,觉得还是自己写一个tabBar比较好。
虽然是自定义tabBar,还是在原生基础上写
基本思路就是:隐藏系统原生tabBar,自己写一个tabView(一个自定义View)放在底部当成tabBar,在点击View上面的button的时候调用原生方法,实现控制器切换
可以实现的功能:
1 可以自己随意的隐藏显示tabBar,实现一些关于tabBar的动画,所有的一切只需要设置tabView就可以了
2 可以自定义tabBar的样式,在tabBar上添加背景图,添加气泡等等完全无压力
在网上找了一个别人写好的tabBar,然后自己修改了一下,立即就可以实现需求,非常方便
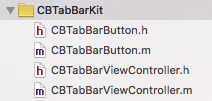
CBTabBar
只有两个类
CBTabBarViewController的.h代码

#import <UIKit/UIKit.h>

/*
 *可以实现隐藏tabBar功能
 */


@interface CBTabBarViewController : UITabBarController
-(void)hidCBTabbar:(BOOL)ishid;
@property (nonatomic, strong) NSArray           * imageNameArray;
@property (nonatomic, strong) NSArray           * imageName_sel_Array;
-(instancetype)initWithImageArray:(NSArray *)array andImageSelArray:(NSArray *)selArray;
-(void)setSelectedButton:(NSUInteger)selectedIndex;
@end
CBTabBarViewController的.m代码
|
1
2
3
4
5
6
7
8
9
10
11
12
13
14
15
16
17
18
19
20
21
22
23
24
25
26
27
28
29
30
31
32
33
34
35
36
37
38
39
40
41
42
43
44
45
46
47
48
49
50
51
52
53
54
55
56
57
58
59
60
61
62
63
64
65
66
67
68
69
70
71
72
73
74
75
76
77
78
79
80
81
82
83
84
85
86
87
88
89
90
91
92
93
94
95
96
97
98
99
100
101
102
103
104
105
106
107
108
109
110
111
112
113
114
115
116
117
118
119
120
121
122
123
124
125
126
127
128
129
130
131
132
133
134
135
136
|
#import "CBTabBarViewController.h"#import "CBTabBarButton.h"@interface CBTabBarViewController (){ UIView * myView; NSMutableArray * _buttonArray;}@property (nonatomic, weak) UIButton *selectedBtn;@end@implementation CBTabBarViewController-(instancetype)initWithImageArray:(NSArray *)array andImageSelArray:(NSArray *)selArray{ self = [super init]; if (self) { self.imageNameArray = array; self.imageName_sel_Array = selArray; [self loadSubView];//添加自定义tabBar } return self;}- (void)viewDidLoad { [super viewDidLoad]; self.imageNameArray = [NSArray array]; self.imageName_sel_Array = [NSArray array]; _buttonArray = [[NSMutableArray alloc] init];}-(void)loadSubView{ //删除现有的tabBar CGRect rect = self.tabBar.frame; [self.tabBar removeFromSuperview]; //移除TabBarController自带的下部的条 //添加自己的视图 /* *tabBar的底部View *背景图,button都会添加到这个myVIew上面 *可以自己添加其他View */ myView = [[UIView alloc] init]; myView.frame = rect;// myView.backgroundColor = [UIColor redColor]; [self.view addSubview:myView]; //给tabBar添加自定义背景图 UIImageView * imageView = [[UIImageView alloc] init]; imageView.image = [UIImage imageNamed:@"tabBarBGImg"]; imageView.frame = CGRectMake(0, 0, myView.frame.size.width, myView.frame.size.height); [myView addSubview:imageView]; if (self.imageName_sel_Array.count < 1 || self.imageNameArray.count < 1) { return; } [_buttonArray removeAllObjects]; for (int i = 0; i < 5; i++) { CGFloat x = i * myView.frame.size.width / 5; UIView * view = [[UIView alloc] initWithFrame:CGRectMake(x, 2, myView.frame.size.width / 5, myView.frame.size.height)]; [myView addSubview:view]; if (i == 2) { view.frame = CGRectMake(x, 0, myView.frame.size.width / 5, myView.frame.size.height); } //tabber 上面的button CBTabBarButton *btn = [[CBTabBarButton alloc] init]; NSString *imageName = [self.imageNameArray objectAtIndex:i]; NSString *imageNameSel = [self.imageName_sel_Array objectAtIndex:i]; [btn setImage:[UIImage imageNamed:imageName] forState:UIControlStateNormal]; [btn setImage:[UIImage imageNamed:imageNameSel] forState:UIControlStateSelected]; btn.tag = i;//设置按钮的标记, 方便来索引当前的按钮,并跳转到相应的视图 [btn addTarget:self action:@selector(clickBtn:) forControlEvents:UIControlEventTouchUpInside]; btn.center = CGPointMake(view.frame.size.width / 2, view.frame.size.height / 2); btn.bounds = CGRectMake(0, 0, 40, 40); [view addSubview:btn]; [_buttonArray addObject:btn]; //设置刚进入时,第一个按钮为选中状态 if (0 == i) { btn.selected = YES; self.selectedBtn = btn; //设置该按钮为选中的按钮 } }}//通过点击tabBar上面的button来跳转控制器- (void)clickBtn:(UIButton *)button { //1.先将之前选中的按钮设置为未选中 self.selectedBtn.selected = NO; //2.再将当前按钮设置为选中 button.selected = YES; //3.最后把当前按钮赋值为之前选中的按钮 self.selectedBtn = button; //4.跳转到相应的视图控制器. (通过selectIndex参数来设置选中了那个控制器) self.selectedIndex = button.tag;}//调用此方法来跳转控制器-(void)setSelectedButton:(NSUInteger)selectedIndex{ //1.先将之前选中的按钮设置为未选中 self.selectedBtn.selected = NO; //2.从buttonarray中找到当前button UIButton * button = [_buttonArray objectAtIndex:selectedIndex]; //3.最后把当前按钮赋值为之前选中的按钮 button.selected = YES; //4.跳转到相应的视图控制器. (通过selectIndex参数来设置选中了那个控制器) self.selectedIndex = selectedIndex;}//通过设置View的透明度来隐藏tabBar-(void)hidCBTabbar:(BOOL)ishid{ if (ishid) { myView.alpha = 0; }else{ myView.alpha = 1; }} |
CBTabBarButton.m代码
|
1
2
3
|
-(void)setHighlighted:(BOOL)highlighted{ //只需要取消高亮,这里什么都不用写} |
调用tabBar的代码
|
1
2
3
4
5
6
7
8
9
10
11
12
13
14
15
16
17
18
19
20
21
22
23
24
25
26
27
28
29
30
31
32
33
34
35
36
37
38
39
40
41
42
43
44
45
46
47
48
49
50
51
52
53
54
|
#import "ViewController.h"#import "CBTabBarViewController.h"#import "TestViewController.h"@interface ViewController ()@end@implementation ViewController- (void)viewDidLoad { [super viewDidLoad]; UIViewController *firstViewController = [[TestViewController alloc] init]; firstViewController.view.backgroundColor = [UIColor redColor]; UIViewController *firstNavigationController = [[UINavigationController alloc] initWithRootViewController:firstViewController]; UIViewController *secondViewController = [[TestViewController alloc] init]; secondViewController.view.backgroundColor = [UIColor yellowColor]; UIViewController *secondNavigationController = [[UINavigationController alloc] initWithRootViewController:secondViewController]; UIViewController *thirdViewController = [[TestViewController alloc] init]; thirdViewController.view.backgroundColor = [UIColor greenColor]; UIViewController *thirdNavigationController = [[UINavigationController alloc] initWithRootViewController:thirdViewController]; UIViewController *fourthViewController = [[TestViewController alloc] init]; fourthViewController.view.backgroundColor = [UIColor orangeColor]; UIViewController *fourthNavigationController = [[UINavigationController alloc] initWithRootViewController:fourthViewController]; UIViewController *fifthViewController = [[TestViewController alloc] init]; fifthViewController.view.backgroundColor = [UIColor blueColor]; UIViewController *fifthNavigationController = [[UINavigationController alloc] initWithRootViewController:fifthViewController]; NSArray * imageArray = [NSArray arrayWithObjects:@"sq_03",@"sq_05",@"zcfTabIcon",@"sousuo",@"wode",nil]; NSArray * selImageArray = [NSArray arrayWithObjects:@"sq_18",@"sq_19",@"sq_16",@"sousuo_sel",@"wode_sel",nil]; CBTabBarViewController * tabVC = [[CBTabBarViewController alloc] initWithImageArray:imageArray andImageSelArray:selImageArray]; tabVC.viewControllers = @[firstNavigationController,secondNavigationController,thirdNavigationController,fourthNavigationController,fifthNavigationController]; [tabVC setSelectedButton:0]; UIWindow * window = [[[UIApplication sharedApplication] delegate] window]; window.rootViewController = tabVC; } |
很简单的tabBar,其中的loadSubView方法可能有隐患,以后再处理
这样靠设置frame写出来的tabBar没有横屏效果,想要实现横屏效果需要自己再写约束代码
升级MDMS到2007下啦
OSS2007与现有系统(asp)如何集成呢
Directory Class
P/Invoke能够在ASP.NET中使用吗?
SPS中的摘要视图下该怎么分页显示信息?
P/Invoke能够在asp.net 中使用哦
SVN+AnkhSVN端配置
利用反射来实现类(含可空字段)的映射
iis7部署WCF服务应用程序