使用Maven搭建项目测试简单的CXF实例
Server:
pom.xml:
    <!-- begin CXF Server -->
    <dependency>
        <groupId>org.apache.cxf</groupId>
        <artifactId>cxf-rt-frontend-jaxws</artifactId>
        <version>3.1.1</version>
    </dependency>
    <dependency>
        <groupId>org.apache.cxf</groupId>
        <artifactId>cxf-rt-transports-http</artifactId>
        <version>3.1.1</version>
    </dependency>
    <dependency>
        <!-- 如果CXF不集成到Web服务器中,必须添加该引用 -->
        <groupId>org.apache.cxf</groupId>
        <artifactId>cxf-rt-transports-http-jetty</artifactId>
        <version>3.1.1</version>
    </dependency>
    <!-- End CXF Server -->
定义WebServer访问接口: ICXFService
package com.cxf;

import javax.jws.WebMethod;
import javax.jws.WebParam;
import javax.jws.WebService;

@WebService(name = "cxfService", targetNamespace = "http://localhost/services/testCXF")
public interface ICXFService {

    @WebMethod
    String test1(@WebParam(name = "name")String name);
}
定义接口的具体实现:CXFServiceImpl
package com.cxf.impl;

import javax.jws.WebService;

import com.cxf.ICXFService;

@WebService(endpointInterface = "com.cxf.ICXFService",
            portName = "HelloCXF",
            serviceName = "HelloCXFService",
            targetNamespace = "http://localhost/services/testCXF")
public class CXFServiceImpl implements ICXFService {

    @Override
    public String test1(String name) {
        return "Hello " + name;
    }

}
测试服务:
package com.cxf;

import org.apache.cxf.jaxws.JaxWsServerFactoryBean;

import com.cxf.impl.CXFServiceImpl;

public class CXFServiceRun {

    public static void main(String[] args) {
        JaxWsServerFactoryBean factory = new JaxWsServerFactoryBean();
        factory.setServiceClass(ICXFService.class);
        factory.setAddress("http://localhost:8888/services/hello");
        factory.setServiceBean(new CXFServiceImpl());
        factory.create();
    }
}
访问: http://localhost:8888/services/hello?wsdl

Client:
创建CXF的客户端maven工程
添加 CXF 必须的 jar :
<!-- begin CXF Client -->
    <dependency>
        <groupId>org.apache.cxf</groupId>
        <artifactId>cxf-rt-frontend-jaxws</artifactId>
        <version>3.1.1</version>
    </dependency>
    <dependency>
        <groupId>org.apache.cxf</groupId>
        <artifactId>cxf-rt-transports-http</artifactId>
        <version>3.1.1</version>
    </dependency>
    <!-- End CXF Client -->
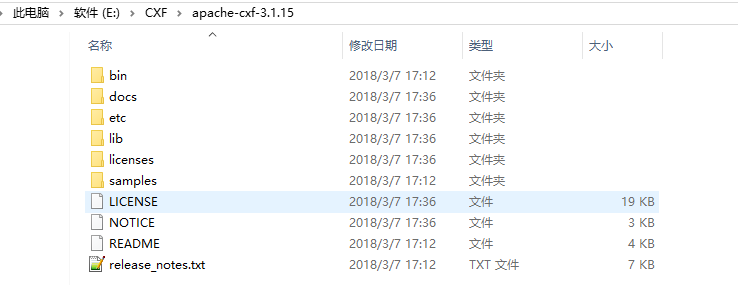
下载 apache 的 CXF 安装包 本次使用的是 apache-cxf-3.1.15 解压,配置环境变量就可以使用。

配置环境变量:

配置完成之后再 命令窗口 下执行 wsdl2java -help 出现如下信息表示配置成功:

执行:wsdl2java -encoding UTF-8 -d C:Users丰志DesktopcxfServersrcmainjava -p com.cxf.generate http://localhost:8888/services/hello?wsdl
-d 后面跟生成java代码的目录, -p后面跟生成代码的包名称,最后跟wsdl的链接地址(或wsdl文件路径 + 文件名称)

生成的代码目录文件:

然后将CXF生成的代码粘贴到客户端项目中(也可以直接将代码生成到eclipse中的webService的客户端工程中)
编写客户端测试:TestClient
package com.cxf.client;

import java.net.MalformedURLException;
import java.net.URL;

import org.apache.cxf.jaxws.JaxWsProxyFactoryBean;

import com.cxf.generate.CxfService;
import com.cxf.generate.ICXFServiceService;

public class TestClient {

    public static void main(String[] args) {
        //jaxws调用
//        URL不是必须的,除非服务的地址有改变
//        URL wsdlUrl = null;
//        try {
//            wsdlUrl = new URL("http://localhost:8888/services/hello?wsdl");
//        } catch (MalformedURLException e) {
//            e.printStackTrace();
//        }
//        ICXFServiceService factory = new ICXFServiceService(wsdlUrl);
////        ICXFServiceService factory = new ICXFServiceService();
//        CxfService cxfService = factory.getCxfServicePort();
//        String name = cxfService.test1("lisi");
//        System.out.println(name);

        // CXF 调用
        JaxWsProxyFactoryBean factory = new JaxWsProxyFactoryBean();
        factory.setServiceClass(CxfService.class);
        factory.setAddress("http://localhost:8888/services/hello");
        CxfService cxfService = factory.create(CxfService.class);
        String name = cxfService.test1("lisi");
        System.out.println(name);
    }

}
两种实现方式都可以
运行成功:

源码:https://files.cnblogs.com/files/guofz/FirstCXF.rar
参考:https://blog.csdn.net/accountwcx/article/details/47082487