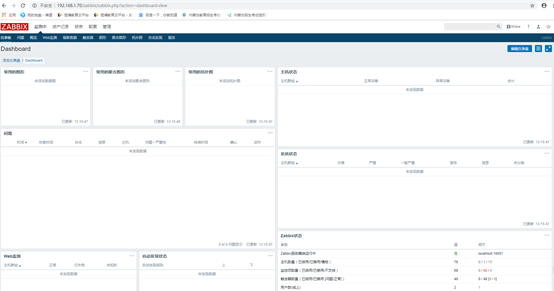
1.安装前准备
(1)关闭防火墙
[root@localhost ~]#Systemctl stop firewalld.service
(2)开机关闭防火墙
[root@localhost ~]#Systemctl disable firewall.service
(3)关闭selinux
编辑/etc/selinux/conf文件
将SELINUX=换成disabled
(4)清空防火墙规则并关闭:
[root@localhost ~]#Iptables -F
[root@localhost ~]#Systemctl iptables stop
(5)检查网络是否畅通(互相ping通)
2.数据库的安装及配置
MariaDB数据库管理系统是MySQL的一个分支,主要由开源社区在维护,采用GPL授权许可。
MariaDB的目的是完全兼容MySQL,包括API和命令行,使之能轻松成为MySQL的代替品。
2.1检查系统版本信息

2.2安装mariadb


[root@localhost ~]#mariadb数据库的相关命令是:
[root@localhost ~]#systemctl start mariadb #启动MariaDB
[root@localhost ~]#systemctl stop mariadb #停止MariaDB
[root@localhost ~]#systemctl restart mariadb #重启MariaDB
[root@localhost ~]#systemctl enable mariadb #设置开机启动
3.Zabbix 3.4安装及配置
3.1 安装zabbix 3.4
[root@localhost ~]#rpm -ivh http://repo.zabbix.com/zabbix/3.4/rhel/7/x86_64/zabbix-release-3.4-1.el7.centos.noarch.rpm

[root@localhost ~]#yum install zabbix-server-mysql zabbix-web-mysql –y

3.2 启动服务
[root@localhost ~]#systemctl start mariadb
3.3 创建数据库
MariaDB [(none)]> create database zabbix character set utf8 collate utf8_bin;
(创建一个库名为zabbix,编码为utf8)
MariaDB [(none)]> grant all privileges on zabbix.* to ‘zabbix’@’%.%.%.%’identified by 'zabbix';
(授权用户zabbix对zabbix这个库里的所有表,授权用户zabbix,密码zabbix,登陆localhost本地)
MariaDB [(none)]> flush privileges;
(刷新策略)
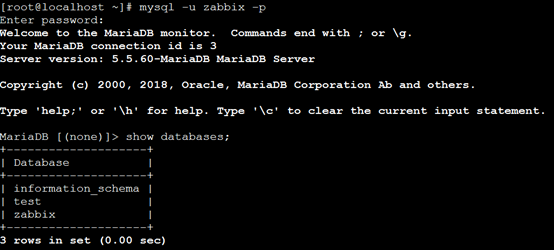
3.4 验证授权用户
3.5 找到数据库文件
先找到数据库文件,查看发现是压缩文件,解压开看到的就是数据库文件
[root@localhost ~]#cd /usr/share/doc/zabbix-server-mysql-3.4.14
[root@localhost ~]#gunzip create.aql.gz
3.6 导入数据库文件
MariaDB [(none)]>use zabbix;
MariaDB [(none)]> source /usr/share/doc/zabbix-server-mysql-3.4.14/create.sql
3.7 配置用户名及密码
[root@localhost ~]#grep -n '^'[a-Z] /etc/zabbix/zabbix_server.conf
[root@localhost ~]# vim /etc/zabbix/zabbix_server.conf
3.8 启动zabbix server并设置开机启动
[root@localhost ~]# systemctl start zabbix-server
[root@localhost ~]# systemctl enable zabbix-server
3.9 编辑Zabbix前端PHP配置
(更改时区)
[root@localhost ~]# vim /etc/httpd/conf.d/zabbix.conf
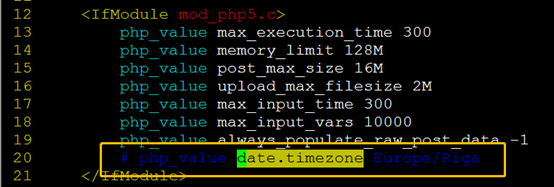
去掉注释,并修改为亚洲上海

3.10 启动httpd并设置开机启动
[root@localhost ~]# systemctl start httpd #启动httpd服务
[root@localhost ~]# systemctl enable httpd #设置开机启动httpd服务
注意:zabbix-server跟httpd服务如果启不来的话,添加系统配置文件

4Zabbix Web安装及配置
4.1 浏览器访问安装
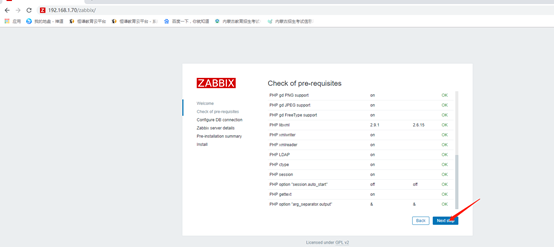
4.2 输入数据库密码
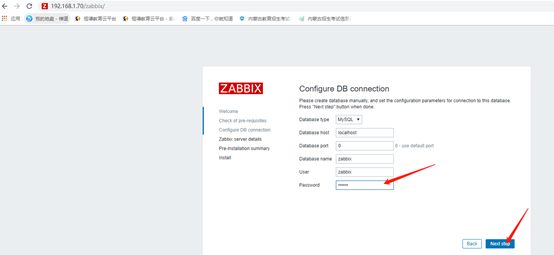
4.3 填写名称
(这里就叫做zabbix)

4.4 展示配置文件信息
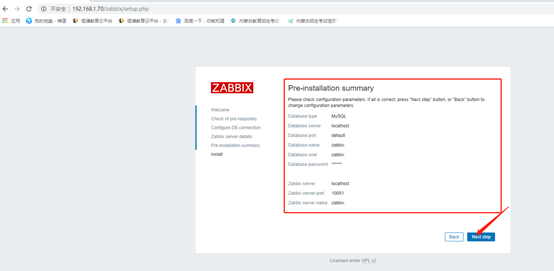
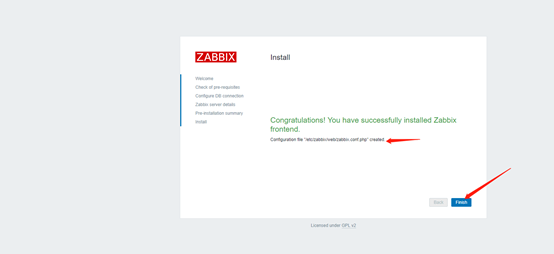
4.5 完成安装
会将在/etc/zabbix/web/zabbix.conf.php生成配置文件
4.6 输入用户名密码
用户名Admin 密码zabbix (默认用户名密码)

4.7 修改zabbix为中文


4.8 安装完成
