基于上篇基于谷歌开源的TensorFlow Object Detection API视频物体识别系统搭建自己的应用(一),实现视频物体识别
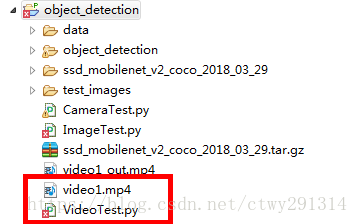
基于上篇,新建VideoTest.py,并将一个视频文件放入到object_detection目录下
主要步骤如下:
1.使用 VideoFileClip 函数从视频中抓取图片。
2.用fl_image函数将原图片替换为修改后的图片,用于传递物体识别的每张抓取图片。
3.所有修改的剪辑图像被组合成为一个新的视频。
废话不多说,直接上代码:
# coding: utf-8
import numpy as np
import os
import six.moves.urllib as urllib
import sys
import tarfile
import tensorflow as tf
import zipfile
from collections import defaultdict
from io import StringIO
from matplotlib import pyplot as plt
from PIL import Image
# This is needed since the notebook is stored in the object_detection folder.
sys.path.append("..")
from object_detection.utils import ops as utils_ops
if tf.__version__ < '1.4.0':
raise ImportError('Please upgrade your tensorflow installation to v1.4.* or later!')
# This is needed to display the images.
from object_detection.utils import label_map_util
from object_detection.utils import visualization_utils as vis_util
os.environ['TF_CPP_MIN_LOG_LEVEL'] = '2'
##Model preparation##
# What model to download.
MODEL_NAME = 'ssd_mobilenet_v2_coco_2018_03_29'
MODEL_FILE = MODEL_NAME + '.tar.gz'
DOWNLOAD_BASE = 'http://download.tensorflow.org/models/object_detection/'
# Path to frozen detection graph. This is the actual model that is used for the object detection.
PATH_TO_CKPT = MODEL_NAME + '/frozen_inference_graph.pb'
# List of the strings that is used to add correct label for each box.
PATH_TO_LABELS = os.path.join('data', 'mscoco_label_map.pbtxt')
NUM_CLASSES = 90
## Download Model##
#opener = urllib.request.URLopener()
#opener.retrieve(DOWNLOAD_BASE + MODEL_FILE, MODEL_FILE)
tar_file = tarfile.open(MODEL_FILE)
for file in tar_file.getmembers():
file_name = os.path.basename(file.name)
if 'frozen_inference_graph.pb' in file_name:
tar_file.extract(file, os.getcwd())
## Load a (frozen) Tensorflow model into memory.
detection_graph = tf.Graph()
with detection_graph.as_default():
od_graph_def = tf.GraphDef()
with tf.gfile.GFile(PATH_TO_CKPT, 'rb') as fid:
serialized_graph = fid.read()
od_graph_def.ParseFromString(serialized_graph)
tf.import_graph_def(od_graph_def, name='')
## Loading label map
label_map = label_map_util.load_labelmap(PATH_TO_LABELS)
categories = label_map_util.convert_label_map_to_categories(label_map, max_num_classes=NUM_CLASSES, use_display_name=True)
category_index = label_map_util.create_category_index(categories)
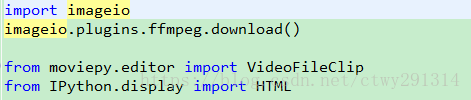
import imageio
imageio.plugins.ffmpeg.download()
from moviepy.editor import VideoFileClip
from IPython.display import HTML
def detect_objects(image_np, sess, detection_graph):
# 扩展维度,应为模型期待: [1, None, None, 3]
image_np_expanded = np.expand_dims(image_np, axis=0)
image_tensor = detection_graph.get_tensor_by_name('image_tensor:0')
# 每个框代表一个物体被侦测到
boxes = detection_graph.get_tensor_by_name('detection_boxes:0')
#每个分值代表侦测到物体的可信度.
scores = detection_graph.get_tensor_by_name('detection_scores:0')
classes = detection_graph.get_tensor_by_name('detection_classes:0')
num_detections = detection_graph.get_tensor_by_name('num_detections:0')
# 执行侦测任务.
(boxes, scores, classes, num_detections) = sess.run(
[boxes, scores, classes, num_detections],
feed_dict={image_tensor: image_np_expanded})
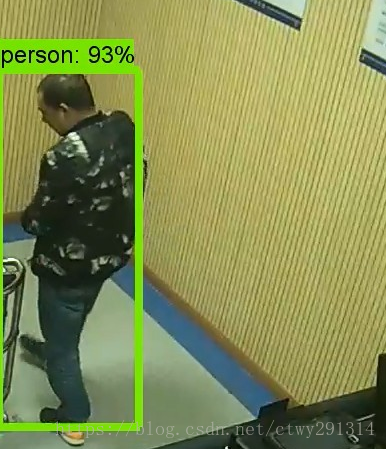
# 检测结果的可视化
vis_util.visualize_boxes_and_labels_on_image_array(
image_np,
np.squeeze(boxes),
np.squeeze(classes).astype(np.int32),
np.squeeze(scores),
category_index,
use_normalized_coordinates=True,
line_thickness=8)
return image_np
def process_image(image):
# NOTE: The output you return should be a color image (3 channel) for processing video below
# you should return the final output (image with lines are drawn on lanes)
with detection_graph.as_default():
with tf.Session(graph=detection_graph) as sess:
image_process = detect_objects(image, sess, detection_graph)
return image_process
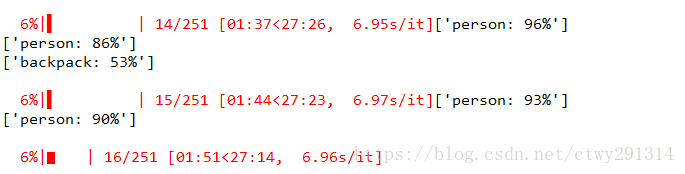
white_output = 'video1_out.mp4'
clip1 = VideoFileClip("video1.mp4").subclip(10,20)
white_clip = clip1.fl_image(process_image) #NOTE: this function expects color images!!s
white_clip.write_videofile(white_output, audio=False)
from moviepy.editor import *
clip1 = VideoFileClip("video1_out.mp4")
clip1.write_gif("final.gif") 代码解释:
此处会下载一个剪辑必备的程序ffmpeg.win32.exe,内网下载过程中容易断线,可以使用下载工具下载完然后放入如下路径:
C:Users用户名AppDataLocalimageioffmpegffmpeg.win32.exe

首先,使用VideoFileClip函数从视频中提取图像,提取10至20S的图像

然后使用fl_image函数通过替换帧来修改剪辑的图像,并通过调用process_image在上面应用物体识别API。fl_image是一个很有用的函数,可以提取图像并把它替换为修改后的图像。通过这个函数就可以实现在每个视频上提取图像并应用物体识别;

最后,把所有处理过的图像片段合并成一个新视频。
至此识别视频中的物体已完成。