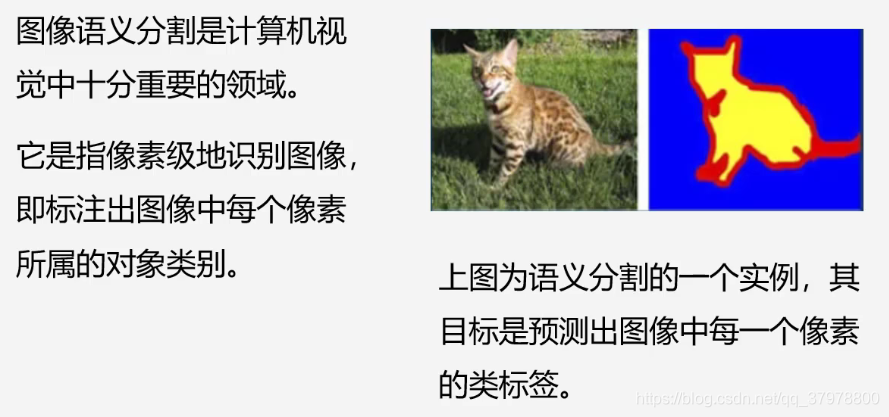
图像语义分割简介


图像语义分割网络结构-FCN


上采样


代码实现


import tensorflow as tf
import matplotlib.pyplot as plt
%matplotlib inline
import numpy as np
import glob
import os
# 显存自适应分配
gpus = tf.config.experimental.list_physical_devices(device_type='GPU')
for gpu in gpus:
    tf.config.experimental.set_memory_growth(gpu,True)
gpu_ok = tf.test.is_gpu_available()
print("tf version:", tf.__version__)
print("use GPU", gpu_ok) # 判断是否使用gpu进行训练

例子
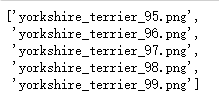
os.listdir("F:/py/ziliao/数据集/图片定位与分割数据集/annotations/trimaps")[-5:]

# 读取图片
img = tf.io.read_file(r"F:/py/ziliao/数据集/图片定位与分割数据集/annotations/trimaps/Abyssinian_2.png")

# 读取图片
img2 = tf.io.read_file(r"F:/py/ziliao/数据集/图片定位与分割数据集/images/Abyssinian_2.jpg")
# 解码
img = tf.image.decode_png(img)
img2 = tf.image.decode_jpeg(img2)
# 查看大小
img.shape

# 移除的所有大小为1的维度具有相同类型的张量
img = tf.squeeze(img)
img.shape

# 绘图
plt.imshow(img)

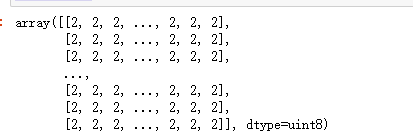
img.numpy()

np.unique(img.numpy()) # 我们能看见改图中只有3种像素 分别对应背景 边框 身体

plt.imshow(img2)

完整代码
 # 读取所有图片路径
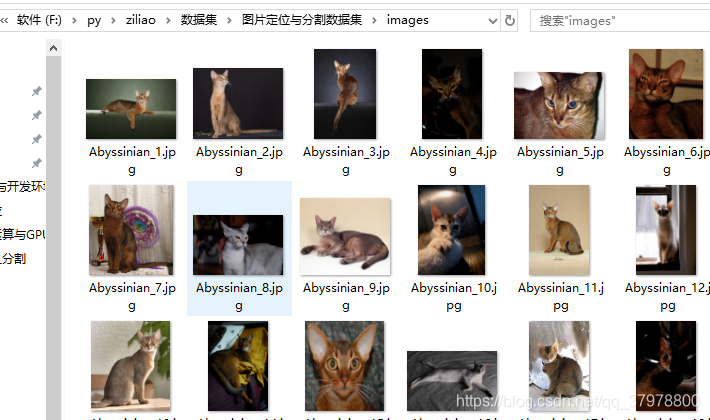
images = glob.glob(r"F:/py/ziliao/数据集/图片定位与分割数据集/images/*.jpg")

# 读取对应的目标图像
anno = glob.glob(r"F:/py/ziliao/数据集/图片定位与分割数据集/annotations/trimaps/*.png")

# 对图片进行随机
np.random.seed(2020) #设置随机数种子生成的随机数将会是同一个
index = np.random.permutation(len(images))
images = np.array(images)[index]
anno = np.array(anno)[index]

# 创建数据集
dataset = tf.data.Dataset.from_tensor_slices((images,anno))

# 划分数据集
test_count = int(len(images)*0.2)
train_count = len(images)-test_count
test_count,train_count

# 分割数据集
data_train =dataset.skip(test_count) # 跳过test_count 的数据作为训练数据
data_test = dataset.take(test_count) #  取出test_count的数据作为测试集
# 创建 jpg格式的解码函数
def read_jpg(path):
    img = tf.io.read_file(path)
    img = tf.image.decode_jpeg(img,channels=3)
    return img
# 创建png的解码函数
def read_png(path):
    img = tf.io.read_file(path)
    img = tf.image.decode_png(img,channels=1)
    return img
#  归一化
def normal_img(input_images,input_anno):
    input_images = tf.cast(input_images,tf.float32) # 改变数据类型为float32
    input_images/127.5 - 1  # 归一化到 -1 到 1 之间

    input_anno -= 1  # 因为目标图像取值范围是 1,2,3   我们 -1 修改为 0,1,2
    return input_images,input_anno
# 加载函数
def load_images(input_images_path,input_anno_path):
    input_image = read_jpg(input_images_path)
    input_anno = read_png(input_anno_path)
    input_image = tf.image.resize(input_image,(224,224))
    input_anno = tf.image.resize(input_anno,(224,224))
    return normal_img(input_image,input_anno)
# 使用加载函数
data_train = data_train.map(load_images,
                            num_parallel_calls=tf.data.experimental.AUTOTUNE)
data_test = data_test.map(load_images,
                            num_parallel_calls=tf.data.experimental.AUTOTUNE)
BATCH_SIZE = 16
# 对数据集进行乱序
data_train = data_train.repeat().shuffle(5912).batch(BATCH_SIZE)
data_test = data_test.batch(BATCH_SIZE)

for img,anno in data_train.take(1):
    plt.subplot(1,2,1) # 1行2列
    plt.imshow(tf.keras.preprocessing.image.array_to_img(img[0]))
    plt.subplot(1,2,2) # 1行2列
    plt.imshow(tf.keras.preprocessing.image.array_to_img(anno[0]))

# 使用预训练网络
conv_base = tf.keras.applications.VGG16(weights="imagenet", # 使用该模型image权重
                                        input_shape=(224,224,3),
                                        include_top = False)
conv_base.summary()


# 例: 获得某一层的输出  如 获取 block5_conv3 的层的输出
conv_base.get_layer("block5_conv3").output
# 例: 从预训练网络中创建子模型
sub_model = tf.keras.models.Model(inputs = conv_base.input,
                                  outputs = conv_base.get_layer("block5_conv3").output
                                 )

FCN跳阶-获取模型中间层的输出
layer_names = [
    "block5_conv3", # 14x14
    "block4_conv3", # 28x28
    "block3_conv3", # 56x56
    "block5_pool"
] # 获取输出层的名字
# 创建特征提取模型
layers_output = [conv_base.get_layer(layer_name).output for layer_name in layer_names]

# 从预训练网络中创建子模型
multi_out_model = tf.keras.models.Model(inputs = conv_base.input,
                                        outputs = layers_output
                                 )
multi_out_model.trainable = False # 禁止训练
#构建模型
inputs = tf.keras.layers.Input(shape=(224,224,3))
out_block5_conv3,out_block4_conv3,out_block3_conv3,out = multi_out_model(inputs)

反卷积 上采样
#输出512个卷积核 窗口大小3*3   图片变大2倍填充方式same保证和原有图像大小一样  激活relu
x1 = tf.keras.layers.Conv2DTranspose(512,3,
                                     strides=2,
                                     padding="same",
                                     activation="relu")(out) # 调用out层

x1 = tf.keras.layers.Conv2D(512,3,
                            padding="same",
                            activation="relu")(x1) # 在增加一层卷积

x2 = tf.add(x1,out_block5_conv3) # 层相加
x2.shape

x2 = tf.keras.layers.Conv2DTranspose(512,3,strides=2,padding="same",activation="relu")(x2)
x2 = tf.keras.layers.Conv2D(512,3,padding="same",activation="relu")(x2) # 在增加一层卷积

x3 = tf.add(x2,out_block4_conv3) # 层相加
x3.shape
x3 = tf.keras.layers.Conv2DTranspose(256,3,strides=2,padding="same",activation="relu")(x3)
x3 = tf.keras.layers.Conv2D(256,3,padding="same",activation="relu")(x3) # 在增加一层卷积进一步提取特征

x4 = tf.add(x3,out_block3_conv3)
x4.shape

x5 = tf.keras.layers.Conv2DTranspose(128,3,strides=2,padding="same",activation="relu")(x4)
x5 = tf.keras.layers.Conv2D(128,3,padding="same",activation="relu")(x5) # 在增加一层卷积进一步提取特征

prediction = tf.keras.layers.Conv2DTranspose(3, # 因为目标图像取值是3个,所以我们输出为3
                                             3,
                                             strides=2,
                                             padding="same",
                                             activation="softmax")(x5) # 上采样

model = tf.keras.models.Model(
    inputs=inputs,
    outputs=prediction
)

# 模型编译
model.compile(
    optimizer="adam",
    loss = "sparse_categorical_crossentropy",
    metrics=["acc"]
)
# 训练模型
history = model.fit(data_train,
                    epochs=5,
                    steps_per_epoch=train_count//BATCH_SIZE,
                    validation_data=data_test,
                    validation_steps=test_count//BATCH_SIZE,

)

loss = history.history["loss"]
val_loss = history.history["val_loss"]

epochs = range(15)

plt.figure()
plt.plot(epochs,loss,"r",label="Trainning loss")
plt.plot(epochs,val_loss,"bo",label="Validation loss")
plt.title("Training and Validation Loss")
plt.xlabel("epochs")
plt.ylabel("Loss Value")

plt.legend()
plt.show()

num = 3
for image, mask in data_test.take(1): # 从test数据取出一个batch
    pred_mask = model.predict(image) # model.predict(image) 对图片进行预测
    pred_mask = tf.argmax(pred_mask, axis=-1)  # 取出预测最大值
    pred_mask = pred_mask[..., tf.newaxis] # 维度扩展 取前面所有维度

    plt.figure(figsize=(10, 10))
    for i in range(num):
        plt.subplot(num, 3, i*num+1)
        plt.imshow(tf.keras.preprocessing.image.array_to_img(image[i])) # 原图
        plt.subplot(num, 3, i*num+2)
        plt.imshow(tf.keras.preprocessing.image.array_to_img(mask[i])) # 真实分割图
        plt.subplot(num, 3, i*num+3)
        plt.imshow(tf.keras.preprocessing.image.array_to_img(pred_mask[i])) # 预测分割图
