(一)token的介绍
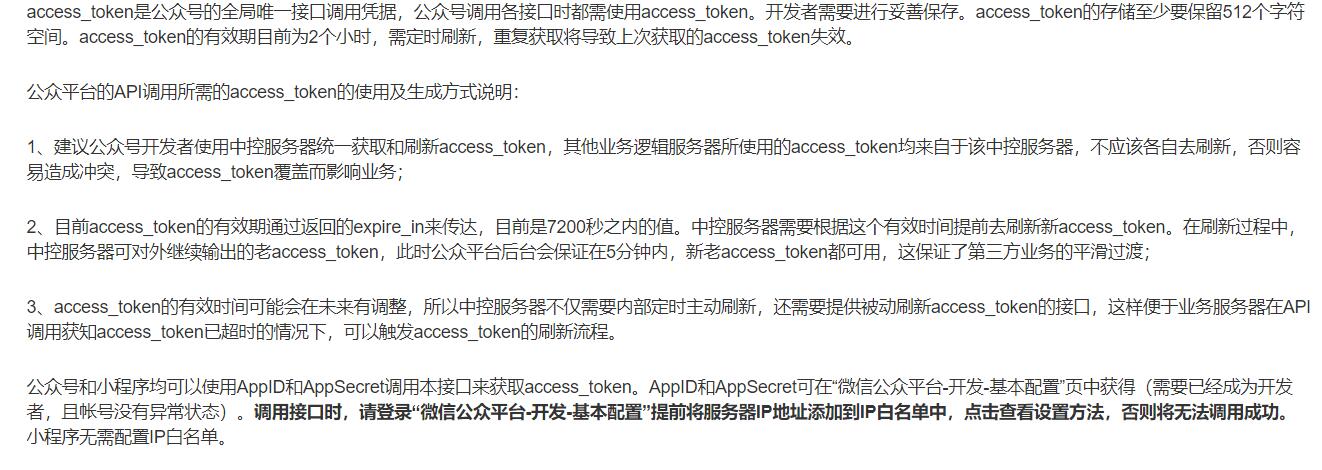
引用:access_token是公众号的全局唯一票据,公众号调用各接口时都需使用access_token。开发者需要进行妥善保存。access_token的存储至少要保留512个字符空间。access_token的有效期目前为2个小时,需定时刷新,重复获取将导致上次获取的access_token失效!
(二)token的获取参考文档
获取的流程我们完全可以参考微信官方文档:http://mp.weixin.qq.com/wiki/14/9f9c82c1af308e3b14ba9b973f99a8ba.html 如图:

(三)token获取流程分析
-
从公众平台获取账号的AppID和AppSecret;
-
token获取并解析存储执行体;
-
采用任务调度每隔两小时执行一次token获取执行体;
(四)token的获取流程的具体实现
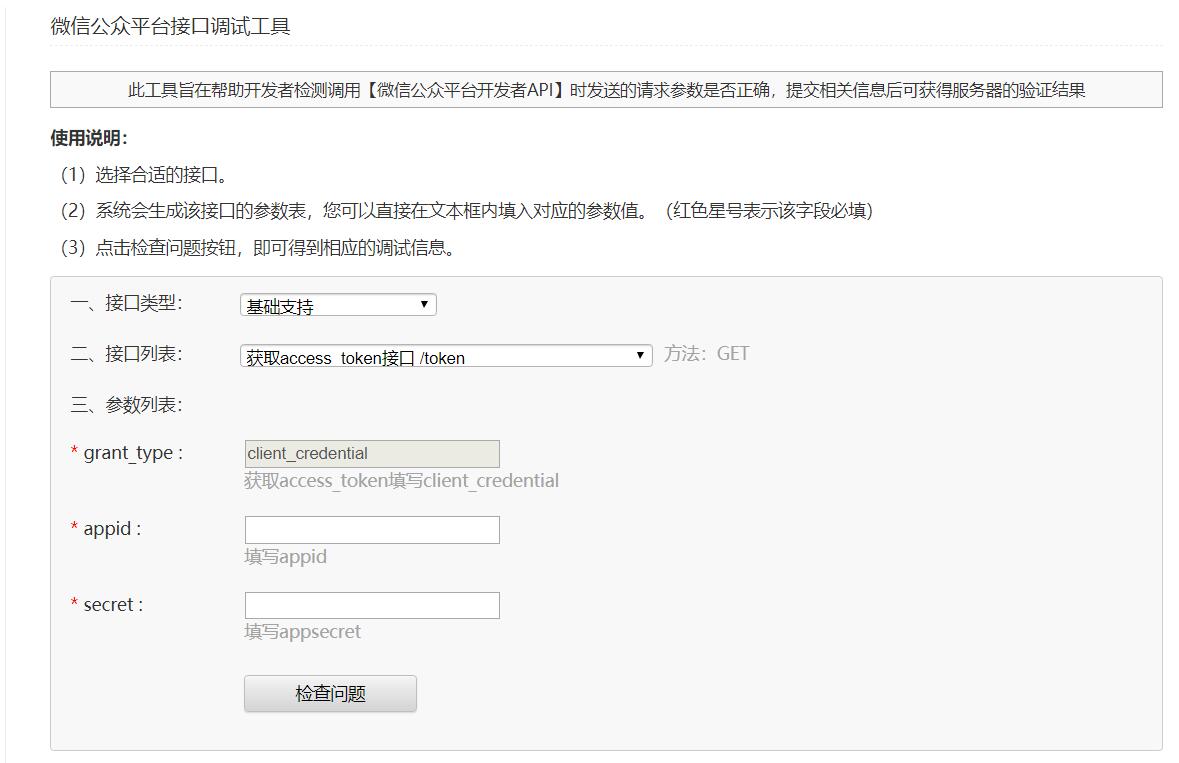
①获取appid和appsecret
在微信公众平台接口测试工具中可以查看到我们需要的两个参数:
这里我们将appid 和secret 定义到配置文件【wechat.properties】,在src目录下新建【wechat.properties】文件,大致代码为:
#开发者的appid
appid=wx7e32765bc24XXXX
#开发者的AppSecret
AppSecret=d58051564fe9d86093f9XXXXX
②token获取并解析存储执行体的代码编写
由于在这里我们需要通过http的get请求向微信服务器获取时效性为7200秒的token,所以我在这里写了一个http请求的工具类HttpUtils,以方便我们的使用,如下:(这里需要导入文末的http协议包)
  1 package com.gede.wechat.util;
  2 import java.io.BufferedInputStream;
  3 import java.io.BufferedReader;
  4 import java.io.IOException;
  5 import java.io.InputStream;
  6 import java.io.InputStreamReader;
  7 import java.io.OutputStreamWriter;
  8 import java.net.MalformedURLException;
  9 import java.net.URI;
 10 import java.net.URL;
 11 import java.net.URLConnection;
 12 import java.util.ArrayList;
 13 import java.util.List;
 14 import java.util.Map;
 15 import java.util.Set;
 16 import java.util.zip.GZIPInputStream;
 17
 18 import org.apache.http.HttpResponse;
 19 import org.apache.http.NameValuePair;
 20 import org.apache.http.client.ClientProtocolException;
 21 import org.apache.http.client.HttpClient;
 22 import org.apache.http.client.entity.UrlEncodedFormEntity;
 23 import org.apache.http.client.methods.HttpGet;
 24 import org.apache.http.client.methods.HttpPost;
 25 import org.apache.http.entity.StringEntity;
 26 import org.apache.http.impl.client.DefaultHttpClient;
 27 import org.apache.http.message.BasicNameValuePair;
 28 import org.apache.http.protocol.HTTP;
 29 import org.apache.http.util.EntityUtils;
 30 /**
 31 * @author gede
 32 * @version date:2019年5月26日 下午5:43:36
 33 * @description :
 34 */
 35 public class HttpUtils {
 36
 37     /**
 38      * @Description: http get请求共用方法
 39      * @param @param reqUrl
 40      * @param @param params
 41      * @param @return
 42      * @param @throws Exception
 43      */
 44     @SuppressWarnings("resource")
 45     public static String sendGet(String reqUrl, Map<String, String> params)
 46             throws Exception {
 47         InputStream inputStream = null;
 48         HttpGet request = new HttpGet();
 49         try {
 50             String url = buildUrl(reqUrl, params);
 51             HttpClient client = new DefaultHttpClient();
 52
 53             request.setHeader("Accept-Encoding", "gzip");
 54             request.setURI(new URI(url));
 55
 56             HttpResponse response = client.execute(request);
 57
 58             inputStream = response.getEntity().getContent();
 59             String result = getJsonStringFromGZIP(inputStream);
 60             return result;
 61         } finally {
 62             if (inputStream != null) {
 63                 inputStream.close();
 64             }
 65             request.releaseConnection();
 66         }
 67
 68     }
 69
 70     @SuppressWarnings("resource")
 71     public static String sendPost(String reqUrl, Map<String, String> params)
 72             throws Exception {
 73         try {
 74             Set<String> set = params.keySet();
 75             List<NameValuePair> list = new ArrayList<NameValuePair>();
 76             for (String key : set) {
 77                 list.add(new BasicNameValuePair(key, params.get(key)));
 78             }
 79             if (list.size() > 0) {
 80                 try {
 81                     HttpClient client = new DefaultHttpClient();
 82                     HttpPost request = new HttpPost(reqUrl);
 83
 84                     request.setHeader("Accept-Encoding", "gzip");
 85                     request.setEntity(new UrlEncodedFormEntity(list, HTTP.UTF_8));
 86
 87                     HttpResponse response = client.execute(request);
 88
 89                     InputStream inputStream = response.getEntity().getContent();
 90                     try {
 91                         String result = getJsonStringFromGZIP(inputStream);
 92
 93                         return result;
 94                     } finally {
 95                         inputStream.close();
 96                     }
 97                 } catch (Exception ex) {
 98                     ex.printStackTrace();
 99                     throw new Exception("网络连接失败,请连接网络后再试");
100                 }
101             } else {
102                 throw new Exception("参数不全,请稍后重试");
103             }
104         } catch (Exception ex) {
105             ex.printStackTrace();
106             throw new Exception("发送未知异常");
107         }
108     }
109
110     public static String sendPostBuffer(String urls, String params)
111             throws ClientProtocolException, IOException {
112         HttpPost request = new HttpPost(urls);
113
114         StringEntity se = new StringEntity(params, HTTP.UTF_8);
115         request.setEntity(se);
116         // 发送请求
117         @SuppressWarnings("resource")
118         HttpResponse httpResponse = new DefaultHttpClient().execute(request);
119         // 得到应答的字符串,这也是一个 JSON 格式保存的数据
120         String retSrc = EntityUtils.toString(httpResponse.getEntity());
121         request.releaseConnection();
122         return retSrc;
123
124     }
125
126     public static String sendXmlPost(String urlStr, String xmlInfo) {
127         // xmlInfo xml具体字符串
128
129         try {
130             URL url = new URL(urlStr);
131             URLConnection con = url.openConnection();
132             con.setDoOutput(true);
133             con.setRequestProperty("Pragma:", "no-cache");
134             con.setRequestProperty("Cache-Control", "no-cache");
135             con.setRequestProperty("Content-Type", "text/xml");
136             OutputStreamWriter out = new OutputStreamWriter(
137                     con.getOutputStream());
138             out.write(new String(xmlInfo.getBytes("utf-8")));
139             out.flush();
140             out.close();
141             BufferedReader br = new BufferedReader(new InputStreamReader(
142                     con.getInputStream()));
143             String lines = "";
144             for (String line = br.readLine(); line != null; line = br
145                     .readLine()) {
146                 lines = lines + line;
147             }
148             return lines; // 返回请求结果
149         } catch (MalformedURLException e) {
150             e.printStackTrace();
151         } catch (IOException e) {
152             e.printStackTrace();
153         }
154         return "fail";
155     }
156
157     private static String getJsonStringFromGZIP(InputStream is) {
158         String jsonString = null;
159         try {
160             BufferedInputStream bis = new BufferedInputStream(is);
161             bis.mark(2);
162             // 取前两个字节
163             byte[] header = new byte[2];
164             int result = bis.read(header);
165             // reset输入流到开始位置
166             bis.reset();
167             // 判断是否是GZIP格式
168             int headerData = getShort(header);
169             // Gzip 流 的前两个字节是 0x1f8b
170             if (result != -1 && headerData == 0x1f8b) {
171                 // LogUtil.i("HttpTask", " use GZIPInputStream  ");
172                 is = new GZIPInputStream(bis);
173             } else {
174                 // LogUtil.d("HttpTask", " not use GZIPInputStream");
175                 is = bis;
176             }
177             InputStreamReader reader = new InputStreamReader(is, "utf-8");
178             char[] data = new char[100];
179             int readSize;
180             StringBuffer sb = new StringBuffer();
181             while ((readSize = reader.read(data)) > 0) {
182                 sb.append(data, 0, readSize);
183             }
184             jsonString = sb.toString();
185             bis.close();
186             reader.close();
187         } catch (Exception e) {
188             e.printStackTrace();
189         }
190
191         return jsonString;
192     }
193
194     private static int getShort(byte[] data) {
195         return (data[0] << 8) | data[1] & 0xFF;
196     }
197
198     /**
199      * 构建get方式的url
200      *
201      * @param reqUrl
202      *            基础的url地址
203      * @param params
204      *            查询参数
205      * @return 构建好的url
206      */
207     public static String buildUrl(String reqUrl, Map<String, String> params) {
208         StringBuilder query = new StringBuilder();
209         Set<String> set = params.keySet();
210         for (String key : set) {
211             query.append(String.format("%s=%s&", key, params.get(key)));
212         }
213         return reqUrl + "?" + query.toString();
214     }
215
216 }
我们在做http请求的时候需要目标服务器的url,这里在项目中为了方便对url的管理我们src目录下建立了interface_url.properties用于存放目标url,这里我们将请求token的url存入:
#获取token的url
tokenUrl=https://api.weixin.qq.com/cgi-bin/token
我们需要将我们配置的配置文件在项目初始化后能得到启动,所以我在这里加入一个项目初始化的代码InterfaceUrlIntiServlet来实现,用于项目启动初始化interface_url.properties和wechat.properties中的配置:
 1 package com.gede.web.start;
 2 import javax.servlet.ServletConfig;
 3 import javax.servlet.ServletException;
 4 import javax.servlet.http.HttpServlet;
 5 /**
 6 * @author gede
 7 * @version date:2019年5月26日 下午7:42:14
 8 * @description :
 9 */
10 public class InterfaceUrlIntiServlet extends HttpServlet {
11
12     private static final long serialVersionUID = 1L;
13
14     @Override
15     public void init(ServletConfig config) throws ServletException {
16         InterfaceUrlInti.init();
17     }
18 }
初始化的具体实现,将初始化过后的方法都存入到GlobalConstants中方便项目中随意调用,如下:
 1 package com.gede.web.start;
 2 import java.io.IOException;
 3 import java.io.InputStream;
 4 import java.util.Properties;
 5 import com.gede.web.util.GlobalConstants;
 6 /**
 7 * @author gede
 8 * @version date:2019年5月26日 下午7:42:37
 9 * @description :
10 */
11 public class InterfaceUrlInti {
12
13     public synchronized static void init(){
14         ClassLoader cl = Thread.currentThread().getContextClassLoader();
15         Properties props = new Properties();
16         if(GlobalConstants.interfaceUrlProperties==null){
17             GlobalConstants.interfaceUrlProperties = new Properties();
18         }
19         InputStream in = null;
20         try {
21             in = cl.getResourceAsStream("interface_url.properties");
22             props.load(in);
23             for(Object key : props.keySet()){
24                 GlobalConstants.interfaceUrlProperties.put(key, props.get(key));
25             }
26
27             props = new Properties();
28             in = cl.getResourceAsStream("wechat.properties");
29             props.load(in);
30             for(Object key : props.keySet()){
31                 GlobalConstants.interfaceUrlProperties.put(key, props.get(key));
32             }
33
34         } catch (IOException e) {
35             e.printStackTrace();
36         }finally{
37             if(in!=null){
38                 try {
39                     in.close();
40                 } catch (IOException e) {
41                     e.printStackTrace();
42                 }
43             }
44         }
45         return;
46     }
47
48 }
这里用到的GlobalConstants,我们新建在web.util包里面,代码如下:
package com.gede.web.util;
import java.util.Properties;
/**
* @author gede
* @version date:2019年5月26日 下午7:45:27
* @description :
*/
public class GlobalConstants {
    public static Properties interfaceUrlProperties;

/**
 * @Description: TODO
 * @param @param key
 * @param @return
 */
    public static String getInterfaceUrl(String key) {
        return (String) interfaceUrlProperties.get(key);
    }
}
当我们把所有的准备工作都做好了之后我们可以开始真正的去获取token了,这里我们将获取到的token解析之后依然存储到GlobalConstants中方便使用,简单代码如下:(这里需要导入我们附件中的json包)
 1 package com.gede.wechat.common;
 2 import java.text.SimpleDateFormat;
 3 import java.util.Date;
 4 import java.util.HashMap;
 5 import java.util.Map;
 6
 7 import com.gede.web.util.GlobalConstants;
 8 import com.gede.wechat.util.HttpUtils;
 9
10 import net.sf.json.JSONObject;
11 /**
12 * @author gede
13 * @version date:2019年5月26日 下午7:50:38
14 * @description :
15 */
16 public class WeChatTask {
17     /**
18      * @Description: 任务执行体
19      * @param @throws Exception
20      */
21     public void getToken_getTicket() throws Exception {
22         Map<String, String> params = new HashMap<String, String>();
23         params.put("grant_type", "client_credential");
24         params.put("appid", GlobalConstants.getInterfaceUrl("appid"));
25         params.put("secret", GlobalConstants.getInterfaceUrl("AppSecret"));
26         String jstoken = HttpUtils.sendGet(
27                 GlobalConstants.getInterfaceUrl("tokenUrl"), params);
28         String access_token = JSONObject.fromObject(jstoken).getString(
29                 "access_token"); // 获取到token并赋值保存
30         GlobalConstants.interfaceUrlProperties.put("access_token", access_token);
31                 System.out.println(new SimpleDateFormat("yyyy-MM-dd HH:mm:ss").format(new Date())+"token为=============================="+access_token);
32     }
33
34 }
(三)采用任务调度每隔两小时执行一次token获取执行体
我们阅读过微信的文档会发现我们的token获取的接口每天是有调用次数限制的,为了防止我们业务量比较大的情况下token的直接调用的接口次数不够用,所以我们需要根据token的时效性(7200s)在自己的业务服务器上做到token的缓存并定时获取,我这里用到的任务调度的方式是采用quartz,下面具体代码的实现:
 1 package com.gede.wechat.quartz;
 2 import org.apache.log4j.Logger;
 3 import com.gede.wechat.common.WeChatTask;
 4
 5 /**
 6 * @author gede
 7 * @version date:2019年5月26日 下午8:00:43
 8 * @description :
 9 */
10 public class QuartzJob{
11     private static Logger logger = Logger.getLogger(QuartzJob.class);
12     /**
13      * @Description: 任务执行获取token
14      * @param
15      */
16     public void workForToken() {
17         try {
18             WeChatTask timer = new WeChatTask();
19             timer.getToken_getTicket();
20         } catch (Exception e) {
21             logger.error(e, e);
22         }
23     }
24 }
这里新建配置文件spring-quartz.xml以方便quartz任务的管理和启用,这里将我们需要用到的workForToken()加入到执行任务中:
 1 <?xml version="1.0" encoding="UTF-8"?>
 2 <!DOCTYPE beans PUBLIC "-//SPRING//DTD BEAN//EN" "http://www.springframework.org/dtd/spring-beans.dtd">
 3
 4 <beans>
 5     <!-- 要调用的工作类 -->
 6     <bean id="quartzJob" class="com.gede.wechat.quartz.QuartzJob"></bean>
 7     <!-- 定义调用对象和调用对象的方法 -->
 8     <bean id="jobtaskForToken"
 9         class="org.springframework.scheduling.quartz.MethodInvokingJobDetailFactoryBean">
10         <!-- 调用的类 -->
11         <property name="targetObject">
12             <ref bean="quartzJob" />
13         </property>
14         <!-- 调用类中的方法 -->
15         <property name="targetMethod">
16             <value>workForToken</value>
17         </property>
18     </bean>
19     <!-- 定义触发时间 -->
20     <bean id="doTimeForToken" class="org.springframework.scheduling.quartz.CronTriggerBean">
21         <property name="jobDetail">
22             <ref bean="jobtaskForToken" />
23         </property>
24         <!-- cron表达式 -->
25         <property name="cronExpression">
26             <value>0 0/1 * * * ?</value>
27         </property>
28     </bean>
29     <!-- 总管理类 如果将lazy-init='false'那么容器启动就会执行调度程序 -->
30     <bean id="startQuertz" lazy-init="false" autowire="no"
31         class="org.springframework.scheduling.quartz.SchedulerFactoryBean">
32         <property name="triggers">
33             <list>
34                 <ref bean="doTimeForToken" />
35             </list>
36         </property>
37     </bean>
38 </beans>
这里我为了测试将执行间隔时间设置成了1分钟一次,根据需要可以自行修改执行时间。
好了到这里我们就已经大功告成,就差初始化加载InterfaceUrlIntiServlet和开启quartz的使用:修改web.xml ,加入相关语句,代码如下:
 1 <?xml version="1.0" encoding="UTF-8"?>
 2 <web-app xmlns:xsi="http://www.w3.org/2001/XMLSchema-instance" xmlns="http://java.sun.com/xml/ns/javaee" xsi:schemaLocation="http://java.sun.com/xml/ns/javaee http://java.sun.com/xml/ns/javaee/web-app_3_0.xsd" version="3.0">
 3   <display-name>mychat</display-name>
 4   <listener>
 5     <listener-class>org.springframework.web.context.ContextLoaderListener</listener-class>
 6   </listener>
 7  <context-param>
 8     <param-name>contextConfigLocation</param-name>
 9     <param-value>classpath:applicationContext.xml,classpath:spring-quartz.xml</param-value>
10   </context-param>
11
12   <servlet>
13       <servlet-name>appServlet</servlet-name>
14         <servlet-class>org.springframework.web.servlet.DispatcherServlet</servlet-class>
15         <init-param>
16             <param-name>contextConfigLocation</param-name>
17             <param-value>
18             classpath:appServlet.xml
19             </param-value>
20         </init-param>
21       <load-on-startup>1</load-on-startup>
22   </servlet>
23
24   <context-param>
25         <param-name>log4jConfigLocation</param-name>
26         <param-value>classpath:log4j.properties</param-value>
27     </context-param>
28     <listener>
29         <listener-class>org.springframework.web.util.Log4jConfigListener</listener-class>
30   </listener>
31
32   <servlet>
33         <servlet-name>interface_url-init_servlet</servlet-name>
34         <servlet-class>com.gede.web.start.InterfaceUrlIntiServlet</servlet-class>
35         <load-on-startup>1</load-on-startup>
36   </servlet>
37
38   <servlet-mapping>
39       <servlet-name>appServlet</servlet-name>
40       <url-pattern>/</url-pattern>
41   </servlet-mapping>
42 </web-app>
当这一切都准备完毕之后我们启动项目,会发现每间隔一分钟就会有token获取到,这里我是将其存储在项目变量中,这里看一下我们的效果图和项目总的目录结构:


附件:今天需要导入的包有很多,最后我就给大家打一个压缩包,大家在运行之前将包全部导入即可。点击下载