原文链接:https://blog.csdn.net/dh554112075/article/details/90597649
使用RabbitMQ实现延迟队列的两种方式
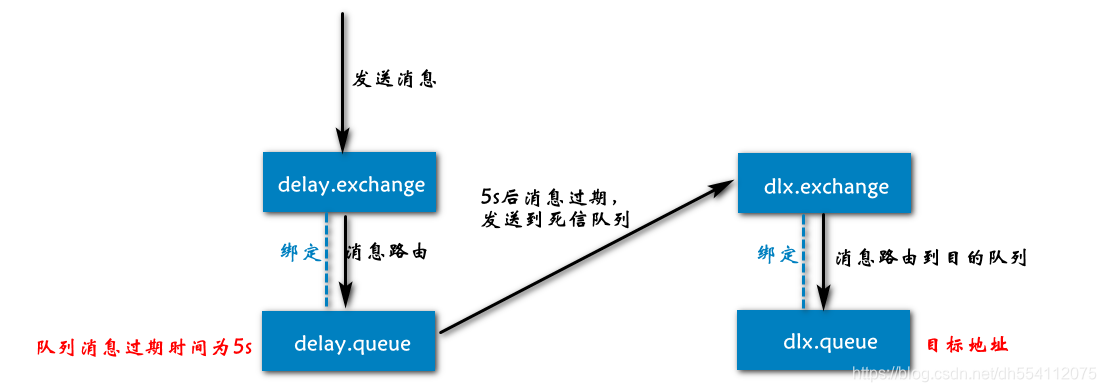
- TTL + DLX
- 使用延迟插件
首先创建用于连接RabbitMQ的Connection
package com.dfyang.rabbitmq;

import com.rabbitmq.client.Connection;
import com.rabbitmq.client.ConnectionFactory;

import java.io.IOException;

public class RabbitConnectionFactory {

    private static final String IP_ADDRESS = "192.168.195.123";
    private static final int PORT = 5672;
    private static final String USERNAME = "root";
    private static final String PASSWORD = "151310";

    private static ConnectionFactory factory = new ConnectionFactory();

    static {
        factory.setHost(IP_ADDRESS);
        factory.setPort(PORT);
        factory.setUsername(USERNAME);
        factory.setPassword(PASSWORD);
    }

    public static Connection getConnection() {
        Connection connection = null;
        try {
            connection = factory.newConnection();
        } catch (Exception e) {
            e.printStackTrace();
        }
        return connection;
    }
}
- 1
- 2
- 3
- 4
- 5
- 6
- 7
- 8
- 9
- 10
- 11
- 12
- 13
- 14
- 15
- 16
- 17
- 18
- 19
- 20
- 21
- 22
- 23
- 24
- 25
- 26
- 27
- 28
- 29
- 30
- 31
- 32
- 33
- 34
1.使用TTL + DLX创建延迟队列
package com.dfyang.rabbitmq.dead;

import com.dfyang.rabbitmq.RabbitConnectionFactory;
import com.rabbitmq.client.Channel;
import com.rabbitmq.client.Connection;

import java.util.HashMap;
import java.util.Map;

public class TimeoutDLX {
    public static void main(String[] args) throws Exception {
        Connection connection = RabbitConnectionFactory.getConnection();
        Channel channel = connection.createChannel();
        //创建DLX及死信队列
        channel.exchangeDeclare("dlx.exchange", "direct");
        channel.queueDeclare("dlx.queue", true, false, false, null);
        channel.queueBind("dlx.queue", "dlx.exchange", "dlx.routingKey");
        //创建测试超时的Exchange及Queue
        channel.exchangeDeclare("delay.exchange", "direct");
        Map<String, Object> arguments = new HashMap<>();
        //过期时间10s
        arguments.put("x-message-ttl", 10000);
        //绑定DLX
        arguments.put("x-dead-letter-exchange", "dlx.exchange");
        //绑定发送到DLX的RoutingKey
        arguments.put("x-dead-letter-routing-key", "dlx.routingKey");
        channel.queueDeclare("delay.queue", true, false, false, arguments);
        channel.queueBind("delay.queue", "delay.exchange", "delay.routingKey");
        //发布一条消息
        channel.basicPublish("delay.exchange", "delay.routingKey", null, "该消息将在10s后发送到延迟队列".getBytes());
        channel.close();
        connection.close();
    }
}
- 1
- 2
- 3
- 4
- 5
- 6
- 7
- 8
- 9
- 10
- 11
- 12
- 13
- 14
- 15
- 16
- 17
- 18
- 19
- 20
- 21
- 22
- 23
- 24
- 25
- 26
- 27
- 28
- 29
- 30
- 31
- 32
- 33
- 34

10s后
2.使用延迟插件
(1)下载延迟插件
https://www.rabbitmq.com/community-plugins.html
注意:支持RabbitMQ 3.5.8及更高版本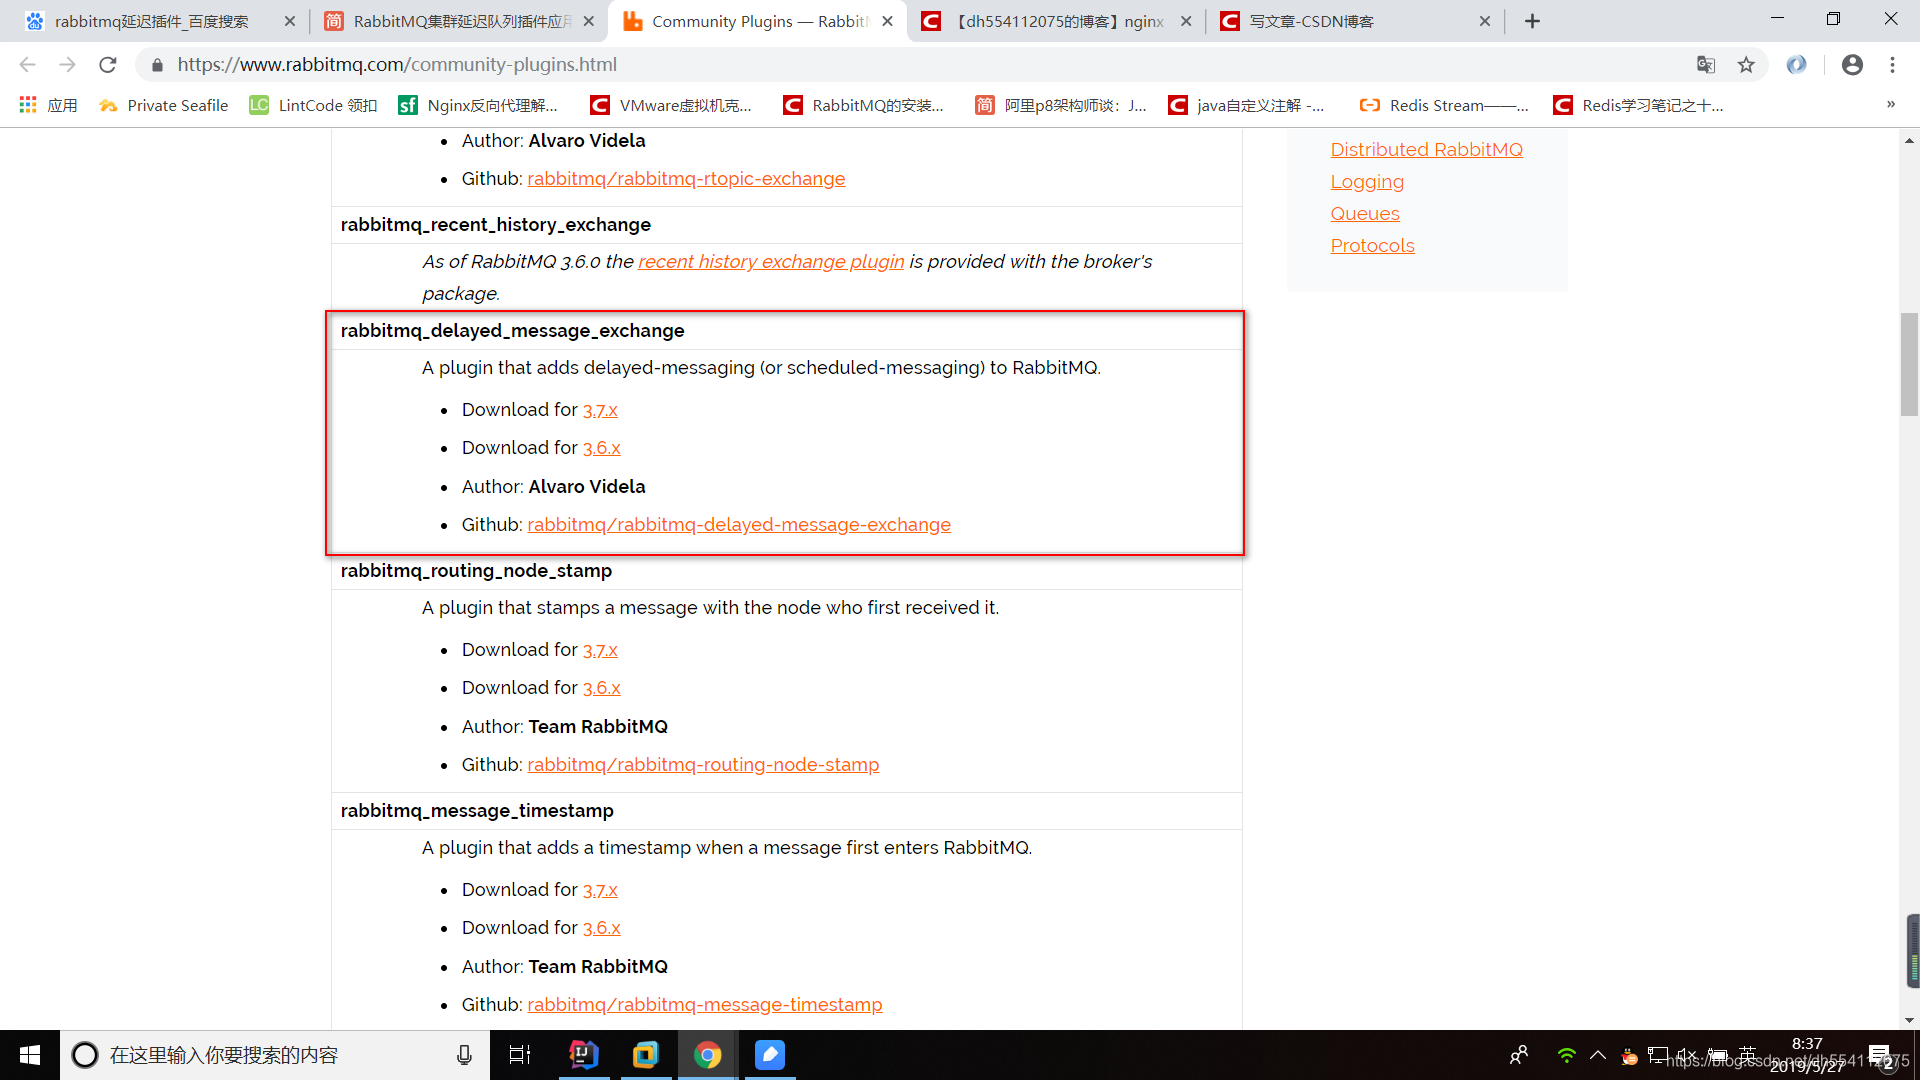
(2)将解压后的ez结尾的文件放到/rabbitmq/plugins/目录下
(3)输入rabbitmq-plugins list查看延迟插件是否存在
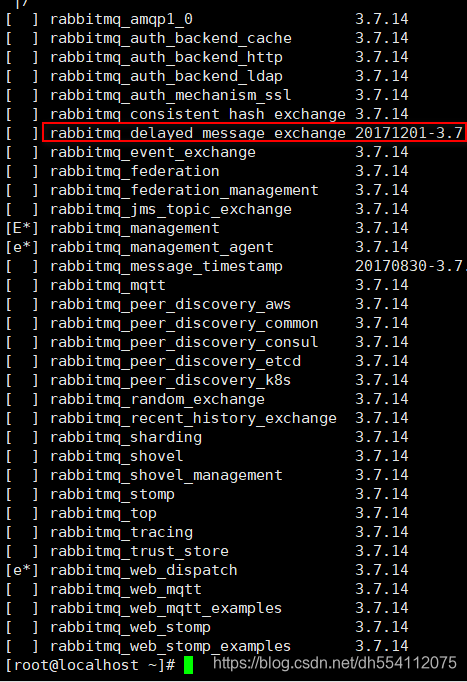
(4)启用延迟插件
启动插件:rabbitmq-plugins enable rabbitmq_delayed_message_exchange
——(关闭插件:rabbitmq-plugins disable rabbitmq_delayed_message_exchange)
访问可视化界面,有如下则说明启动成功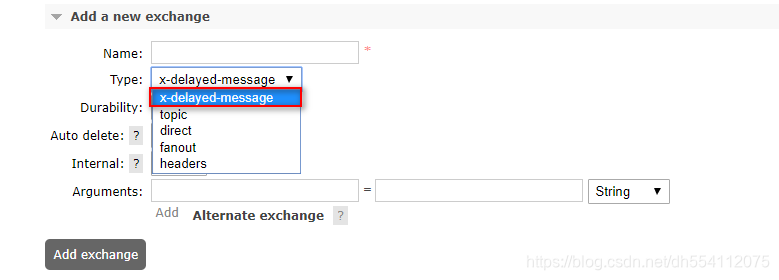
(5)使用延时Exchange(消息发送到Exchange,Exchange等待指定时间后发送到匹配队列)
注意x-delayed-type参数必须有,不然会报错。
package com.dfyang.rabbitmq.dead;

import com.dfyang.rabbitmq.RabbitConnectionFactory;
import com.rabbitmq.client.AMQP;
import com.rabbitmq.client.Channel;
import com.rabbitmq.client.Connection;

import java.util.HashMap;
import java.util.Map;

public class DelayExchangeDemo {
    public static void main(String[] args) throws Exception {
        Connection connection = RabbitConnectionFactory.getConnection();
        Channel channel = connection.createChannel();
        Map<String, Object> arguments = new HashMap<>();
        arguments.put("x-delayed-type", "direct");
        channel.exchangeDeclare("delay.plugin.exchange", "x-delayed-message", true, false, arguments);
        channel.queueDeclare("delay.plugin.queue", true, false, false, null);
        channel.queueBind("delay.plugin.queue", "delay.plugin.exchange", "delay.plugin.routingKey");
        Map<String, Object> headers = new HashMap<>();
        //延迟10s后发送
        headers.put("x-delay", 10000);
        AMQP.BasicProperties.Builder builder = new AMQP.BasicProperties.Builder();
        builder.headers(headers);
        channel.basicPublish("delay.plugin.exchange", "delay.plugin.routingKey", builder.build(), "该消息将在10s后发送到队列".getBytes());
        channel.close();
        connection.close();
    }
}
- 1
- 2
- 3
- 4
- 5
- 6
- 7
- 8
- 9
- 10
- 11
- 12
- 13
- 14
- 15
- 16
- 17
- 18
- 19
- 20
- 21
- 22
- 23
- 24
- 25
- 26
- 27
- 28
- 29
- 30

10s后