1. 现在安装的脚手架vue-cli是4.4了,vue-router也是4.x,
现在我们安装 vue-router 版本的时候,默认还是安装的 3.x 版本的,由于 vue3 的更新发生很大的变化,所以为了兼容处理,
vue-router 也将发布最新版 4.x 版本了,router当中的一些东西变化很多,参考官网;https://next.router.vuejs.org/zh/api/#router-link-%E7%9A%84-v-slot
比如<router-link tag="">的tag属性删除了,新版的做法
<div class="title">热销推荐</div>
    <ul>
      <!-- <router-link
        :to="`/detali/${recommend.id}`"
        tag="li"
        class="item border-1px-bottom"
        v-for="(recommend, index) in recommendList"
        :key="recommend.id"
      >
        <img :src="recommend.imgUrl" class="item-img" />
        <div class="item-info">
          <p class="item-title">{{ recommend.title }}</p>
          <p class="item-desc">{{ recommend.desc }}</p>
          <button class="item-buttton">查看那详情</button>
        </div>
      </router-link> -->
      <router-link
        :to="`/detail/${recommend.id}`"
        class="item border-1px-bottom"
        v-for="(recommend, index) in recommendList"
        :key="recommend.id"
        v-slot="{ navigate, href }"
         custom

      >
        <li @click="navigate" >
          <img :src="recommend.imgUrl" class="item-img" />
          <div class="item-info">
            <p class="item-title">{{ recommend.title }}</p>
            <p class="item-desc">{{ recommend.desc }}</p>
            <button class="item-buttton">查看那详情</button>
          </div>
        </li>
      </router-link>
    </ul>
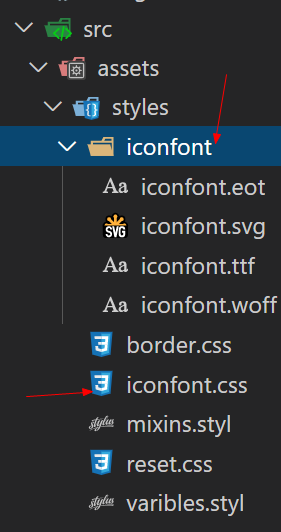
2.如果新增了阿里图标数据,那么需要更换以下文件,iconfont文件夹的文件, iconfont.css文件, 另外iconfont.css里头图标url路径需要跟换下
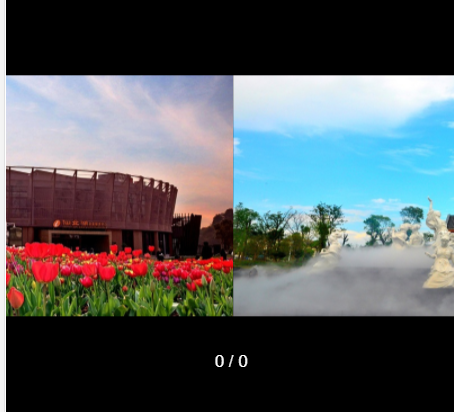
3.gallary画廊组件
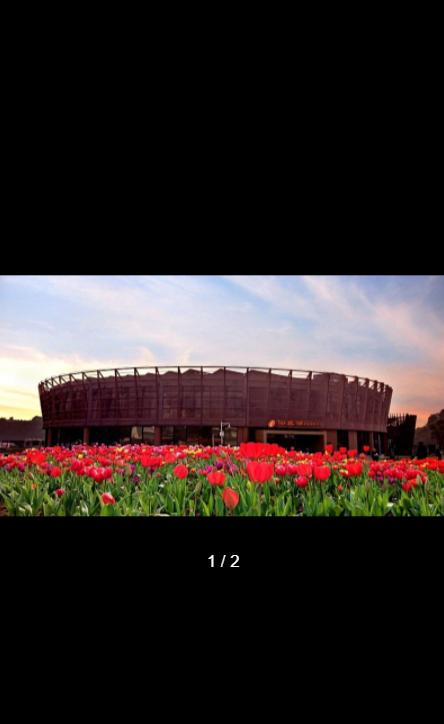
在banner组件,galllary是子组件,利用vue-awesome-swiper第三方插件做出画廊效果,
<template> <div class="container"> <div class="wrapper"> <swiper :options="swiperOptions"> <swiper-slide> <img class="gallary-img" src="http://img1.qunarzz.com/sight/p0/1804/9a/9ab14695c879723ca3.img.jpg_r_800x800_99bc8e07.jpg" alt="" /> </swiper-slide> <swiper-slide> <img class="gallary-img" src="http://img1.qunarzz.com/sight/p0/1804/2c/2c9bd88beb228c5ea3.img.jpg_r_800x800_d1a6dc47.jpg" alt="" /> </swiper-slide> <div class="swiper-pagination" slot="pagination"></div> </swiper> </div> </div> </template> <script> export default { data() { return { swiperOptions: { pagination: { el: ".swiper-pagination",
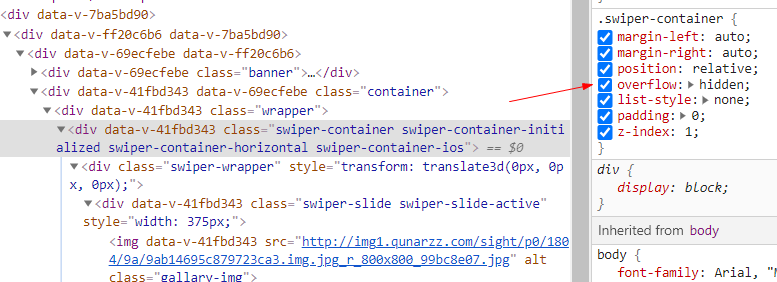
//分页器样式 type: "fraction" } // pagination: ".swiper-pagination", // type: "fraction" // observeParents: true, // observer: true } }; } }; </script> <style scoped lang="stylus"> .container >>> .swiper-container // 继承副属性 overflow: inherit .container display :flex flex-direction :column justify-content :center z-index :999 position :fixed top:0 left:0 right :0 bottom :0 background:#000 .wrapper height: 0 100% padding-bottom: 53.3% .gallary-img 100% .swiper-pagination color: #fff margin-bottom: -1.1rem </style>
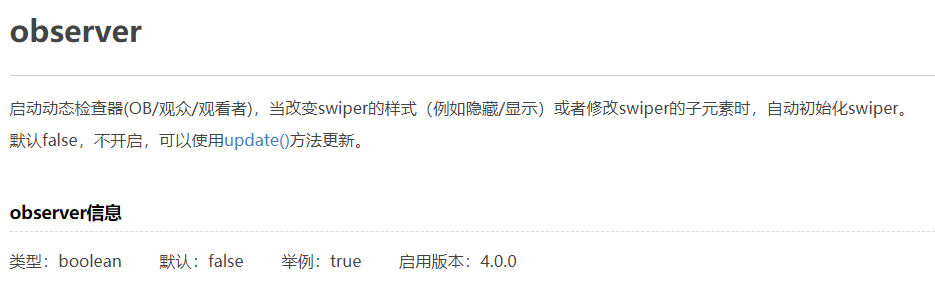
3.点击顶部图片,显示画廊组件gallary, 点击画廊组件,影藏画廊组件,
注意,点击顶部图片,显示画廊组件,有个bug,分页器样式没有显示,原因,影藏和显示swiper,需要在自动初始化swiper,加入如下两个属性即可正常了

gallary子组件
<template>
  <div class="container" @click="handleGallaryClick">
    <div class="wrapper">
      <swiper :options="swiperOptions">
        <swiper-slide>
          <img
            class="gallary-img"
            src="http://img1.qunarzz.com/sight/p0/1804/9a/9ab14695c879723ca3.img.jpg_r_800x800_99bc8e07.jpg"
            alt=""
          />
        </swiper-slide>
        <swiper-slide>
          <img
            class="gallary-img"
            src="http://img1.qunarzz.com/sight/p0/1804/2c/2c9bd88beb228c5ea3.img.jpg_r_800x800_d1a6dc47.jpg"
            alt=""
          />
        </swiper-slide>
        <div class="swiper-pagination" slot="pagination"></div>
      </swiper>
    </div>
  </div>
</template>
 methods:{
    handleGallaryClick(){
      this.$emit('close')
    }
  }
data() {
    return {
      swiperOptions: {
        pagination: {
          el: ".swiper-pagination",
          type: "fraction"

        },
        observeParents: true,
        observer: true

      }
    };
  },
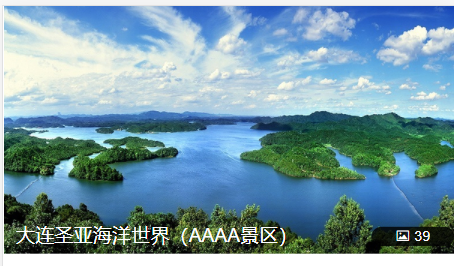
banner父组件
<template>
  <div>
    <div class="banner"  @click="handleBannerClick">
      <img
        class="banner-img"
        src="//img1.qunarzz.com/sight/p0/1804/f1/f15c15c5362d5a8da3.img.jpg_600x330_dc6855d1.jpg"
      />
      <div class="banner-info">
        <!-- 图片介绍 -->
        <div class="banner-tittle">
          大连圣亚海洋世界(AAAA景区)
        </div>
        <div class="banner-number">
          <span class="iconfont  icontupian banner-icon"></span>
          39
        </div>
      </div>
    </div>

    <!-- 画廊组件 -->
    <Gallary v-show="showGallary" @close="handleGallaryClose"></Gallary>
  </div>
</template>

<script>
import Gallary from "common/gallary";
export default {
  data() {
    return {
      showGallary:false
    };
  },

  methods:{
    // 点击轮播图,画廊组件出来
    handleBannerClick () {
      this.showGallary = true
    },
    // 监听画廊组件
    handleGallaryClose(){
      this.showGallary = false
    }
  },

  components: {
    Gallary
  }
};
</script>
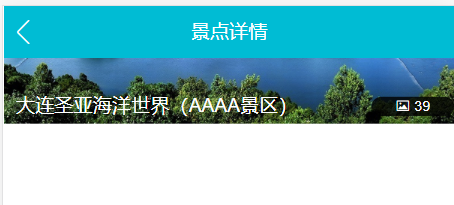
4, header组件,给页面全局绑定scroll事件,当滑动大于60px,顶部的景点详情返回图标出现,否则消失,并且有一个opcity渐变效果
注意,全局绑定事件,因为组件被keep-alive包裹,组件切换时激活时,触发activated钩子函数,绑定scroll事件,在切换到其他组件时,触发 deactived钩子函数,解绑scroll事件

 <keep-alive >
      <router-view></router-view>
    </keep-alive>
<template>
  <div>
    <router-link class="header-abs" to="/" v-show="showAbs">
      <div class="header-fixed-back iconfont iconfanhui"></div>
    </router-link>

    <router-link
      class="header-fixed"
      to="/"
      v-show="!showAbs"
      :style="opcityStyle"
    >
      <div>
        <div class="header-fixed-back iconfont iconfanhui"></div>
        <span>景点详情</span>
      </div>
    </router-link>
  </div>
</template>

<script>
export default {
  data() {
    return {
      // 控制景点详情的显示与影藏
      showAbs: true,
      opcityStyle: {
        opcity: 0
      }
    };
  },

  methods: {
    handleScroll() {
      let top = document.documentElement.scrollTop;
      console.log(top);
      if (top < 60) {
        let opcity = top / 140;
        opcity = opcity > 1 ? 1 : opcity;
        this.opcityStyle = { opcity };
        this.showAbs = true;
      } else {
        this.showAbs = false;
      }
    }
  },

  // mounted() {
  //   // 全局绑定滚动事件,但是只能作用于

  //   window.addEventListener("scroll", this.handleScroll,true);
  // },
  // beforeUnmount() {
  //   // 组件消失,解绑scroll事件
  //   window.removeEventListener("scroll", this.handleScroll,true);
  // },
  // destroyed() {
  //   window.removeEventListener("scroll", this.handleScroll,true);
  // }

  activated() {
    // 全局绑定滚动事件,但是只能作用于
    window.addEventListener("scroll", this.handleScroll);
  },
  deactivated() {
    // 组件消失,解绑scroll事件
    window.removeEventListener("scroll", this.handleScroll);
  }
};
</script>

<style scoped lang="stylus">
@import '~assets/style/varibles.styl'

.header-abs
  position :absolute
  left:.2rem
  top:.2rem
  .8rem
  height:.8rem
  line-height :.8rem
  border-radius:.4rem
  text-align:center
  background :rgba(0,0,0,.8)
  opacity :.7
  .header-abs-back
    color:#fff
    font-size:.4rem

.header-fixed
    z-index: 2
    position: fixed
    top: 0
    left: 0
    right: 0
    height: $headerHeight
    line-height: $headerHeight
    text-align: center
    color: #fff
    background: $bgColor
    font-size: .32rem
    .header-fixed-back
      position: absolute
      top: 0
      left: 0
       .64rem
      text-align: center
      font-size: .4rem
      color: #fff
</style>
5. vue中递归组件的使用
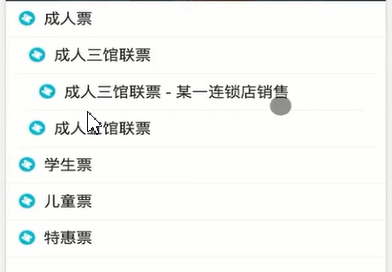
新建list组件,在detail组件中注册使用,数据传入list组件中, 嵌套数组
<template>
  <div class="container">
    <DetailBanner></DetailBanner>
    <DetailHeader ></DetailHeader>
    <DetailList :List="List" ></DetailList>
  </div>
</template>

<script>
import DetailBanner from "./components/banner";
import DetailHeader from "./components/header";
import DetailList from "./components/list";
export default {
  data() {
    return {
      List: [
        {
          title: "成人票",
          children: [
            {
              title: "成人三馆联票",
              children: [{
                title: "成人三馆联票-某一连锁店销售"
              }]
            }
          ]
        },
        {
          title: "学生票"
        },
        {
          title: "儿童票"
        },
        {
          title: "老年票"
        }
      ]
    };
  },
  components: {
    DetailBanner,
    DetailHeader,
    DetailList
  }
在list组件中,自己调用自己的组件,和name的属性值关联,必须嵌套多层数组
<template>
  <div>
    <div class="item" v-for="(item, index) in List" :key="index">
      <div class="item-title border-1px-bottom">
        <span class="item-title-icon"></span>
        {{ item.title }}
      </div>
      <!-- 递归组件 -->
      <div class="item-children" v-if="item.children">
        <DetailList :List="item.children"></DetailList>
      </div>
    </div>
  </div>
</template>

<script>
export default {
  name: "DetailList",
  data() {
    return {};
  },
  props: {
    List: Array
  }
};
</script>

<style scoped lang="stylus">
@import '~assets/style/mixins.styl'
.item-title
  // position :relative
  line-height :.8rem
  font-size:.32rem
  padding :0 .2rem

  .item-title-icon
    // position :absolute
    // left:.06rem
    // top:.06rem
    margin-bottom: -0.05rem;
    display :inline-block
    .36rem
    height:.36rem
    background:url(http://s.qunarzz.com/piao/image/touch/sight/detail.png) 0 -.45rem no-repeat
    margin-right:.1rem
    background-size:.4rem 3rem
.item-children
  padding :0 .2rem

</style>
9.关于组件中name对 属性的作用
组件的name属性,1,.递归组件,2.keep-alive组件的exclude属性,3,devtools的vue调试工具的的组件名
组件keep-alive的用法,不保存其他组件的存活,如果切换到detail组件,在mouted阶段发送请求(请求有个parmas参数,唯一的),获取数据,此时需要在keep-alive组件中使用
exclude属性去除detail组件的保留,因为每次切换该组件都会发送新的请求(parmas不同)
  async getDetail() {
      const { data: res } = await axios.get("/api/detail", {
        params: { id: this.$route.params.id }
      });
      // console.log(res)
      if (res.error === 0) {
        this.sightName = res.data.sightName;
        this.bannerImg = res.data.bannerImg;
        this.gallaryImgs = res.data.gallaryImgs;
        this.List = res.data.categoryList;
      }
    }
<template>
  <div>

    <keep-alive exclude="Detail">
      <router-view></router-view>
    </keep-alive>

  </div>
</template>
切换路由组件后,配置路由顶部滑动,在路由总配置
import Vue from "vue";
import VueRouter from "vue-router";
import Home from "views/Home/Home";
import City from "views/city/city";
import Detail from "views/detail/detail";

Vue.use(VueRouter);

const routes = [
  {
    path: "/",
    component: Home
  },
  {
    path: "/city",
    component: City
  },
  {
    path: "/detail/:id",
    component: Detail
  }
];

const router = new VueRouter({
  routes,
  scrollBehavior (to, from, savedPosition) {
    return { x: 0, y: 0 }
  }
});

export default router;
利用vue的transition动画封装一个组件fadeAnimation,利用插槽
<template>
  <transition>
    <slot></slot>
  </transition>
</template>

<script>
export default {
  data() {
    return {};
  }
};
</script>

<style scoped lang="stylus">
.v-enter, .v-leave-to
  opacity: 0
.v-enter-active, .v-leave-active
  transition: opacity .5s
</style>
给gallary组件加入动画
<template>
  <div>
    <div class="banner" @click="handleBannerClick">
      <img class="banner-img" :src="bannerImg" />
      <div class="banner-info">
        <!-- 图片介绍 -->
        <div class="banner-tittle">
          {{ sightName }}
        </div>
        <div class="banner-number">
          <span class="iconfont  icontupian banner-icon"></span>
          {{ bannerImgs.length }}
        </div>
      </div>
    </div>
    <FadeAnimation>
      <!-- 画廊组件 -->
      <Gallary
        v-show="showGallary"
        @close="handleGallaryClose"
        :bannerImgs="bannerImgs"
      ></Gallary>
    </FadeAnimation>
  </div>
</template>

<script>
import Gallary from "common/gallary";
import FadeAnimation from "common/FadeAnimation";
10.异步组件,路由按需加载,当组件特别大时,整个项目几mb,可以使用