一,订单管理中订单列表页面搭建

1.1,order订单组件路由配置
import Order from '@/views/Order/Order'
 {
    path: '/home',
    component: Home,
    // 重定向
    redirect: '/welcome',
    children: [
      { path: '/welcome', component: Welcome },
      { path: '/users', component: User },
      { path: '/rights', component: Rights },
      { path: '/roles', component: Roles },
      { path: '/categories', component: Cate },
      { path: '/params', component: Params },
      { path: '/goods', component: List },
      { path: '/goods/add', component: Add },
      { path: '/orders', component: Order },
    ]
  }
1.2,页面渲染时,发送请求,获取订单数据
请求参数定义
data() {
    return {
      // 订单列表请求参数
      queryInfo: {
        query: '',
        pagenum: 1,
        pagesize: 10
      },
      total: 0,
      orderlist: []
    }
  },
  mounted() {
    this.getOrderList()
  },

  methods: {
    async getOrderList() {
      const { data: res } = await this.$http.get('orders', {
        params: this.queryInfo
      })

      if (res.meta.status !== 200) {
        return this.$message.error('获取订单列表失败!')
      }

      console.log(res)
      this.total = res.data.total
      this.orderlist = res.data.goods
    }
  }
下单时间create_time返回的是时间戳,我们需要用vue的filter过滤器,在main.js中全局注册下
// 时间过滤器
Vue.filter('dateFormat', function(originVal) {
  const dt = new Date(originVal)
  const y = dt.getFullYear()
  const m = dt.getMonth() + 1
  const d = dt.getDate()
  const hh = dt.getHours()
  const mm = dt.getMinutes()
  const ss = dt.getSeconds()
  return `${y}-${m}-${d} ${hh}:${mm}:${ss}`
})
  <!-- 面包屑导航区域 -->
    <el-breadcrumb separator-class="el-icon-arrow-right">
      <el-breadcrumb-item :to="{ path: '/home' }">首页</el-breadcrumb-item>
      <el-breadcrumb-item>订单管理</el-breadcrumb-item>
      <el-breadcrumb-item>订单列表</el-breadcrumb-item>
    </el-breadcrumb>

    <!-- 卡片视图区域 -->
    <el-card style="margin: 20px 0">
      <el-row>
        <el-col :span="8">
          <el-input placeholder="请输入内容">
            <el-button slot="append" icon="el-icon-search"></el-button>
          </el-input>
        </el-col>
      </el-row>

      <!-- 订单列表数据 -->
      <el-table :data="orderlist" border stripe style="margin : 20px 0">
        <el-table-column type="index"></el-table-column>
        <el-table-column label="订单编号" prop="order_number"></el-table-column>
        <el-table-column label="订单价格" prop="order_price"></el-table-column>
        <el-table-column label="是否付款" prop="pay_status">
          <template slot-scope="{ row, $index }">
            <el-tag type="success" v-if="row.pay_status === '1'">已付款</el-tag>
            <el-tag type="danger" v-else>未付款</el-tag>
          </template>
        </el-table-column>
        <el-table-column label="是否发货" prop="is_send">

        </el-table-column>
        <el-table-column label="下单时间">
          <template slot-scope="{row, $index}">
            {{ row.create_time | dateFormat }}
          </template>
        </el-table-column>
        <el-table-column label="操作">
          <template slot-scope="{ row, $index }">
            <el-button
              size="mini"
              type="primary"
              icon="el-icon-edit"
            ></el-button>
            <el-button
              size="mini"
              type="success"
              icon="el-icon-location"
            ></el-button>
          </template>
        </el-table-column>
      </el-table>
    </el-card>
分页器
 <!-- 分页区域 -->
      <el-pagination @size-change="handleSizeChange" @current-change="handleCurrentChange"
      :current-page="queryInfo.pagenum" :page-sizes="[5, 10, 15]"
      :page-size="queryInfo.pagesize" layout="total, sizes, prev, pager, next, jumper" :total="total">
      </el-pagination>
 handleSizeChange(newSize) {
      this.queryInfo.pagesize = newSize
      // 重新发送请求,获取订单数据
      this.getOrderList()
    },
    handleCurrentChange(newPage) {
      this.queryInfo.pagenum = newPage
      this.getOrderList()
    },
1.3, 点击编辑按钮,弹出修改框

 <el-table-column label="操作">
          <template slot-scope="{ row, $index }">
            <el-button
              size="mini"
              type="primary"
              icon="el-icon-edit"
              @click="showBox"
            ></el-button>
  // 展示修改地址的对话框
    showBox() {
      this.addressVisible = true
    },
级联选择器的数据源cityData是在citydata.js文件中,将他导入进来即可,v-model="addressForm.address1"收集的选中的值,是个数组
import cityData from './citydata.js'
然后在data中定义
    addressForm: {
        address1: [],
        address2: ''
      },
      addressVisible: false,
      addressFormRules: {
        address1: [
          { required: true, message: '请选择省市区县', trigger: 'blur' }
        ],
        address2: [
          { required: true, message: '请填写详细地址', trigger: 'blur' }
        ]
      },
      cityData,
 <!-- 修改地址的对话框 -->
    <el-dialog
      title="修改地址"
      :visible.sync="addressVisible"
      width="50%"
      @close="addressDialogClosed"
    >
      <el-form
        :model="addressForm"
        :rules="addressFormRules"
        ref="addressFormRef"
        label-width="100px"
      >
        <el-form-item label="省市区/县" prop="address1">
          <el-cascader
            :options="cityData"
            v-model="addressForm.address1"
            @change="handleChange"
          ></el-cascader>
        </el-form-item>
        <el-form-item label="详细地址" prop="address2">
          <el-input v-model="addressForm.address2"></el-input>
        </el-form-item>
      </el-form>
      <span slot="footer" class="dialog-footer">
        <el-button @click="addressVisible = false">取 消</el-button>
        <el-button type="primary" @click="addressVisible = false"
          >确 定</el-button
        >
      </span>
    </el-dialog>
// 关闭修改的dialog触发
    addressDialogClosed() {
      // 初始化form表单数据
      this.$refs.addressFormRef.resetFields()
    },


    // 选中节点
    handleChange(){
      console.log(this.addressForm.address1)
    }
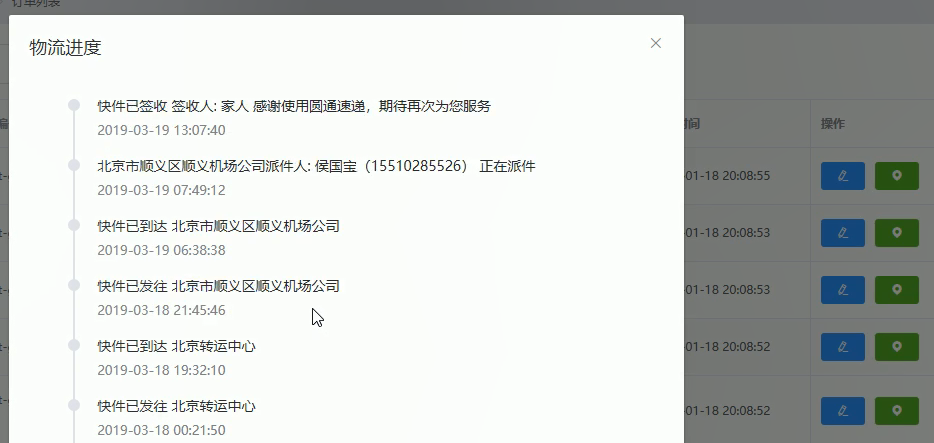
1.4,点击物流信息按钮,弹出物流框

点击物流信息按钮,发送请求,获取物流数据
  <el-button
              size="mini"
              type="success"
              icon="el-icon-location"
              @click="showProgressBox"
            ></el-button>
          </template>
        </el-table-column>
  // 点击物流信息按钮
    async showProgressBox() {
      const { data: res } = await this.$http.get('/kuaidi/1106975712662')

      if (res.meta.status !== 200) {
        return this.$message.error('获取物流进度失败!')
      }

      this.progressInfo = res.data

       this.progressVisible = true
      console.log(this.progressInfo)
    }
返回的部分数据
{
  "data": [
    {
      "time": "2018-05-10 09:39:00",
      "ftime": "2018-05-10 09:39:00",
      "context": "已签收,感谢使用顺丰,期待再次为您服务",
      "location": ""
    },
    {
      "time": "2018-05-10 08:23:00",
      "ftime": "2018-05-10 08:23:00",
      "context": "[北京市]北京海淀育新小区营业点派件员 顺丰速运 95338正在为您派件",
      "location": ""
    },
数据填充页面

注;element安装的是2019-1-9月的, timeline组件发布的是2019-03-01
     <!-- 展示物流进度的对话框 -->
    <el-dialog title="物流进度" :visible.sync="progressVisible" width="50%">
      <!-- 时间线 -->
      <el-timeline>
        <el-timeline-item v-for="(activity, index) in progressInfo" :key="index" :timestamp="activity.time">
          {{activity.context}}
        </el-timeline-item>
      </el-timeline>
    </el-dialog>
二,数据统计中的数据报表页面搭建,利用第三方echarts插件

安装echarts插件,
npm install echarts --save<template>
<div>
<!-- 面包屑导航区域 -->
<el-breadcrumb separator-class="el-icon-arrow-right">
<el-breadcrumb-item :to="{ path: '/home' }">首页</el-breadcrumb-item>
<el-breadcrumb-item>数据统计</el-breadcrumb-item>
<el-breadcrumb-item>数据报表</el-breadcrumb-item>
</el-breadcrumb>
<!-- 卡片视图区域 -->
<el-card style="margin: 20px 0">
<!-- 2. 为ECharts准备一个具备大小(宽高)的Dom -->
<div id="main" style=" 750px;height:400px;"></div>
</el-card>
</div>
</template>
页面刷新,发送请求,获取图表数据
配置项在data中定义,合并需要lodash来合并
import _ from 'lodash'
// 需要合并的数据
      options: {
        title: {
          text: '用户来源'
        },
        tooltip: {
          trigger: 'axis',
          axisPointer: {
            type: 'cross',
            label: {
              backgroundColor: '#E9EEF3'
            }
          }
        },
        grid: {
          left: '3%',
          right: '4%',
          bottom: '3%',
          containLabel: true
        },
        xAxis: [
          {
            boundaryGap: false
          }
        ],
        yAxis: [
          {
            type: 'value'
          }
        ]
      }
 // 此时,页面上的元素,已经被渲染完毕了!
  async mounted() {
    // 1. 导入 echarts
    var echarts = require('echarts')

    console.log(echarts)
    // 3. 基于准备好的dom,初始化echarts实例
    var myChart = echarts.init(document.getElementById('main'))

    const { data: res } = await this.$http.get('reports/type/1')
    if (res.meta.status !== 200) {
      return this.$message.error('获取折线图数据失败!')
    }
    // console.log(res.data)

    // 4. 准备数据和配置项,合并数据
    const result = _.merge(res.data, this.options)

    // 5. 展示数据
    myChart.setOption(result)
  }
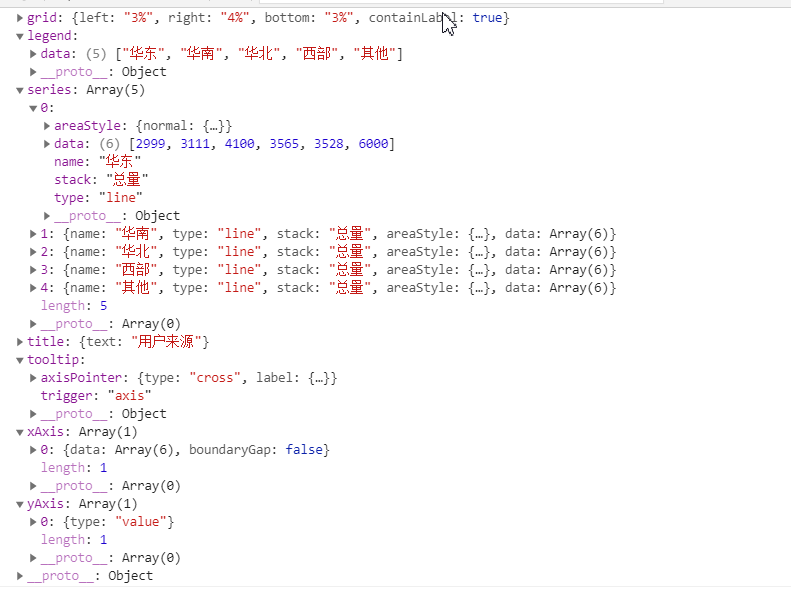
请求回来的报表数据res.data
