虽然JUnit5 的测试版本早就出来了,但正式版直到几年9月份推出,目前最新版5.0.1。几乎所有的Java 开发人员都会使用JUnit 来做测试,但其实很多自动化测试人员也会使用Junit 。目前,Android单元测试默认使用 Junit4,相信不久的将来也会使用 JUnit5 。
但是介绍 JUnit5 安装与使用资料并不算太多。本文普及一下JUnit5 安装与基本使用。
什么是Junit5 ?
先看来个公式:
JUnit 5 = JUnit Platform + JUnit Jupiter + JUnit Vintage
这看上去比Junit4 复杂,实际上在导入包时也会复杂一些。
JUnit Platform是在JVM上启动测试框架的基础。
JUnit Jupiter是JUnit5扩展的新的编程模型和扩展模型,用来编写测试用例。Jupiter子项目为在平台上运行Jupiter的测试提供了一个TestEngine (测试引擎)。
JUnit Vintage提供了一个在平台上运行JUnit 3和JUnit 4的TestEngine 。
环境:
IDE:IntelliJ IDEA
版本工具:Maven
如果你从没使用过IntelliJ IDEA 和Maven的话,那么本文不适合你。
接下来在 IntelliJ IDEA中创建一个Maven项目,创建项目目录结果如下:
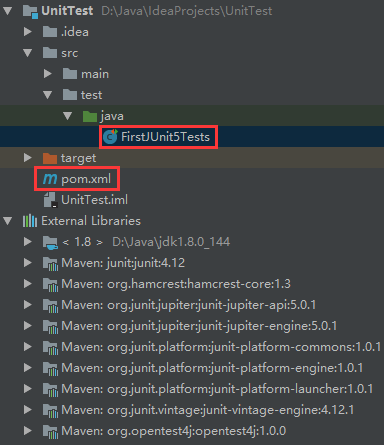
在 pom.xml 文件中添加JUnit5的相关库。
<dependencies>

    <dependency>
        <groupId>org.junit.platform</groupId>
        <artifactId>junit-platform-launcher</artifactId>
        <version>1.0.1</version>
        <scope>test</scope>
    </dependency>
    <dependency>
        <groupId>org.junit.jupiter</groupId>
        <artifactId>junit-jupiter-engine</artifactId>
        <version>5.0.1</version>
        <scope>test</scope>
    </dependency>
    <dependency>
        <groupId>org.junit.vintage</groupId>
        <artifactId>junit-vintage-engine</artifactId>
        <version>4.12.1</version>
        <scope>test</scope>
    </dependency>

</dependencies>
在test.java目录下创建一个 FistJUnit5Tests 类。代码如下:
import static org.junit.jupiter.api.Assertions.assertEquals;

import org.junit.jupiter.api.Test;

class FirstJUnit5Tests {

    @Test
    void myFirstTest() {
        assertEquals(2, 1 + 1);
    }

}
明显看出和Junit4 还是有些不同的。首先,导入测试测试注解(@Test)和断言方法(assertEquals)的路径不同。其次,不需要手动把测试和测试方法声明为 public 了。
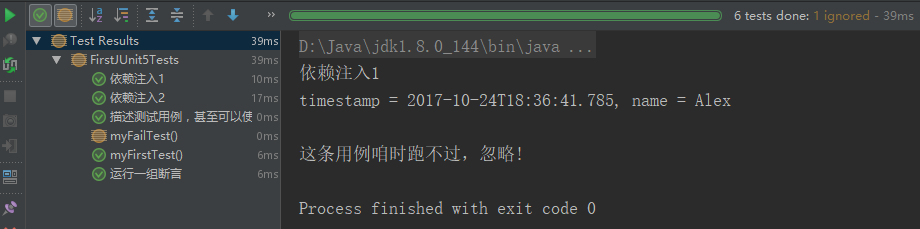
import static org.junit.jupiter.api.Assertions.assertEquals;
import static org.junit.jupiter.api.Assertions.assertTrue;
import static org.junit.jupiter.api.Assertions.assertAll;

import org.junit.jupiter.api.*;

class FirstJUnit5Tests {

    @BeforeEach
    @DisplayName("每条用例开始时执行")
    void start(){

    }

    @AfterEach
    @DisplayName("每条用例结束时执行")
    void end(){

    }

    @Test
    void myFirstTest() {
        assertEquals(2, 1 + 1);
    }

    @Test
    @DisplayName("描述测试用例╯°□°)╯")
    void testWithDisplayName() {

    }

    @Test
    @Disabled("这条用例暂时跑不过,忽略!")
    void myFailTest(){
        assertEquals(1,2);
    }

    @Test
    @DisplayName("运行一组断言")
    public void assertAllCase() {
        assertAll("groupAssert",
                () -> assertEquals(2, 1 + 1),
                () -> assertTrue(1 > 0)
        );
    }

    @Test
    @DisplayName("依赖注入1")
    public void testInfo(final TestInfo testInfo) {
        System.out.println(testInfo.getDisplayName());
    }

    @Test
    @DisplayName("依赖注入2")
    public void testReporter(final TestReporter testReporter) {
        testReporter.publishEntry("name", "Alex");
    }

}
上面一段代码,大概展示了Junit5的一些新的特性或与旧版本的不同。我通过用例描述,已经做了介绍。在IDEA中的运行结果如下。