DXUT(也称sample framework)是建立在Direct3D API之上的Direct3D应用程序框架,有了DXUT这样一个Direct3D程序框架,只需在这个框架的基础上编写相应的代码,从而简化了windows和Direct3D API的使用,可以高效地进行Direct3D程序设计。
生成一个Direct3D程序框架
第一步,运行Direct3D示例程序浏览器:
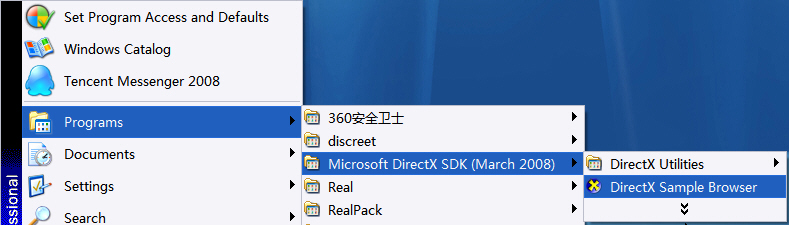
第二步,单击"EmptyProject"中的"Installl Project"安装工程:
![]()
第三步,在弹出的对话框中输入新工程的名称,修改该工程的创建路径,单击Install即可创建工程:
![]()
第四步,系统将自动完成工程的创建,然后弹出对话框询问是否查看创建的工程文件夹中的内容:
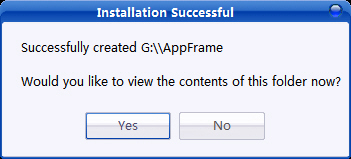
若选择是,则可以查看新创建的工程文件夹的内容:
![]()
使用Direct3D程序框架
通过上面的操作,Direct3D已经为我们创建好了一个应用程序框架,该框架主要包括以下文件:
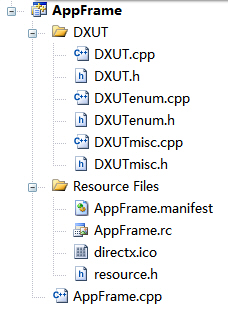
其中最主要的两个文件是DXUT.h和DXUT.cpp。
除了上面这些通用文件外,Direct3D还生成了一个主程序文件,该文件的名字和工程名字相同,在此即是AppFrame.cpp。该文件主要由以下几个回调函数构成:
bool CALLBACK IsD3D9DeviceAcceptable(D3DCAPS9* pCaps, D3DFORMAT AdapterFormat, D3DFORMAT BackBufferFormat,
									 bool bWindowed, void* pUserContext);
bool CALLBACK ModifyDeviceSettings(DXUTDeviceSettings* pDeviceSettings, void* pUserContext);
HRESULT CALLBACK OnD3D9CreateDevice(IDirect3DDevice9* pd3dDevice, const D3DSURFACE_DESC* pBackBufferSurfaceDesc,
									void* pUserContext);
HRESULT CALLBACK OnD3D9ResetDevice(IDirect3DDevice9* pd3dDevice, const D3DSURFACE_DESC* pBackBufferSurfaceDesc,
								   void* pUserContext);
void CALLBACK OnFrameMove(double fTime, float fElapsedTime, void* pUserContext);
void CALLBACK OnD3D9FrameRender( IDirect3DDevice9* pd3dDevice, double fTime, float fElapsedTime, void* pUserContext );
LRESULT CALLBACK MsgProc( HWND hWnd, UINT uMsg, WPARAM wParam, LPARAM lParam,
                          bool* pbNoFurtherProcessing, void* pUserContext );
void CALLBACK OnD3D9LostDevice( void* pUserContext );
void CALLBACK OnD3D9DestroyDevice( void* pUserContext );
函数名前使用"CALLBACK"表示声明的是一个回调函数,也就是说,这是DXUT框架为我们设置好的接口,DXUT框架将在合适的时机调用相应的回调函数。现在我们需要做的就是在这些回调函数中填写相应的代码完成所需要的功能。为了使DXUT框架能够调用这些回调函数,还需要在WinMain函数中为DXUT框架设置这些回调函数,代码如下:
    // Set the callback functions
    DXUTSetCallbackD3D9DeviceAcceptable(IsD3D9DeviceAcceptable);
    DXUTSetCallbackD3D9DeviceCreated(OnD3D9CreateDevice);
    DXUTSetCallbackD3D9DeviceReset(OnD3D9ResetDevice);
    DXUTSetCallbackD3D9FrameRender(OnD3D9FrameRender);
    DXUTSetCallbackD3D9DeviceLost(OnD3D9LostDevice);
    DXUTSetCallbackD3D9DeviceDestroyed(OnD3D9DestroyDevice);
    DXUTSetCallbackDeviceChanging(ModifyDeviceSettings);
    DXUTSetCallbackMsgProc(MsgProc);
    DXUTSetCallbackFrameMove(OnFrameMove);
DXUT框架程序的整个“生命周期”可划分为三个阶段:启动、运行和结束。
第一阶段:启动
DXUT框架依次执行IsD3D9DeviceAcceptable()、ModifyDeviceSettings()、OnD3D9CreateDevice()、OnD3D9ResetDevice()这4个函数。
在创建某个Direct3D渲染设备之前,如果需要对渲染设备的特征进行检查,查看设备是否支持需要的功能,可将检查代码写在函数IsD3D9DeviceAcceptable()中。
在某个渲染设备创建之前,如果需要修改该渲染设备的设置,可将代码写在函数ModifyDeviceSettings()中。DXUT框架接下来就根据设置(或者是默认设置)创建最适合当前硬件的Direct3D渲染设备。例如,当硬件不支持某些功能时,可以通过使用参考设备进行模拟,设置使用参考设备代码通常写在该函数中。
DXUT框架创建了Direct3D设备之后,接下来会调用OnD3D9CreateDevice()回调函数,可在OnD3D9CreateDevice()回调函数中创建所有内存池类型为D3DPOOL_MANAGED或D3DPOOL_SYSTEMMEM的资源。以类型D3DPOOL_MANAGED创建的设备由Direct3D系统代替管理(位于显存或系统内存中),以类型D3DPOOL_SYSTEMMEM创建的设备位于系统内存中,在程序退出之前,这些资源常驻内存,不会出现设备丢失的现象。也就是说,以这两种内存类型创建的资源不需要程序员进行管理。
DXUT框架在调用OnD3D9CreateDevice()回调函数之后,将调用OnD3D9ResetDevice()回调函数。我们可在函数OnD3D9ResetDevice()中创建所有内存池类型为D3DPOOL_DEFAULT的资源,这一类资源将尽可能存放在显存中,这样可以提高程序的运行速度。但是,这类资源在程序运行时会出现设备丢失的现象,因此需要程序员自己管理。在设备丢失时释放它的内存,当设备恢复时重新为它分配内存。此外,观察变换矩阵和投影变换矩阵以及在整个程序运行期间保持不变的渲染状态通常也在该回调函数中设置。
如果性能不是很重要,使用D3DPOOL_MANAGED内存类型资源永远是一种安全的选择。
第二阶段:运行
DXUT框架调用回调函数MsgProc()处理各类消息,并在空闲时间反复调用OnFrameMove()和OnFrameRender()两个函数进行场景渲染。
在每一帧中,程序为实现对场景的刷新,为用户输入的响应而编写的代码通常写在函数OnFrameMove()中,例如设置世界变换矩阵实现物体的运动,它相当于“update”的性质,真正进行渲染的代码写在函数OnFrameRender()中。
需要说明的是,在应用程序运行期间,当Direct3D设备变为丢失状态时,DXUT框架会调用OnD3D9LostDevice()函数,释放所有在回调函数OnD3D9ResetDevice()中创建的设备资源。也就是说,这时释放的资源都是D3DPOOL_DEFAULT类型的。当Direct3D设备从丢失状态恢复时,DXUT框架会调用回调函数OnD3D9ResetDevice()重新创建所有类型为D3DPOOL_DEFAULT的资源。也就是说,在程序运行时,如果出现设备丢失现象,OnD3D9LostDevice()和OnD3D9ResetDevice()这一对函数就需要分别调用一次。
第三阶段:退出
在退出程序时,DXUT框架会依次调用OnD3D9LostDevice()和OnD3D9DestroyDevice()回调函数,在函数OnD3D9LostDevice()中释放由函数OnD3D9ResetDevice()创建的资源,在函数OnD3D9DestroyDevice()中释放由函数OnD3D9CreateDevice()创建的资源。
AppFrame.cpp的全部代码如下:
#include "DXUT.h"
#include "resource.h"
//--------------------------------------------------------------------------------------
// Rejects any D3D9 devices that aren't acceptable to the app by returning false.
//--------------------------------------------------------------------------------------
bool CALLBACK IsD3D9DeviceAcceptable(D3DCAPS9* pCaps, D3DFORMAT AdapterFormat, D3DFORMAT BackBufferFormat,
bool bWindowed, void* pUserContext)
{
// Typically want to skip back buffer formats that don't support alpha blending
IDirect3D9* pD3D = DXUTGetD3D9Object();
/*
HRESULT CheckDeviceFormat(
UINT Adapter,
D3DDEVTYPE DeviceType,
D3DFORMAT AdapterFormat,
DWORD Usage,
D3DRESOURCETYPE RType,
D3DFORMAT CheckFormat
);
/*/
if(FAILED(pD3D->CheckDeviceFormat(pCaps->AdapterOrdinal, pCaps->DeviceType, AdapterFormat,
D3DUSAGE_QUERY_POSTPIXELSHADER_BLENDING, D3DRTYPE_TEXTURE, BackBufferFormat)))
{
return false;
}
return true;
}
//--------------------------------------------------------------------------------------
// Before a device is created, modify the device settings as needed.
//--------------------------------------------------------------------------------------
bool CALLBACK ModifyDeviceSettings(DXUTDeviceSettings* pDeviceSettings, void* pUserContext)
{
return true;
}
//--------------------------------------------------------------------------------------
// Create any D3D9 resources that will live through a device reset (D3DPOOL_MANAGED)
// and aren't tied to the back buffer size.
//--------------------------------------------------------------------------------------
HRESULT CALLBACK OnD3D9CreateDevice(IDirect3DDevice9* pd3dDevice, const D3DSURFACE_DESC* pBackBufferSurfaceDesc,
void* pUserContext)
{
return S_OK;
}
//--------------------------------------------------------------------------------------
// Create any D3D9 resources that won't live through a device reset (D3DPOOL_DEFAULT)
// or that are tied to the back buffer size.
//--------------------------------------------------------------------------------------
HRESULT CALLBACK OnD3D9ResetDevice(IDirect3DDevice9* pd3dDevice, const D3DSURFACE_DESC* pBackBufferSurfaceDesc,
void* pUserContext)
{
return S_OK;
}
//--------------------------------------------------------------------------------------
// Handle updates to the scene. This is called regardless of which D3D API is used.
//--------------------------------------------------------------------------------------
void CALLBACK OnFrameMove(double fTime, float fElapsedTime, void* pUserContext)
{
}
//--------------------------------------------------------------------------------------
// Render the scene using the D3D9 device
//--------------------------------------------------------------------------------------
void CALLBACK OnD3D9FrameRender( IDirect3DDevice9* pd3dDevice, double fTime, float fElapsedTime, void* pUserContext )
{
HRESULT hr;
// Clear the render target and the zbuffer
V( pd3dDevice->Clear(0, NULL, D3DCLEAR_TARGET | D3DCLEAR_ZBUFFER, D3DCOLOR_ARGB(0, 5, 5, 5), 1.0f, 0) );
// Render the scene
if( SUCCEEDED( pd3dDevice->BeginScene() ) )
{
V( pd3dDevice->EndScene() );
}
}
//--------------------------------------------------------------------------------------
// Handle messages to the application
//--------------------------------------------------------------------------------------
LRESULT CALLBACK MsgProc( HWND hWnd, UINT uMsg, WPARAM wParam, LPARAM lParam,
bool* pbNoFurtherProcessing, void* pUserContext )
{
return 0;
}
//--------------------------------------------------------------------------------------
// Release D3D9 resources created in the OnD3D9ResetDevice callback
//--------------------------------------------------------------------------------------
void CALLBACK OnD3D9LostDevice( void* pUserContext )
{
}
//--------------------------------------------------------------------------------------
// Release D3D9 resources created in the OnD3D9CreateDevice callback
//--------------------------------------------------------------------------------------
void CALLBACK OnD3D9DestroyDevice( void* pUserContext )
{
}
//--------------------------------------------------------------------------------------
// Initialize everything and go into a render loop
//--------------------------------------------------------------------------------------
INT WINAPI wWinMain( HINSTANCE, HINSTANCE, LPWSTR, int )
{
// Enable run-time memory check for debug builds.
#if defined(DEBUG) | defined(_DEBUG)
_CrtSetDbgFlag( _CRTDBG_ALLOC_MEM_DF | _CRTDBG_LEAK_CHECK_DF );
#endif
// Set the callback functions
DXUTSetCallbackD3D9DeviceAcceptable(IsD3D9DeviceAcceptable);
DXUTSetCallbackD3D9DeviceCreated(OnD3D9CreateDevice);
DXUTSetCallbackD3D9DeviceReset(OnD3D9ResetDevice);
DXUTSetCallbackD3D9FrameRender(OnD3D9FrameRender);
DXUTSetCallbackD3D9DeviceLost(OnD3D9LostDevice);
DXUTSetCallbackD3D9DeviceDestroyed(OnD3D9DestroyDevice);
DXUTSetCallbackDeviceChanging(ModifyDeviceSettings);
DXUTSetCallbackMsgProc(MsgProc);
DXUTSetCallbackFrameMove(OnFrameMove);
// TODO: Perform any application-level initialization here
// Initialize DXUT and create the desired Win32 window and Direct3D device for the application
DXUTInit( true, true ); // Parse the command line and show msgboxes
DXUTSetHotkeyHandling( true, true, true ); // handle the default hotkeys
DXUTSetCursorSettings( true, true ); // Show the cursor and clip it when in full screen
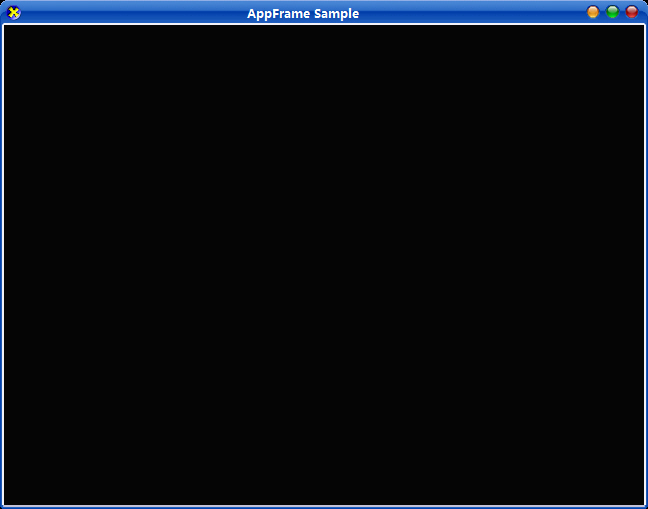
DXUTCreateWindow( L"AppFrame Sample" );
DXUTCreateDevice( true, 640, 480 );
// Start the render loop
DXUTMainLoop();
// TODO: Perform any application-level cleanup here
return DXUTGetExitCode();
}
运行效果图: