本篇一开始就上代码,主要演练MessageQueue的实际应用。用户提交订单(消息发送),系统将订单发送到订单队列(Order Queue)中;订单管理系统(消息接收)端,监听消息队列,收到新的消息就显示在订单列表中,用户可以处理订单。原创(每行代码皆为自己手敲的)
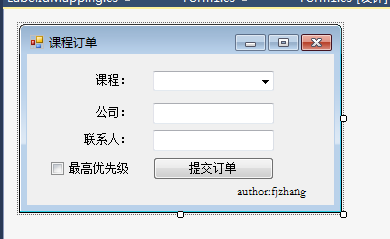
1、提交课程订单
    public partial class Form1 : Form
    {
        // author:fjzhang 2017-08-01
        public Form1()
        {
            InitializeComponent();
        }
        /// <summary>
        /// 提交订单按钮
        /// </summary>
        /// <param name="sender"></param>
        /// <param name="e"></param>
        private void btnSubmit_Click(object sender, EventArgs e)
        {
            try
            {
                //实例一个课程订单对象
                var order = new CourseOrder();
                //订单信息
                order.Course = new Course()
                {
                    Title = comboBoxCourse.SelectedItem.ToString()
                };
                //顾客信息
                order.Customer = new Customer()
                {
                    Company = textBoxCompany.Text,
                    Contact = textBoxContact.Text
                };
                //实例一个队列对象
                using (var queue = new MessageQueue(CourseOrder.CourseOrderQueueName))
                {
                    //实例一个消息对象
                    using (var message = new System.Messaging.Message(order))
                    {
                        //设置优先级
                        if (checkBoxPriority.CheckState == CheckState.Checked)
                        {
                            message.Priority = MessagePriority.High;
                        }
                        //设置消息可以恢复
                        message.Recoverable = true;
                        //发送消息
                        queue.Send(order, string.Format("课程订单[{0}]", order.Customer.Company));
                    }
                }
                //提示订单提交成功
                MessageBox.Show("订单提交成功!", "课程订单", MessageBoxButtons.OK, MessageBoxIcon.Information);
            }
            catch (MessageQueueException ex)
            {
                //提示异常信息
                MessageBox.Show(ex.Message, "异常提示", MessageBoxButtons.OK, MessageBoxIcon.Error);
            }
        }
    }
2、处理课程订单

    /// <summary>
    /// 订单处理界面 author:fjzhang 2017-08-01
    /// </summary>
    public partial class Form1 : Form
    {
        /// <summary>
        /// 订单队列
        /// </summary>
        private MessageQueue orderQueue;
        /// <summary>
        /// 构造函数,初始化界面窗体,监听订单队列
        /// </summary>
        public Form1()
        {
            InitializeComponent();
            //队列名称
            string queueName = CourseOrder.CourseOrderQueueName;
            //初始化订单队列
            orderQueue = new MessageQueue(queueName);
            //设置消息类型
            orderQueue.Formatter = new XmlMessageFormatter(new Type[] {
                typeof(CourseOrder),
                typeof(Customer),
                typeof(Course)
            });
            //在未收到订单之前,不启用处理订单按钮
            btnProcessOrder.Enabled = false;
            //开始监听订单队列
            Task t1 = new Task(PeekMessages);
            t1.Start();
        }
        /// <summary>
        /// 监听订单队列(如果收到新订单,就在订单列表显示出来)
        /// </summary>
        private void PeekMessages()
        {
            //使用消息队列枚举器来显示队列的所有消息
            using (MessageEnumerator messagesEnumerator = orderQueue.GetMessageEnumerator2())
            {
                //检查队列中是否有新消息。如果没有消息,就等待队列的新消息,这里设置等待3小时后才退出。
                while (messagesEnumerator.MoveNext(TimeSpan.FromHours(3)))
                {
                    //这里的LaBELIdMapping是我自己定义的,就两字String类型的字段(Id,Label)
                    var lableId = new LabelIdMapping()
                    {
                        Id = messagesEnumerator.Current.Id,
                        Label = messagesEnumerator.Current.Label
                    };
                    //使用主线程执行新增收到订单行
                    this.Invoke(new EventHandler(delegate
                    {
                        AddListItem(lableId);
                    }));
                }
                //提示等待3小时还没有新消息进队列
                MessageBox.Show("三小时内没有订单", "退出提醒", MessageBoxButtons.OK, MessageBoxIcon.Information);
            }
        }
        /// <summary>
        /// 在订单列表新增一项
        /// </summary>
        /// <param name="labelIdMapping"></param>
        private void AddListItem(LabelIdMapping labelIdMapping)
        {
            //在listBox控件中新增一行
            listBox1.Items.Add(labelIdMapping);
        }
        /// <summary>
        /// 处理订单
        /// </summary>
        /// <param name="sender"></param>
        /// <param name="e"></param>
        private void btnProcessOrder_Click(object sender, EventArgs e)
        {
            LabelIdMapping labelId = listBox1.SelectedItem as LabelIdMapping;
            var message = orderQueue.ReceiveById(labelId.Id);
            listBox1.Items.Remove(labelId);
            listBox1.SelectedIndex = -1;
            btnProcessOrder.Enabled = false;
            textBoxCourse.Text = string.Empty;
            textBoxCompany.Text = string.Empty;
            textBoxContact.Text = string.Empty;
            MessageBox.Show(string.Format("订单[{0}]处理成功", labelId.Label), "订单管理", MessageBoxButtons.OK, MessageBoxIcon.Information);
        }
        /// <summary>
        /// 选中消息列表某一行(订单)执行事件(查看订单详情)
        /// </summary>
        /// <param name="sender"></param>
        /// <param name="e"></param>
        private void listBox1_SelectedIndexChanged(object sender, EventArgs e)
        {
            LabelIdMapping labelId = listBox1.SelectedItem as LabelIdMapping;
            if (labelId == null)
                return;
            orderQueue.MessageReadPropertyFilter.Priority = true;
            var message = orderQueue.PeekById(labelId.Id);
            CourseOrder order = message.Body as CourseOrder;
            if (order != null)
            {
                textBoxCourse.Text = order.Course.Title;
                textBoxCompany.Text = order.Customer.Company;
                textBoxContact.Text = order.Customer.Contact;
                btnProcessOrder.Enabled = true;

                if (message.Priority > MessagePriority.Normal)
                {
                    labelPriority.Text = "高优先级";
                }
                else
                {
                    labelPriority.Text = "--";
                }
            }
            else
            {
                MessageBox.Show("当前选中的不是课程订单", "订单管理", MessageBoxButtons.OK, MessageBoxIcon.Warning);
            }
        }
    }
3、效果

以上就是今天实现的全部代码,主要实现了消息的发送和消息的接收,代码写了注释。有不足的地方,上一篇写到消息有几种类型,其中有两种“确认消息”和“响应消息”还没有演示,后面再写一篇应用“确认消息”和“响应消息”。