目的
用Java或则Python画出DAG图、状态转换图
应用场景:编译原理等课程设计 画自动机、状态转换图、基本块等有向图
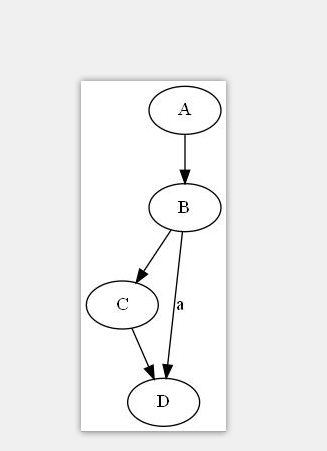
效果如下:


1.安装
1.需要用到 graphviz,需要下载 http://www.graphviz.org/download/
但是上面下载太慢了,打包一个windows版的下载链接:https://www.yun.cn/s/31884bceaad04c3e8c630212babc0639
步骤A.下载:下载完解压到某个文件夹就可以了。
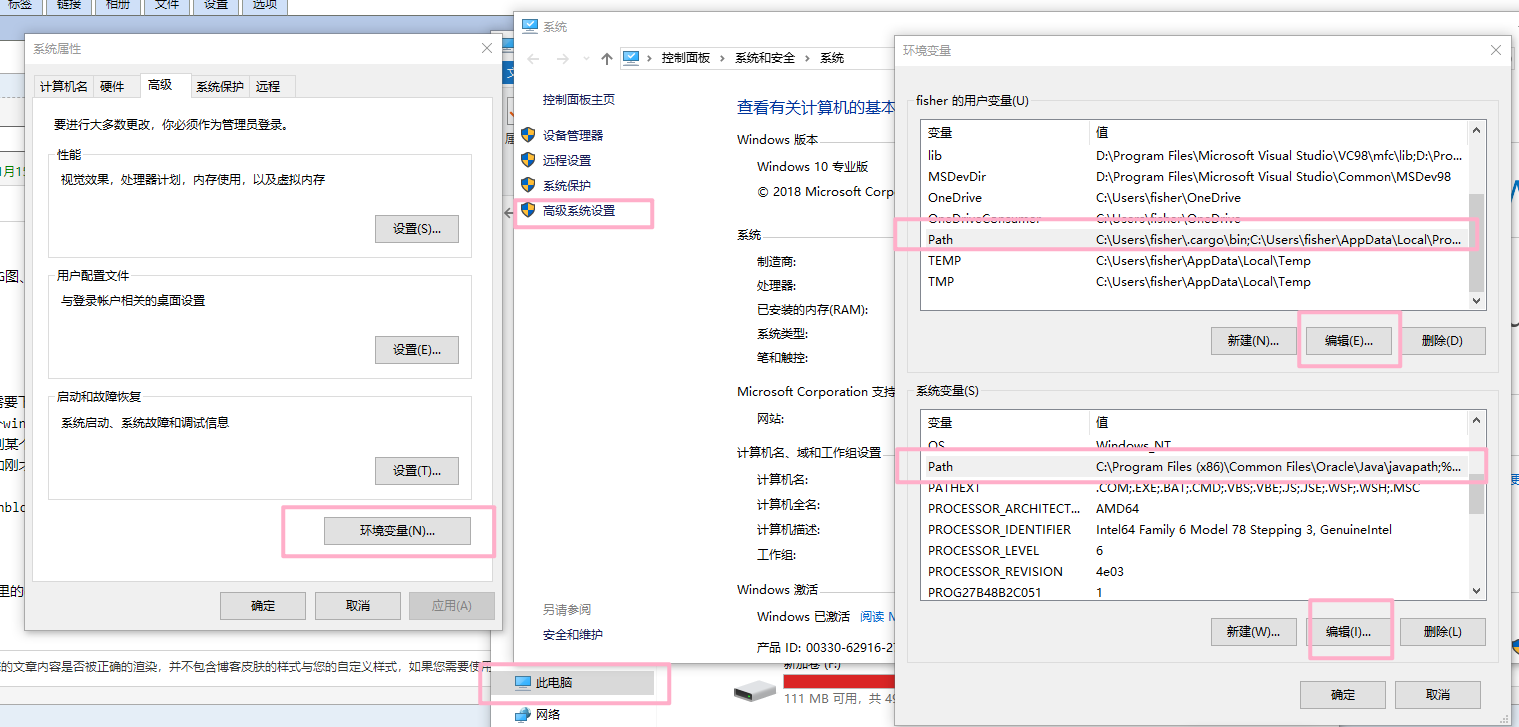
步骤B.配置环境变量:添加刚才解压的文件夹下的bin目录到Path环境变量中


打开cmd,输入dot -V 如果有显示,就代表安装成功、配置环境成功了。要是没显示就重新再来一遍。

2.画图
直接用安装的graphviz里的dot工具画一个图试试
步骤A:新建一个txt文件
把下面的dot命令复制进去
digraph G {
  A->B
  B->C[label="a"]
  C->D[label="1"]
}
打开cmd命令行,输入以下命令,用dot工具就可以生成状态转换图。
其中D:graphexample.txt是刚才新建的txt文件的目录文件名
其中D:graphexample.jpg是想要生成图片的文件目录文件名称
dot D:graphexample.txt -T jpg -o D:graphexample.jpg


这个时候,可以猜测到之前txt文本中的命令的含义,A->B就是结点A到B连一条有向边,B->C[label="a"]就是结点B向结点C连一条有向边,并且边权写上label=a
digraph G {
  A->B
  B->C[label="a"]
  C->D[label="1"]
}
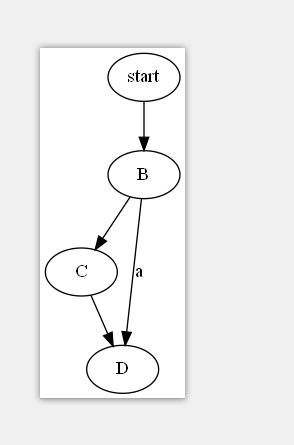
另外如果想给结点里面添加自定义的文字,也可以给结点添加lebl值,例如下图和下面的指令所示


3.程序画图
可以用Java或则Python写程序进行画图,Python更简单网上有很多方法只需要导入库,这篇文章主要来演示用Java来进行画图
暂时没有Java相关的API。
所以要自己写一个生成dot指令的,
dot指令就是下面的代码,上文中我们写好了代码,在cmd下用dot命令就能生成图了。
dot D:graphexample.txt -T jpg -o D:graphexample.jpg
digraph G {
  A->B
  B->C[label="a"]
  C->D[label="1"]
}
如果要用Java程序实现,我们需要完成几个功能:
1.生成dot指令(生成边和结点,比如生成A->B这个字符串或则生成 A[label="write some"]这个带有文字的结点)。
2.执行cmd下生成有向图的命令。
3.自动打开生成的图片。
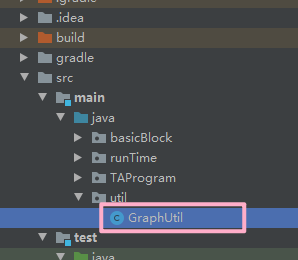
所以就写好了个工具类来玩。原理就是实现了上面几个功能,复制文末附件代码到本地,可以直接用。
example使用的例子:
    public static void main(String[] args) throws IOException, InterruptedException {
        GraphUtil graphUtil = new GraphUtil(); //new一个自己写的GraphUtil类
        graphUtil.setSourcePath("D:\graph\example.txt"); //设置dot指令的txt文件目录
        graphUtil.setTargetPath("D:\graph\example.jpg"); //设置要生成的图片的目录路径

        graphUtil.link("A","B"); //A结点向B结点 连一条有向边  实际上就是字符串拼接,dot指令加上 A->B 这个字符串
        graphUtil.link("B","C"); //B结点向C结点 连一条有向边 实际上就是字符串拼接,dot指令加上 B->C 这个字符串
        graphUtil.link("C","D"); //C结点向D结点 连一条有向边
        graphUtil.link("B","D","a"); //B结点向D结点 连一条有向边

        graphUtil.node("A","start"); //在A结点里面写文字
        GraphUtil.saveCodeToFile(graphUtil.getSourcePath(),graphUtil.getCode()); //保存dot指令到example.txt文件,graphUtil.getCode()获取了dot指令的内容
        GraphUtil.genAndOpenGraph(graphUtil.getSourcePath(),graphUtil.getTargetPath()); //生成图片 并自动打开图片文件
    }
效果:
执行完上面Main函数的代码,看到在指定的目录下生成了txt指令文件,和jpg状态转换图。


附:GraphUtil类(在本地新建一个命名 名称为GraphUtil的class类,然后把下面代码拷贝进去就可以了)


import java.awt.*;
import java.io.File;
import java.io.FileWriter;
import java.io.IOException;

public class GraphUtil {

    private String code = "digraph G {" + "
";
    private String sourcePath;
    private String targetPath;

    public void setTargetPath(String targetPath) {
        this.targetPath = targetPath;
    }

    //节点A到节点B画一条有向边
    public void link(String dotA, String dotB){
        String linkCode = dotA + " -> " + dotB + "
";
        this.code += linkCode;
    }

    //节点A到节点B画一条有向边,边权写上label
    public void link(String dotA,String dotB,String label){
        String linkCode = dotA + " -> " + dotB + "[label=" + label + "]" + "
";
        this.code += linkCode;
    }

    public void node(String dot,String label){
        String nodeCode = dot + "[label="" + label + ""]" + "
";
        this.code += nodeCode;
    }

    //打开已经生成的DAG图片
    public static void openFile(String filePath) {
        try {
            File file = new File(filePath);
            Desktop.getDesktop().open(file);
        } catch (IOException | NullPointerException e) {
            System.err.println(e);
        }
    }

    //使用dot的命令 用dot指令文件 生成DAG图片
    public static void genGraph(String sourcePath,String targetPath) throws IOException, InterruptedException {
        Runtime run = Runtime.getRuntime();
        run.exec("dot "+sourcePath+" -T jpg -o "+targetPath);
        Thread.sleep(1000);
    }

    //整合上面两个方法的功能: 生成图片后自动打开
    public static void genAndOpenGraph(String sourcePath,String targetPath) throws InterruptedException, IOException {
        genGraph(sourcePath,targetPath);
        Thread.sleep(1000);
        openFile(targetPath);
    }

    //保存dot指令到文件  后续利用这个指令文件 就可以用dot命令生成图了
    public static void saveCodeToFile(String filePath, String content) {
        FileWriter fwriter = null;
        try {
            // true表示不覆盖原来的内容,而是加到文件的后面。若要覆盖原来的内容,直接省略这个参数就好
            fwriter = new FileWriter(filePath, false);
            fwriter.write(content);
        } catch (IOException ex) {
            ex.printStackTrace();
        } finally {
            try {
                fwriter.flush();
                fwriter.close();
            } catch (IOException ex) {
                ex.printStackTrace();
            }
        }
    }

    //一些setter和getter方法
    public String getCode() {
        return code + "
}";
    }

    public void setCode(String code) {
        this.code = code;
    }

    public String getSourcePath() {
        return sourcePath;
    }

    public void setSourcePath(String sourcePath) {
        this.sourcePath = sourcePath;
    }

    public String getTargetPath() {
        return targetPath;
    }

}