This tutorial shows how to cross-compile the Embedded build of Qt 5.5 for Raspberry Pi 2. The Embedded build does not use the X11 server and instead displays the GUI directly using the Raspberry Pi framebuffer. We will show how to use a Raspberry Pi cross-compiler to build the Qt5 framework for Raspberry Pi on a Windows machine.
- Download a fresh SD card image for your Raspberry Pi. In this tutorial we will use a Debian Jessieimage. Write the image into the SD card using WinFLASHTool or any other similar tool.
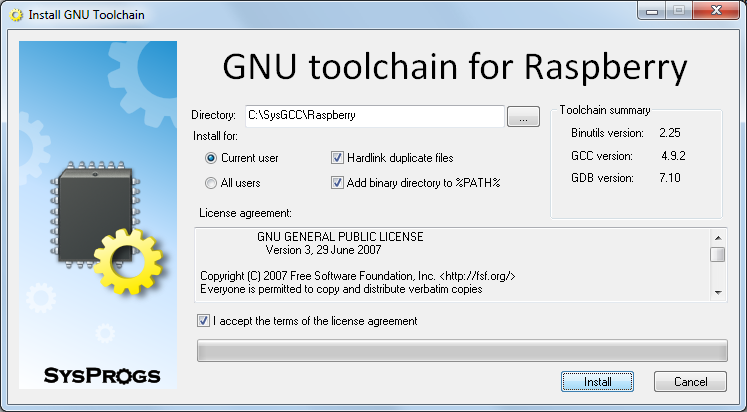
- Download a cross-toolchain matching the image and install it:
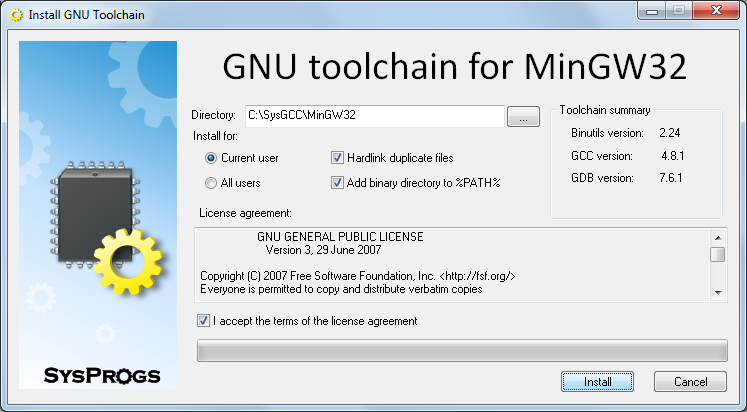
- Download and install a MinGW toolchain that will be used to build Windows versions of build tools like Qmake:
- Download and install Python 2.7 for Windows and ensure that its directory is added to PATH.
- Download the Qt source package (e.g. qt-everywhere-opensource-src-5.5.0.tar.xz) from the Qt Archive.
- Before we can build the Qt for Raspberry Pi, we need to resynchronize the sysroot with the toolchain to ensure that the toolchain has all the headers and libraries from your Raspberry. Start the UpdateSysroot.bat file from the <sysgcc>RaspberryTOOLS folder:
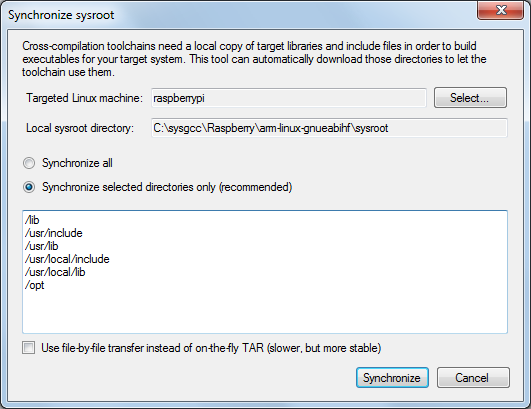 You need to synchronize at least the /opt folder, as it contains OpenGL headers that are not included in the toolchain. If you have installed additional packages on your Raspberry Pi, resynchronize other suggested directories as well.
 - Launch the msys shell from the MinGW toolchain by running<sysgcc>MinGW32msys1.0msys.bat:
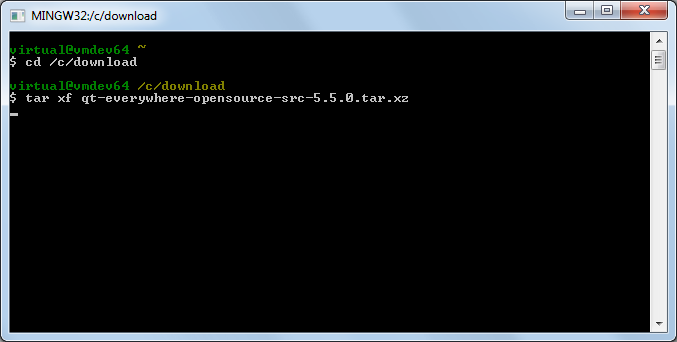
- Go to the directory containing the archive with the Qt source and extract it by running tar xf <archive name>:
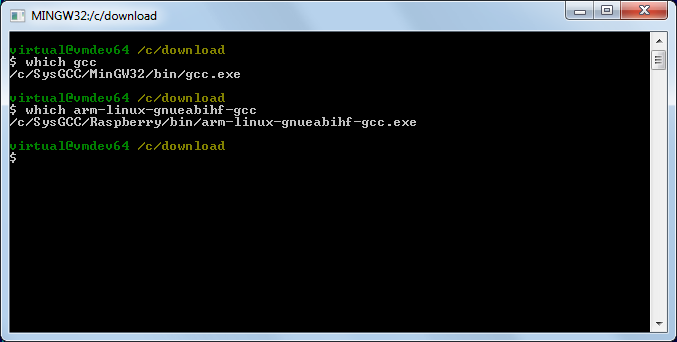
- Ensure that the directories containing the MinGW gcc compiler and the Raspberry Pi cross-compiler are added to PATH. If not, add them manually:
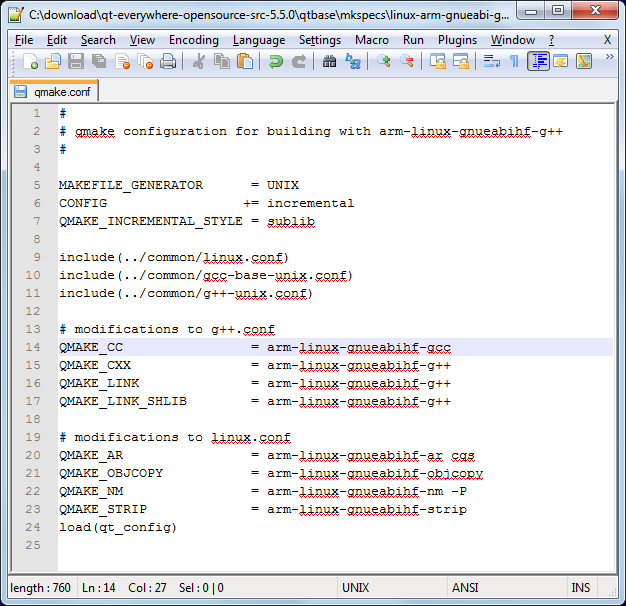
- Open the qt-everywhere-opensource-src-5.5.0qtbasemkspecslinux-arm-gnueabi-g++qmake.conf file and replace all occurences of arm-linux-gnueabi- with arm-linux-gnueabihf-:
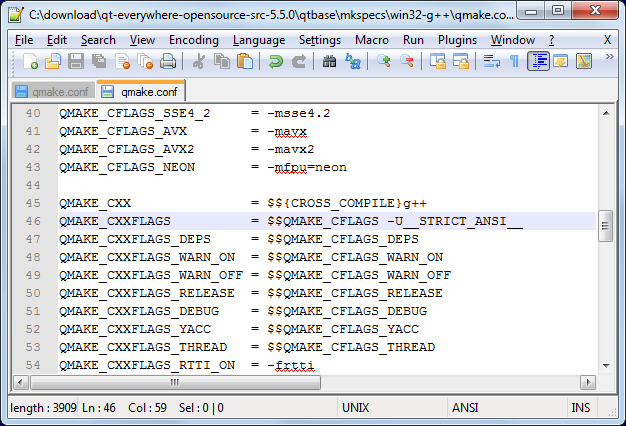
- Now we are ready to build Qt. Due to a bug in the Qmake build script, we will need to build it in 2 steps: first we will build a Qmake for Windows and then we’ll build the actual Qt binaries. First we will modify the win32-g++ platform definition to prevent MinGW from excluding some functions that Qt relies upon. Open the qt-everywhere-opensource-src-5.5.0qtbasemkspecswin32-g++qmake.conf file and add -U__STRICT_ANSI__ to CXXFLAGS:
- Now we can build the Windows tools. Create a directory (e.g. qt-build) and run the configuration script from there:
123mkdir qt-buildcd qt-build../qt-everywhere-opensource-src-5.5.0/configure -platform win32-g++ -xplatform linux-arm-gnueabi-g++ -release -opengl es2 -device linux-rasp-pi2-g++ -sysroot C:/SysGCC/Raspberry/arm-linux-gnueabihf/sysroot -prefix /usr/local/qt5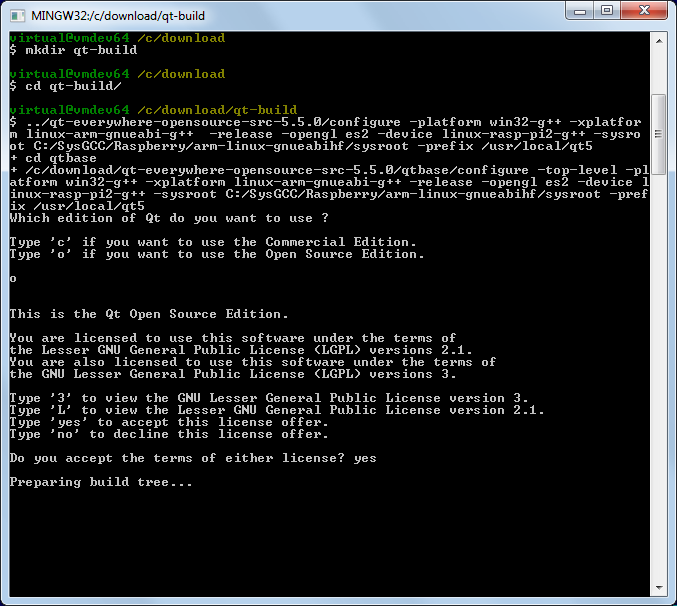 Note the “-opengl es2″ option that configures Qt to use the Raspberry Pi framebuffer directly instead of the X11 system.
 - Eventually the build should fail complaining about the errors to process specs for the raspberry device:
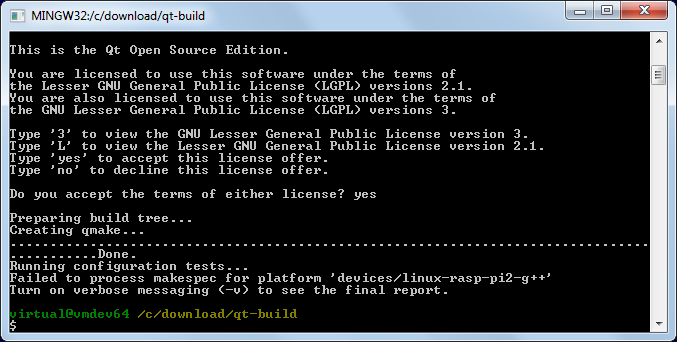
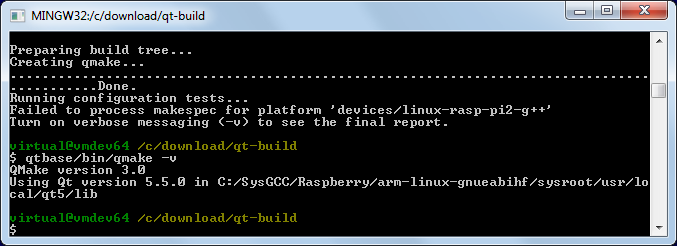
- This is normal as long as qmake.exe got built. Check this by running “qtbase/bin/qmake -v”:
- Now we can build the rest of the Qt framework. First of all open the qtbaseconfigure file and replace the condition before the “Creating qmake line” with this one:
1if [ '!' -f "$outpath/bin/qmake.exe" ]; then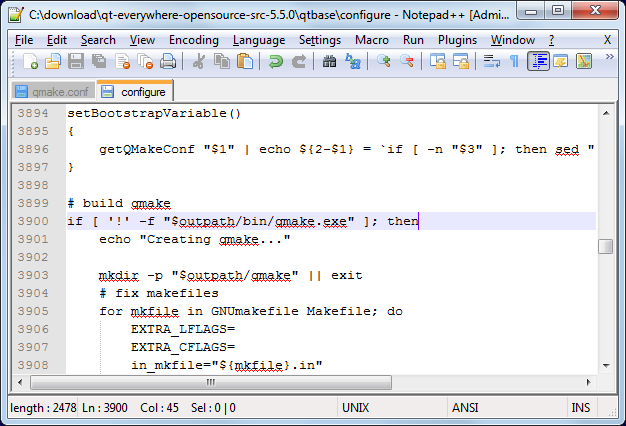
- Start the configure script again, this time adding the following argument to the end of the previous command line:
1-device-option CROSS_COMPILE=C:/SysGCC/Raspberry/bin/arm-linux-gnueabihf- -qt-xcb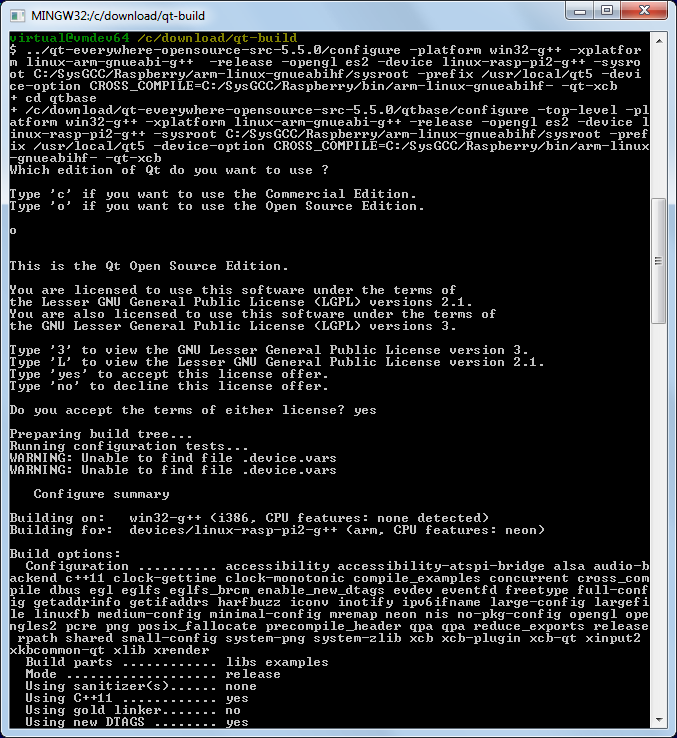 The -device-option is required when using the device specification, however if you specify it while building Qmake, the Qt build system will try to use the cross-compiler to build the Windows Qmake executable that will obviously fail.
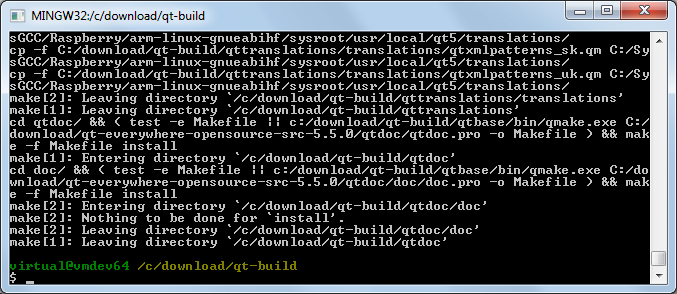
 - Once the configure script reports that the configuration is complete, run the “make && make install” command to build the entire Qt framework and install it into the cross-compiler directory. The framework is huge, so the build process might take several hours to complete, even on a fast machine.
 Warning: do not run “make install” before “make” succeeds as it would fail leaving the build directory in a partially built state failing further builds until the entire directory is deleted and re-created.
 - Open SmarTTY (a portable version can be found in <SysGCC>RaspberryTOOLSPortableSmartty) and connect to your Raspberry Pi. Then run the following commands to create the /usr/local/qt5 folder and make it writable to the current user:
123cd /usr/localsudo mkdir qt5sudo chown pi qt5
Then select SCP->Upload directory: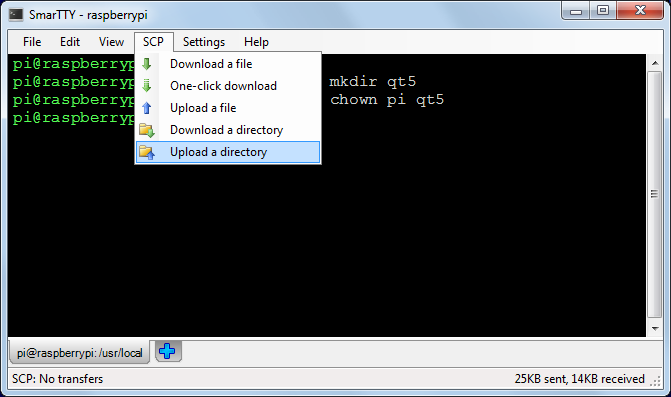
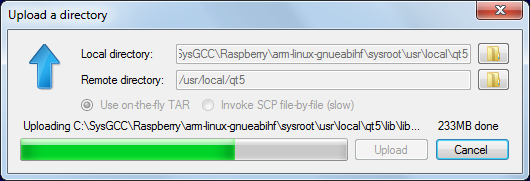
- Select the <sysroot>usrlocalqt5 directory and upload it to /usr/local/qt5:

- Wait for the upload to complete. The built Qt framework is relatively large and would take several minutes to upload:
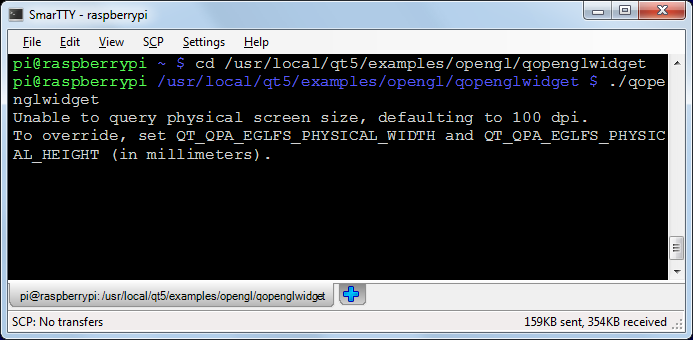
- Once the upload is complete, you can test out the framework. Go to the/usr/local/qt5/examples/opengl/qopenglwidget directory and launch ./qopenglwidget:
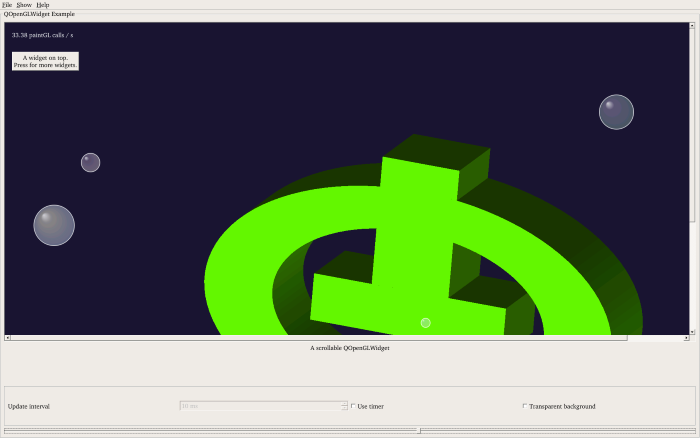
- Look at the screen connected to the HDMI port of the Raspberry Pi. You will see a rotating Qt logo animation:
 If the screen does not show anything, shut down your Raspberry Pi and re-plug the power connector. As long as the screen is connected when the device is powered on, Raspberry Pi should recognize it.
Now that you have cross-compiled the Qt framework for your Raspberry, follow this tutorial to create and build a basic Qt application using the same cross-compiler.
http://visualgdb.com/tutorials/raspberry/qt/embedded/