一、IS4服务器配置
1、新建一个Asp.net Core MVC程序,模板选择 Empty

2、Nuget添加 IdentityServer4,我这里添加的是2.5.3
3、添加Config文件,配置clients和scopes等信息,需要持久化配置的可以看 https://www.cnblogs.com/fengchao1000/p/10184921.html
public class Config
    {
        // scopes define the resources in your system
        public static IEnumerable<IdentityResource> GetIdentityResources()
        {
            return new List<IdentityResource>
            {
                new IdentityResources.OpenId(),
                new IdentityResources.Profile()
            };
        }

        public static IEnumerable<ApiResource> GetApis()
        {
            return new List<ApiResource>
            {
                new ApiResource("FrameworkAPI",new List<string>(){JwtClaimTypes.Subject})
            };
        }

        public static IEnumerable<Client> GetClients()
        {
            return new List<Client>
            {

                //Implicit模式Client配置,适用于SPA
                new Client
                {
                    ClientId = "Test",
                    ClientName = "Test",
                    AllowedGrantTypes = GrantTypes.Implicit,
                    AllowAccessTokensViaBrowser = true,
                    AccessTokenLifetime = 60*60,
                    AccessTokenType = AccessTokenType.Jwt,
                    RedirectUris =
                    {
                        "https://localhost:5003/signin-callback.html",
                        "https://localhost:5003/silent-callback.html"
                    },
                    PostLogoutRedirectUris = { "https://localhost:5003" },
                    AllowedCorsOrigins = { "https://localhost:5003" },
                    RequireConsent = false,
                    AllowedScopes =
                    {
                        IdentityServerConstants.StandardScopes.OpenId,
                        IdentityServerConstants.StandardScopes.Profile,
                        "FrameworkAPI"//对应webapi里面的scope配置
                    }
                },
                //ResourceOwnerPassword模式Client配置,适用于App、winform
                new Client
                {
                    ClientId = "App",
                    ClientName = "App",
                    ClientSecrets = { new Secret("123456".Sha256()) },
                    AccessTokenLifetime = 60*60,//单位s
                    AllowedGrantTypes = GrantTypes.ResourceOwnerPassword,
                    SlidingRefreshTokenLifetime =  2592000,
                    AllowOfflineAccess = true,
                    AllowedScopes = new List<string>
                    {
                        "FrameworkAPI",//对应webapi里面的scope配置
                        StandardScopes.OfflineAccess,
                        StandardScopes.OpenId,
                        StandardScopes.Profile
                    }
                }

            };
        }
    }
4、添加ProfileService文件,用于自定义登录返回信息
/// <summary>
    /// 自定义用户登录返回的信息claims
    /// </summary>
    public class ProfileService : IProfileService
    {
        private readonly ILogger logger;

        public ProfileService(ILogger<ProfileService> logger)
        {
            this.logger = logger;
        }

        public async Task GetProfileDataAsync(ProfileDataRequestContext context)
        {
            try
            {
                var claims = context.Subject.Claims.ToList();

                context.IssuedClaims = claims.ToList();
            }
            catch (Exception ex)
            {
                logger.LogError(ex.ToString());
            }
        }

        public async Task IsActiveAsync(IsActiveContext context)
        {
            context.IsActive = true;
        }
    }
5、添加ResourceOwnerPasswordValidator文件,在ResourceOwnerPassword模式下用于自定义登录验证
/// <summary>
    ///ResourceOwnerPassword模式下用于自定义登录验证
    /// </summary>
    public class ResourceOwnerPasswordValidator : IResourceOwnerPasswordValidator
    {
        private readonly IConfiguration config;

        public ResourceOwnerPasswordValidator(IConfiguration config)
        {
            this.config = config;
        }

        public Task ValidateAsync(ResourceOwnerPasswordValidationContext context)
        {
            //根据context.UserName和context.Password与数据库的数据做校验,判断是否合法
            if (context.UserName == "test" && context.Password == "test")
            {
                context.Result = new GrantValidationResult(
                 subject: context.UserName,
                 authenticationMethod: OidcConstants.AuthenticationMethods.Password);
            }
            else
            {
                //验证失败
                context.Result = new GrantValidationResult(
                    TokenRequestErrors.InvalidGrant,
                    "invalid custom credential"
                    );
            }
            return Task.FromResult(0);
        }
    }
6、在 Startup 配置IdentityServer
public class Startup
    {
        // This method gets called by the runtime. Use this method to add services to the container.
        // For more information on how to configure your application, visit https://go.microsoft.com/fwlink/?LinkID=398940
        public void ConfigureServices(IServiceCollection services)
        {
            services.AddIdentityServer()
                   //配置证书
                   .AddDeveloperSigningCredential()
                   //配置API资源
                   .AddInMemoryApiResources(Config.GetApis())
                   //配置身份资源
                   .AddInMemoryIdentityResources(Config.GetIdentityResources())
                   //预置Client
                   .AddInMemoryClients(Config.GetClients())
                   .AddProfileService<ProfileService>()
                   .AddResourceOwnerValidator<ResourceOwnerPasswordValidator>();

            services.AddAuthentication()
            .AddCookie(options =>
            {
                options.ExpireTimeSpan = System.TimeSpan.FromMinutes(30);
                options.SlidingExpiration = true;
            });
        }

        // This method gets called by the runtime. Use this method to configure the HTTP request pipeline.
        public void Configure(IApplicationBuilder app, IHostingEnvironment env)
        {
            if (env.IsDevelopment())
            {
                app.UseDeveloperExceptionPage();
            }

            app.UseIdentityServer();//IdentityServer4中间件

            app.Run(async (context) =>
            {
                await context.Response.WriteAsync("IdentityServer4");
            });
        }
    }
到这里我们IdentityServer4服务端已经搭建好了,我们用postman测试下,这里调用的是ResourceOwnerPassword模式

二、.net framework webapi 配置
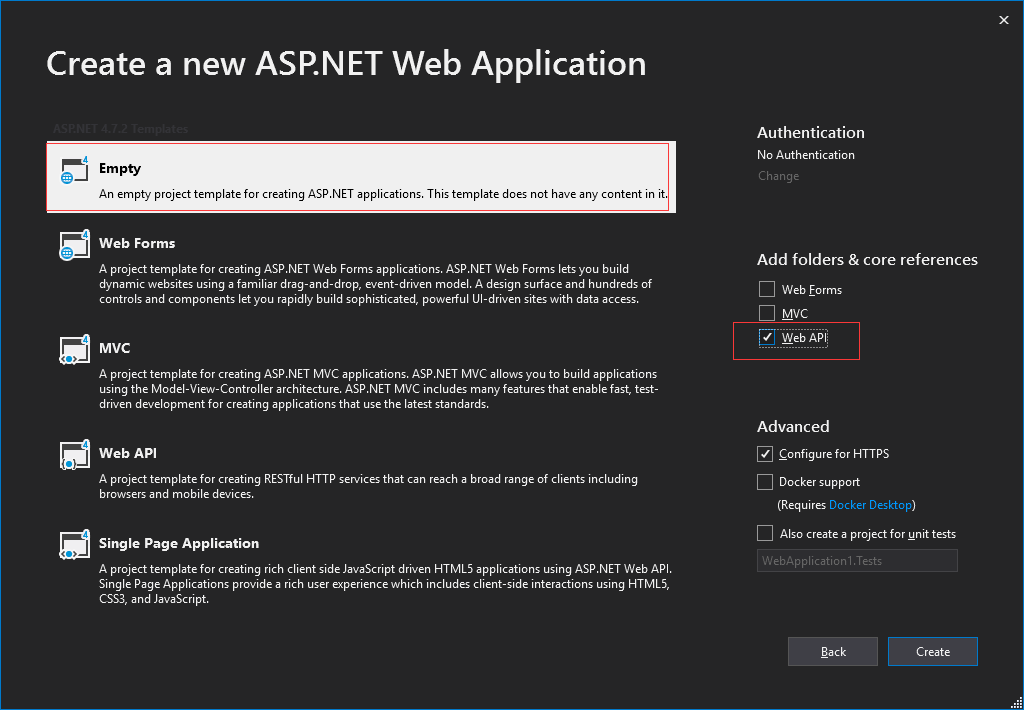
1、新建一个 .net framework webapi 程序
2、由于webapi是.net Framework版本的,所以我们需要引用 IdentityServer3.AccessTokenValidation 作为api端token的验证组件。
Nuget添加:
IdentityServer3.AccessTokenValidation
IdentityModel
Microsoft.Owin.Host.SystemWeb
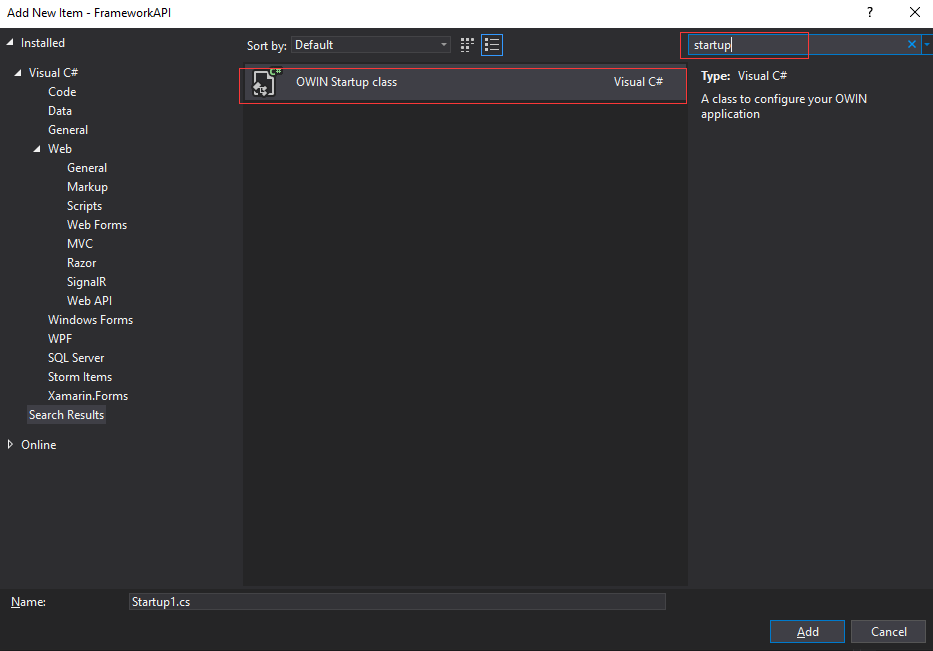
3、添加一个 Owin Startup.cs ,最好是用现有的startup类,而不要自己去新建一个类,然后修改名称。
4、在Startup中配置 IdentityServer AccessToken 验证参数
    public class Startup
    {
        public void Configuration(IAppBuilder app)
        {
            app.UseIdentityServerBearerTokenAuthentication(new IdentityServerBearerTokenAuthenticationOptions
            {
                Authority = "http://localhost:62527/",
                RequiredScopes = new[] { "FrameworkAPI" },//对应Client中配置的AllowedScopes和ApiResource

                DelayLoadMetadata = true
            });

        }
    }
5、在 WebAPIConfig 中加入 config.Filters.Add(new AuthorizeAttribute()) 来启用授权验证
config.Filters.Add(new AuthorizeAttribute());
6、添加TestController
    public class TestController : ApiController
    {
        public IHttpActionResult Get()
        {
            var user = User as ClaimsPrincipal;

            var claims = from c in user.Claims
                         select new
                         {
                             type = c.Type,
                             value = c.Value
                         };

            return Json(claims);
        }
    }
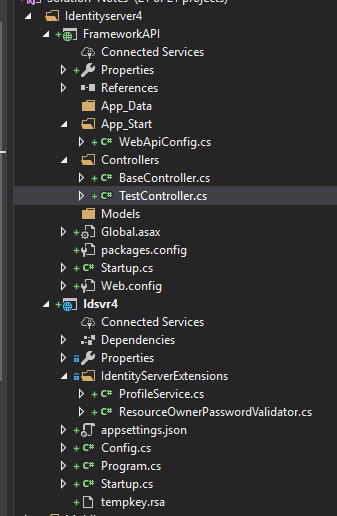
最后项目结构如下:
三、测试
我们的服务端和webapi都已经配置好了,我们用postman测试下
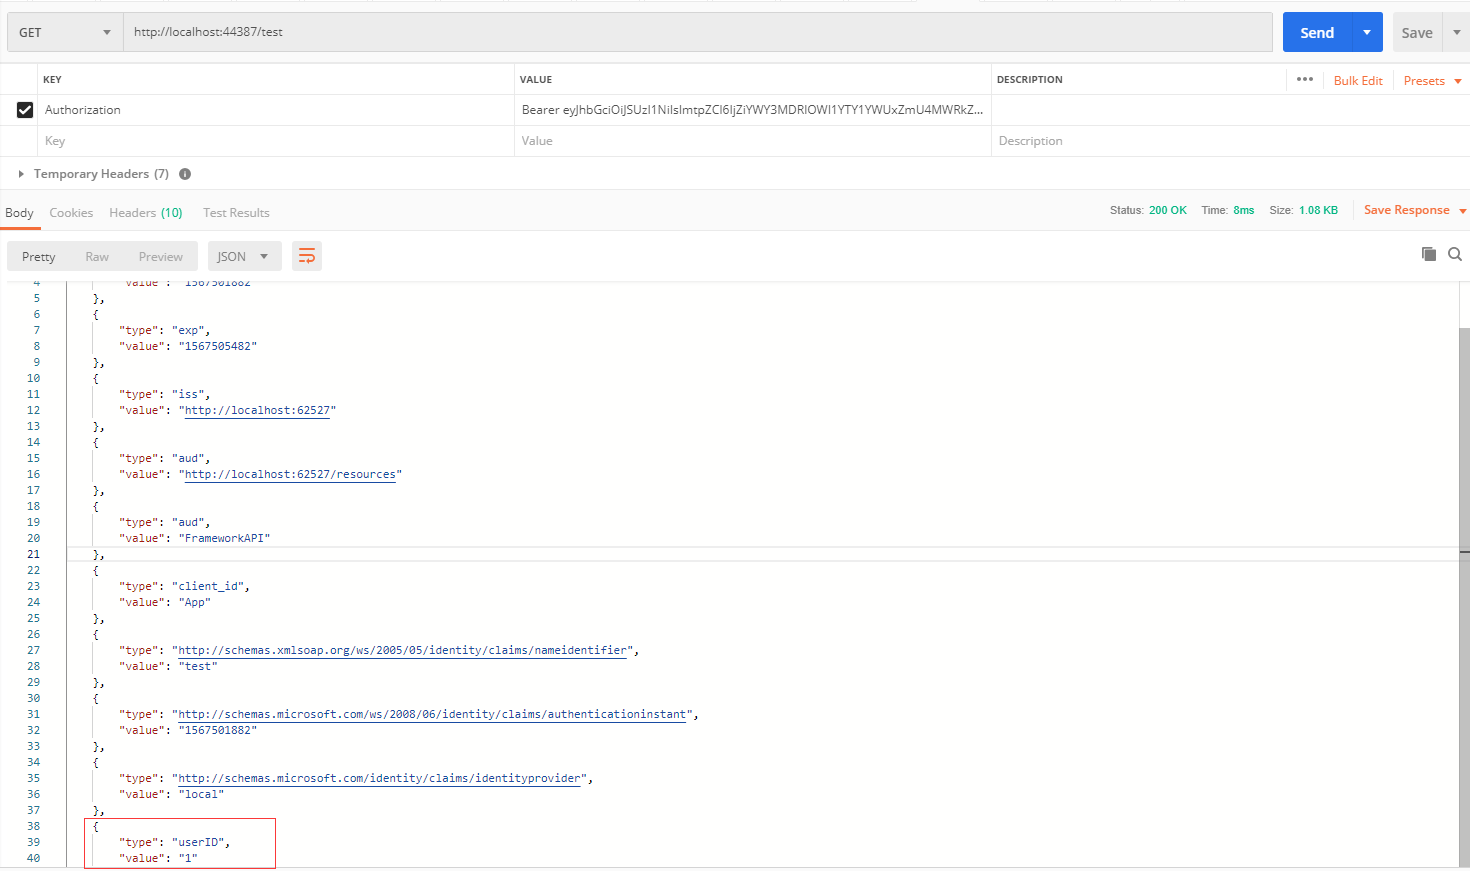
1、直接访问api地址 http://localhost:44387/test ,不加入token ,得到如下结果,返回401
2、加入token ,验证通过,返回200