一、前言
屏幕截图控件在我的很多项目中都有用到,尤其是嵌入式的系统上的软件,因为在嵌入式系统中,基本上系统都很精简,甚至连UI都没有,开机之后直接运行的就是Qt程序,很多时候需要对软件进行截图保存下来,用来编写文档和介绍,还有产品彩页之类的,毕竟在板子上直接运行的效果是最好的,还有一种办法是将系统编译成win的版本,用系统的截图来,但是嵌入式上很多代码其实很不方便在win上运行,甚至没法运行,而且还要外接很多接口来得到真正的运行效果,所以还是采用直接在板子上的Qt程序中直接集成截图的功能,需要的时候直接鼠标右键弹出来选择即可。
二、代码思路
ScreenWidget::ScreenWidget(QWidget *parent) : QWidget(parent)
{
    //this->setWindowFlags(Qt::Tool | Qt::WindowStaysOnTopHint | Qt::FramelessWindowHint | Qt::X11BypassWindowManagerHint);

    menu = new QMenu(this);
    menu->addAction("保存当前截图", this, SLOT(saveScreen()));
    menu->addAction("保存全屏截图", this, SLOT(saveFullScreen()));
    menu->addAction("截图另存为", this, SLOT(saveScreenOther()));
    menu->addAction("全屏另存为", this, SLOT(saveFullOther()));
    menu->addAction("退出截图", this, SLOT(hide()));

    //取得屏幕大小
    screen = new Screen(QApplication::desktop()->size());
    //保存全屏图像
    fullScreen = new QPixmap();
}

void ScreenWidget::paintEvent(QPaintEvent *)
{
    int x = screen->getLeftUp().x();
    int y = screen->getLeftUp().y();
    int w = screen->getRightDown().x() - x;
    int h = screen->getRightDown().y() - y;

    QPainter painter(this);

    QPen pen;
    pen.setColor(Qt::green);
    pen.setWidth(2);
    pen.setStyle(Qt::DotLine);
    painter.setPen(pen);
    painter.drawPixmap(0, 0, *bgScreen);

    if (w != 0 && h != 0) {
        painter.drawPixmap(x, y, fullScreen->copy(x, y, w, h));
    }

    painter.drawRect(x, y, w, h);

    pen.setColor(Qt::yellow);
    painter.setPen(pen);
    painter.drawText(x + 2, y - 8, tr("截图范围:( %1 x %2 ) - ( %3 x %4 )  图片大小:( %5 x %6 )")
                     .arg(x).arg(y).arg(x + w).arg(y + h).arg(w).arg(h));
}

void ScreenWidget::showEvent(QShowEvent *)
{
    QPoint point(-1, -1);
    screen->setStart(point);
    screen->setEnd(point);

#if (QT_VERSION <= QT_VERSION_CHECK(5,0,0))
    *fullScreen = fullScreen->grabWindow(QApplication::desktop()->winId(), 0, 0, screen->width(), screen->height());
#else
    QScreen *pscreen = QApplication::primaryScreen();
    *fullScreen = pscreen->grabWindow(QApplication::desktop()->winId(), 0, 0, screen->width(), screen->height());
#endif

    //设置透明度实现模糊背景
    QPixmap pix(screen->width(), screen->height());
    pix.fill((QColor(160, 160, 160, 200)));
    bgScreen = new QPixmap(*fullScreen);
    QPainter p(bgScreen);
    p.drawPixmap(0, 0, pix);
}
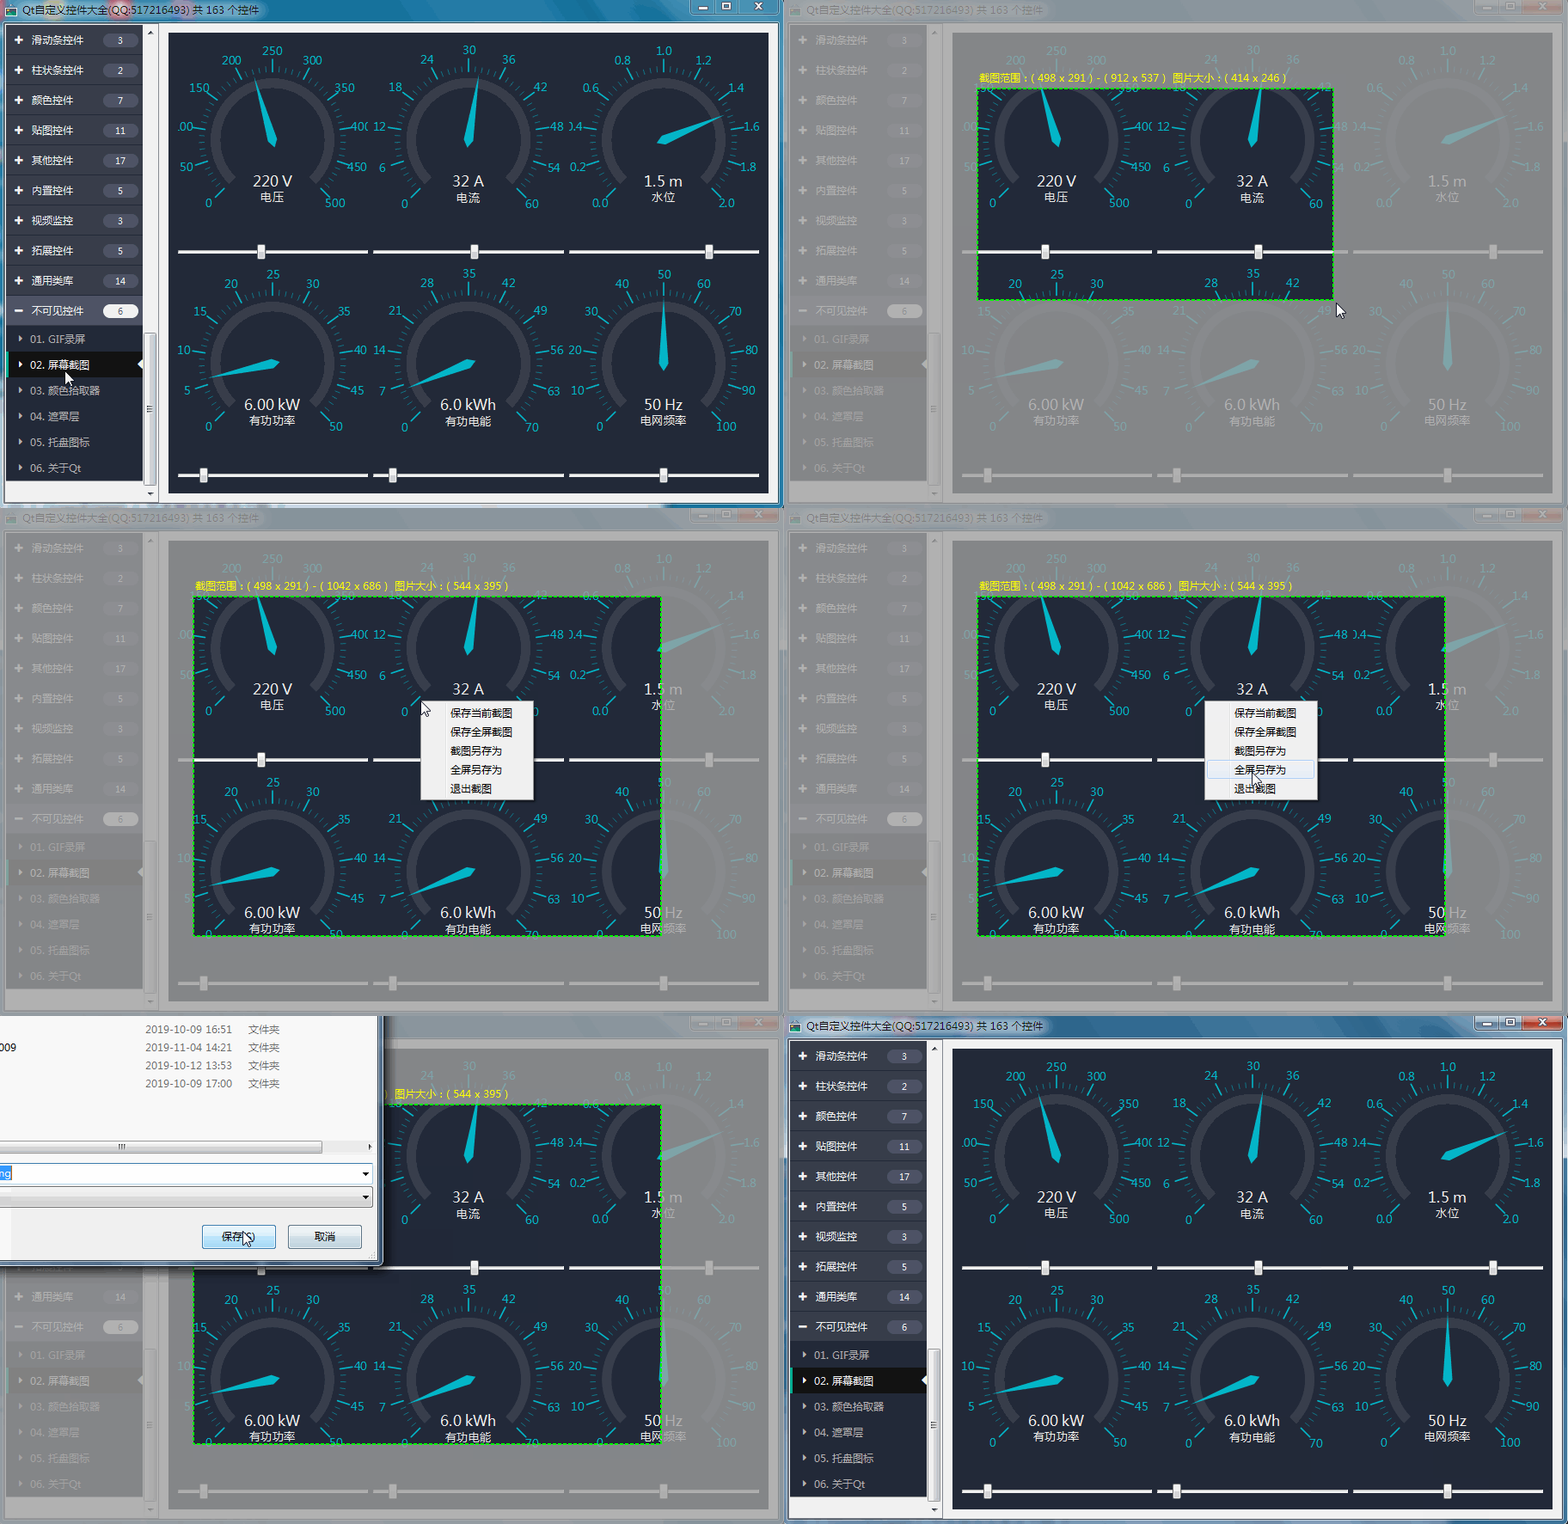
三、效果图

四、开源主页
以上作品完整源码下载都在开源主页,会持续不断更新作品数量和质量,欢迎各位关注。