实现简单的登录和注册
步骤:
工程目录:

1.创建一个动态的web工程
2.导入springMvc所需要的jar包(包含mysql驱动包)
3.配置web.xml步骤:
配置唯一的 Servlet
3.1 增加 servlet和 servlet-mapping 标签
3.2 配置 servlet 标签,name 随便起,class 是 DispatcherServlet
3.3 配置 servlet-mapping,name 和上边保持一致,url-pattern 是 /
3.4 在 servlet 标签中增加 init-param 标签设置 spring-mvc 配置文件的路径
3.5 param-name:contextConfigLocation
3.6 param-value:classpath:spring-mvc.xml
代码如下:
<?xml version="1.0" encoding="UTF-8"?>
<web-app xmlns:xsi="http://www.w3.org/2001/XMLSchema-instance" xmlns="http://java.sun.com/xml/ns/javaee" xsi:schemaLocation="http://java.sun.com/xml/ns/javaee http://java.sun.com/xml/ns/javaee/web-app_2_5.xsd" id="WebApp_ID" version="2.5">
<display-name>Springdemo1</display-name>
<welcome-file-list>
<welcome-file>index.html</welcome-file>
<welcome-file>index.htm</welcome-file>
<welcome-file>index.jsp</welcome-file>
<welcome-file>default.html</welcome-file>
<welcome-file>default.htm</welcome-file>
<welcome-file>default.jsp</welcome-file>
</welcome-file-list>
<!-- The front controller of this Spring Web application, responsible for handling all application requests -->
<servlet>
<servlet-name>springDispatcherServlet</servlet-name>
<servlet-class>org.springframework.web.servlet.DispatcherServlet</servlet-class>
<init-param>
<param-name>contextConfigLocation</param-name>
<param-value>classpath:spring-mvc.xml</param-value>
</init-param>
<load-on-startup>1</load-on-startup>
</servlet>
<!-- Map all requests to the DispatcherServlet for handling -->
<servlet-mapping>
<servlet-name>springDispatcherServlet</servlet-name>
<url-pattern>/</url-pattern>
</servlet-mapping>
</web-app>
以上配置web.xml文件的属性过于繁琐,有没有简单的方法?
在原web.xml文件中输入“dispatch“按alt+/会出现提示符,向上按会出现一个“# dispatcherservlet”选中,即可自动添加代码。
注意:把<param-value>location</param-value>修改为<param-value>classpath:spring-mvc.xml</param-value>
<url-pattern>url</url-pattern>修改为<url-pattern>/</url-pattern>即可。
4.在src目录下建立spring-mvc.xml文件:
4.1复制代码:
<?xml version="1.0" encoding="UTF-8"?>
<beans xmlns="http://www.springframework.org/schema/beans"
xmlns:context="http://www.springframework.org/schema/context"
xmlns:mvc="http://www.springframework.org/schema/mvc"
xmlns:xsi="http://www.w3.org/2001/XMLSchema-instance"
xmlns:task="http://www.springframework.org/schema/task"
xsi:schemaLocation="
http://www.springframework.org/schema/beans
http://www.springframework.org/schema/beans/spring-beans-4.0.xsd
http://www.springframework.org/schema/context
http://www.springframework.org/schema/context/spring-context-4.0.xsd
http://www.springframework.org/schema/mvc
http://www.springframework.org/schema/mvc/spring-mvc-4.0.xsd
http://www.springframework.org/schema/task
http://www.springframework.org/schema/task/spring-task-4.0.xsd">
</beans>
4.1 增加对注解的支持<context:component-scan base-package="controller"/>
4.2使用默认的 handleMapping 和启用 mvc 中的注解 <mvc:annotation-driven/>
4.3 增加页面解析类 InternalResourceViewResolver
4.3.1 增加 bean 标签
4.3.2 设置 class = 全名 = 包名 + 路径
4.3.3 增加 prefix 和 suffix 设置页面路径的前缀和后缀
设置前缀以后将来所有的 jsp 必须放在 view 文件夹下
<property name="prefix" value="/view/"></property>
<property name="suffix" value=".jsp"></property>
代码如下:
<?xml version="1.0" encoding="UTF-8"?>
<beans xmlns="http://www.springframework.org/schema/beans"
xmlns:context="http://www.springframework.org/schema/context"
xmlns:mvc="http://www.springframework.org/schema/mvc" xmlns:xsi="http://www.w3.org/2001/XMLSchema-instance"
xmlns:task="http://www.springframework.org/schema/task"
xsi:schemaLocation="
http://www.springframework.org/schema/beans
http://www.springframework.org/schema/beans/spring-beans-4.0.xsd
http://www.springframework.org/schema/context
http://www.springframework.org/schema/context/spring-context-4.0.xsd
http://www.springframework.org/schema/mvc
http://www.springframework.org/schema/mvc/spring-mvc-4.0.xsd
http://www.springframework.org/schema/task
http://www.springframework.org/schema/task/spring-task-4.0.xsd">
<!-- 启用 mvc 中的注解 -->
<mvc:annotation-driven />
<!-- 启用 自动扫描的包 -->
<context:component-scan base-package="controller" />
<!-- 增加页面解析类 InternalResourceViewResolver -->
<bean
class="org.springframework.web.servlet.view.InternalResourceViewResolver">
<property name="prefix" value="/view/"></property>
<property name="suffix" value=".jsp"></property>
</bean>
</beans>
注意说明的是,启动自动扫描,spring会在指定的包下(例如我这里是controller包),自动扫描标注@Controller的类
prefix指的是返回的值给自动加一个前缀,同理suffix指的就是后缀
5.编写逻辑代码
5.1 建立一个包:controller,包下建立一个LoginControl类
5.2在WebContent下建立一个文件view,在其中新建login.jsp,代码如下:
<%@ page language="java" contentType="text/html; charset=UTF-8"
pageEncoding="UTF-8"%>
<!DOCTYPE html PUBLIC "-//W3C//DTD HTML 4.01 Transitional//EN" "http://www.w3.org/TR/html4/loose.dtd">
<html>
<head>
<meta http-equiv="Content-Type" content="text/html; charset=UTF-8">
<title>Insert title here</title>
</head>
<body>
<form action="login" method="post">
<input type="text" name="username" /><br>
<input type="password" name ="password"/><br>
<input type="submit" value="登录"/><br>
<a href="regist">注册</a>
</form>
</body>
</html>
5.3form的action指向login,Controller会自动捕获到这个请求,于是在所以LoginControl类需要一个login方法来捕获这个请求
代码如下:
package controller;
import javax.servlet.http.HttpServletRequest;
import org.springframework.stereotype.Controller;
import org.springframework.ui.Model;
import org.springframework.web.bind.annotation.RequestMapping;
import org.springframework.web.bind.annotation.RequestMethod;
import check.CheckLogin;
@Controller
public class LoginControl {
@RequestMapping(value = "login", method = RequestMethod.POST)
public String login(Model model,// 前台页面传的值放入model中
HttpServletRequest request) {// 从前台页面取得的值
String username = request.getParameter("username");
String password = request.getParameter("password");
String user_name = CheckLogin.check(username, password);
if (user_name != null && user_name != "") {
model.addAttribute("USER", user_name);
return "loginsuccess";
}
return "regist";
}
}
5.4 建立check包和LoginCheck类,以及对应的check方法,有check方法,就要用到数据库,先建立一个dao类,代码如下:
package db;
import java.sql.Connection;
import java.sql.DriverManager;
import java.sql.PreparedStatement;
import java.sql.ResultSet;
import java.sql.SQLException;
public class Dao {
public static Connection getConnection(){
Connection conn = null;
String user="root";
String pass="1234";
String url ="jdbc:mysql://localhost:3306/test?useOldAliasMetadataBehavior=true";
try {
Class.forName("com.mysql.jdbc.Driver");
conn= DriverManager.getConnection(url, user, pass);
} catch (ClassNotFoundException e) {
e.printStackTrace();
System.out.println("数据库驱动有误");
} catch (SQLException e) {
e.printStackTrace();
System.out.println("数据库有误");
}
return conn;
}
public static void closeAll(ResultSet rs,PreparedStatement ps,Connection conn){
try {
if(!rs.isClosed()){
rs.close();
}
if(!ps.isClosed()){
ps.close();
}
if(!conn.isClosed()){
conn.close();
}
} catch (SQLException e) {
e.printStackTrace();
System.out.println("数据库关闭有误");
}
}
public static void close(PreparedStatement p,Connection conn)
{
try
{
if(!p.isClosed()){
p.close();
}
if(!conn.isClosed()){
conn.close();
}
}
catch(SQLException e)
{
e.printStackTrace();
System.out.println("数据关闭出错");
}
}
}
5.5有了dao类就可以编写check方法了:
代码如下:
package check;
import java.sql.Connection;
import java.sql.PreparedStatement;
import java.sql.ResultSet;
import java.sql.SQLException;
import db.Dao;
public class CheckLogin {
public static String check(String username, String password) {
try {
String sql = "select * from table_demo where username=? and password=?";
Connection conn = Dao.getConnection();
PreparedStatement ps = conn.prepareStatement(sql);
ps.setString(1, username);
ps.setString(2, password);
ResultSet rs = ps.executeQuery();
if (rs.next()) {
String user_name = rs.getString("username");
return user_name;
}
Dao.closeAll(rs, ps, conn);
} catch (SQLException e) {
e.printStackTrace();
}
return null;
}
}
6.运行项目:

异常;
严重: Servlet /Springdemo1 threw load() exception
java.lang.ClassNotFoundException: org.apache.commons.logging.LogFactory
解决方案;解决办法是在项目中导入commons-logging-1.2.jar(这是我导入的版本,其他版本没有测试)。
7.接下来就是写注册页面的
RegistController类:
package controller;
import javax.servlet.http.HttpServletRequest;
import org.springframework.stereotype.Controller;
import org.springframework.ui.Model;
import org.springframework.web.bind.annotation.RequestMapping;
import org.springframework.web.bind.annotation.RequestMethod;
import check.RegistCheck;
@Controller
public class RegistControl {
@RequestMapping(value = "regist", method = RequestMethod.GET)
public String regist() {
return "regist";
}
@RequestMapping(value = "registSuccess", method = RequestMethod.POST)
public String registSuccess(HttpServletRequest request, Model model) {
String username = request.getParameter("username");
String password = request.getParameter("password");
String age = request.getParameter("age");
if (RegistCheck.registCheck(username, password, age)) {
model.addAttribute("username", username);
return "login";
} else {
return "regist";
}
}
}
8.regist.jsp
<%@ page language="java" contentType="text/html; charset=UTF-8"
pageEncoding="UTF-8"%>
<!DOCTYPE html PUBLIC "-//W3C//DTD HTML 4.01 Transitional//EN" "http://www.w3.org/TR/html4/loose.dtd">
<html>
<head>
<meta http-equiv="Content-Type" content="text/html; charset=UTF-8">
<title>Insert title here</title>
</head>
<body>
<form action="registSuccess" method="Post">
用户名:<input type="text" name="username"/>
密 码<input type="text" name="password"/>
年 龄<input type="number" name="age"/>
<input type="submit" value="提交"/>
</form>
</body>
</html>
9.registSuccess.jsp
<%@ page language="java" contentType="text/html; charset=UTF-8"
pageEncoding="UTF-8"%>
<!DOCTYPE html PUBLIC "-//W3C//DTD HTML 4.01 Transitional//EN" "http://www.w3.org/TR/html4/loose.dtd">
<html>
<head>
<meta http-equiv="Content-Type" content="text/html; charset=UTF-8">
<title>Insert title here</title>
</head>
<body>
注册成功!
</body>
</html>
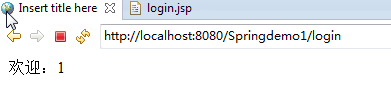
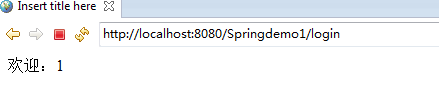
10:运行效果:
姓名输入1:
数据库中有数据1,可登录成功!
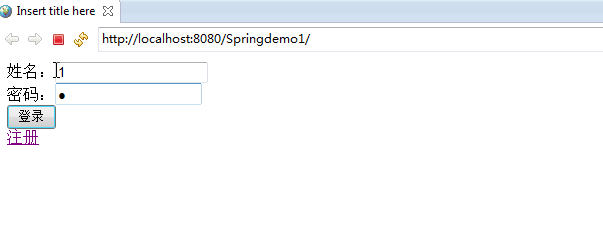
数据库没有1则跳转到注册页面:

点击注册,进入注册页面。如上图,添加对应信息后,点击提交,控制台输出注册成功,回到登录页面,再实现登录!

简单的小程序,面试时候遇到,总结一下,分享给大家!
java新手,请多指教!哈哈~